Notice: We request that you don't just set up a new account at this time if you are a previous user.
If you used to be one of our moderators, please feel free to reach out to Chris via the facebook Outerlimits4x4 group and he will get you set back up with access should he need you.
If you used to be one of our moderators, please feel free to reach out to Chris via the facebook Outerlimits4x4 group and he will get you set back up with access should he need you.
Recovery:If you cannot access your old email address and don't remember your password, please click here to log a change of email address so you can do a password reset.
cookiemonster-jr's Sierra Build Thread
Thanks guys.
it really has been fun and a great bonding project.
Could'nt help but put a pic up of the pink, just thought id tease you all
There is still loads to come :
Trimming rear with ali chequer plate
Fitting new SAAS steering wheel(you'll never guess what colour !!)
Ali number plate trims
Twin rear recovery hooks
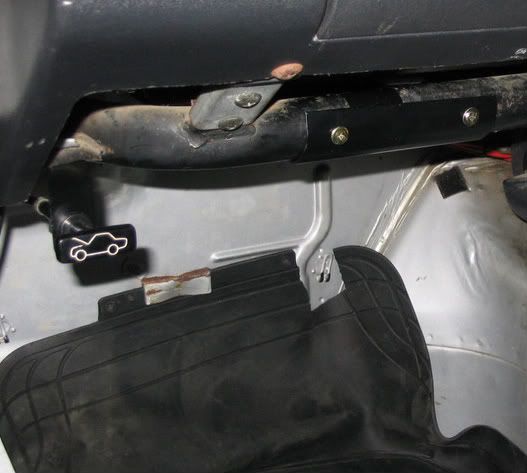
Bonnet catches
Some of the pics will have to come after the 28th June though, as they will give too much away re the colour scheme
This weekend we will be touching the paintwork up on the bonnet, as we are a little dissapointed with a small area of it.
Put the evening of the 28th June in your diary, for the big reveal
cookie monster
99 GU Patrol Wagon 4.2td
God Of Emo
Posts: 7350
Joined: Sun Aug 24, 2003 7:04 pm
Joined: Sun Aug 24, 2003 7:04 pm
Location: Newy, home of the ZOOK (Rockin the 'diff)
Contact:
Posts: 3825
Joined: Wed Nov 06, 2002 8:42 pm
Joined: Wed Nov 06, 2002 8:42 pm
Location: in the sky , its a bird , its a plane ! No its super MOOSE !!!
God Of Emo
Posts: 7350
Joined: Sun Aug 24, 2003 7:04 pm
Joined: Sun Aug 24, 2003 7:04 pm
Location: Newy, home of the ZOOK (Rockin the 'diff)
Contact:
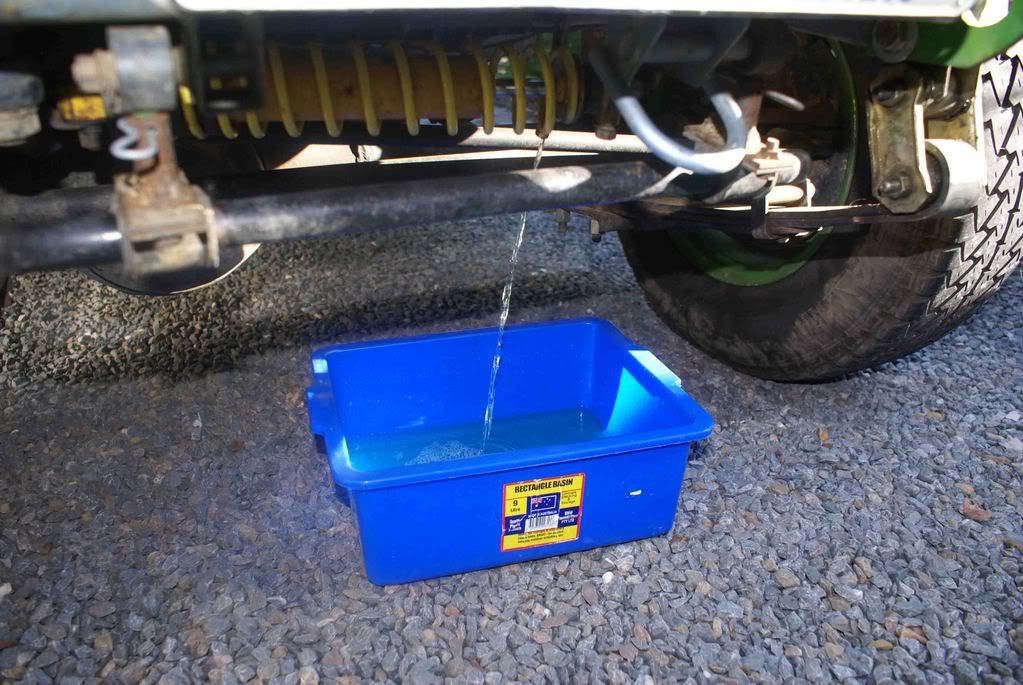
Yeah, that is VERY cool.moose wrote:you idiiot !!!lay80n wrote:Swaybar disconnects
Or are you just excited that the car is urinating on the ground moose?
Layto....
yes the dis-connects !!! very neat way of doing it !!!
Layto....
[quote="v840"]Just between me and you, I actually really dig the Megatwon, but if anyone asks, I'm going to shitcan it as much as possible! :D[/quote]
What a brilliant work up.
My man/child informed me this past weekend he wanted to buy a Sierra as his first 4WD. It was good to be able to show him a little of what he could have in store for him. Not to mention what he could be working on with my 4WD.
My bearings need doing too..lol
Can't wait to see the end result and hope it brings you many many more hours of enjoyment.
Its Awsome to see the family getting together for a build up, school project or not!
I'm not 100 % sure on this but I think the reason for the short wires on the spotlights was to keep the connection inside the housing so it dose not get water damage?
"hense the plastic coated plugs so it dose not spark on the housing!"
correct me if I'm wrong?
power wire is a bit short
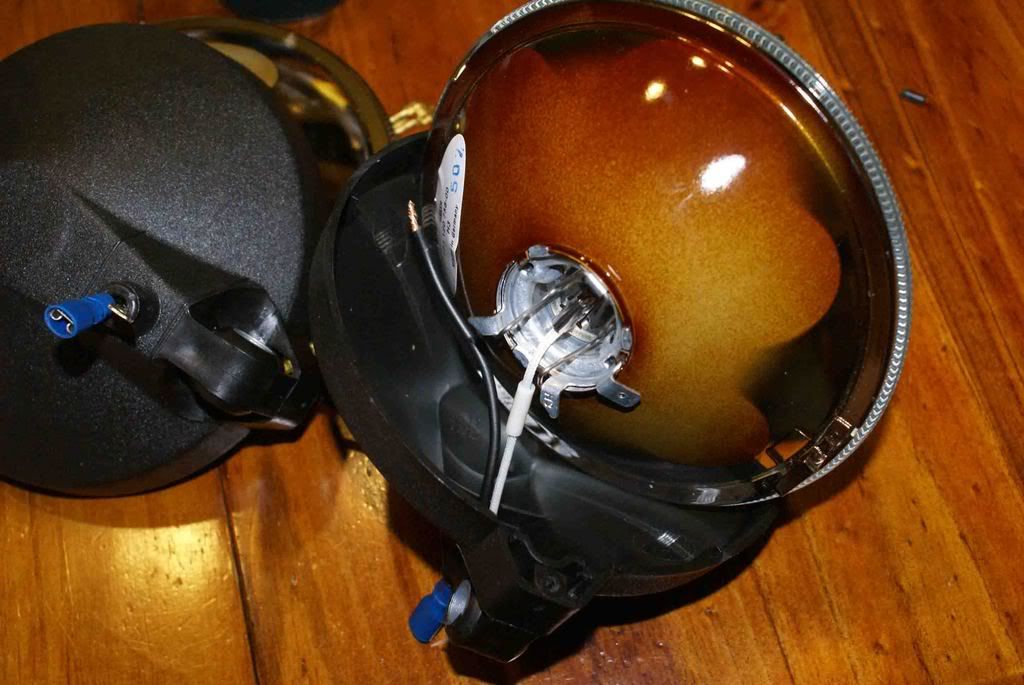
I'm not 100 % sure on this but I think the reason for the short wires on the spotlights was to keep the connection inside the housing so it dose not get water damage?
"hense the plastic coated plugs so it dose not spark on the housing!"
correct me if I'm wrong?
power wire is a bit short

I hate going to weddings because all the grandma's used to poke me in the ribs saying you're next, you're next. They've stopped doing it since I started doing it to them at funerals.
I would really think twice about putting after market bonnet catches on, unless done properly, they can look pretty dodgy, and draw unwanted attention from the boys in blue.cookie monster wrote: There is still loads to come :
Trimming rear with ali chequer plate
Fitting new SAAS steering wheel(you'll never guess what colour !!)
Ali number plate trims
Twin rear recovery hooks
Bonnet catches
also, i have found from personal experience that they can fail at the worst of times, e.g. doing 100 on the express way, NOT FUN!!!
If having the bonnet release in the glove box is a major PITA to you, you can quite cheaply buy after market bonnet release cables which can be located more conveniently.
Cant wait to see the paint job, I have an Urban Camo one Planned for the LWB, (Pretty close to the one on the CALMINI website, but more grey)
Pixie
Or just move the stock release to a more convenient location.
I can't see what's wrong with the stock latch either.
Steve.
I can't see what's wrong with the stock latch either.
Steve.
[quote="greg"] some say he is a man without happy dreams, or that he sees silver linings on clouds and wonders why they are not platinum... all we know, is he's called the stevie.[/quote]
Dont have a problem with the way the bonnet opens etc and the latch is all in tact and working.
The bonnet does not sit down onto one of the front rubber stops, so has a little bit of movement in it.
We tried adjusting the rubbers, but to no avail.
Just thought we'd put the rubber bonnet latches on as a secondary measure to stop the movement.
Danzo.
You may well be right!
But once we take the car out and check the positioning of the lamps and adjust, we will cover the connectors in shrink wrap for protection.
Thought it would be easier to remove the lamps if needed with the connectors on the outside.
cookie monster
99 GU Patrol Wagon 4.2td
Steering Wheel Install
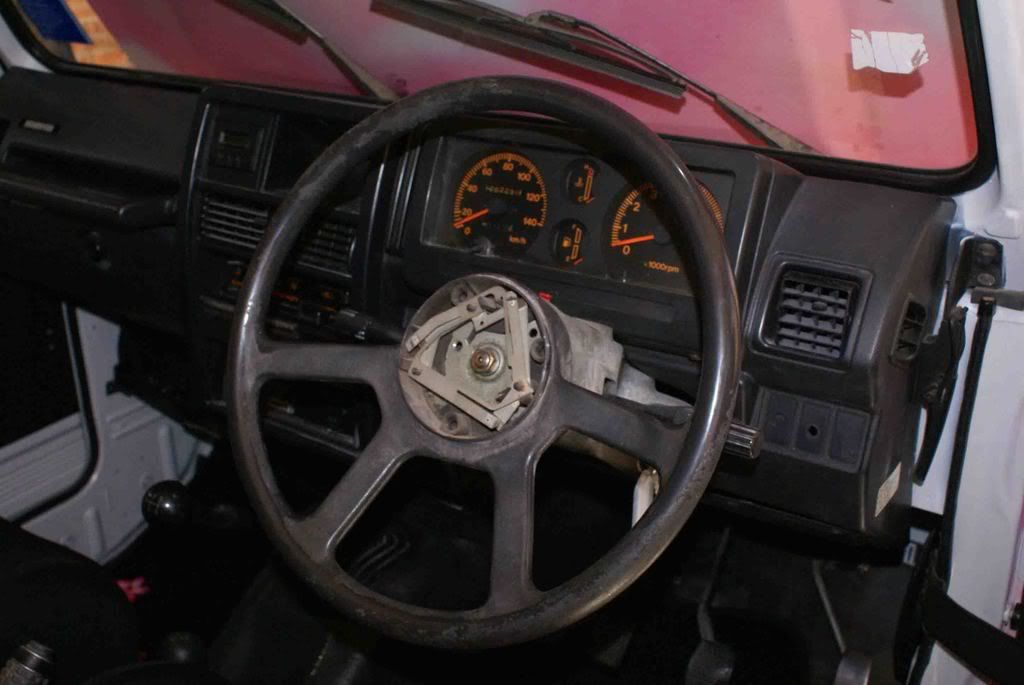
Original Steering wheel
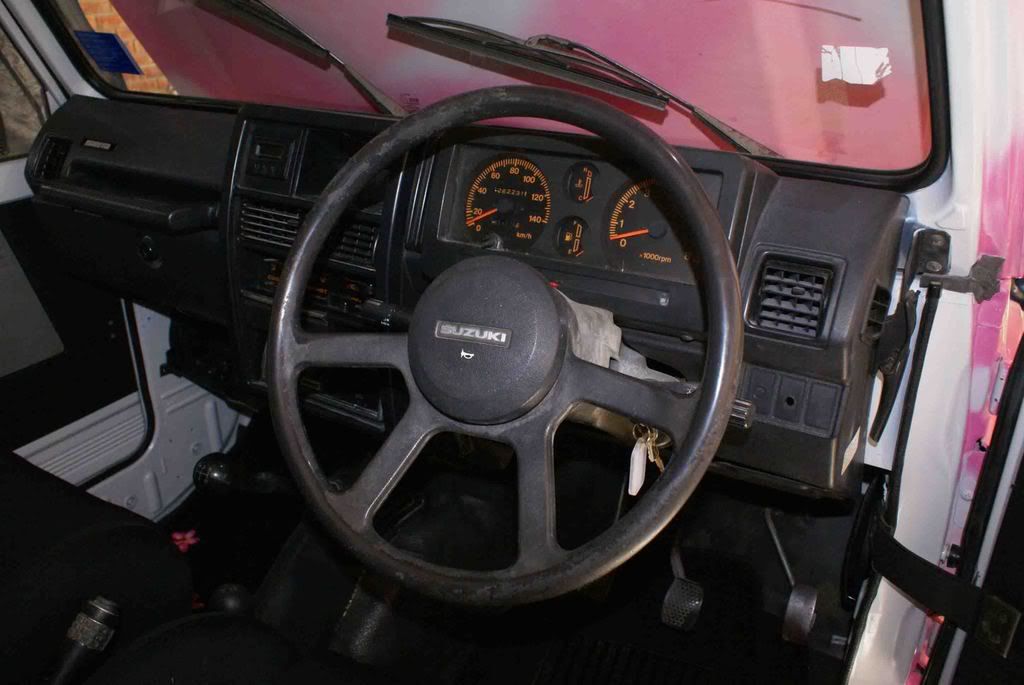
Pull off the horn to expose the nut
Undoing the nut
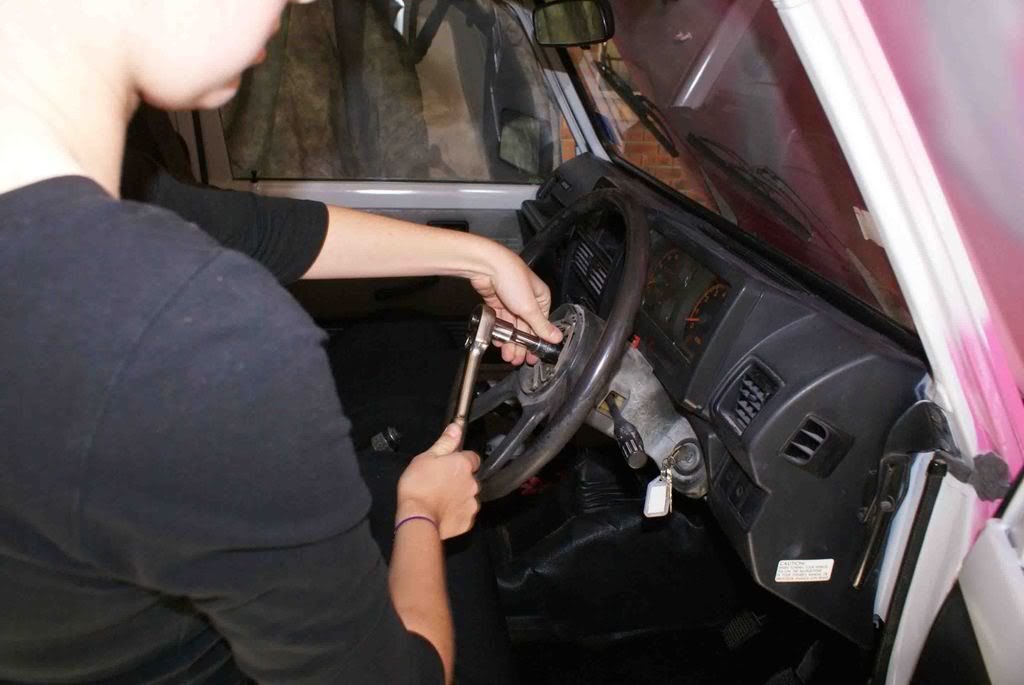
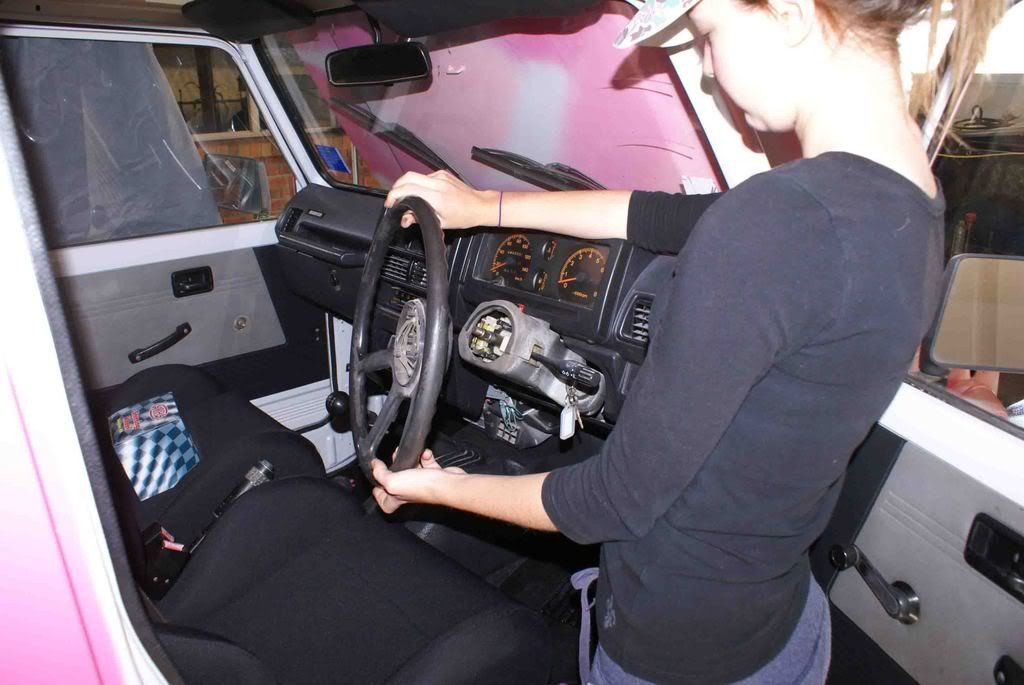
Before totally removing the nut, make sure the wheel is going to come off the splines. Ours wriggled off easy enough.
If the wheel is tight on the splines, you will have to use both palms of your hands to 'hit' the back of the wheel rim and dislodge it. If you dont have the nut on, you will end up with the wheel in your face !
Wheel off the splines
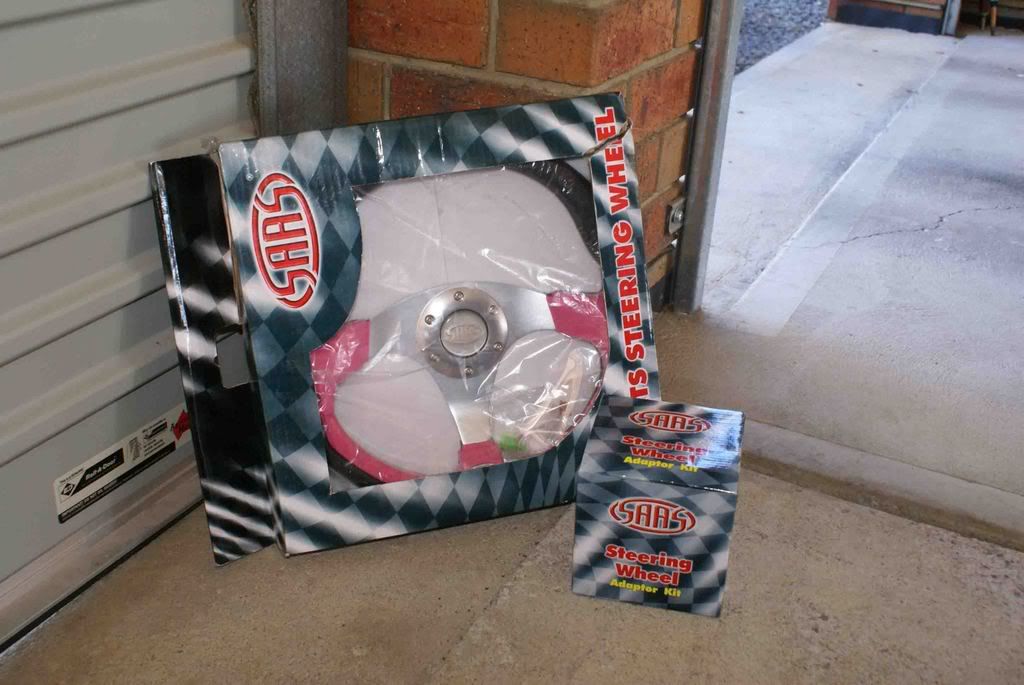
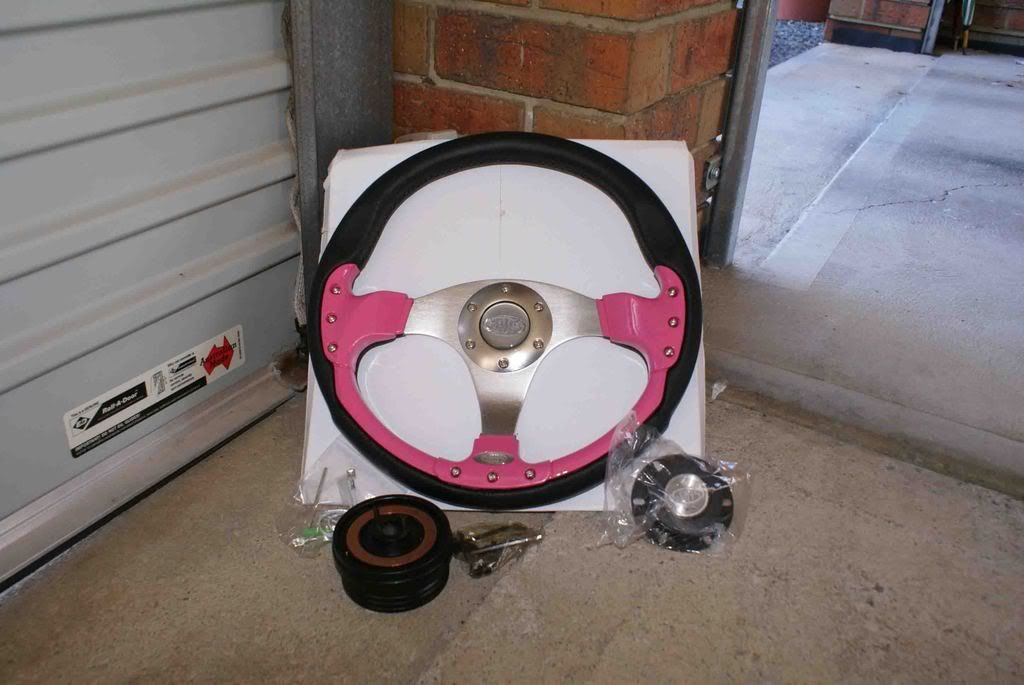
The new wheel & boss kit
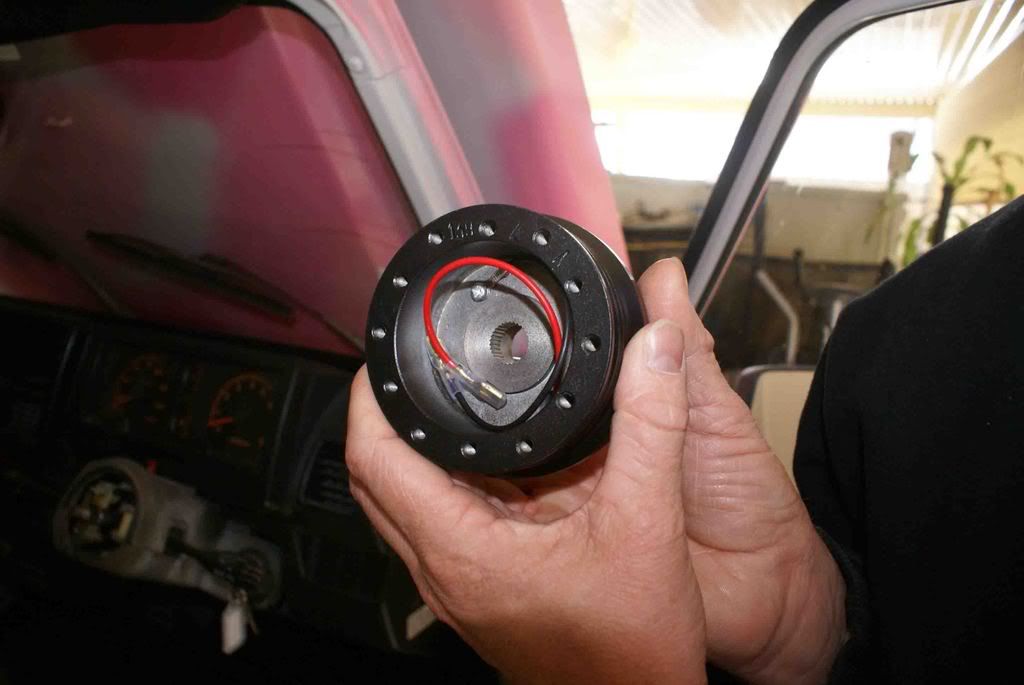
Boss showing splines to match the steering column
On with the boss(make sure you have the boss so that the wheel will be screwed onto it in the correct position
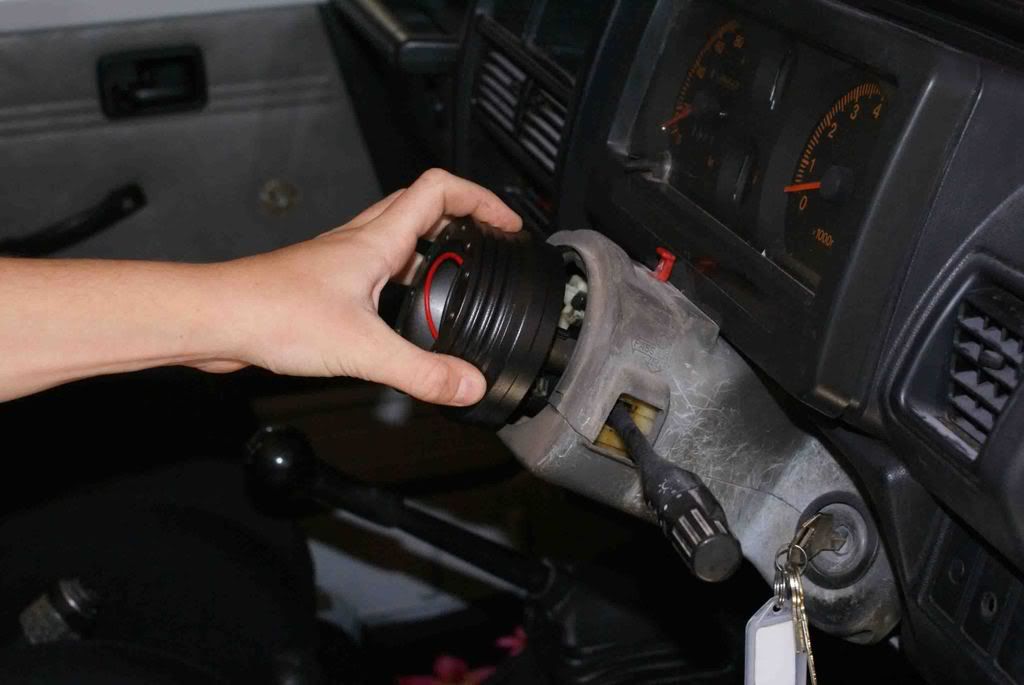
Tighten nut slightly, as you may need to remove the whole boss to index it a few splines, to make sure it in the right position
Attaching the horn wires
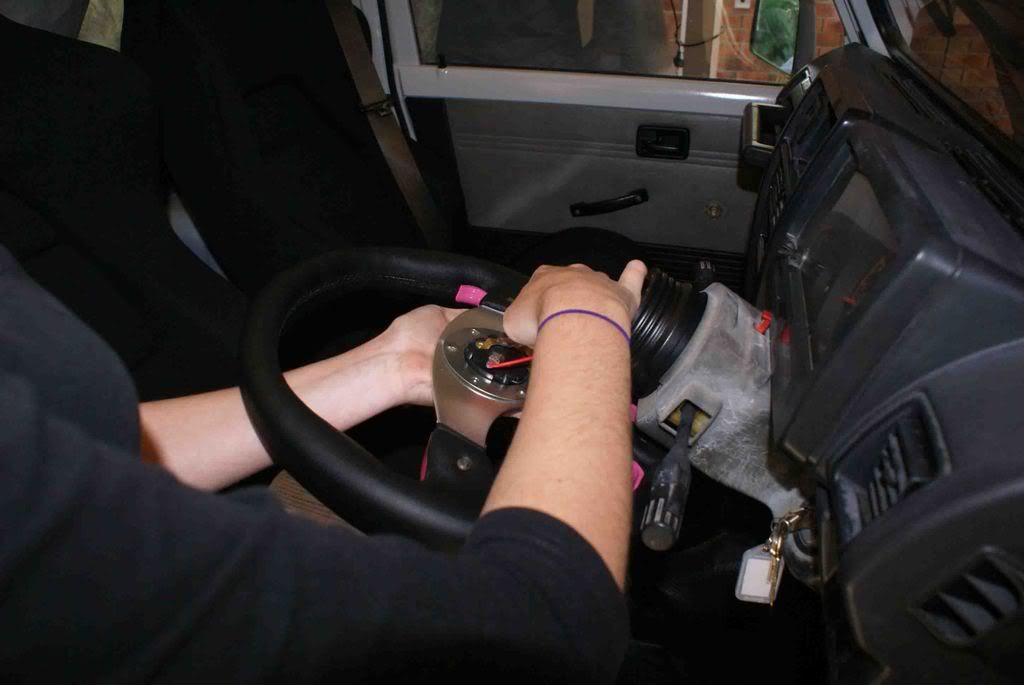
The wheel was attached to the boss using dome head screws. We checked to make sure it was in the right position, then tightened the nut.
All complete
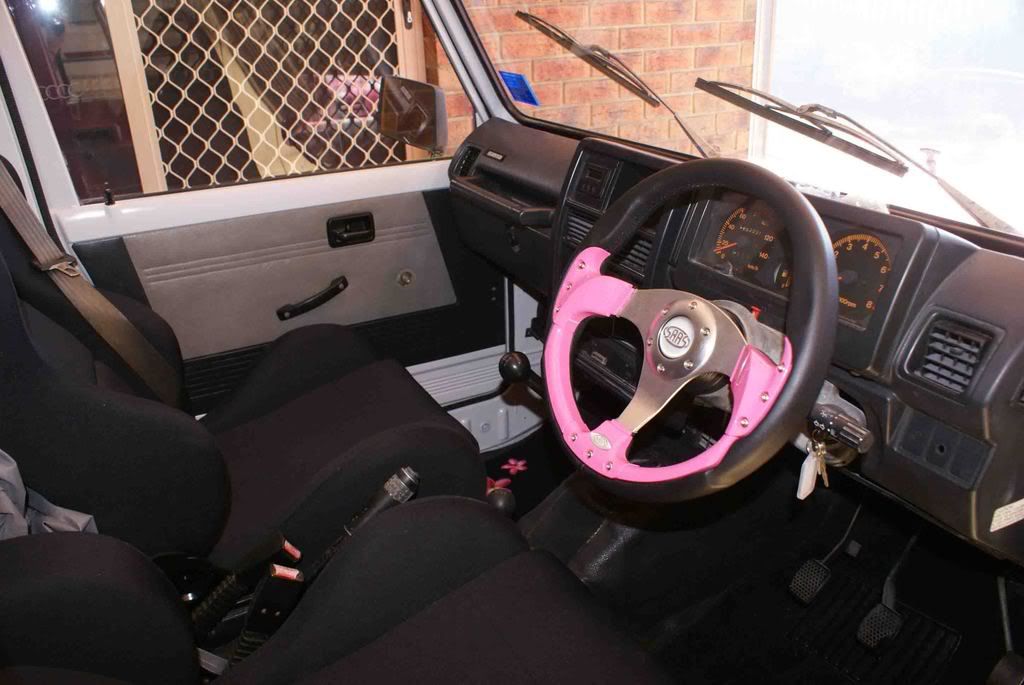
cookie monster
Original Steering wheel

Pull off the horn to expose the nut

Undoing the nut

Before totally removing the nut, make sure the wheel is going to come off the splines. Ours wriggled off easy enough.
If the wheel is tight on the splines, you will have to use both palms of your hands to 'hit' the back of the wheel rim and dislodge it. If you dont have the nut on, you will end up with the wheel in your face !
Wheel off the splines

The new wheel & boss kit


Boss showing splines to match the steering column

On with the boss(make sure you have the boss so that the wheel will be screwed onto it in the correct position

Tighten nut slightly, as you may need to remove the whole boss to index it a few splines, to make sure it in the right position
Attaching the horn wires

The wheel was attached to the boss using dome head screws. We checked to make sure it was in the right position, then tightened the nut.
All complete

cookie monster
99 GU Patrol Wagon 4.2td
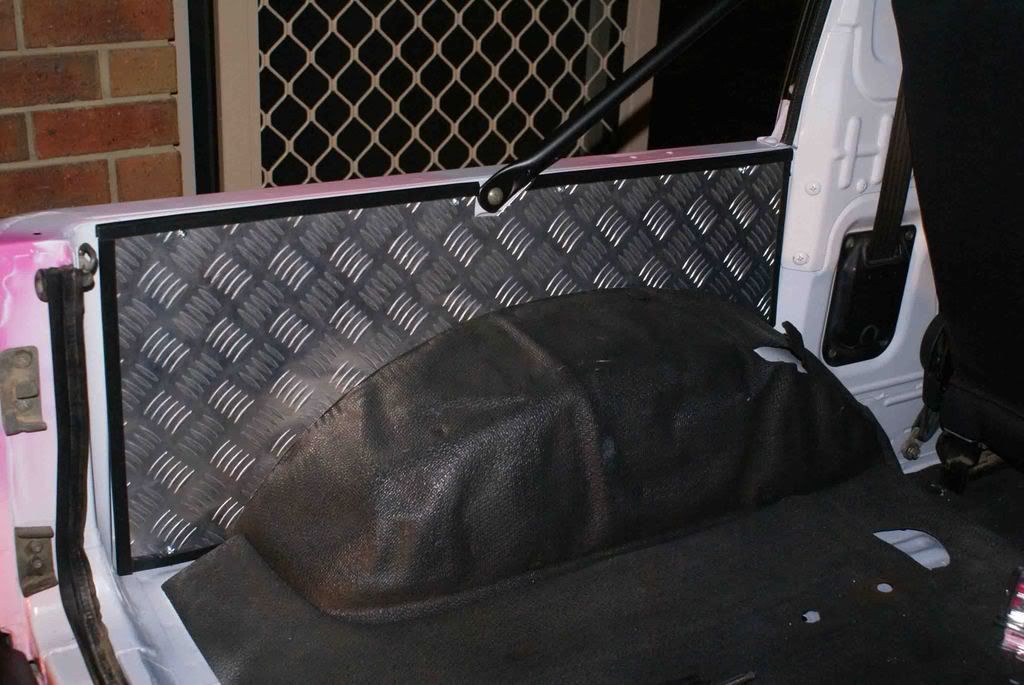
Trimming the rear cargo area with aluminium chequer plate
Old trim
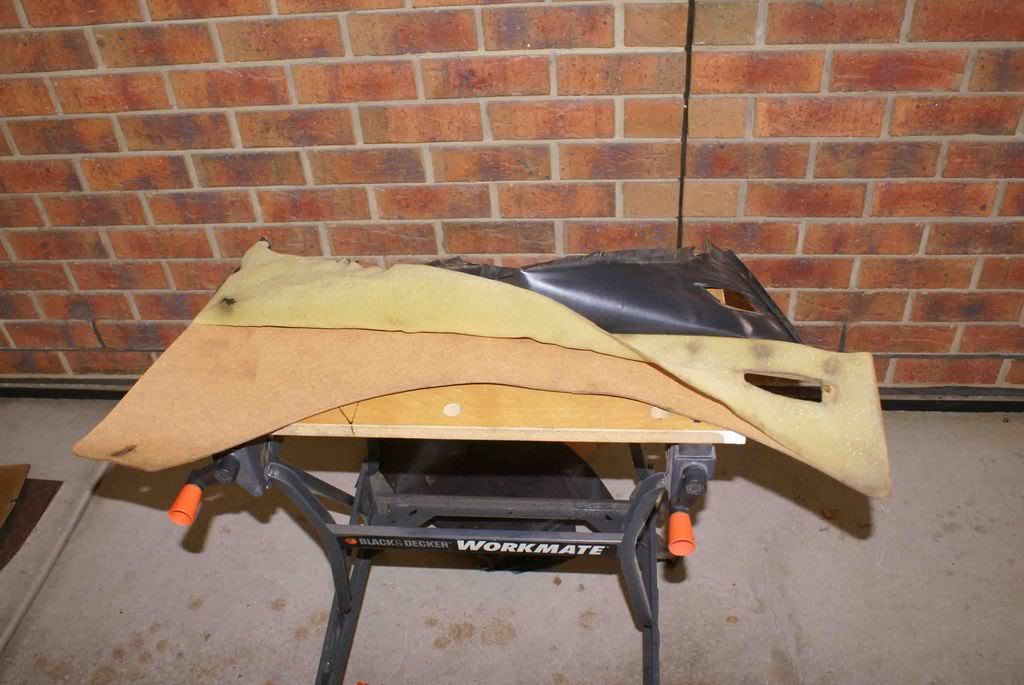
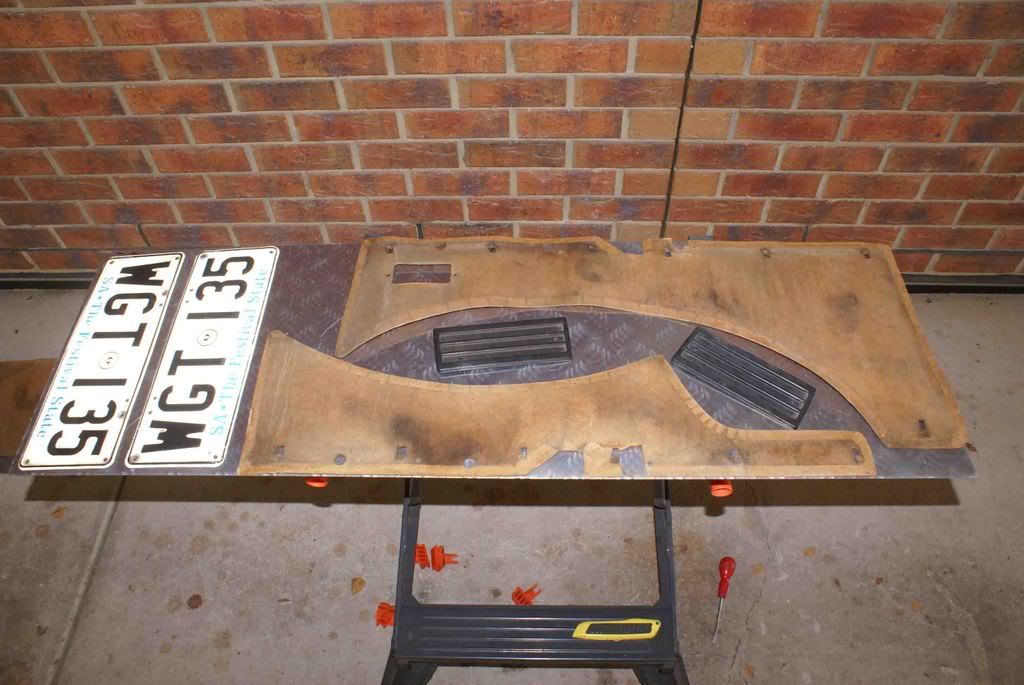
Old trims layed out on ali chequer plate
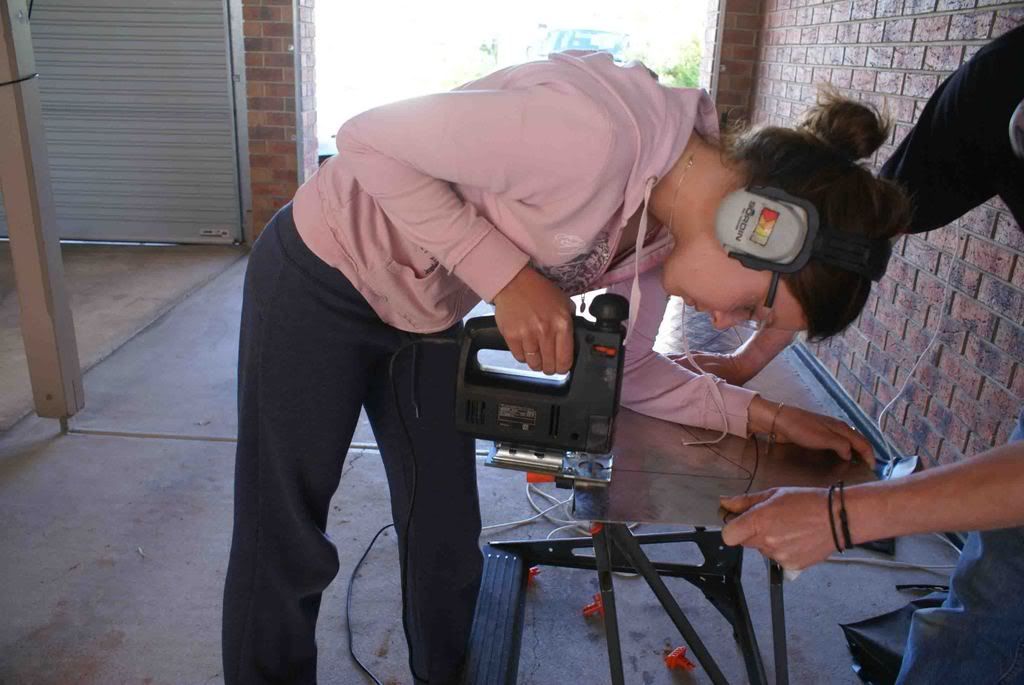
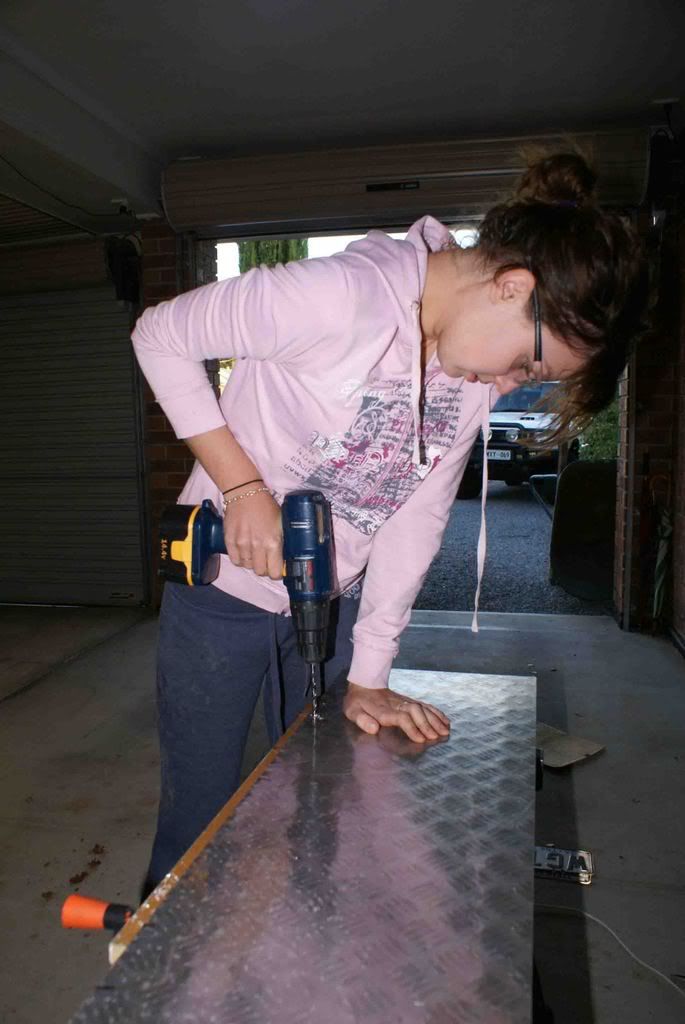
Hailey cutting shapes out with jigsaw
Trial fitting trims
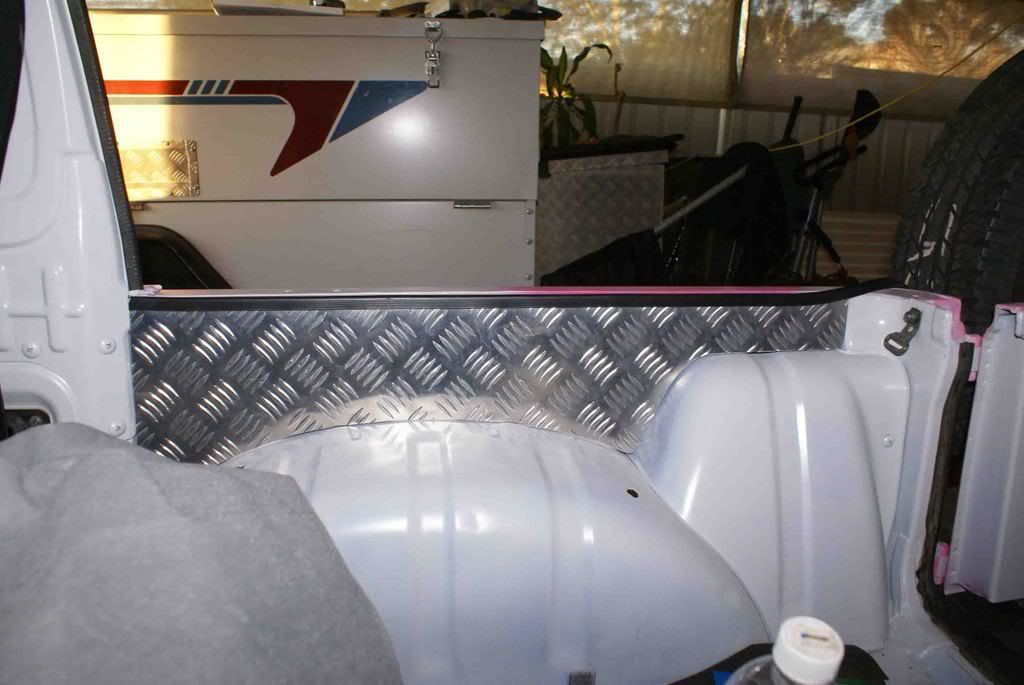
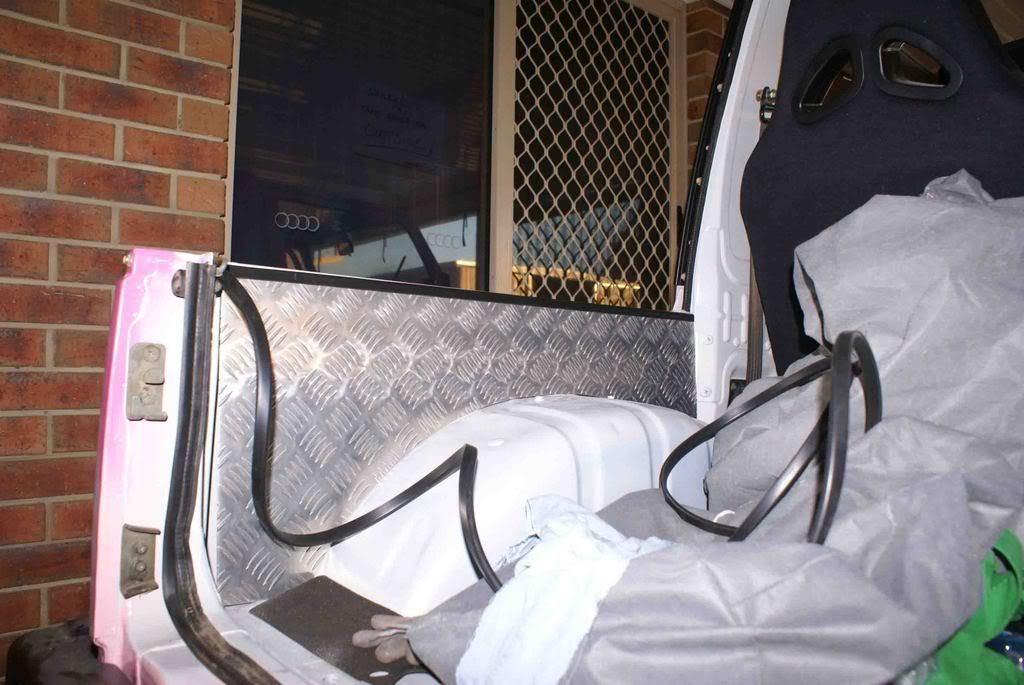
We decided to make the rear door trim into a fold down table
Hailey drilling holes for hinges
Fitting it up
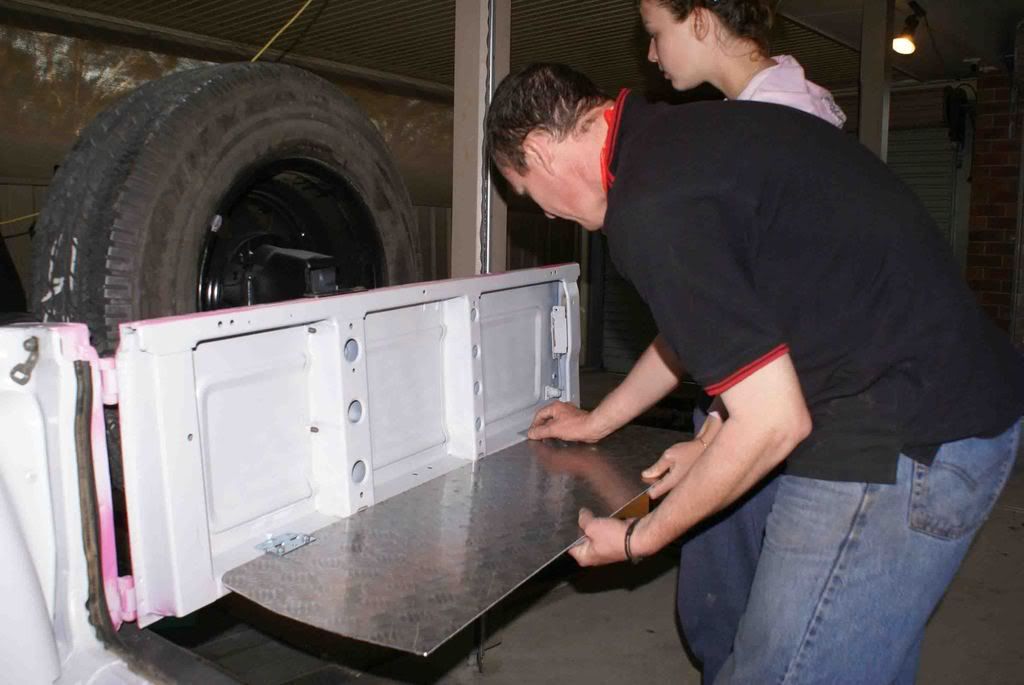
We used tek screw to attach hinges to bodywork
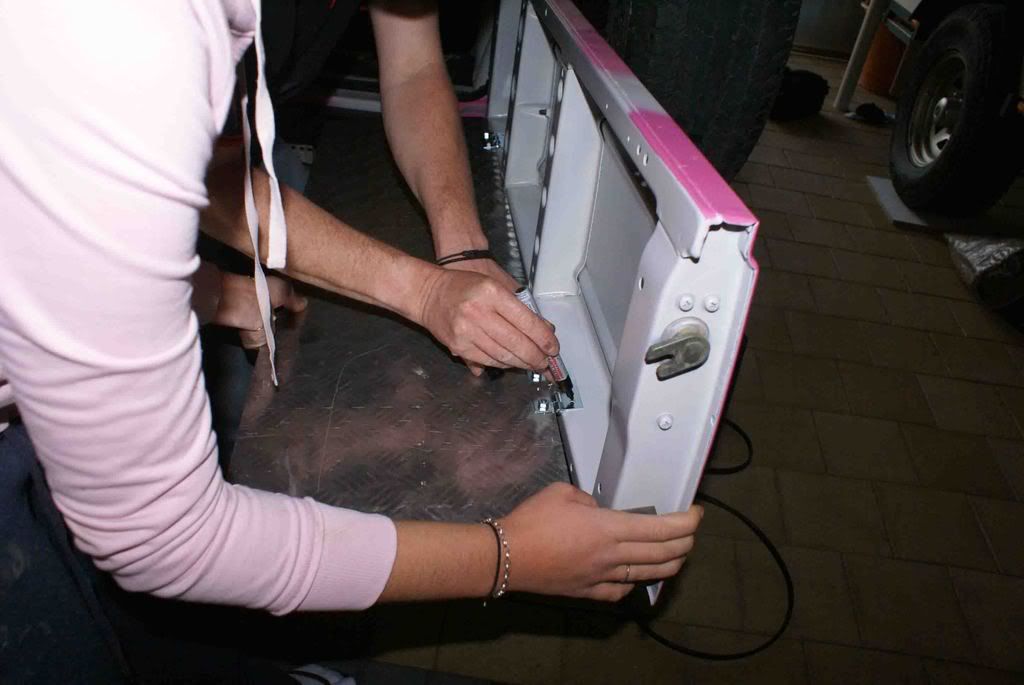
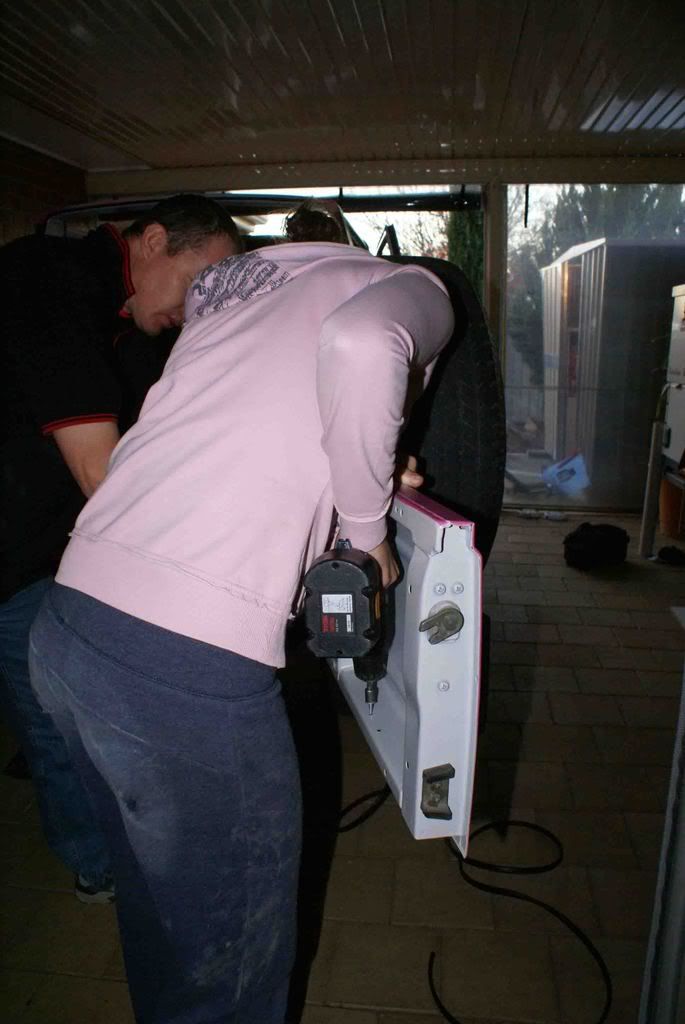
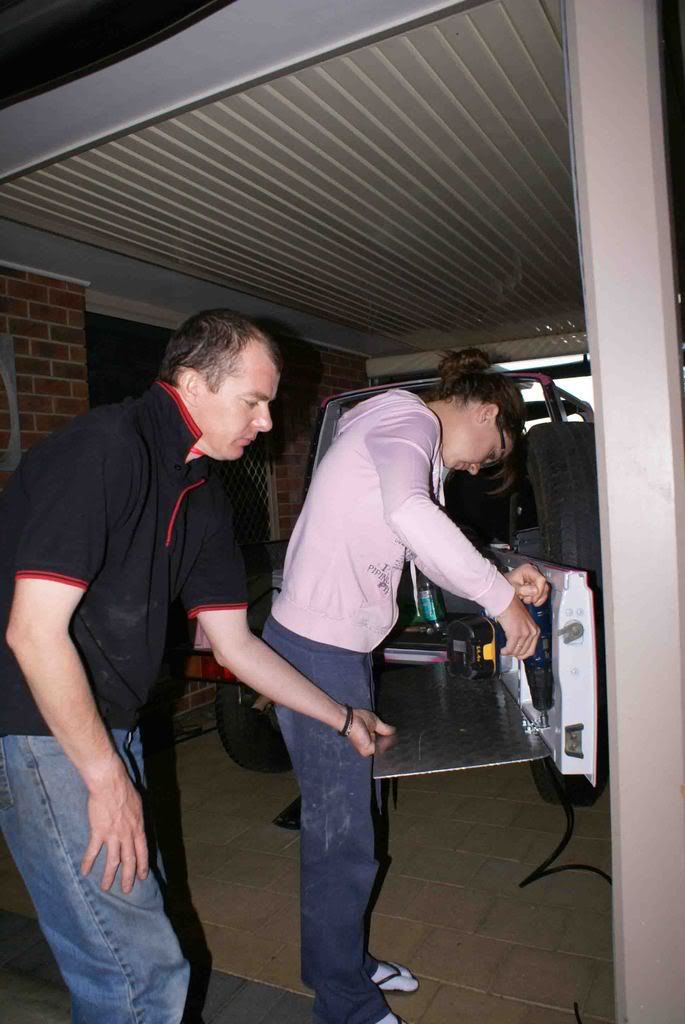
Seeing if it shuts !
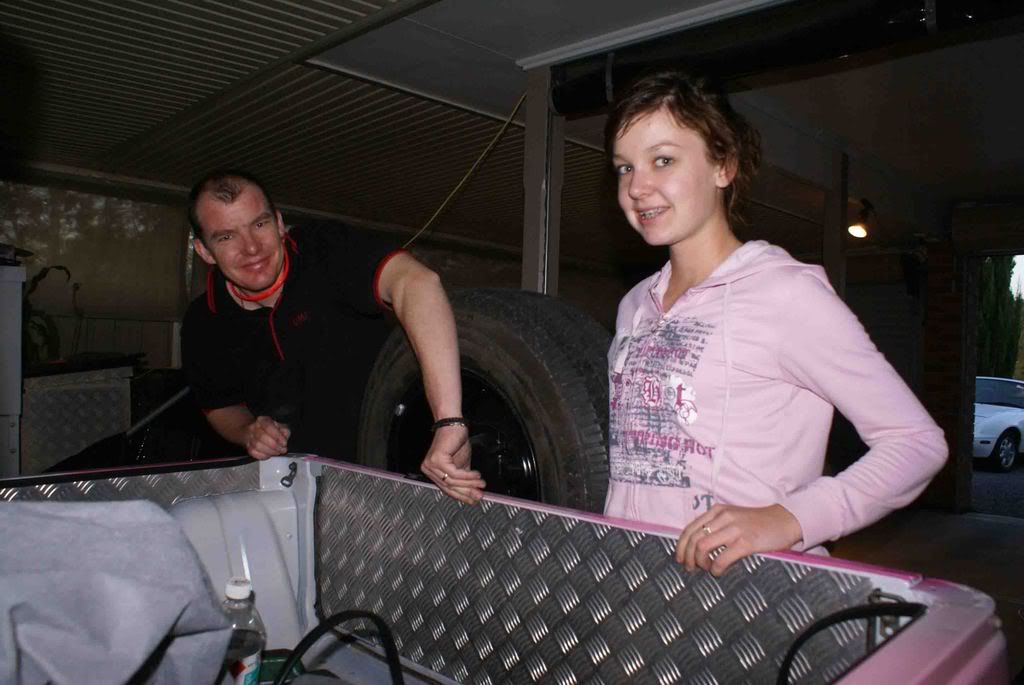
Finished articles
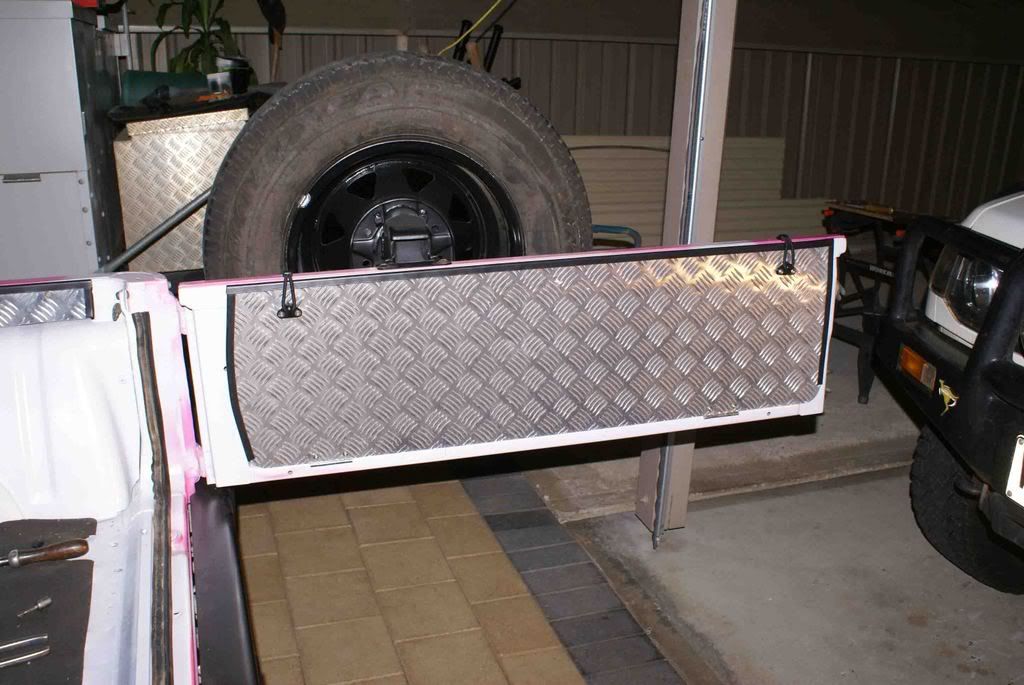
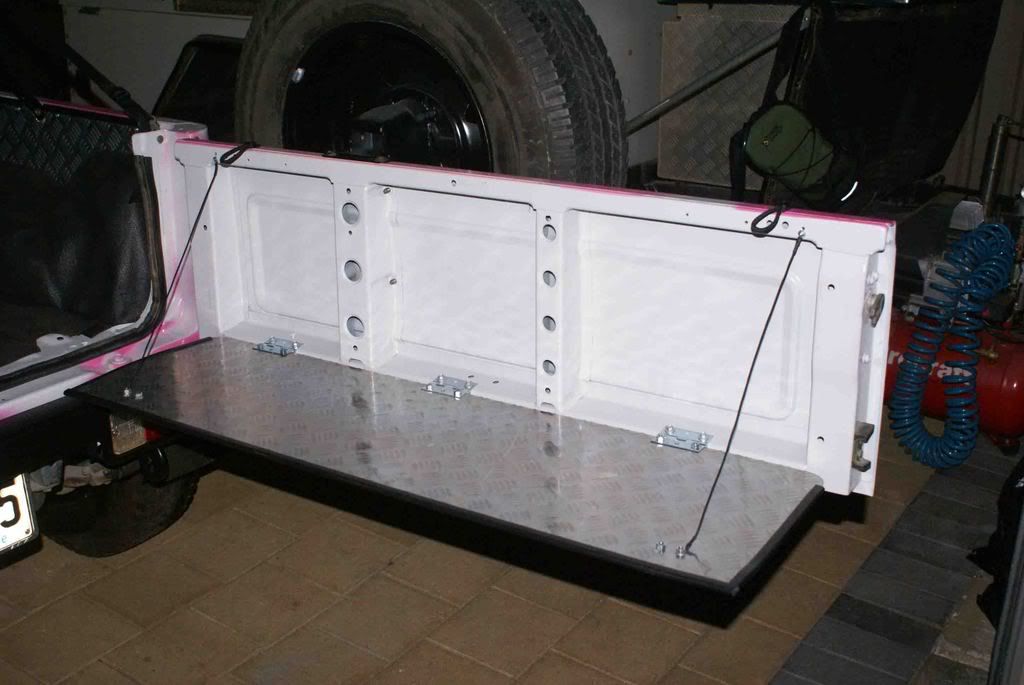
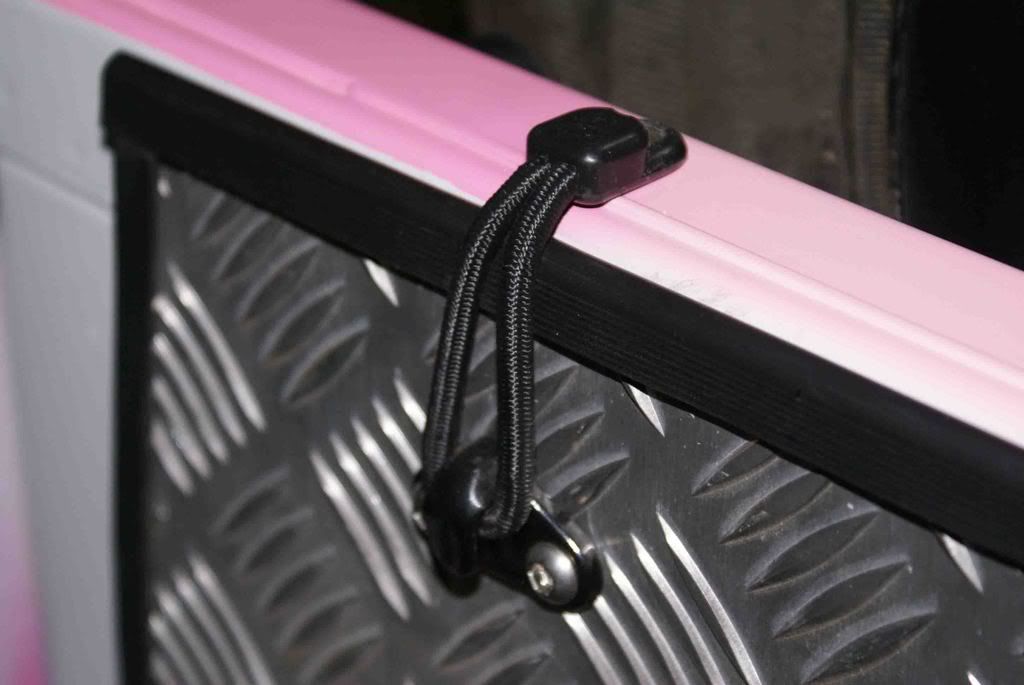
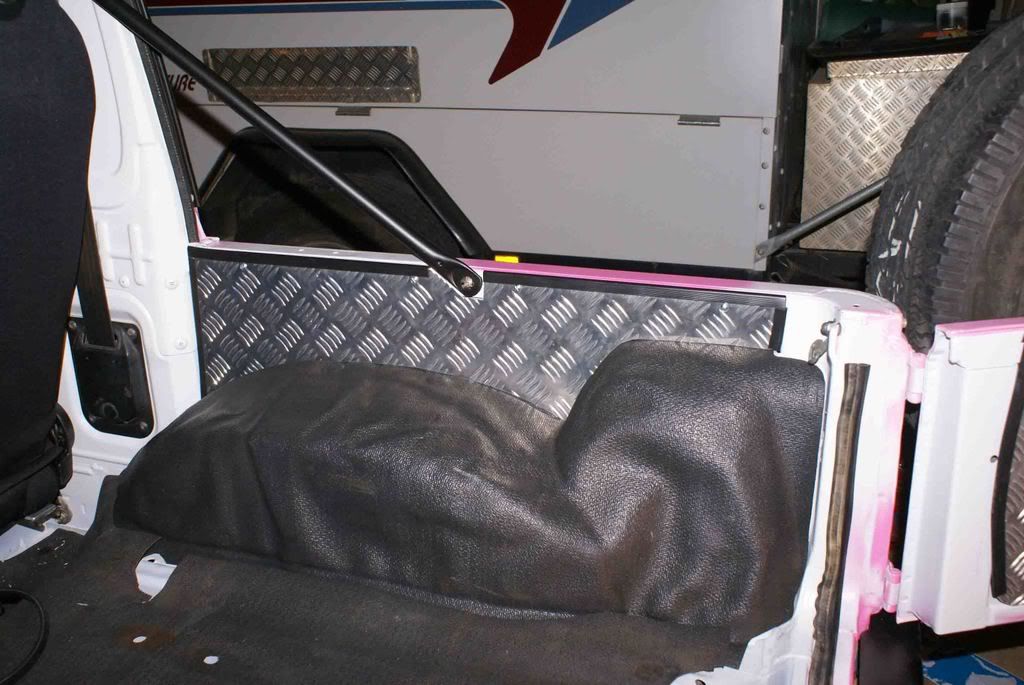
cookie monster
Old trim

Old trims layed out on ali chequer plate

Hailey cutting shapes out with jigsaw

Trial fitting trims


We decided to make the rear door trim into a fold down table
Hailey drilling holes for hinges

Fitting it up

We used tek screw to attach hinges to bodywork


Seeing if it shuts !

Finished articles


cookie monster
99 GU Patrol Wagon 4.2td
Good work guys, do I sense a little bit of wanting to get it finished.... 
You should hit the steering column with a coat of black paint as well to match the new Steering wheel and shiny black Boss kit that went on.... Or is the whole dash getting a pink Fur covering......

You should hit the steering column with a coat of black paint as well to match the new Steering wheel and shiny black Boss kit that went on.... Or is the whole dash getting a pink Fur covering......
..wrench, wheel, wreck repeat..
check out the action @ http://www.darwin4x4.net
check out the action @ http://www.darwin4x4.net
Yes the steering column shroud will be getting some paint, does the wheel have to come off to get the shrouds off ?MUD-PIGSIERRA wrote:Good work guys, do I sense a little bit of wanting to get it finished....
You should hit the steering column with a coat of black paint as well to match the new Steering wheel and shiny black Boss kit that went on.... Or is the whole dash getting a pink Fur covering......
We have just about finished, only the shrouds to paint and the bonnet to cut and polish after some fresh paint was put on last weekend to fix up an unsightly area.
cookie monster
99 GU Patrol Wagon 4.2td
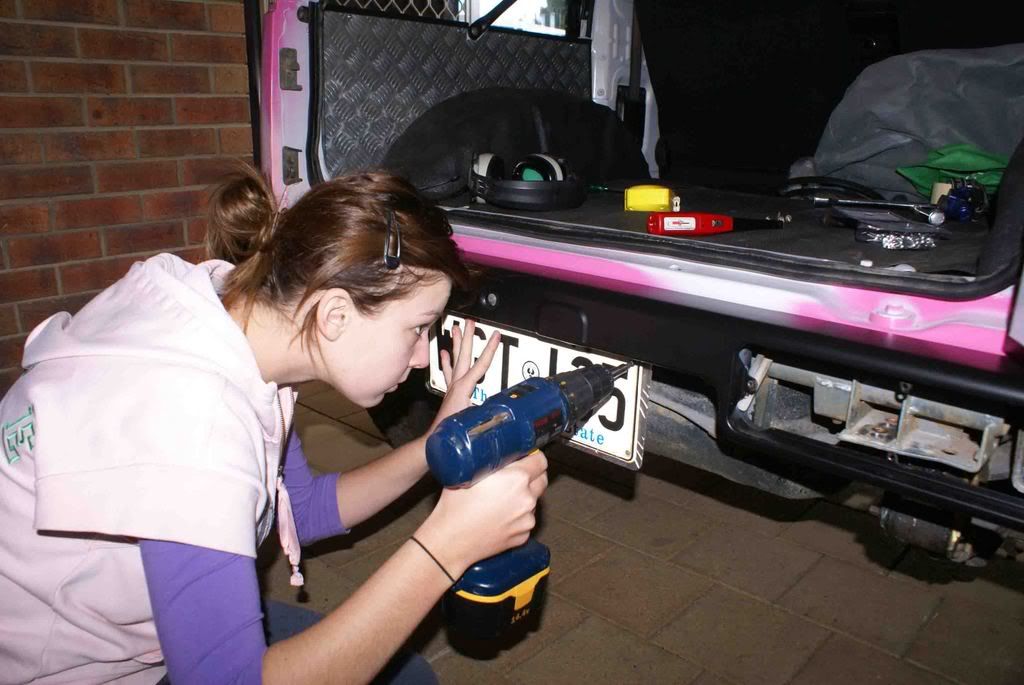
Fitting Number Plate Surrounds
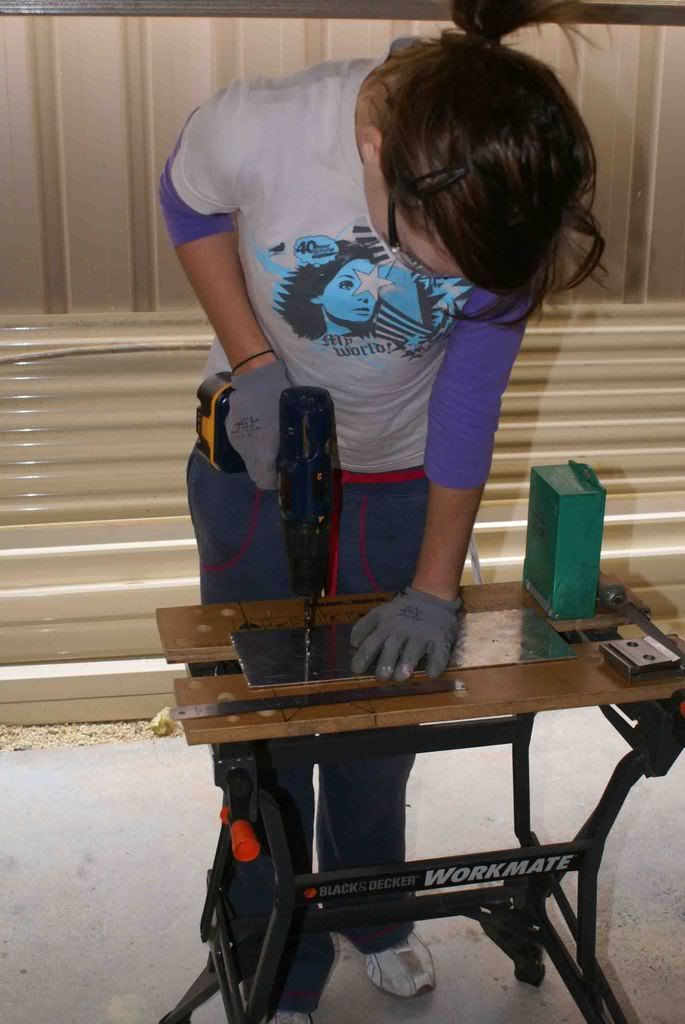
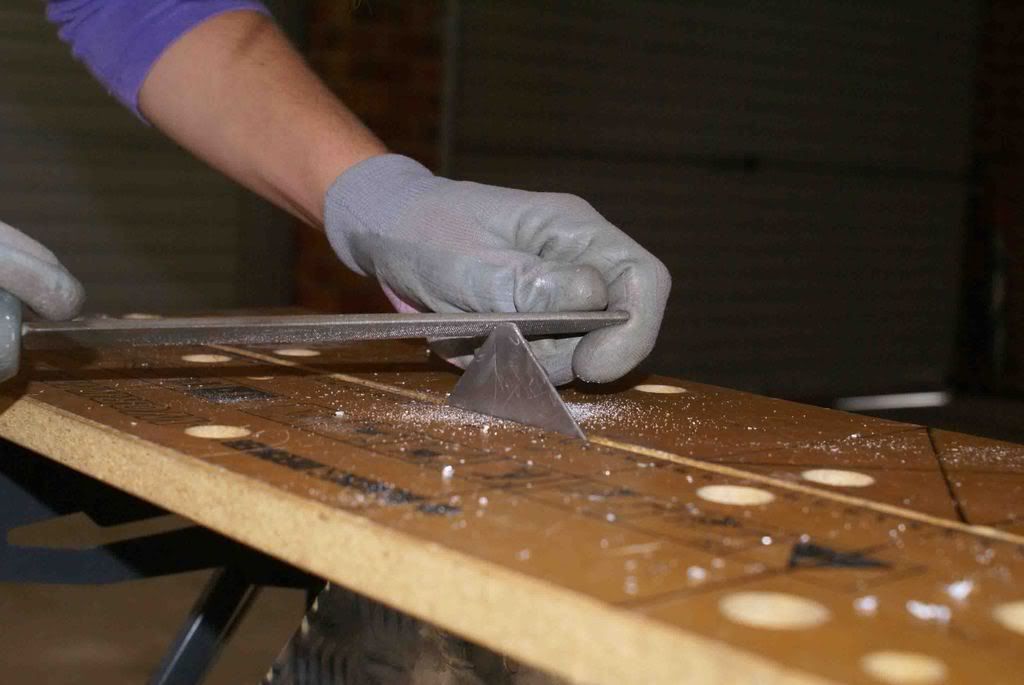
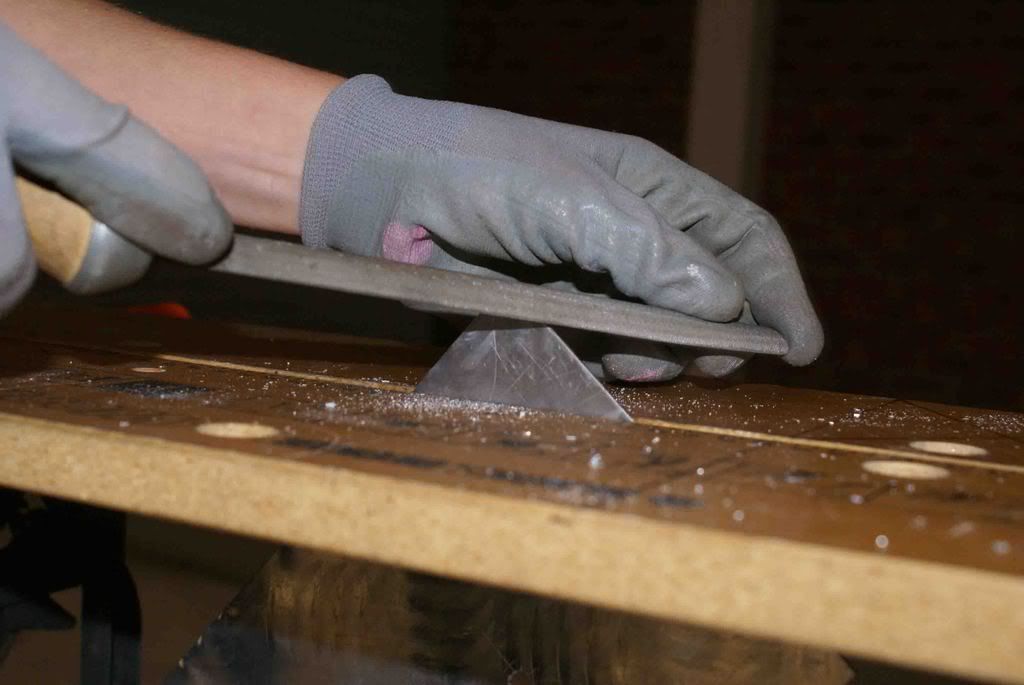
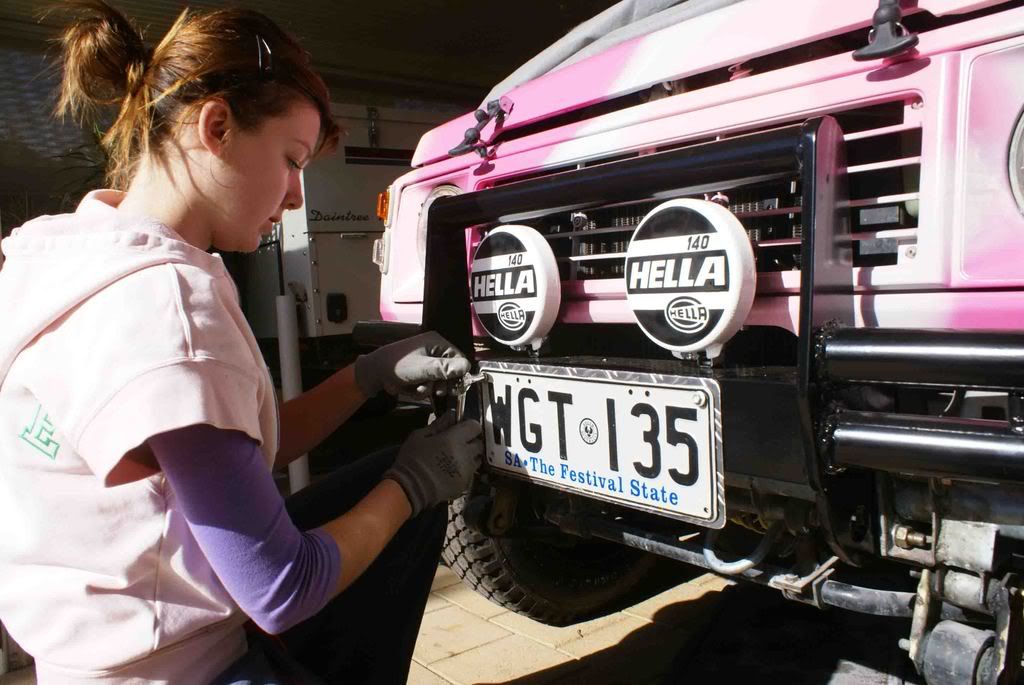
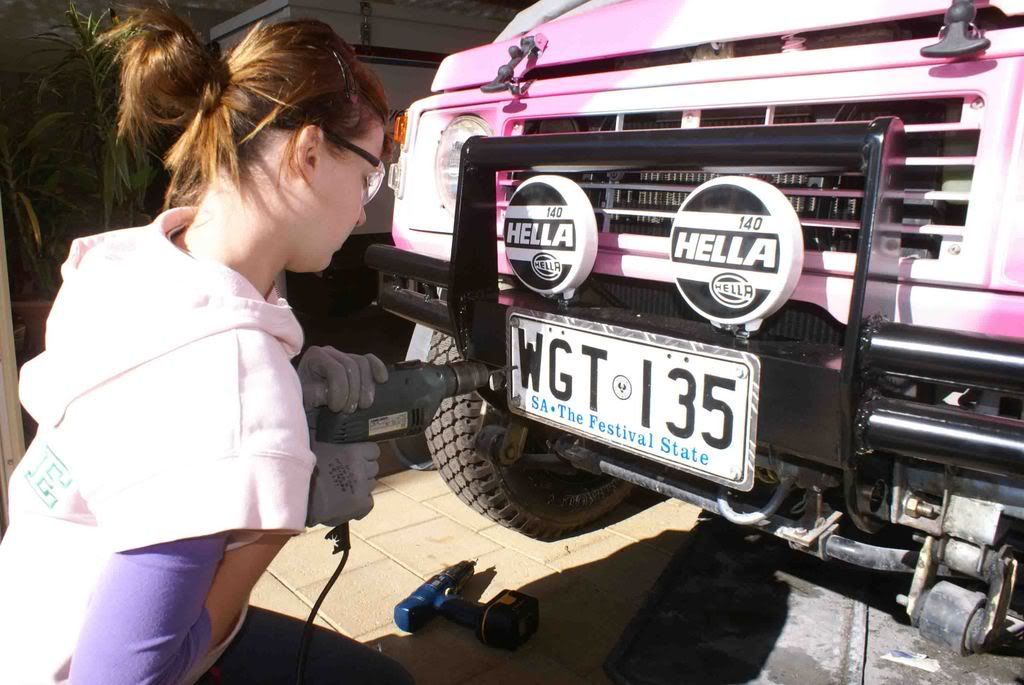
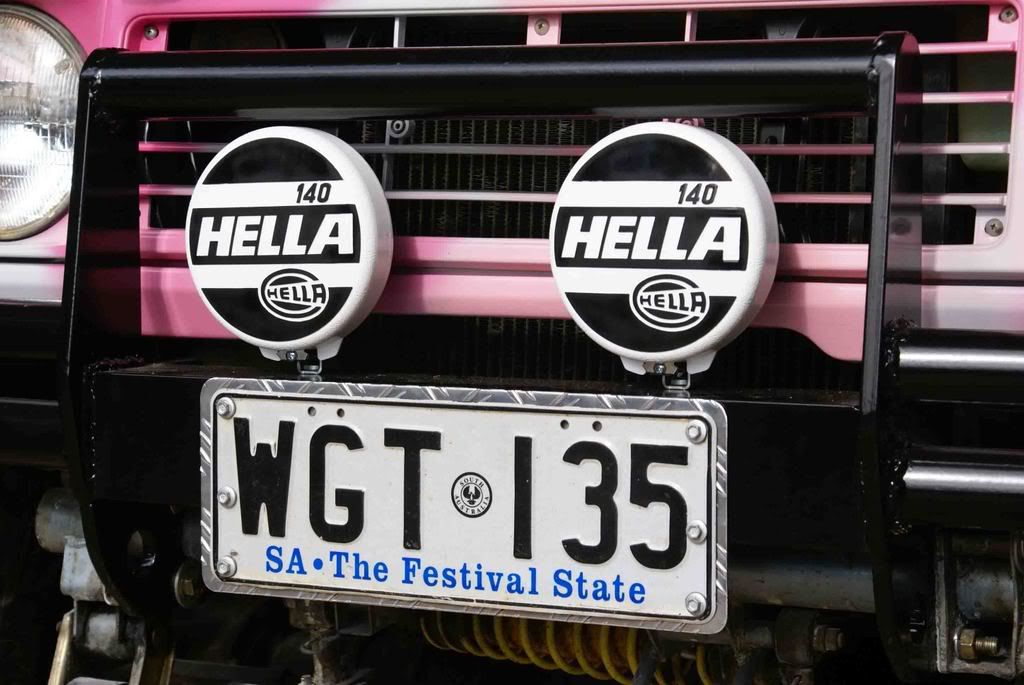
The ali was left over from the cargo area re-trim, so we thought we'd make some number plate surrounds. This would strengthen the front plate, as it hangs down from the bull bar and allow us to remove the large ugly steel number plate holder that was on the rear.
Hailey drilling mounting holes
Filling the rad's
Drilling holes with tek screw
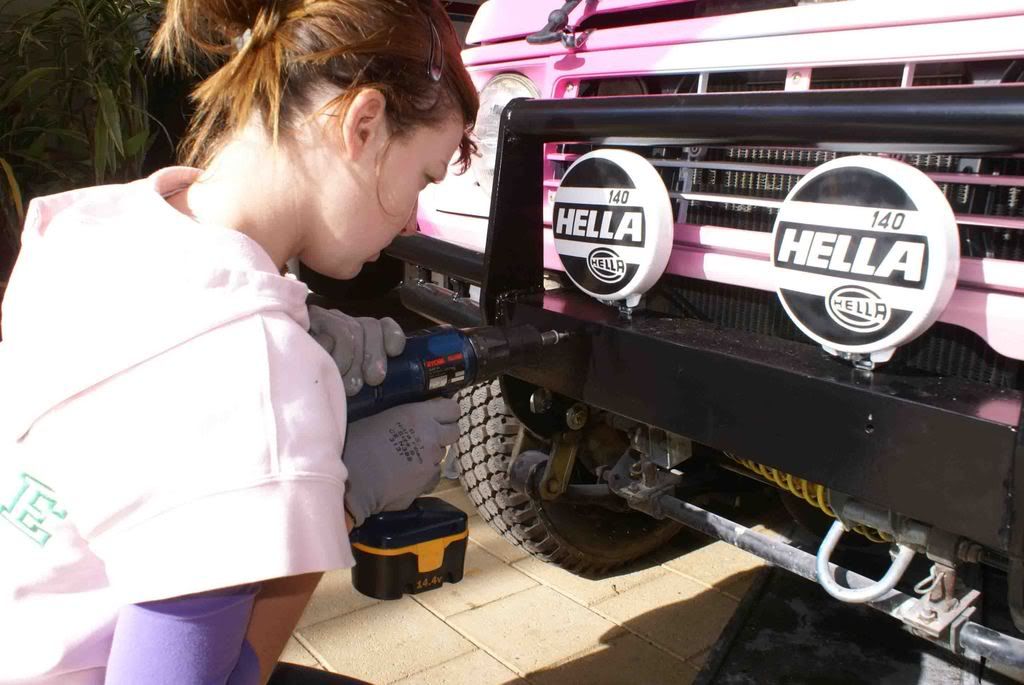
The bull bar was too thick for the drill to seat the tek's, so had to use the ratchet to tighten
Pre drilling holes for 2nd set of mounting screws
Finished front plate
Attaching rear plate
cookie monster
The ali was left over from the cargo area re-trim, so we thought we'd make some number plate surrounds. This would strengthen the front plate, as it hangs down from the bull bar and allow us to remove the large ugly steel number plate holder that was on the rear.
Hailey drilling mounting holes

Filling the rad's


Drilling holes with tek screw

The bull bar was too thick for the drill to seat the tek's, so had to use the ratchet to tighten

Pre drilling holes for 2nd set of mounting screws

Finished front plate

Attaching rear plate

cookie monster
99 GU Patrol Wagon 4.2td
Besides the pink - way cooler than my first car!
Love the way that you are building it up too - very good lesson for Hailey.
Least we know now she won't be one of those ladies who stand looking at their flat tyre waiting for some nice bloke to come and change it for them.
Love the way that you are building it up too - very good lesson for Hailey.
Least we know now she won't be one of those ladies who stand looking at their flat tyre waiting for some nice bloke to come and change it for them.
'04 NP DiD Pajero: 2" Lift, 33's, ARB Bar, XD9000 Winch, Rear ARB Locker, Snorkel, Dual Batts and Much More...
excellent work on the inner panels (and the rear door table - wink, wink!)
i especially like the way you lined it all with rubber around the edges of the checker plate - that will be a tip i will use next time.
To stop my table 'rattling' i put small pieces of sticky-backed rubber at the corners - doesnt rattle at all, and i have seen bonnet latches used instead of rubber ties, but my 3 rubber ties have held my table tight against the rubber perfectly.
excellent work guys - this thread has given me a list of jobs (which i have parts for sitting in the shed, but havent gotten around to doing yet):
- bearings
- brakes
- rocker cover gasket change
- steering wheel replacement
'93 sierra WT, 2" BL, 3" TG springs, 2" zorst, CD, 235's
To do: xtractrs, bigger tyres, gears, etc
See members for pics/info
http://www.outerlimits4x4.com/sutra1368130.php#1368130
To do: xtractrs, bigger tyres, gears, etc
See members for pics/info
http://www.outerlimits4x4.com/sutra1368130.php#1368130
i clicked on pg 4 read it through then had to click ph1 and start from the beginning!!
Awesome effort Hailey & Dad. it great to see people as young as yourself getting in and enjoying a "not so girl" hobby big HIGH 5 your way!!
keep it up...

Evan
Awesome effort Hailey & Dad. it great to see people as young as yourself getting in and enjoying a "not so girl" hobby big HIGH 5 your way!!
keep it up...
Evan
www.energizedracing.com
Support from:
Locktup 4x4
Arb Newcastle
Genr8 LED lighting
Yukon Gear & Axle
Overkill Engineering
Ruffstuff Specialties
Support from:
Locktup 4x4
Arb Newcastle
Genr8 LED lighting
Yukon Gear & Axle
Overkill Engineering
Ruffstuff Specialties
Who is online
Users browsing this forum: No registered users and 1 guest
