Notice: We request that you don't just set up a new account at this time if you are a previous user.
If you used to be one of our moderators, please feel free to reach out to Chris via the facebook Outerlimits4x4 group and he will get you set back up with access should he need you.
If you used to be one of our moderators, please feel free to reach out to Chris via the facebook Outerlimits4x4 group and he will get you set back up with access should he need you.
Recovery:If you cannot access your old email address and don't remember your password, please click here to log a change of email address so you can do a password reset.
NH SWB Pajero Body Lift
Moderator: -Scott-
NH SWB Pajero Body Lift
Hi Guys,
First time poster here, but i have been looking at this site and many others for the last few weeks, to work out what was needed for a 2"body lift for my Pajero. There is not alot of info around for the equipment needed on the net.
I finally worked out what was needed and set about getting the gear together. Installed the lift yesterday. Took about an hour and a half to do the lift, on my own. Could of helped if i had a mate to lend a hand, but they were all at work.
Re: NH SWB Pajero Body Lift
So the list of equipment needed goes like this.......
For the SWB Paj you will need...
8 50mm body lift blocks. (i used Polyurethane. I made them at my work.
8 M10 x 150 High Tensile Bolts
8 M10 Nyloc Nuts
8 M10 heavy duty Washers
Tools........
Socket set, Swivel joint for socket set etc.
CRC or WD40
Trolley Jack
Lump of wood
Car ramps (optional)
Phillips Screwdriver.
Re: NH SWB Pajero Body Lift
First thing to do is get all tools and equipment together and park the vechile on a level surface.
Open the bonnet and find the 2 Brake line coils for the front brakes. Drivers side is located under the Factory air box. I found it easier to remove the air box to see it. Passenger side is under the Battery against the inner wheel arch. Slowly and carefully start to feed the hard brake line thru from the engine bay to the inside of the wheel arch. only needs to be able to move thru the big hole. do this for both sides.
Open the bonnet and find the 2 Brake line coils for the front brakes. Drivers side is located under the Factory air box. I found it easier to remove the air box to see it. Passenger side is under the Battery against the inner wheel arch. Slowly and carefully start to feed the hard brake line thru from the engine bay to the inside of the wheel arch. only needs to be able to move thru the big hole. do this for both sides.
Re: NH SWB Pajero Body Lift
Next up, go to the left rear wheel. at the back of the wheel arch there is a steel plate that is held on by 3 M6 Blots.
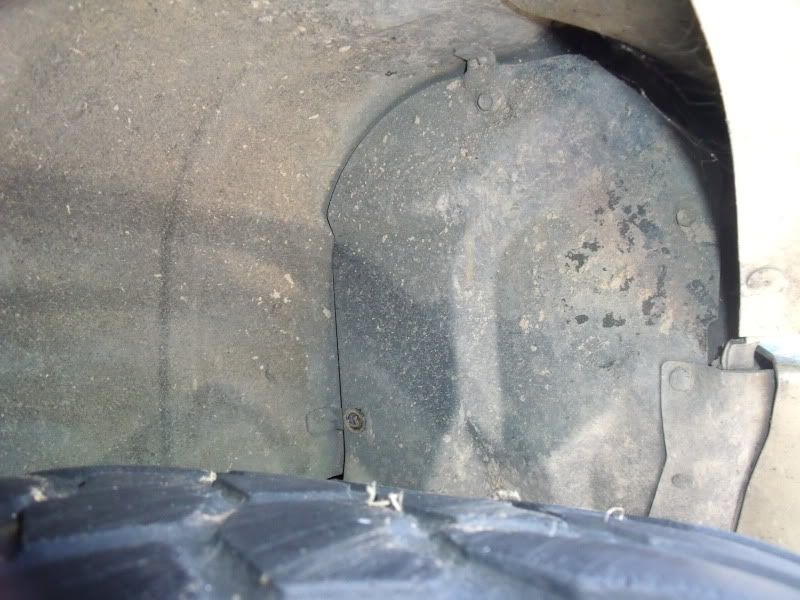
Undo these and remove the plate. Behind this is the fuel filler tube, going from tank to filler mouth. At the bottom of the filler tube, there is a clamp that is bolted to a bracket welded to the chassis rail. Unbolt the clamp, otherwise the body will not lift.
RIght now its time to find the body mounts.
Last edited by H8_4DS on Sat Nov 12, 2011 9:22 am, edited 1 time in total.
Re: NH SWB Pajero Body Lift
There are 8 body mounts on the SWB Paj.
2 at the front beside the radiator, 2 behind the front wheels, 2 in front of the rear wheels and 2 just before the rear bumper.
2 at the front beside the radiator, 2 behind the front wheels, 2 in front of the rear wheels and 2 just before the rear bumper.
Re: NH SWB Pajero Body Lift
With the Paj all ready i took a couple of measurements and started.
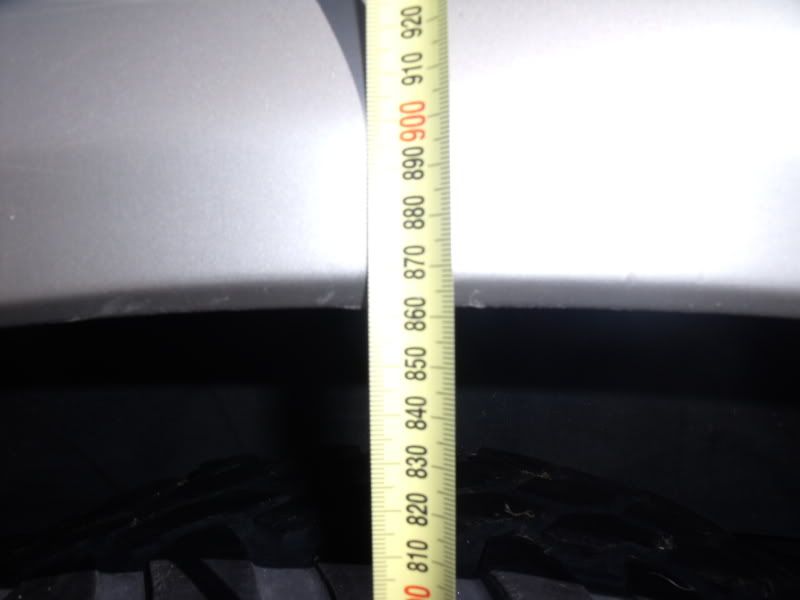
This is the height as standard at the middle of the rear wheel arch.
Starting on the passengers side at the back of the paj, i found a rubber bung beside the tail light.
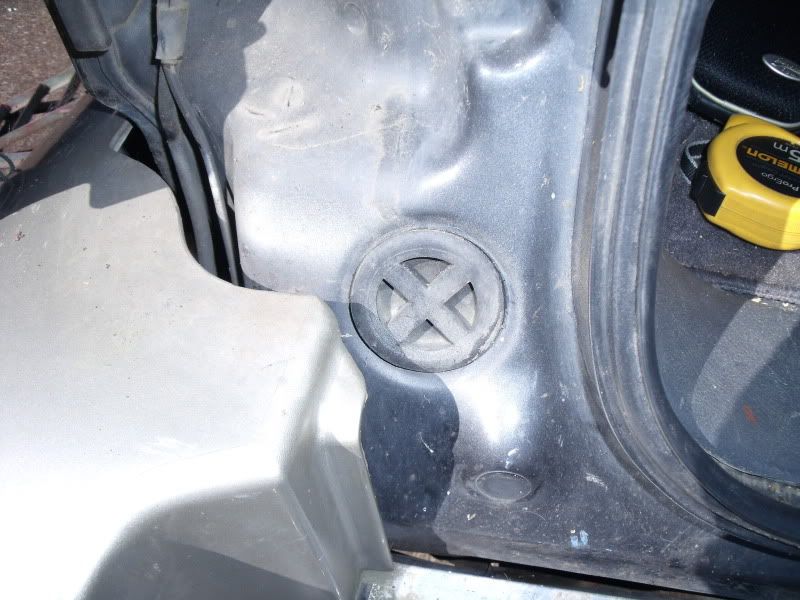
pull this off and there is the first body mount bolt. there is one on the drivers side as well in the same place.
loosen both sides but leave the nuts on the bolts.
Next was the ones in front of the rear wheels.
Climb in the back seat and remove the crpet from under the rear seat. pull the carpet back from infront of the rear seat as well. this is where the next bolt is hiding.
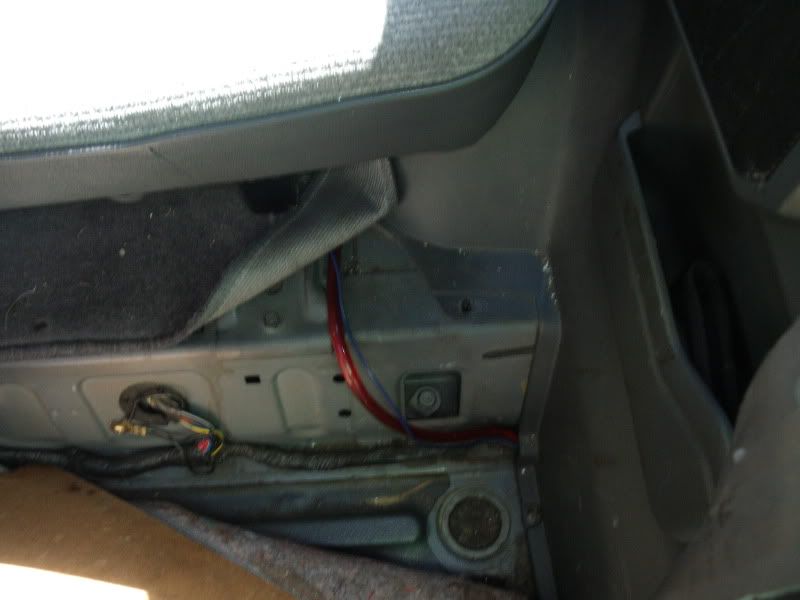
Once again there is one in the same place on the drivers side. Loosen both sides but leave the nuts on the bolts.
Next bolts are in the front foot wells.
remove the plastic trim panel from alont the door sill. then pull the triangle plastic out from the kick panel.
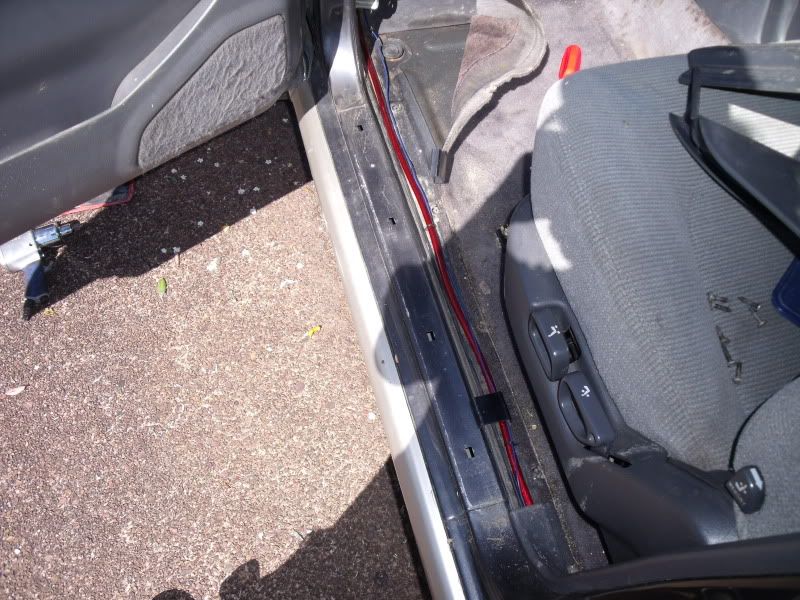
Pull the carpet back and there will be a rubber bung in the floor.
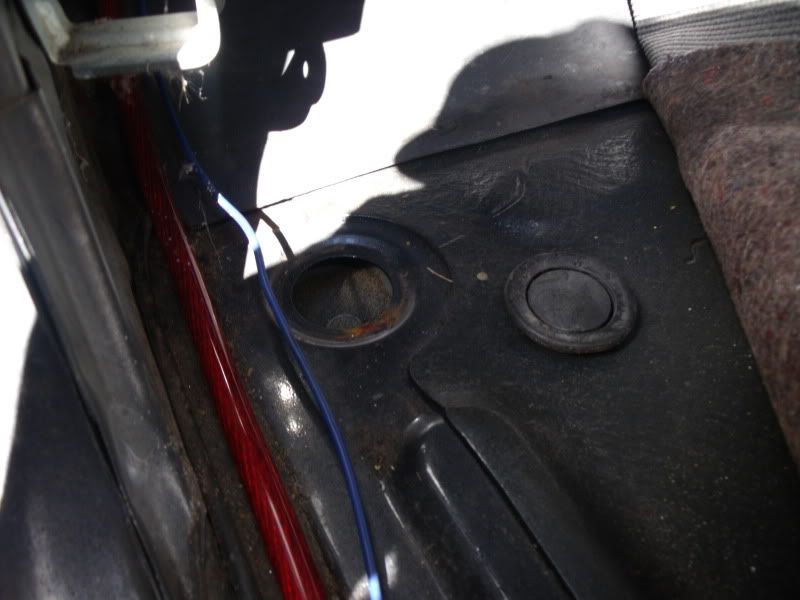
Once again there is one in the same place on the drivers side. Loosen both sides but leave the nuts on the bolts.
Now for the ones in the front. This is where it gets a bit different.
Remove the radiator overflow bottle from its mounting. Usually just pull straight up and it will slide out.
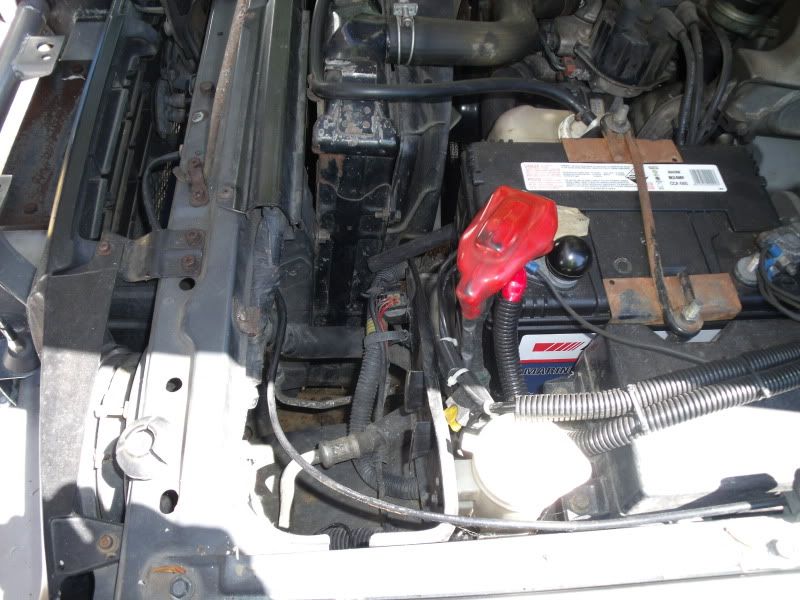
down beside the radiator there is an oval hole.
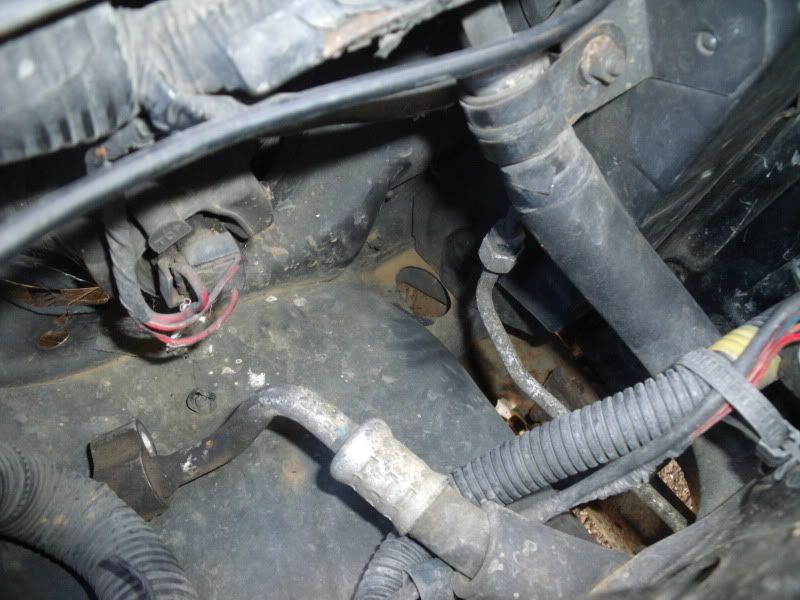
This will probably have some tape over it. remove the tape and you will be able to see the top of the mount bolt. The drivers side has the same thing but is a bit harder to get at.
look under the front and find the mounts. loosen the nut off and also remove the other 2 nuts that are beside it.
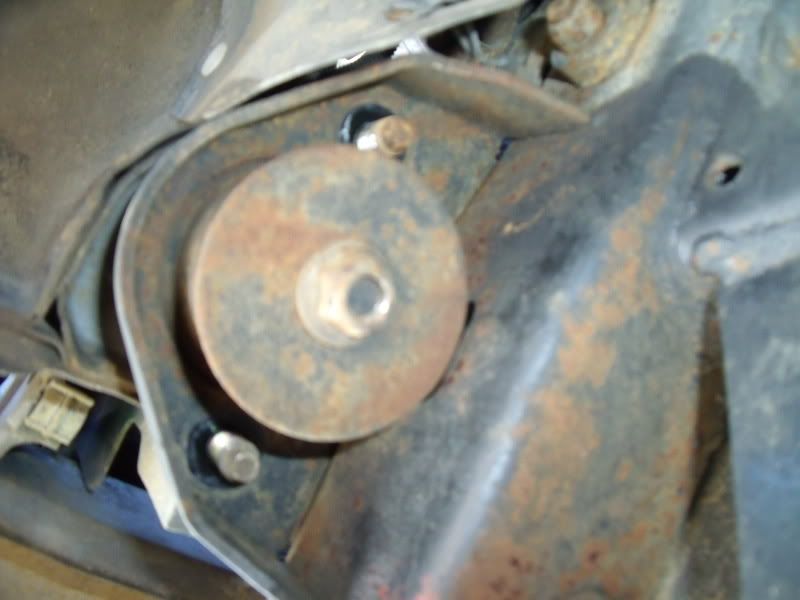
Without removing the extra 2 nuts the body wont lift.

This is the height as standard at the middle of the rear wheel arch.
Starting on the passengers side at the back of the paj, i found a rubber bung beside the tail light.

pull this off and there is the first body mount bolt. there is one on the drivers side as well in the same place.
loosen both sides but leave the nuts on the bolts.
Next was the ones in front of the rear wheels.
Climb in the back seat and remove the crpet from under the rear seat. pull the carpet back from infront of the rear seat as well. this is where the next bolt is hiding.

Once again there is one in the same place on the drivers side. Loosen both sides but leave the nuts on the bolts.
Next bolts are in the front foot wells.
remove the plastic trim panel from alont the door sill. then pull the triangle plastic out from the kick panel.

Pull the carpet back and there will be a rubber bung in the floor.

Once again there is one in the same place on the drivers side. Loosen both sides but leave the nuts on the bolts.
Now for the ones in the front. This is where it gets a bit different.
Remove the radiator overflow bottle from its mounting. Usually just pull straight up and it will slide out.

down beside the radiator there is an oval hole.

This will probably have some tape over it. remove the tape and you will be able to see the top of the mount bolt. The drivers side has the same thing but is a bit harder to get at.
look under the front and find the mounts. loosen the nut off and also remove the other 2 nuts that are beside it.

Without removing the extra 2 nuts the body wont lift.
Re: NH SWB Pajero Body Lift
Now to lift. Undo all the nuts off the mount bolts down the passenger side. Leave the drivers side on for now.
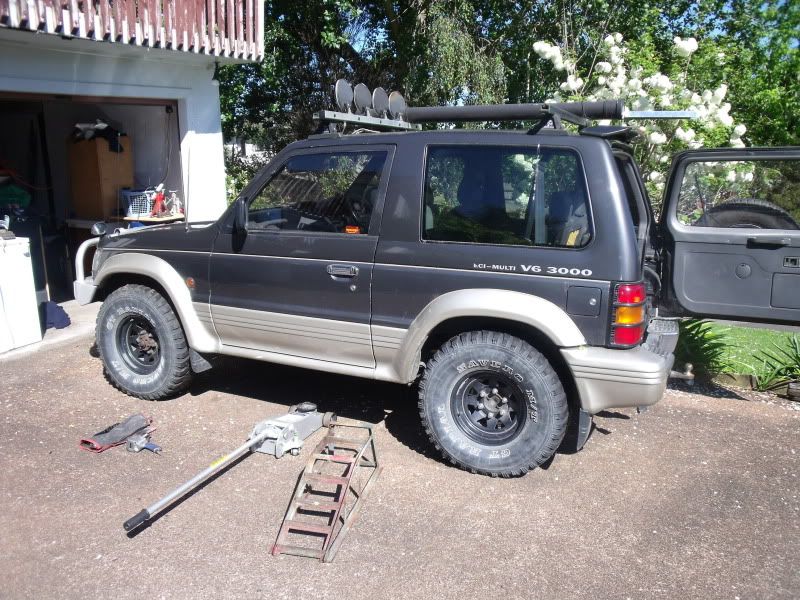
I used a trolley jack placed on a pair of car ramps. position this under the passengers side. block of wood on the jack and start lifting the body.
Dont have any photos of doing this as i wanted to get it back down as fast as i could. Lift the body up high enough that you can slide the new mount in ontop of the origional. put a heave duty washer on the bolt. Drop in down thru the body into the new mount, then thru the old mount, and down so you can put the origional washers etc on and a new Nyloc nut on the bottom. Finger tight is all thats needed at the mo.
Once all 4 are done on the passenger side, then do the same for the Drivers side.
Now go around and tighten up all the new bolts.
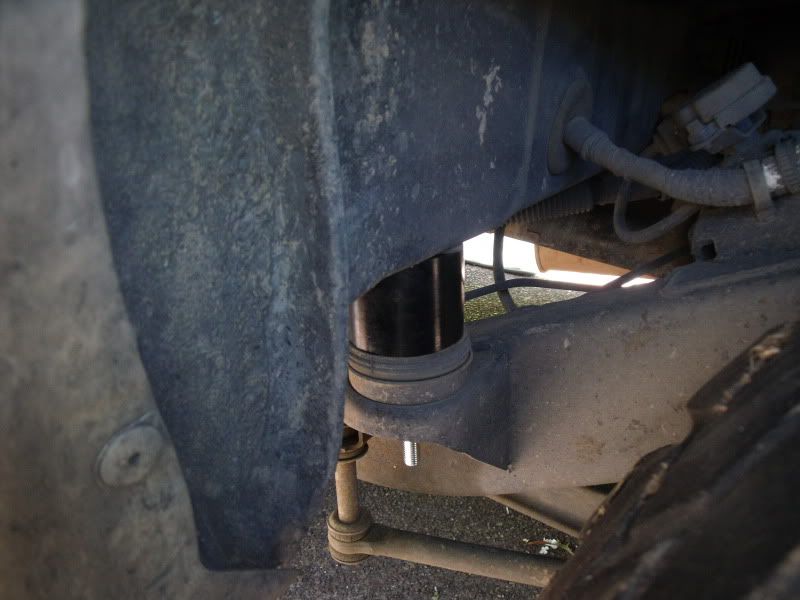
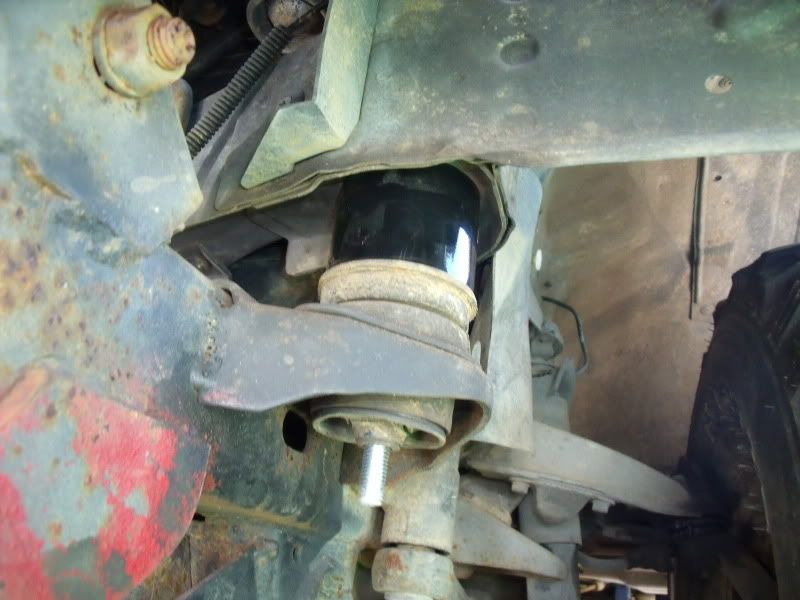
Put the radiator bottle back in place and the steel panel back behind the rear passengers wheel.
Check the steel brake lines and push any extra back thru into the engine bay and tidy them up.
Check your fan on the radiator. you will have to cut(or unclip as in my case) the lower section of the shroud for clearance.
And thats the body Lift done. In a week or so. i will check all the bolts still tight and that they have settled in properly.
Next i will have to lift the front bumper and rear bumper to match the body and i will look at doing a suspension lift as well.
Hope this is going to help people, its not a hard job, just look at it logically and all will fall into place.

I used a trolley jack placed on a pair of car ramps. position this under the passengers side. block of wood on the jack and start lifting the body.
Dont have any photos of doing this as i wanted to get it back down as fast as i could. Lift the body up high enough that you can slide the new mount in ontop of the origional. put a heave duty washer on the bolt. Drop in down thru the body into the new mount, then thru the old mount, and down so you can put the origional washers etc on and a new Nyloc nut on the bottom. Finger tight is all thats needed at the mo.
Once all 4 are done on the passenger side, then do the same for the Drivers side.
Now go around and tighten up all the new bolts.


Put the radiator bottle back in place and the steel panel back behind the rear passengers wheel.
Check the steel brake lines and push any extra back thru into the engine bay and tidy them up.
Check your fan on the radiator. you will have to cut(or unclip as in my case) the lower section of the shroud for clearance.
And thats the body Lift done. In a week or so. i will check all the bolts still tight and that they have settled in properly.
Next i will have to lift the front bumper and rear bumper to match the body and i will look at doing a suspension lift as well.
Hope this is going to help people, its not a hard job, just look at it logically and all will fall into place.
Re: NH SWB Pajero Body Lift
Nice write-up - it's now in the Bible. Thanks. 
Interesting that you managed to lift it without removing the rear bumper. On my NJ, there were two tabs on the body that protrude under the top surface of the rear bumper (which is attached to the chassis, for those that haven't done this...) so I couldn't lift the body 50mm without removing the bumper.
FWIW, I had some nasty sounding groans from the front end for a while, which I presume was things settling into place. I haven't heard such noises for a long while now, and when I look under the front, I can see where the blocks have been moving with respect to the body.
Also, check with the relevant registration mob about material for the blocks. When I did mine (in Queensland) the official publications said the blocks had to be metal (steel / aluminium), although the DOT inspectors said they accept some poly blocks if they have steel crush tubes.
Re: NH SWB Pajero Body Lift
Chur..... in the bible already hahaha
I live in the big NZ. Have talked to a mate of mine that does warrent of fitness and LVC, and he has said that a 2"lift dosent need a cert or anything. And the material that the lift blocks are made out off is quite open. I have made a s**t load of blocks for extreme off roaders, thru my work. I use UHMWPE or polyutethane. But as you say Steel or Aluminium could be used. Only problem with the harder plastic or metal is that it will cause more stress on the origional body mount seats. I suggest putting a rubber or polyutrethane spacer between the body the solid plastic or steel spacer.
I will post a couple of pics up tomorrow of how the lift has turned out. Its definately higher than i thought it would be. I took the running boards off and My wife has already asked how she is going to get into it.
Re: NH SWB Pajero Body Lift
beat me to it scott, very good write up
mike_nofx wrote:Is "Athol" what people with a lisp call him??
RAY185 wrote:I think it's delightful! So does my wife Bill.
Re: NH SWB Pajero Body Lift
Ok, so its been about a month since i did the lift.Done approx 450 kms. Went around and checked all the bolts and they were still tight.
A couple of things that i have found to be small roblems are...
Even with taking off the bottom of the radiator shroud, the fan still just hits it on the bottom edge on the passengers side. Easy fix is to cut a bit more off of it. Only hits when there is a bit of flex. normal day to day driving is no problem.
4X4 selector is the next problem. I found that driving along the motorway that i was in 4 high. the rubber gator around the selector stick was holding it from going all the way back into 2 High. Removed the gator and it is all good now. I will make up a leather one to cover the hole thats left now.
And the other thing that i overlooked when doing the lift, was remember to unbolt the mud flap from the rear drivers side wheel arch. i never noticed it and have pulled the tabs that hold it up off. Not a major but it would of been ideal to undo them first.
I probably wont be rasing my bumpers at this stage. The rear bumper will have to be cut so that my tow bar can still function. Having a heavy boat to tow, means that i would rather tow it with my Paj than my commy wagon.
Who is online
Users browsing this forum: No registered users and 7 guests