Page 2 of 2
Posted: Thu Jun 04, 2009 6:12 pm
by napsta
is there not a known weakness of using an ARB in a 9 inch? Not in the design of the ARB but fitting it in a 9 inch? I think alot of the crawler guys over there are having problems with them, especially when 'crash' locked or used with cutting brakes?
Posted: Thu Jun 04, 2009 7:30 pm
by ashtrans
Hi,
we make 4 mods to the 9" ARB RD99,
1) to fit to our new housing we have to machine the ARB on the non crown wheel side to pull the journal bearing in closer to the centre,
the other 3 mods are to improve the poor dog clutch engagement,
2) there are 12 small but strong disengagement springs, this is a huge force for the pneumatic piston to overcome on engagement, we remove 4.
3) the dog clutch only has 2.5mm engagement, we machine it to add 1mm more.
4) the internal air feed holes are 1mm, we open these up to 1.5mm.
not tested any of the above yet but hopefully it will improve the problems the 9" ARB suffers from.
Posted: Fri Jun 05, 2009 1:02 am
by ISUZUROVER
ashtrans wrote:Hi,
we make 4 mods to the 9" ARB RD99,
1) to fit to our new housing we have to machine the ARB on the non crown wheel side to pull the journal bearing in closer to the centre,
the other 3 mods are to improve the poor dog clutch engagement,
2) there are 12 small but strong disengagement springs, this is a huge force for the pneumatic piston to overcome on engagement, we remove 4.
3) the dog clutch only has 2.5mm engagement, we machine it to add 1mm more.
4) the internal air feed holes are 1mm, we open these up to 1.5mm.
not tested any of the above yet but hopefully it will improve the problems the 9" ARB suffers from.
Great info Dave. I'm sure you have your own ARB contacts, but daniel bongard (dbongard) on here is an ARB engineer...
Posted: Fri Jun 05, 2009 9:18 am
by Slunnie
ISUZUROVER wrote:ashtrans wrote:Hi,
we make 4 mods to the 9" ARB RD99,
1) to fit to our new housing we have to machine the ARB on the non crown wheel side to pull the journal bearing in closer to the centre,
the other 3 mods are to improve the poor dog clutch engagement,
2) there are 12 small but strong disengagement springs, this is a huge force for the pneumatic piston to overcome on engagement, we remove 4.
3) the dog clutch only has 2.5mm engagement, we machine it to add 1mm more.
4) the internal air feed holes are 1mm, we open these up to 1.5mm.
not tested any of the above yet but hopefully it will improve the problems the 9" ARB suffers from.
Great info Dave. I'm sure you have your own ARB contacts, but daniel bongard (dbongard) on here is an ARB engineer...
Product development supervisor for the Airlockers and compressors at that!
Posted: Sat Jun 06, 2009 1:50 am
by ashtrans
few update photos for you guys,
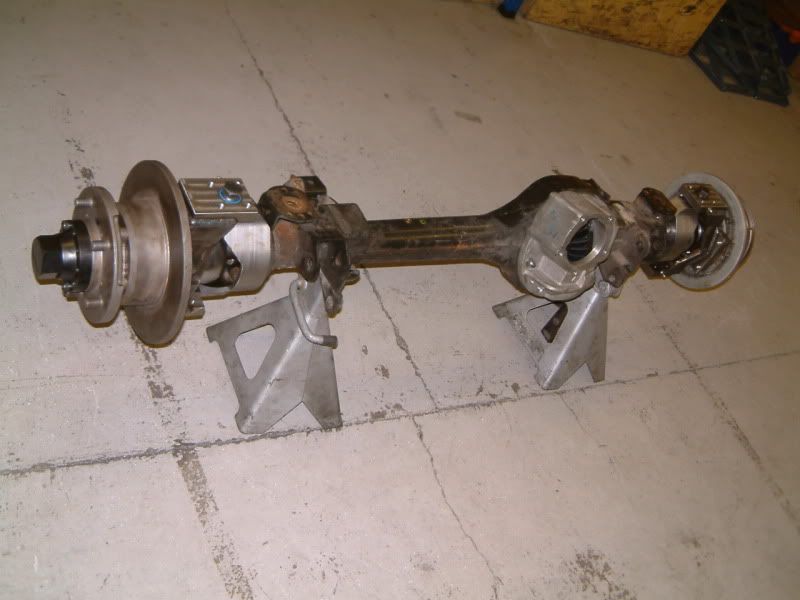
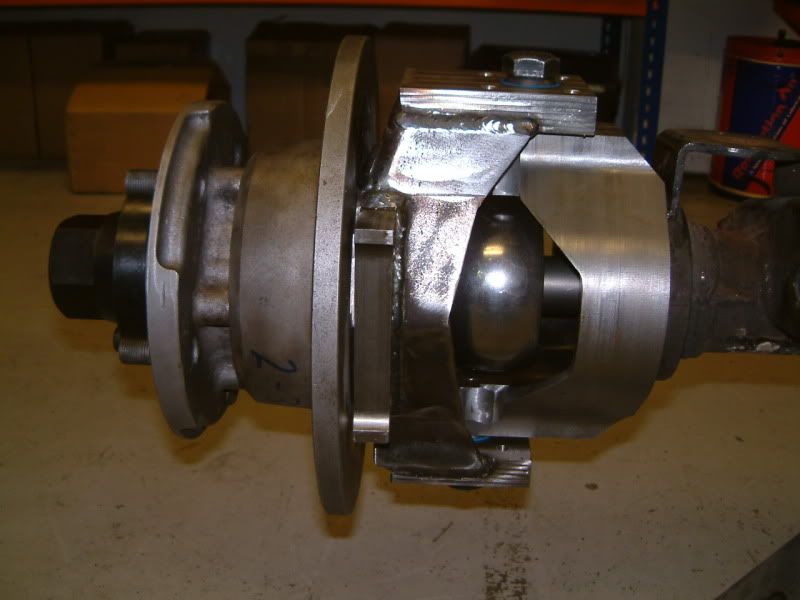
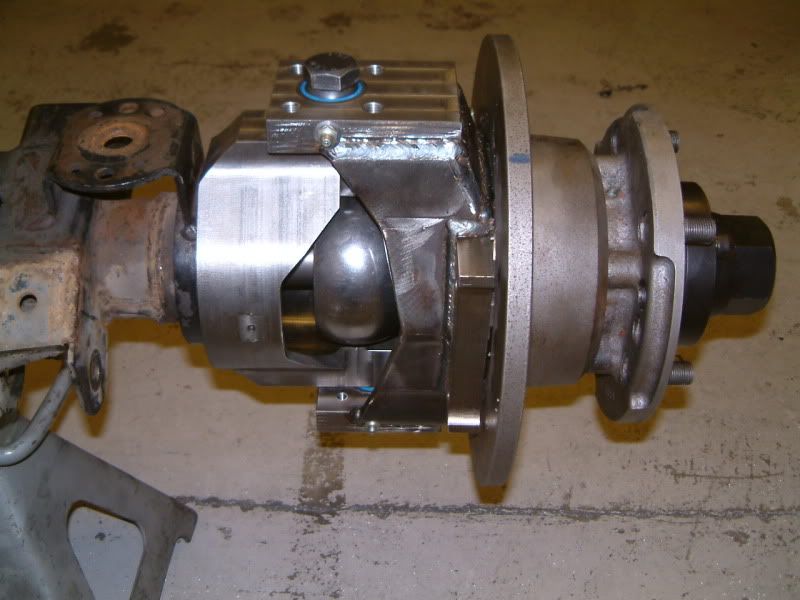
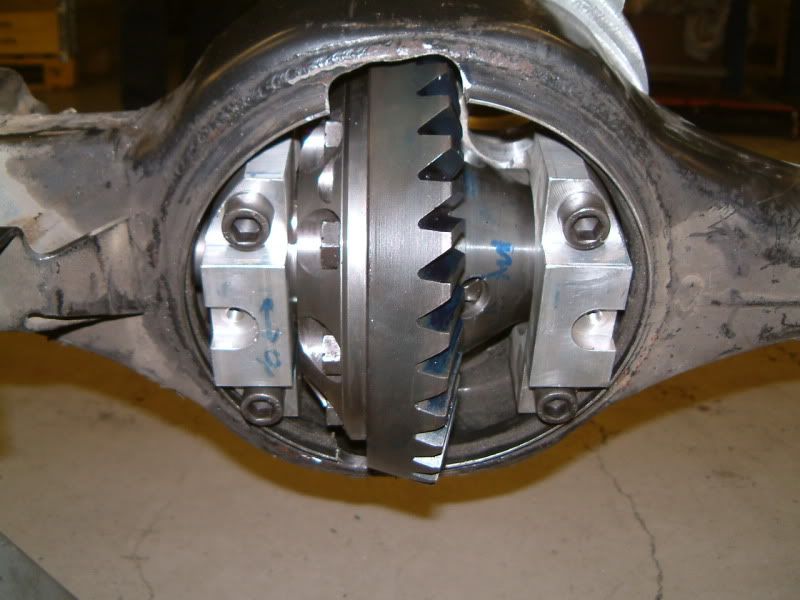
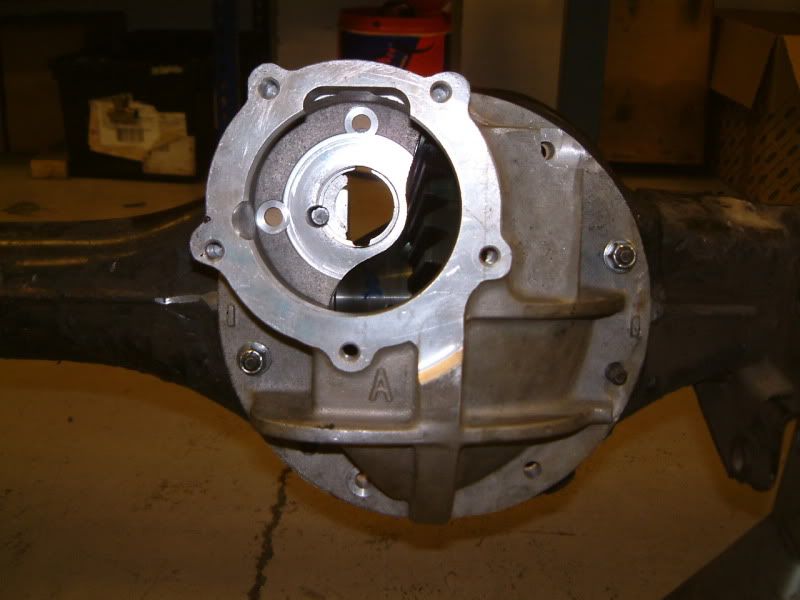
it's slow process but it's definatly getting there,
these newer knuckle inners are solid steel, the outers are solid flange and twin caliper flanges with fabricated sides,
seal and needle roller bearings on CV
Posted: Sun Jun 07, 2009 6:09 pm
by Micka
So are the inner knuckles a bolt on or weld on?
Looks very heavy duty. Top work, guys.
Posted: Sun Jun 07, 2009 8:24 pm
by ashtrans
they bolt on,
Posted: Sun Jun 07, 2009 10:50 pm
by Slunnie
Is this a full bolt up conversion with the Rover axle that requires no fabrication etc?
Posted: Mon Jun 08, 2009 1:08 am
by ISUZUROVER
double post...
Posted: Mon Jun 08, 2009 1:09 am
by ISUZUROVER
Slunnie wrote:Is this a full bolt up conversion with the Rover axle that requires no fabrication etc?
Well at the very least you need to cut off the pan and weld a new one on...
Thanks for posting the pics Dave, looks great!!!
Am I seeing it right, that you need to bolt the centre casing to the housing, then install the pinion???
Posted: Mon Jun 08, 2009 8:38 am
by Micka
ISUZUROVER wrote:Slunnie wrote:Is this a full bolt up conversion with the Rover axle that requires no fabrication etc?
Am I seeing it right, that you need to bolt the centre casing to the housing, then install the pinion???
Think so, Ben.
Would make it REALLY hard to get to the other 2 or 3 nuts and bolts for the centre casing.
Posted: Mon Jun 08, 2009 8:45 am
by LOCKEE
Better than having to put in the oval section required by traditional 9 inch housing.
Posted: Mon Jun 08, 2009 4:56 pm
by ashtrans
ISUZUROVER wrote:Slunnie wrote:Is this a full bolt up conversion with the Rover axle that requires no fabrication etc?
Well at the very least you need to cut off the pan and weld a new one on...
Thanks for posting the pics Dave, looks great!!!
Am I seeing it right, that you need to bolt the centre casing to the housing, then install the pinion???
Yes it will need a new pan/sewercap fitting,
the diff can be fitted complete with the pinion, we just didn't have one made up when we took the photos,
Posted: Tue Jun 09, 2009 6:51 am
by ashtrans
ashtrans wrote:ISUZUROVER wrote:Slunnie wrote:Is this a full bolt up conversion with the Rover axle that requires no fabrication etc?
Well at the very least you need to cut off the pan and weld a new one on...
Thanks for posting the pics Dave, looks great!!!
Am I seeing it right, that you need to bolt the centre casing to the housing, then install the pinion???
Yes it will need a new pan/sewercap fitting,
the diff can be fitted complete with the pinion, we just didn't have one made up when we took the photos,
sorry, got that wrong, on this later design yes the diff casing will need fitting to the axle then the pinion fitting to the casing
Posted: Thu Jun 11, 2009 7:48 am
by nottie
I think i just got a hard on when i seen those pics.

Posted: Sat Jul 25, 2009 3:38 am
by ashtrans
video of the first test run here :
video
we were very pleased, the ticking is the CV boot clip fouling, now fixed, the diff was silent and the oil feed to the pinion bearings worked well,
should be on a car for real testing very soon,
Posted: Sat Jul 25, 2009 9:00 am
by Slunnie
Dave that is looking excellent!!!! Nice testing bench by the way!!!!
http://www.youtube.com/watch?v=nwaU_fqhk3I


