Page 2 of 4
Posted: Mon Aug 27, 2007 7:00 pm
by NJV6
I have done the ball joint flip as well.... so I guess your fronts wouldn't fit.
Posted: Mon Aug 27, 2007 7:08 pm
by Overkill
NJV6 wrote:I have done the ball joint flip as well.... so I guess your fronts wouldn't fit.
Have you also cut your bumstops? I did the flip AND cut the stops, the shocks work well if the stops aren't removed.
Posted: Mon Aug 27, 2007 7:13 pm
by NJV6
Ya, about half way down the previous page.

Posted: Mon Aug 27, 2007 7:16 pm
by Overkill
No worries, look out for them on Trademe

Posted: Fri Aug 31, 2007 1:25 pm
by jfarsang
I'm considering doing the ball joint flip.
Reading both good/bad things about it.
How hard/often do you guys take it offroad and would you recommend doing it ?
How much lift do you get approx ?
Posted: Sun Sep 16, 2007 9:57 am
by NJV6
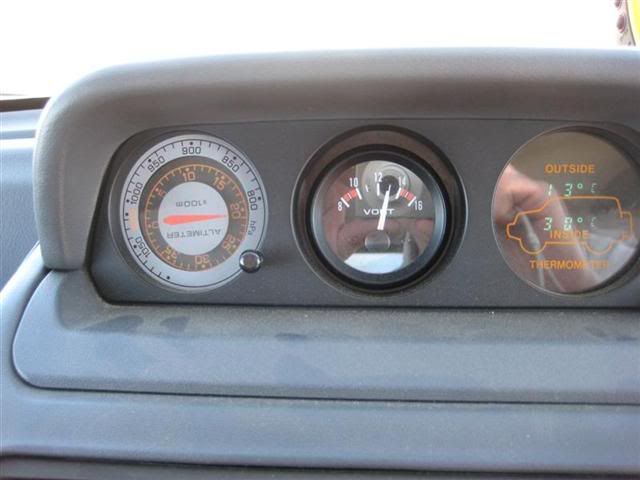
Voltmeter
I put it where the roll meter went in the centre instruments to keep an idea of when I can turn the vehicle off after winching. I felt I know when I'm on a hell of an angle and the tilt meter is the last thing i'd be admiring about then.
Heavy winching voltage drops to about 10 volts and operating is about 14.
Fits well, even the back light goes


Posted: Sun Sep 16, 2007 10:00 am
by NJV6
Winch control
The other switch for controlling the inch inside the vehicle - one of the most useful mods done.

It is the switch in the middle of the photo, the top one is the electric ariel which I like but after breaking one I put a manual control so listening to CD's whilst wheelin doesn't snap it off

Posted: Sun Sep 16, 2007 10:05 am
by NJV6
Posted: Fri Nov 09, 2007 4:05 pm
by Overkill
NJV6 wrote:Steering Damper
Seems to feel nice through the wheel on my test try but yet to test it properly.
Have you given it its proper test yet? Apart from it looking nice does it do the trick

Its something I might look into if its worth it.
Posted: Fri Nov 09, 2007 8:37 pm
by NJV6
Sorry dude, havn't been anywhere yet

! Um all that tells me is I gotta get out more!

actually I tell a lie, I did but then discovered I hadn't done the bolt up tight enough on the steering arm and it moved... Sorted now
Posted: Fri Nov 23, 2007 8:56 am
by NJV6
Finally another update.
Got my rear 'Picnic table'

finished, working and kindof looking good.
It is a right pain in the rear trying to get a flat table to mount to a curved rear door, luckily under the plastic panelling it is basically flat where I mounted a piece of steel from one end to the other and bolted it to the door.
Next mission was getting it to stay 'up' while still looking tidy - I have suceeded with the 'up' part and I guess it is tidy enough.


Posted: Fri Nov 23, 2007 5:57 pm
by Overkill
NJV6 wrote:Next mission was getting it to stay 'up' while still looking tidy - I have suceeded with the 'up' part and I guess it is tidy enough.
Does look tidy and good idea to boot. All I can say is MAGNETS!!! Will hold that puppy up no worries and if you recess them, well that will almost look "posh"

Posted: Sat Nov 24, 2007 7:04 am
by NJV6
Tried magnets, tried cupboard door clips, all sorts but the jolt of the door shutting pop's any of them open.
I guess it'd be good if every time you opened the door was for smoko

Open the door and the table drops down automatically!
Posted: Wed Nov 28, 2007 12:38 am
by HotAe92
NJV6 wrote:Finally another update.
Got my rear 'Picnic table'

finished, working and kindof looking good.
It is a right pain in the rear trying to get a flat table to mount to a curved rear door, luckily under the plastic panelling it is basically flat where I mounted a piece of steel from one end to the other and bolted it to the door.
Next mission was getting it to stay 'up' while still looking tidy - I have suceeded with the 'up' part and I guess it is tidy enough.


Very nice, I have been planning to do the same thing with mine - except i didn't know how to go about it with the curved door. So you mounted a plate of steel which you bolted to the door, then bolted the hinges to the steel.
Trying to see what you used to hold the table in a horizontal position - is it just nylon cord or braided steel wire.
As for fastening in an upright position, a friend of mine used those elastic clips found one those ice chests and so forth, seems to work well.
Thanks for the much needed inspiration.
Cheers,
Jayden
Posted: Wed Nov 28, 2007 5:37 am
by NJV6
Yep
Take the trim off, then run a bit of 2 or 3mm x 25mm flat steel the width apart of the hinges. Bolted it to the door in three places. Make sure you drill the holes where you can get you hand in behind to put the nuts on.....
Then cut the hole for the hinge in plastic and bend the hinge to suit as it still sits back about 10mm from the plastic. If I was doing it again I'd mount the hinges on the steel before I put the steel on as it can then be bolted, I don't like using self tappers.
The cord is Nylon and probably not very strong but it's ok & is mounted to the frame in behind.
Elastic things - good idea.
Posted: Mon Mar 31, 2008 4:54 pm
by Dexter
With the arial button, how did you get the sucker to stay down? I have a stock switch in my NL that toggles between Hi and Low, but I cant get it to stay down unless I turn the CD player off, I assume you just cut the power to one of the lines to the arial but is it that easy?
Posted: Mon Mar 31, 2008 5:35 pm
by NJV6
Yes, it is real easy. Just put the switch (on/off toggle) on the power out of the head unit (usually a blue wire on an aftermarket head unit).
Switch the switch off and the aeriel computer thinks the radio is turned off and lowers the aeriel!
Posted: Tue Jul 01, 2008 7:33 pm
by NJV6
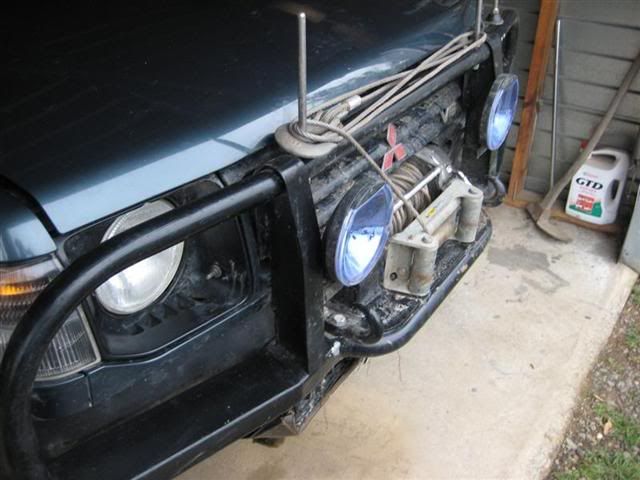
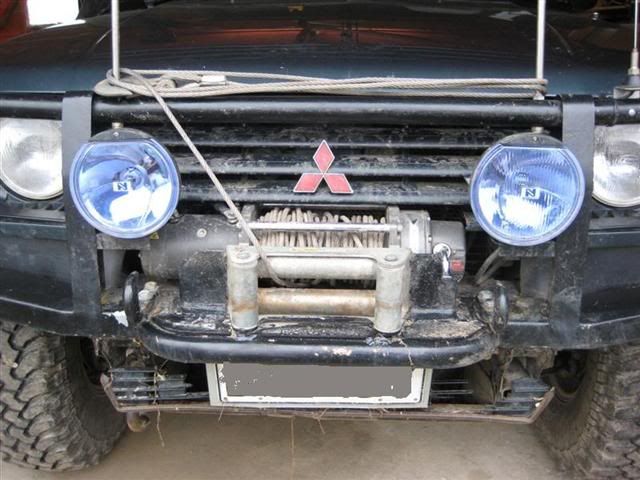
Spent a bit of time remodelling my front bar.
I felt the winch stuck out further than it should and simply by loosening the two bolts holding the two horns on and moving them sideways there was alot of unsed space.
So I moved the winch back the width of it and used the old rear holes as the fronts and added a plate to the back to fit the winch.
Added some bracing to stop the twist with some super long bolts right down through the chassis and had to remount the lights. I wanted to be able to use the horns on the bull bar to wrap the rope around without it hitting the lights.
This also enabled me to fit a second front recovery hook.
All in all pretty happy but I would like to beef up the chassis mount at some stage if I was going to be doing hard snatchs. The factory welds on the uprights look pretty marginal.
The winch can be taken off without taking the bar off which was a must and the winch motor can be taken off without removing the winch to dry it out etc which is also a bonus.
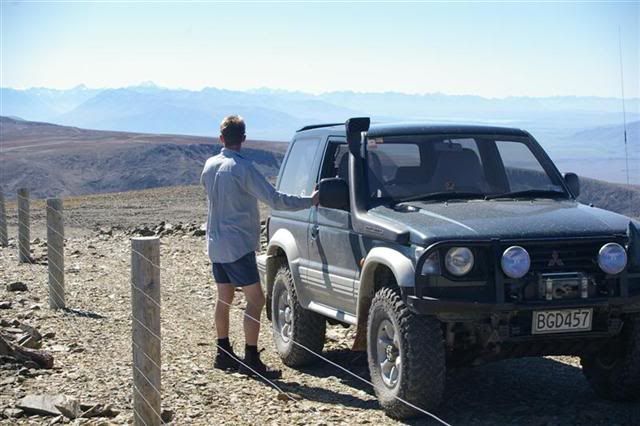
And one of me and vehicle at 7000 feet or 2098m to be exact

Posted: Fri Aug 29, 2008 3:51 pm
by Dexter
Mate, do you remember what length bolts you used for the ball joint flip?
Posted: Sat Aug 30, 2008 11:21 am
by NJV6
HI Dexter, Something tells me 20mm in the back of my mind. I got 25mm but they were too long. If you used 25mm then you could get 2 nuts on but with decent 8.8 bots I don't believe 2 nuts are necessary.
Posted: Sat Aug 30, 2008 6:12 pm
by mad geordies
how do you wire up the voltage clock? cheers
Posted: Sat Aug 30, 2008 8:05 pm
by NJV6
Red power, Black earth. Yip, very very easy. Well within my capabilities.
Any power will do, mine is from the power for the outside/inside temp gauge right beside it I think.
Posted: Sat Aug 30, 2008 11:29 pm
by Dexter
Doh I got some 40mm's here. But couldn't separate the damn ball joint from the upper arm, any suggestions?
Posted: Sun Aug 31, 2008 7:50 am
by NJV6
They are only sitting there! Undo the top ball joint from the hub assembly then undo the 3 x 8 mm bolts and it'll just lift out.......
If not, hammer, bigger hammer, gas.
Posted: Sun Aug 31, 2008 10:54 am
by Dexter
NJV6 wrote:They are only sitting there! Undo the top ball joint from the hub assembly then undo the 3 x 8 mm bolts and it'll just lift out.......
If not, hammer, bigger hammer, gas.
Yeah that's the bit that is getting me I undid the top ball joint but cant get that damn bolt to slide off the hub assembly. Took the split pin and nut off but couldn't get her to budge so took the 8mm bolts/nuts off and still couldn't get enough leverage to get the sucker off.
Posted: Sun Aug 31, 2008 2:10 pm
by NJV6
Do the 8mm bolts back up. Smack the side of the ball joint on the hub assemble side. Leave the big nut on a few turns so when it lets go it doens't fall off. A few really good blows and it should drop off the tapered joint..
Posted: Sun Sep 21, 2008 4:48 pm
by NJV6
Got sick of small stones and grit getting in behind the stone guards, it would happen to any one of 4! After deciding they were pointless I decided off they were coming.
When I went to do this there is a flange than would protect the seal somewhat where the axle goes in. So I simply ground out the centre of the guard and reassembled.
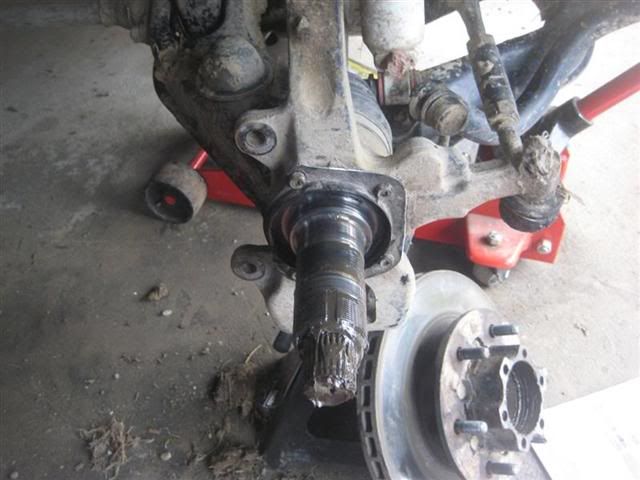

No more screaching stones!!!

Yet to do the rears.
And this weekend this happened
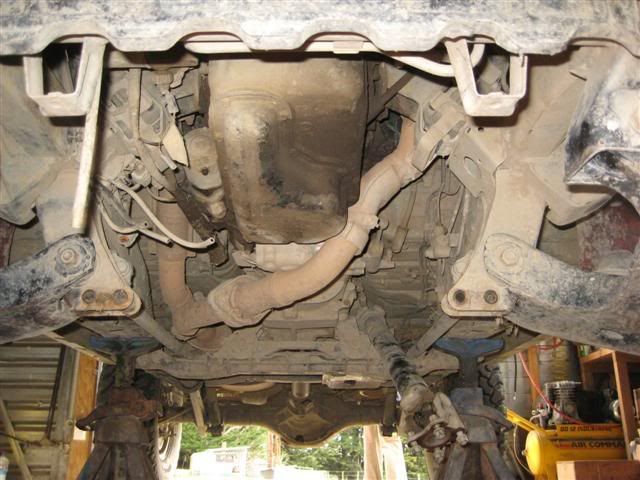
The front diff is getting an air locker fitted, taking this opportunity to put new seals in each end of the diff where the cv's enter as both were weaping and the diff oil murky (again!).
Will probably do the hub seals also as there was a bit of moisture there (again - sigh)
Posted: Tue Oct 07, 2008 6:29 pm
by NJV6
Front diff back in. Compressor all wired up and front air locker working. Yes to try it out properly, but since the garage had all the assembly apart I got the dreaded front flashing light syndrome when in 2H ARGH!!
Just so happened that a Rear 4.9 factory locker came up for sale for a steal - far to good of an opportunity to let go by so it is in as well

And the dam rear diff lock light won't stop flashing when it is engaged either!
I'm haunted by flashing lights

33"
Posted: Sun Oct 19, 2008 7:32 am
by casualman
have u taken out the body lift and not to much scraping on the 33"s
nice wagon
Posted: Mon Oct 20, 2008 12:23 pm
by NJV6
No body lift and No scraping and Narrow 33's. Remember this only works with the right offset rims.


finished, working and kindof looking good.


