Page 4 of 5
Posted: Fri Aug 07, 2009 11:06 am
by Guy
Seeing as you were making custom body mounts .. whay not make at least a few that dont need to use body lift pucks ?
Will anchor the body better and put a bit less stress on the body itself.
Posted: Fri Aug 07, 2009 11:38 am
by NJV6
I know they will. And you would have read I didn't want to do a body lift but body mounts were done before engine mounts and the previously mentioned steeering shaft.
Prado front diffs are more centered than Hilux meaning higher motor without mods to the sump.
Posted: Wed Aug 12, 2009 8:56 am
by Dalluke
Awesome build, i now keen to do it to my shorty, how hard was the actual cut? I trying to decided if to get it done pro (just cut and seal it up) and I do the cleanup and paint or weather to just do it myself with a friend whos a good welder? How did you find it NJ?
Posted: Sat Sep 05, 2009 9:45 pm
by NJV6
Righto, another update.
Started building the deck.
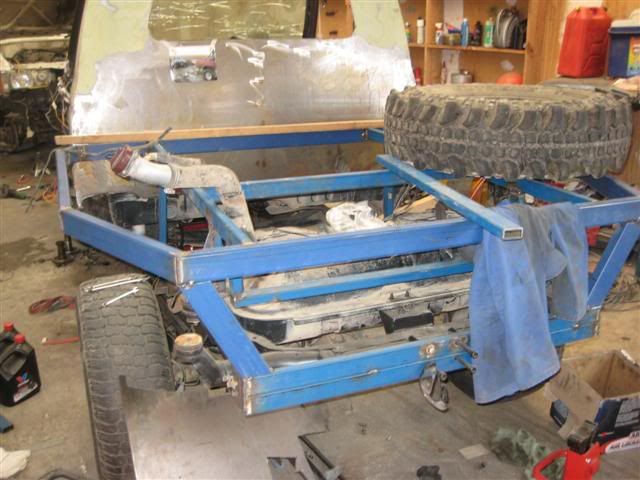
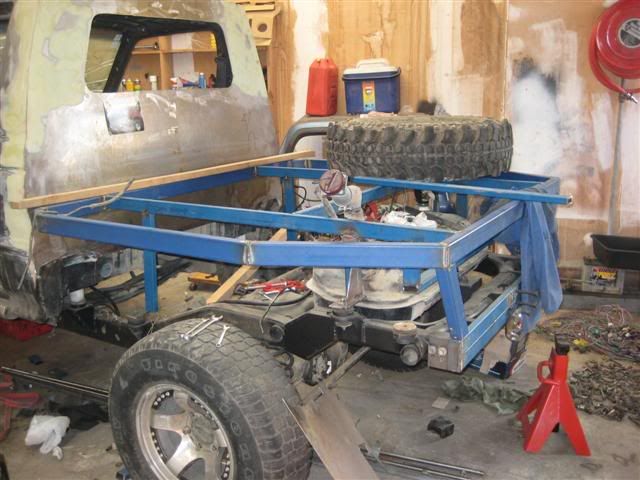
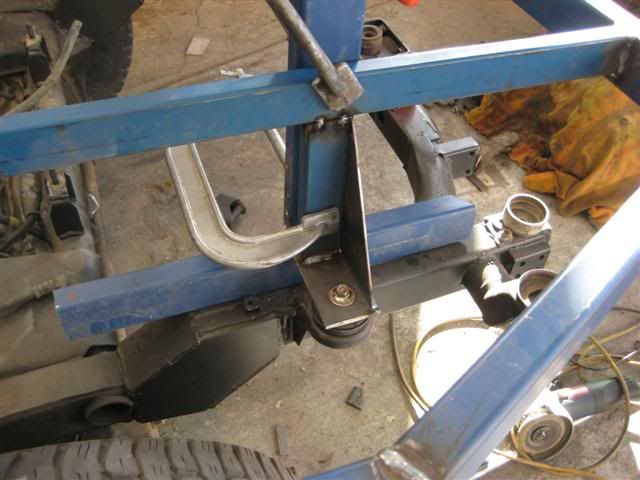
Had a dry O ring on the fuel rail and the barstard was pissing petrol out when the pump was running so had to pull it off... sigh - but it meant I could do the other rocker gasket.
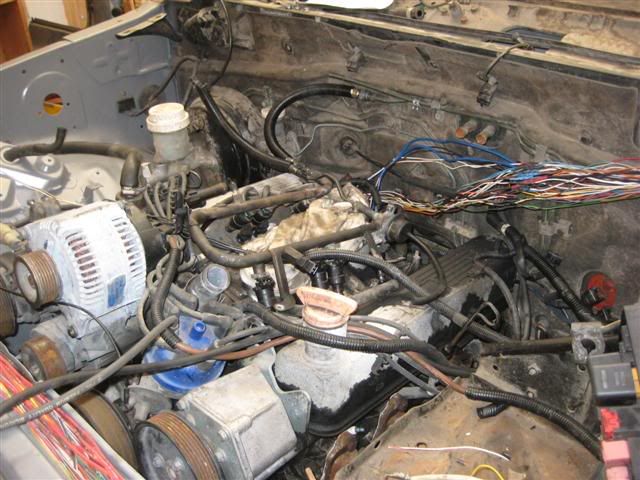
Got the transfercase up nice and high! Changed the original bracket and whipped up a modified lifted one which looks great!
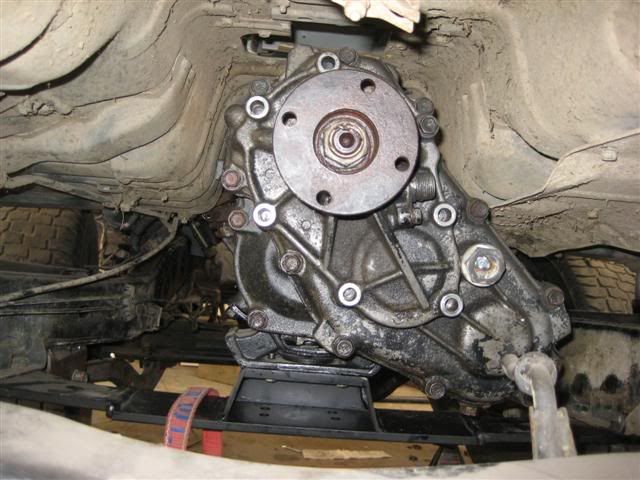
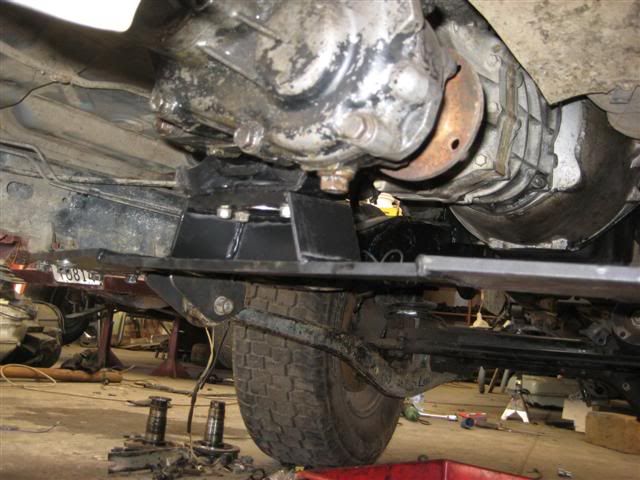
And the best news is...... it runs! This was the 1st time it ran. Had done what I thought was all the wiring, put some fuel in the tank and this was the result.
project chop
Posted: Mon Sep 14, 2009 5:47 am
by scorpion 42
Just caught up with you Glen, I was sitting here, thinking if you had done anymore work to your project, so I went on site to have a look and seen that you were at it last Saturday the 5th and saw that you had the second ROVER V8 mounted to the gearbox / transfer box and that you now have it in the tub and I watched the short video of you starting it up, but it looked as though you didn't have the throttle pedal conected, so you couldn't reach the throttle body to gun it to make it run.
Well Glen well done mate, I honestly thought to myself, when you stopped work on it, that you wanted more time off road, now that your Summer is on its way, are you going to crack on with it now or are you going to take a break from it


Regards Jack.
project chop
Posted: Mon Sep 14, 2009 5:54 am
by scorpion 42
Just caught up with you Glen, I was sitting here, thinking if you had done anymore work to your project, so I went on site to have a look and seen that you were at it last Saturday the 5th and saw that you had the second ROVER V8 mounted to the gearbox / transfer box and that you now have it in the tub and I watched the short video of you starting it up, but it looked as though you didn't have the throttle pedal conected, so you couldn't reach the throttle body to gun it to make it run.
Well Glen well done mate, I honestly thought to myself, when you stopped work on it, that you wanted more time off road, now that your Summer is on its way, are you going to crack on with it now or are you going to take a break from it


Regards Jack.
Posted: Mon Sep 14, 2009 6:10 am
by NJV6
Hi Jack, yes I am just quietly working away, no rush! Was tracing wires yesterday....

I need to do a bit more on the wiring... Im a bit fussy and want everything to be tidy. When I get sick of wires I work on the deck! And that is nearly done, just needs covering.
I don't have the throttle hooked up or the AFM so it was dumping fuel in and creating cool flames!
project chop
Posted: Mon Sep 14, 2009 6:55 am
by scorpion 42
Hi Glen,
That platform on the back, looks the dogs danglees are you going to cover it with plate metal or do you want to use some marine ply, anyhow Mate you take your time, as you said, your in no real hurry.
That loom seems like a head ache, hope it doesn't defeat you.
Regards once more Jack.


Posted: Fri Dec 04, 2009 5:45 pm
by toastmaster
any updates?

Posted: Fri Dec 04, 2009 7:36 pm
by NJV6
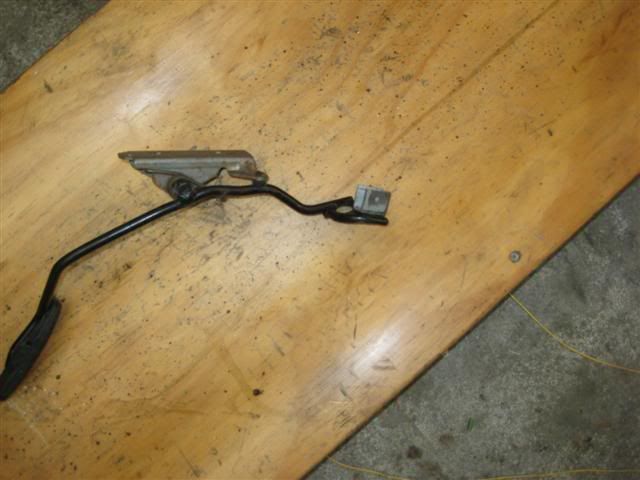
Yea, I modified the Pajero throttle pedal by whipping up a wee spacer/adapter to be able to use the Rover cable.
I have done alot of staring and gazing in thought about things though!! I think the wiring is about complete, the 4WD lamps on the dash for the super select not work with the Hilux gearbox, that involves a bit of trickery, and it'll now be impossible to get the flashing light syndrome!!!

The front wheel lights come on when the lever is in 4WD. Any of the guys doing solid axle swaps will have constantly flashing lights, the fix is pretty simple now its worked out, just a bit with the soldering iron! Reverse light wires sorted.
Still trying to do the inlet manifold and AFM, at this stage I think the battery is going to the have to go to the deck to make this fit. Had to fit a Rover car SD1 starter to go with the SD1 manifolds, Discovery ones would not fit within he chassis rails and discovery starters do not fit with SD1 headers!!!
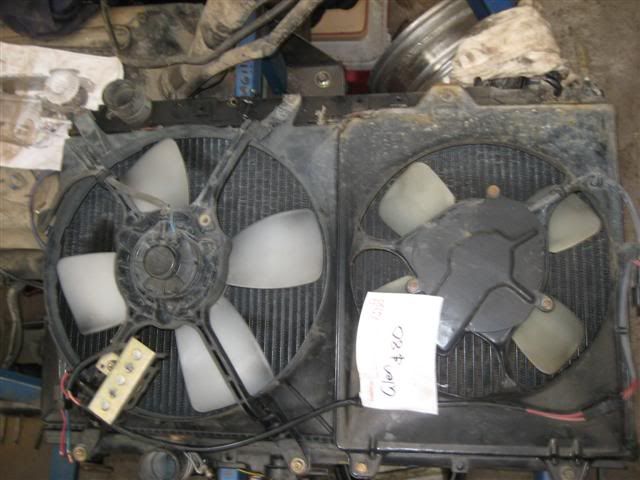
Anyway, exhaust mocked up, going to be tight with the radiator hoses running under the body to the deck and rear mounted radiator. I have bought a radiator with twin thermo's, it is off a turbocharged 2.0 Mitsi RVR. A mate has one keeping his 4.0 Lexus cool so it should be sufficient.
Got some 35 inch Simes Centipede's mounted today and the driveshaft is at the balancer's so I can complete the deck once I know how low I can mount the batteries. I have also got a 24 volt Aisin (Toyota Hi Mount) and freespool for it.
Cheers
Posted: Sat Dec 05, 2009 6:29 am
by WACKO
Posted: Thu Dec 10, 2009 8:02 pm
by Overkill
MINT

Looking "O" for awesome Glenn.
Posted: Mon Jan 04, 2010 2:04 pm
by NJV6
As this is my first attempt at anything like this is it the small things that is taking the time (and money!) but next time will be easier no doubt!
The deck is coming along and a few little things tidied up.
Throttle cable is hooked up but the travel is not right, it'll do for now. The Land Rover have a nice long pedal action compared to the Pajero so a new pedal will need made but for now a little adapting was alll that was req'd.
Collected a radiator, a mate has one on his Lexus powered Hilux so it should be up to the task. It is from a Mitsi RVR turbo Evolution.
And started bending up a roll frame.
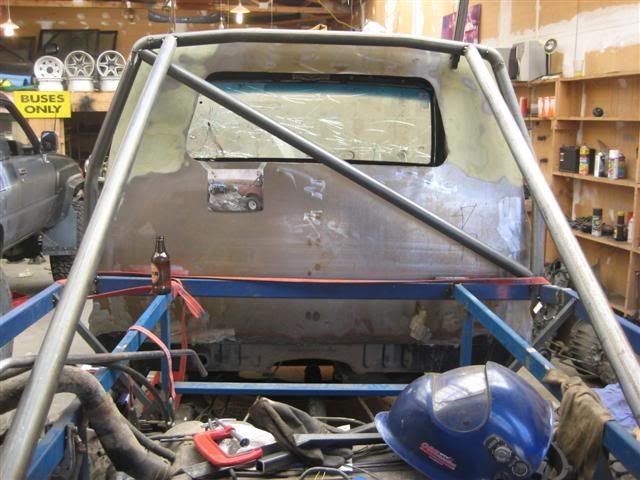
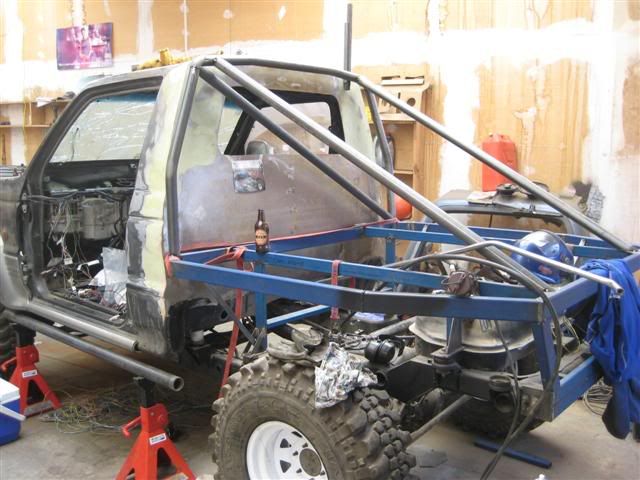
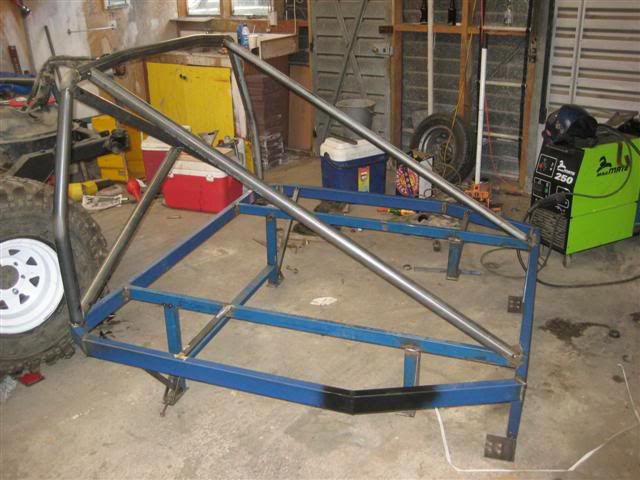
Tyres and rims with tubes mounted.
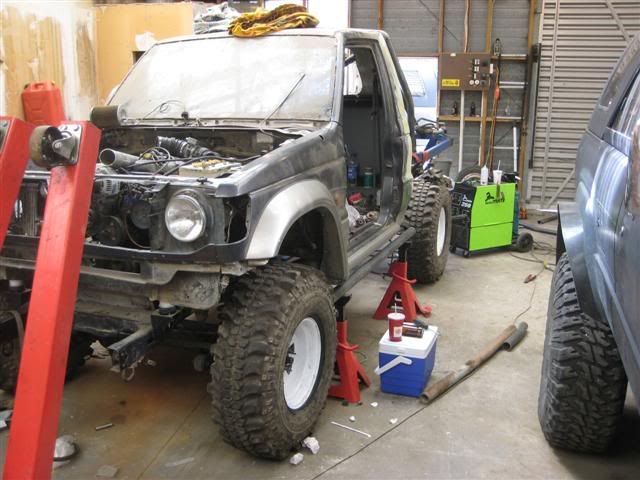
And the driveshaft is in.
Posted: Tue Jan 05, 2010 11:32 am
by J Top
Be aware the rover car starters foul the front driveshafts in R.Rovers.
An angle brace from the front of your tray to the chassis to help support the cage may be required. Not criticisms, just hopefully helpful comments
Posted: Tue Jan 05, 2010 11:49 am
by NJV6
Hi Carl, good to hear from you,
I'll check out the driveshaft thing and yep, the front of the tray will be getting chassis support.
Glen
Posted: Thu Jan 07, 2010 4:58 pm
by NJV6
Next Update
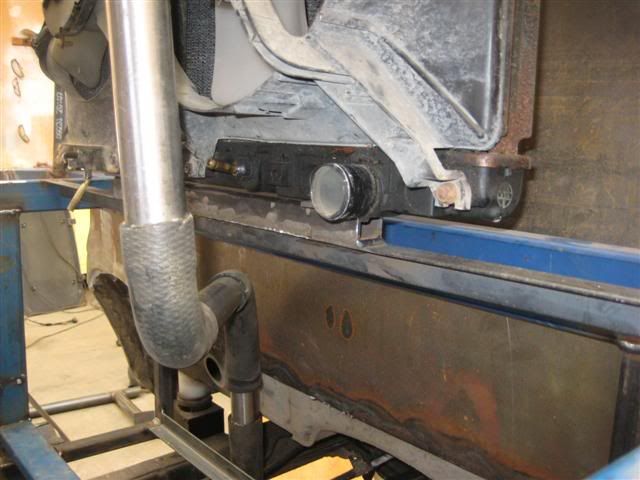
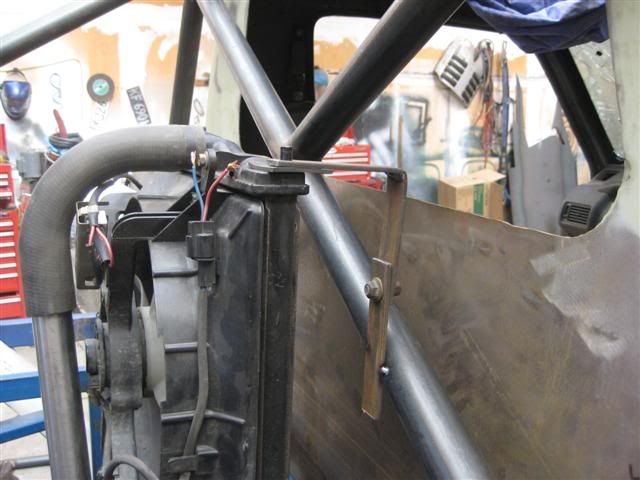
Deck closer to completion with the cross braces in, spare tyre mount done, mudflap holders and cardboard template, battery holder done and the radiator is mounted.
Deck
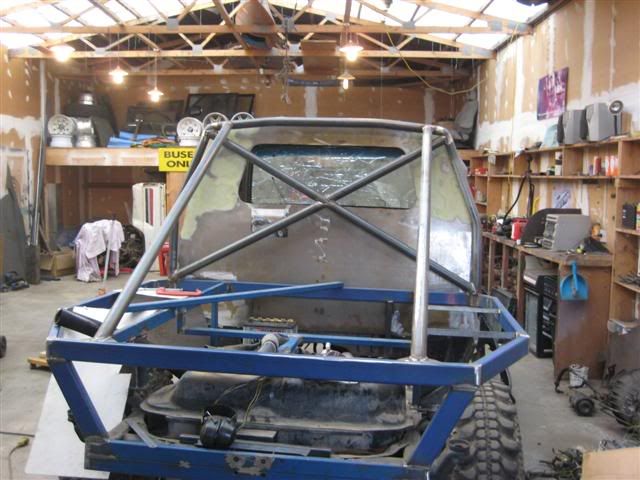
Tyre Mount - it sits flat 'in' the deck, this pic also shows the battery mount.
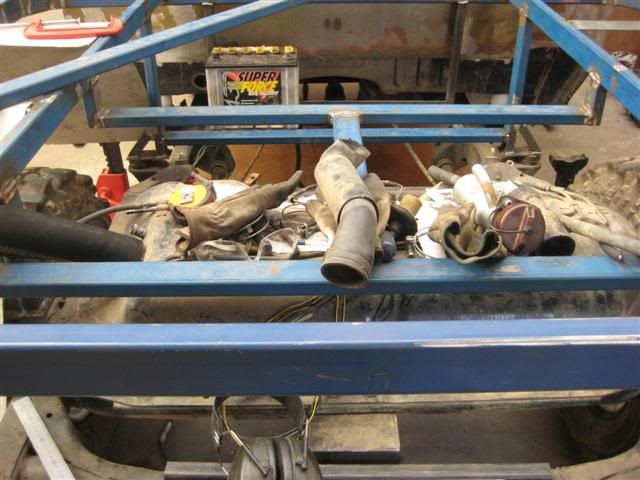
Radiator Mounted
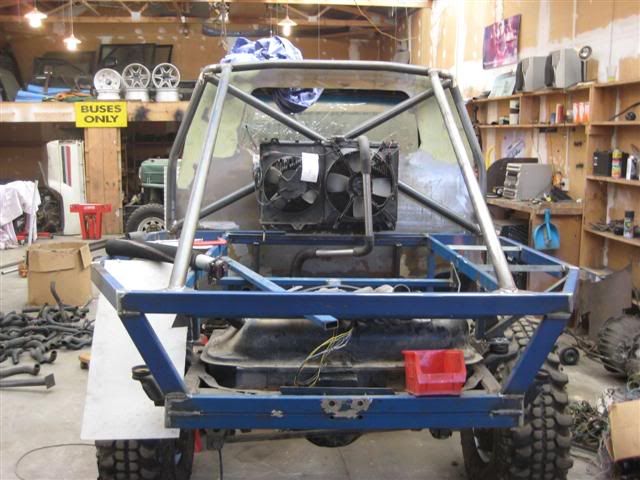
Bottom Mount
Top Mount
Glen.
Posted: Fri Jan 08, 2010 8:04 am
by petes 80
Hi Glen,
Looking great mate!!!!!
Just curious, are you going to get the necessary air flow in that position for the radiator? I know that you have the twin thermos but it looks like the airflow will be somewhat limited.
Keep up the great work
Cheers Pete
Posted: Fri Jan 08, 2010 2:55 pm
by NJV6
Thats a good question, I really have no idea. Just feeling my way really. If you have any suggestions fire away, there is about 200mm clearance from the back of the cab to the front of the radiator.
position of rad.
Posted: Sun Jan 10, 2010 9:45 am
by scorpion 42
Hello Glen, hows it going mate, was reading what petes pag was saying, as you think he has a point, just thought I would put my 2 penny worth in,
How about turning the radiator 360 degrees, that way, the fans would be pulling the air through the rad and there is lots of unobstrucked air traveling this way, just a thought Glen, what do YOU think?????
See you are awaiting for more bits and pieces, but as you said ages ago, no real rush for anything.
You take care buddy, Cheers Jack.
Posted: Sun Jan 10, 2010 5:30 pm
by NJV6
Hi Jack, sorry I don't follow. 360 degrees would be back where it starts now...
Posted: Sun Jan 10, 2010 5:49 pm
by NJV6
Power steering is now complete. The Rover pump has a fitting that is the same thread and seal as the Pajero one so that was a lucky break. I then mounted the cooler lines from a Toyota Prado to the steering box and back to a Prado P/S resiviour. All was able to be done with exisiting parts which made for a nice and uncostly exercise.
Also got onto the air intake and made use of some bling 3 inch alloy pipe.
Brakes - also got them a step closer and the clutch is all plumbed up.
Rad Mounting
Posted: Mon Jan 11, 2010 5:57 am
by scorpion 42
Sorry Glen, should have said 180 degrees, DOh, so you are cracking on, more problem jobs done, while you await other bits to turn up, have you managed to get yourself a winch, that was not to costly, are you going to put it on the front, as I see that the front chassis is still waiting something to be mounted there, apart from the front bumper

Question
Posted: Sat Feb 13, 2010 2:31 am
by scorpion 42
Hi Glen,
Was just wondering, if you are going to make it road legal, or are you going to trailer it to meets and just use it purely as an offroader, certainly save you loads of wonga mate, no registration, no tax, no insurance, no MOT or your equivalent, well there you go, how are you then, fine I hope
Cheers Jack.
Posted: Sat Feb 13, 2010 5:23 pm
by toastmaster
this is awesome! And i just got another donor truck for the chopping on saturday

Posted: Fri May 21, 2010 7:23 am
by NJV6
Well after time standing still for a while, we are moving out of the big workshop I have been involved with.
What this means is - no more will I have a free access to electricity (haven't paid a cent in 3 years), nor was the welder mine, big grinder, drill, tube bender and numourous other bits used. Not to mention the large space available.
So all that did was motivate me to do some more! And funds have recovered a bit from my overseas trip.
Anyway enough rambling.
Got some Stainless radiator lines run, under the car and attached to the chassis. Have put temperature senders in the pipe at two (in and out of radiator) places so I can put on a swicth to operate one gauge.
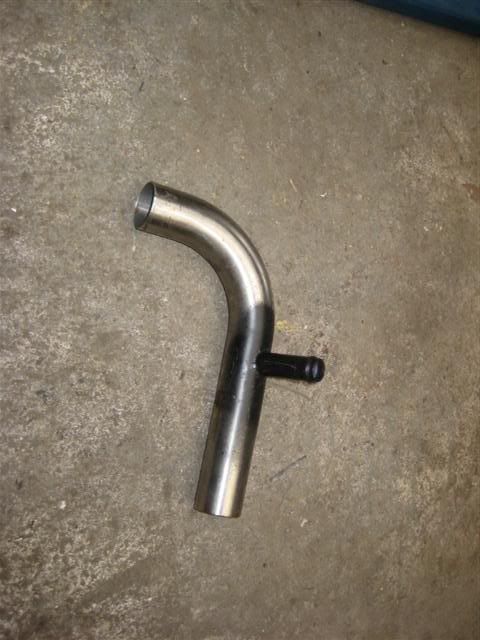
You can see the lines coming out the back at the bottom of the left battery.
These are two big batteries to be used totally for winching. 800cca each and 24 volt.
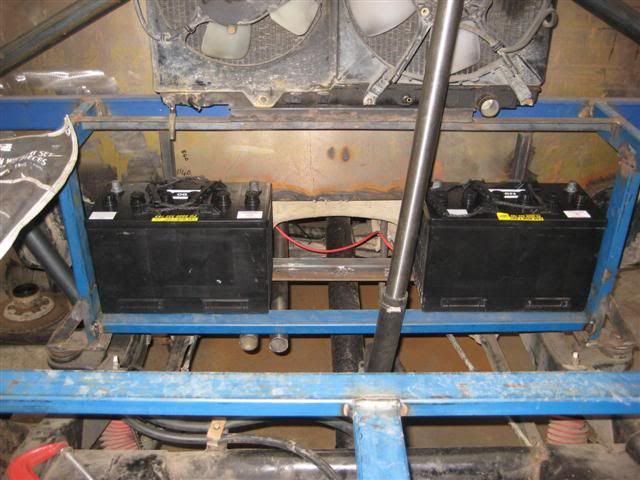
The third and main battery is going to fit on the same battery shelf.
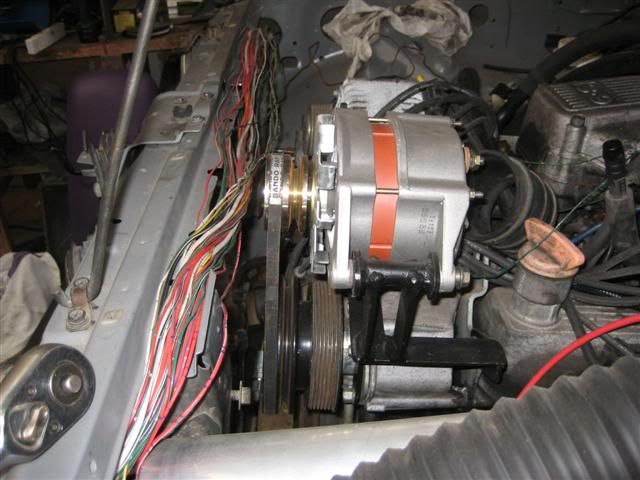
This is the 24 volt alternator sitting up nice and high. It is twin pullys (only one belt at the mo) and is driven from the power steering pully.
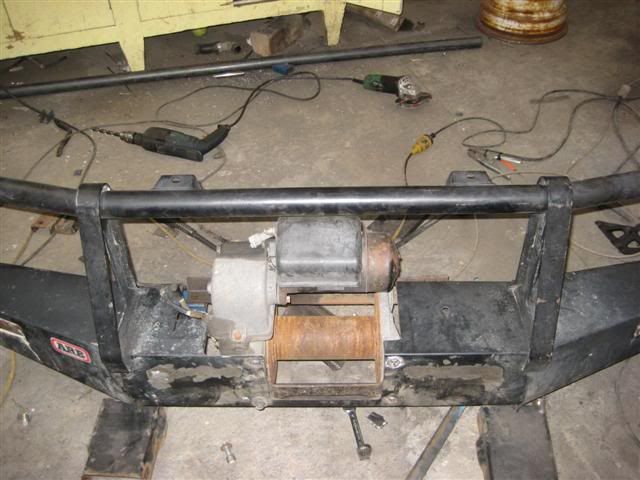
I then got a nice ARB bull bar and took to it with the grinder. Sacrilidge really but it was the easiest option. I have mounted the 24 volt high mount winch in the bar and it fits very well.
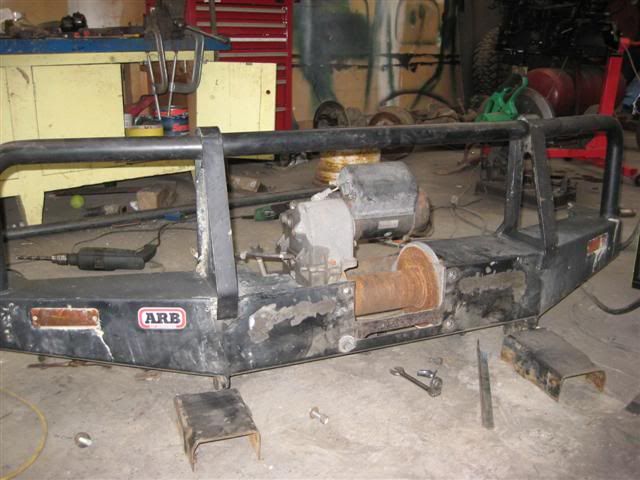
The front chassis needed some mods to fit it, I cut the bull bar mounts off a Pajero and then made some spacers to get it sitting at the right height.
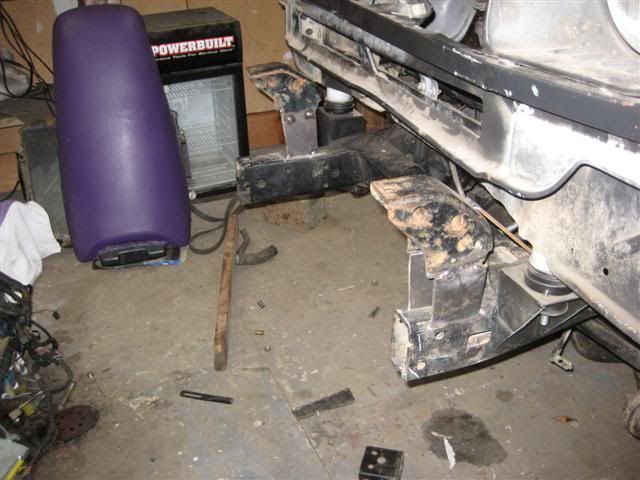
You can see how much I have cut off the front of the chassis
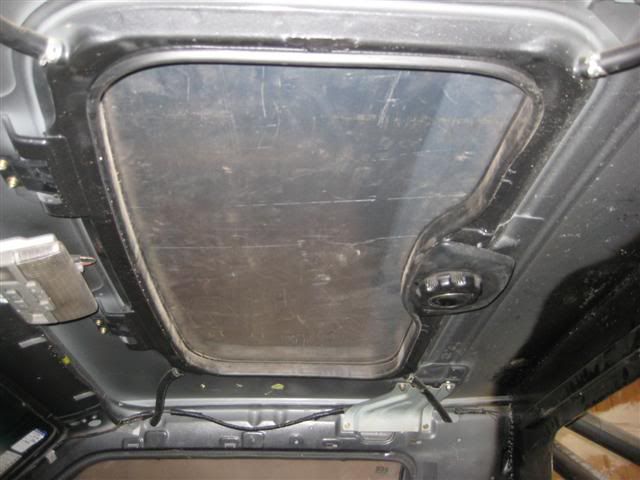
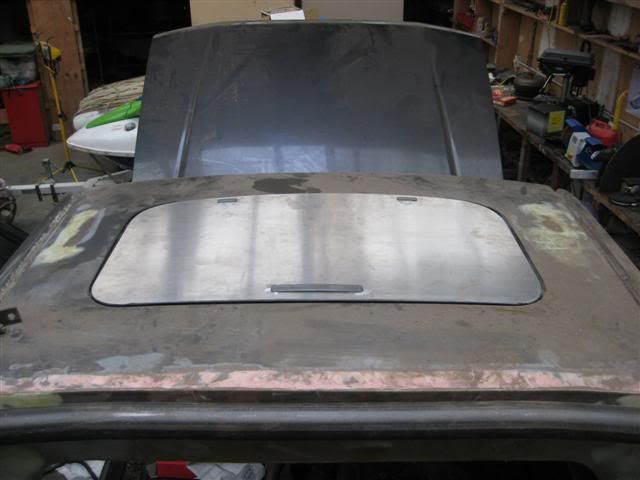
I got a pice of Alloy and ran it through the rollers to get a curve in it the same as the factory sunroof so I could still use it as a sunroof, but with out the sun.
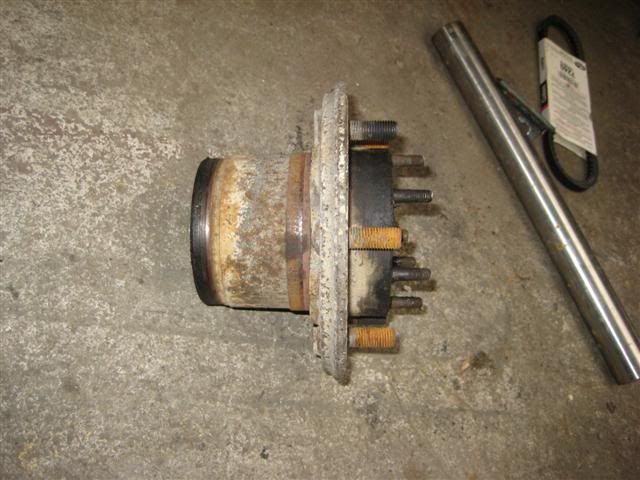
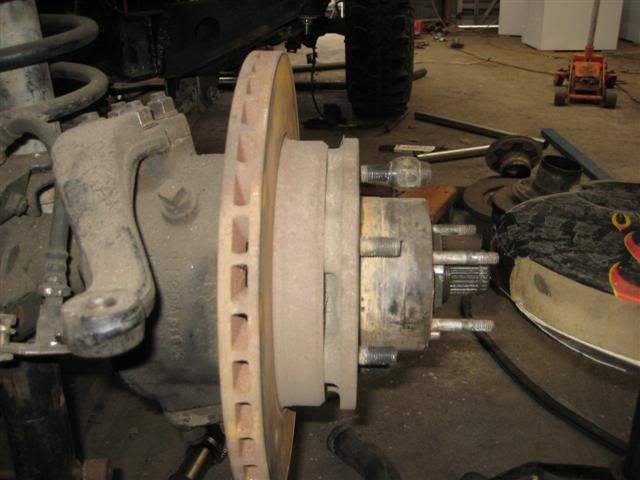
Still need to do the IFS hub swap, what this does is pushes the hub out wider to gain a wider track, soo the mounting mounts on the next two pictures to know what I mean. THe 1st one is the IFS one.
Got it running again for more than two seconds... A few vacuum leaks which will be blocked off, but it went and the sounds of a V8 on headers.... priceless. Ran it for about a minute I guess, just long enough to get an oil leak!


Glen
Posted: Fri May 21, 2010 7:25 pm
by Overkill
Lookin bloody MINT Glen

Welldone.....
Should of just bought a Land Rover though, you have put in all that effort that I have out of the box

Posted: Fri May 21, 2010 9:14 pm
by NJV6
Yea yea Josh - what have you bought?
I still bet mine is more unique than yours!!!
P.S. We are down to 32.3million sheep...


Posted: Sat May 22, 2010 7:29 am
by Overkill
HA HA, I went out and got a Land Rover Discovery V8 as our new family offroad vehicle. Kids are now old enough to come with us, so thought it about time to get into the scene again
Tell ya what though, miss the Paj that's for sure

project chop
Posted: Mon May 24, 2010 1:04 am
by scorpion 42
Hi Glen, good to see you at it again Mate, like the 24 volt alt and that front winch, but how many 40 ton cattle transporters are you expecting to see bogged down, when your on your travels off road LOL anyhow you are going to be a real strong setup to be rekoned with, shouldn't ever get stuck from now on Glen mate, keep up the good work, hope to see it out and about shortly, hope your going to do a few bits about its test runs out in the big yonder and a couple of good journeys once you have sorted its niggles after a good test run. Keep on trucking Mate, good on ya.
Re: Project Chop!
Posted: Thu Nov 04, 2010 4:18 pm
by NJV6
Just to prove I am still here....
I had to do a search for my own thread!!!
So since last update got the radiator lines all done and ran it up to temperature still with no exhausts, I am still astounded that this thing didn't leek any oil!!
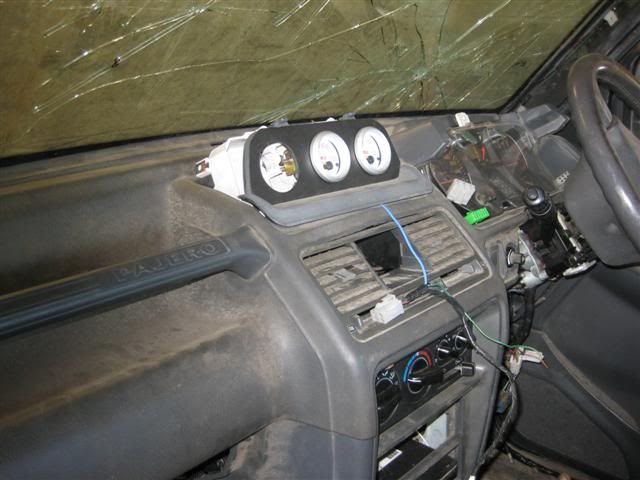
I couldn't work out why they oil pressure light wouldn't work when the wire was fine and so pulled the dash out all over again to find where this crook wire was, turns out, the clock and 3 gauges above the heater needs to be plugged in for the oil light on the dash to work... and I have no freekin idea why that would be. And it was just by chance that I found it, nothing was written in the wiring diagrams about that one!
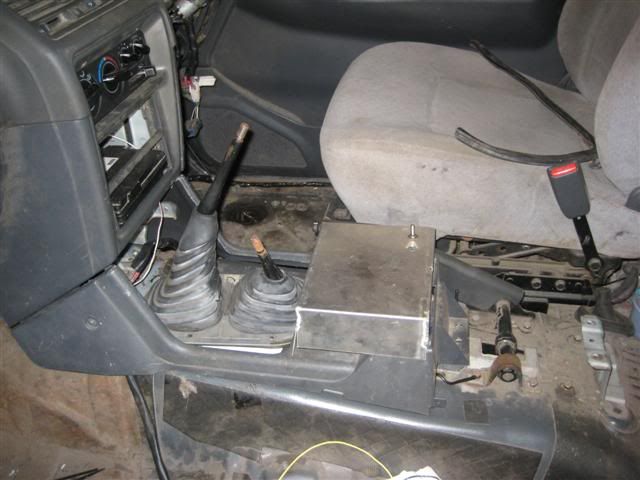
Here are the gauges, and the beginning of the centre console. Put a seat in to check where I can reach the switches.

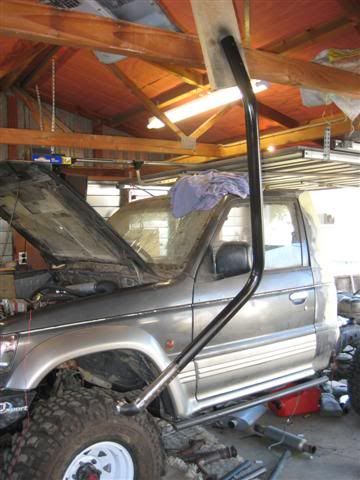
Made up a side bar and it is getting a bit of paint splashed onto it here hanging from the roof
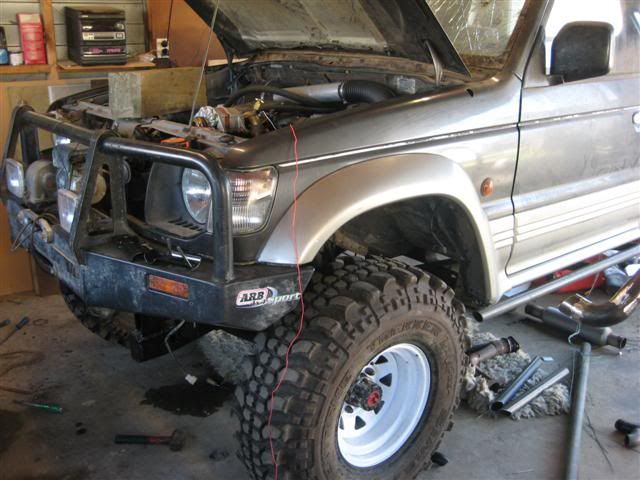
And the bullbar properly mounted, the chassis mounts are not going anywhere fast!!! Also here the front end is finally all assembled with hub spacers, and free wheeling hubs.
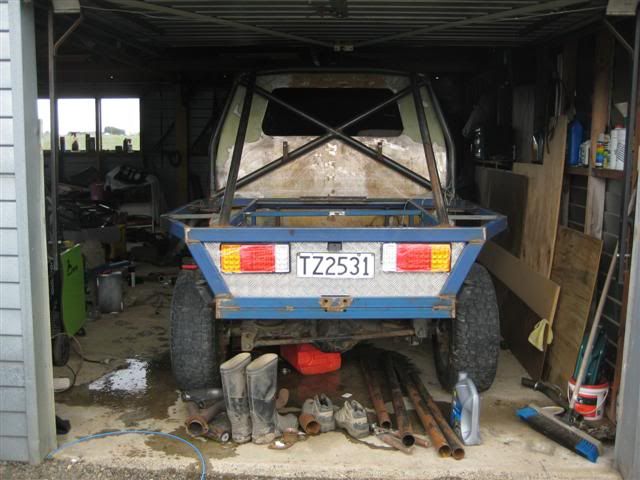
Got some LED tail lights cheap of Trade Me (eblag), they are rather large and Im not sure if I like them but it'll be better all painted up.
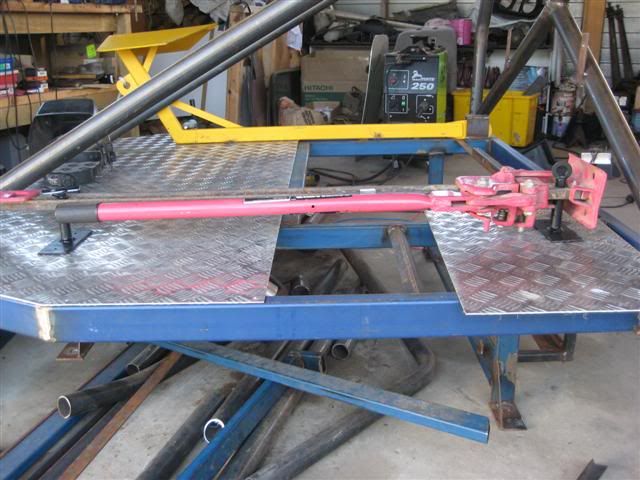
Some more on the deck, made a couple of hi lift mounts which was a bit of a pain but in the end came out good.
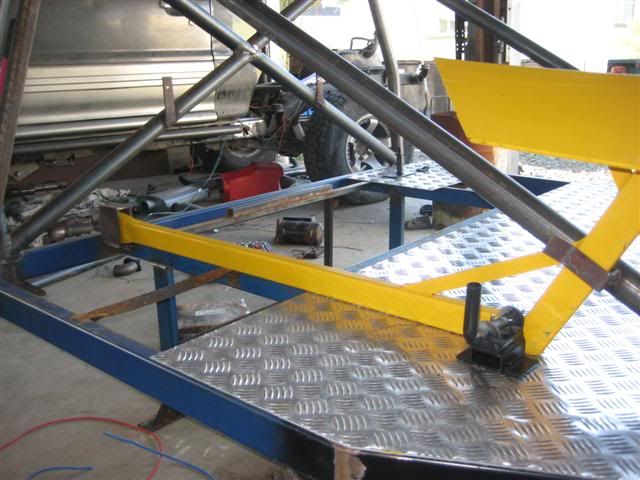
And the Ground anchor mounted, has a locator at the front and at the back with a spring latch holding it in place.
Currently building an exhaust, I swear never to do an exhaust again!!
Glen


