DIY Front Bar
Posted: Wed Jun 04, 2008 12:47 am
Have almost finished building a front bar for my son's Holden Drover and thought I would add to my clubs web site as a DIY.
I your interested you follow it here
http://www.macarthur4wd.net/gallery/thu ... hp?album=9
This is where I'm up to...
After working out what shape we wanted, we started the basic bullbar build by working out where the rear bar would bend. On this build we used mock-ups and mk-I eyeball more so than the tape measure though it was never far away.

Next we started bending. We marked the angle we wanted on the garage floor in chalk as a type of pattern and bent to that so both ends would be the same.

Once we finished bending the bottom bar, we double checked the angle on the 4b (my youngest son's drover) and then maked where we wanted to cut the ends.

With the ends cut to size, it was time to play with the grinder and file to notch them so the top bar will sit flush (well sort of flush, this is mostly mk-I eyeball , a true DIY on the cheap :-) )

Back to the 4b to check how the bottom and top bars are coming together.

To give the radiator a little more protection and to give us somewhere to mount the number plate, we added a couple of uprights. At this pont nothing has been joined, all the bars are just resting on each other

With the bars tacked together, it is time to lay the bar flat and weld all the joints. This was done bit by bit in an attempt to avoid bending from the heat.

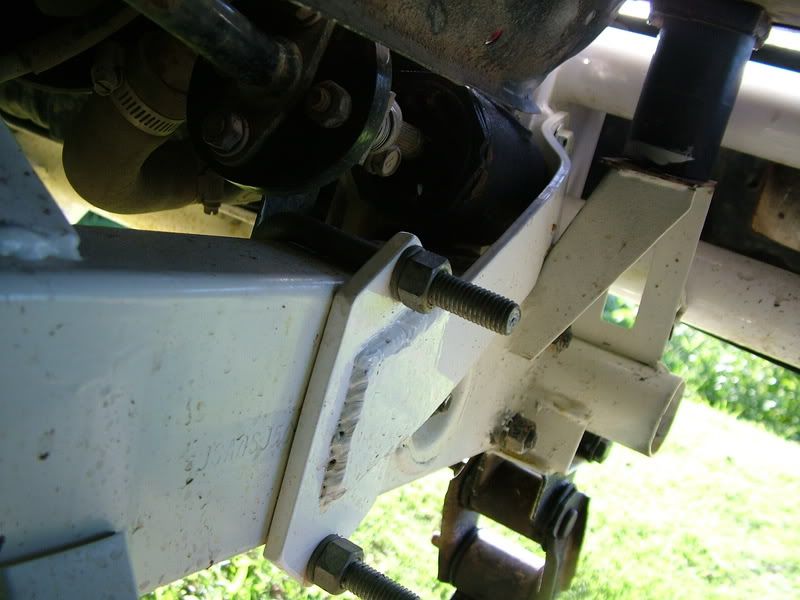
This pic shows the first two brackes in place, another two will go on the other side of the chassis rail opening. Also in this pic you can see the original bumper mount ends have been removed just past the front body mounts. This is to allow for larger tyres

We bent up another bar that will become a top hoop for the bar. This will have a UHF areial mounted on it and should give a little protection to a pair of driving lights the will be mounted under it.

Almost there. Still waiting on the second pair of mounting brackets, aerial and spotlight mounts plus a little clean up and paint. The original indicators and parking light were inserted into the front bumper. Here you can see the truck clearance lights we have added next to the headlights as a substitute.

I your interested you follow it here
http://www.macarthur4wd.net/gallery/thu ... hp?album=9
This is where I'm up to...
After working out what shape we wanted, we started the basic bullbar build by working out where the rear bar would bend. On this build we used mock-ups and mk-I eyeball more so than the tape measure though it was never far away.

Next we started bending. We marked the angle we wanted on the garage floor in chalk as a type of pattern and bent to that so both ends would be the same.

Once we finished bending the bottom bar, we double checked the angle on the 4b (my youngest son's drover) and then maked where we wanted to cut the ends.

With the ends cut to size, it was time to play with the grinder and file to notch them so the top bar will sit flush (well sort of flush, this is mostly mk-I eyeball , a true DIY on the cheap :-) )

Back to the 4b to check how the bottom and top bars are coming together.

To give the radiator a little more protection and to give us somewhere to mount the number plate, we added a couple of uprights. At this pont nothing has been joined, all the bars are just resting on each other

With the bars tacked together, it is time to lay the bar flat and weld all the joints. This was done bit by bit in an attempt to avoid bending from the heat.

This pic shows the first two brackes in place, another two will go on the other side of the chassis rail opening. Also in this pic you can see the original bumper mount ends have been removed just past the front body mounts. This is to allow for larger tyres

We bent up another bar that will become a top hoop for the bar. This will have a UHF areial mounted on it and should give a little protection to a pair of driving lights the will be mounted under it.

Almost there. Still waiting on the second pair of mounting brackets, aerial and spotlight mounts plus a little clean up and paint. The original indicators and parking light were inserted into the front bumper. Here you can see the truck clearance lights we have added next to the headlights as a substitute.


