Page 1 of 4
Pajero Solid axle swap and other modifications
Posted: Sat Aug 16, 2008 12:49 am
by monmendoza
After a year of going light trailing, I have finally decided to build what I call a "Town Fiesta Ofroad Race Vehicle " A rig intended for joining small town races here in the Philippines. I was lucky enough to buy a 3 door pajero at a low price and have decided to use it a the platform. Because of parts availability I decided to use Land Cruiser 40 series 9.5" axles.
Basically the activities of this project is as follows:
1. Convert the front IFS into solid axles
2. Use LC40 axles for the front and rear
3. Regear to 6.17
4. Front coil springs with disc brakes
5. Rear leaf springs to simplify engineering
6. Lock right or ARB for rear
7. ARB lockers or LSD for front
8. internal roll cage
9. Rock sliders
10. Snorkel
11. Free flow exhaust
12. Stronger windshield water spray because I don't want to remove
the front windshield as I also want to retain the aircon
13. 36" tires probably swamper
14. A lot of fender trimming as I don't want to increase the vehicle
height by a big factor to minimize rollover.
I expect the project to be completed in approximately 8 months .
Here are some pictures of the vehicle. It is a 3 door Jtop gen1 pajero
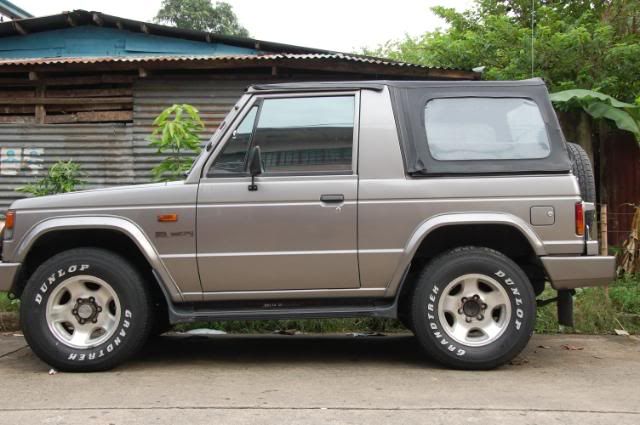
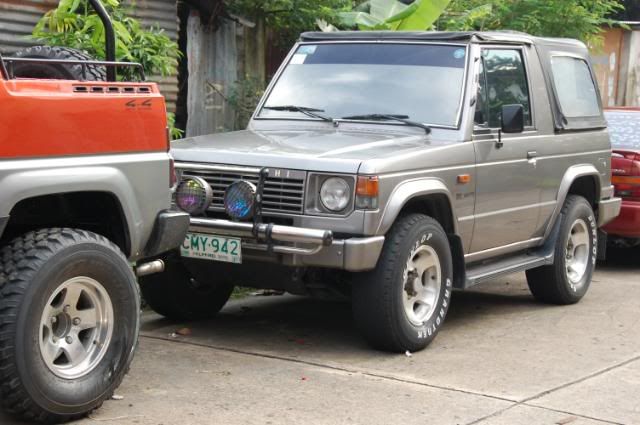
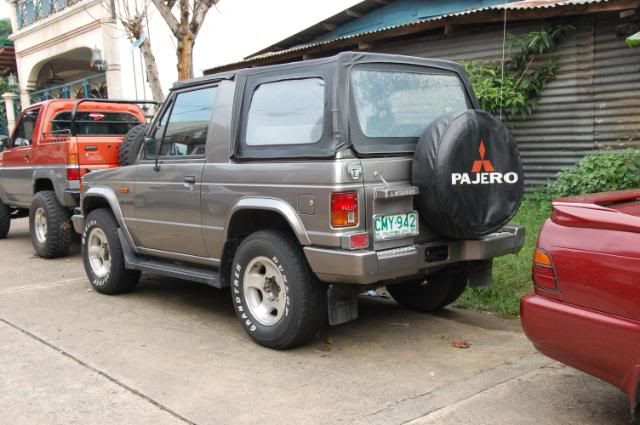
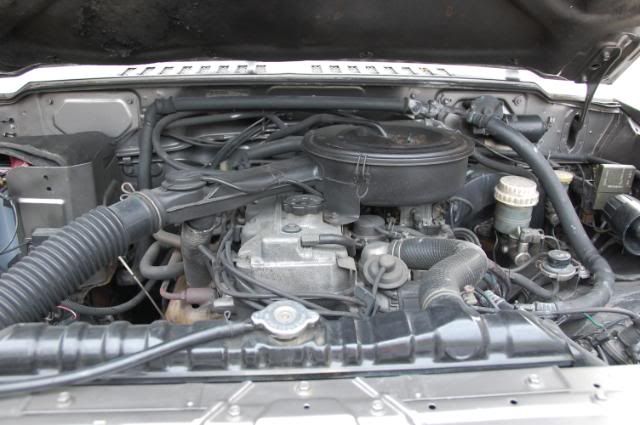
The engine is a 2.6L 4G54 carb engine.
Here are some pictures of the interior
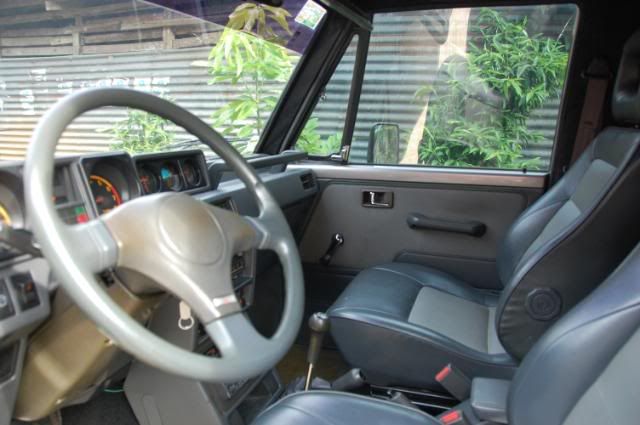
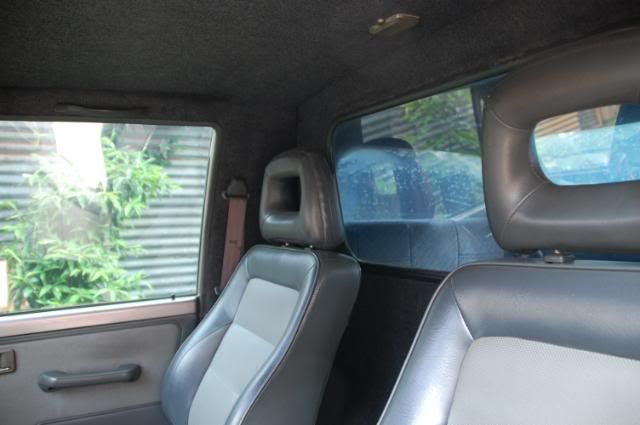
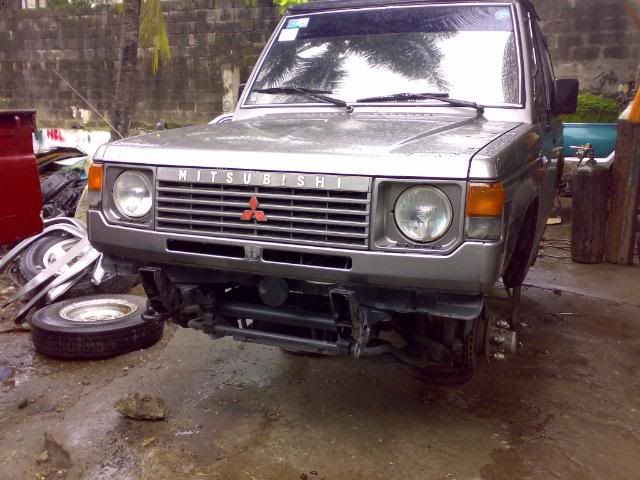
Here is the vehicle with the front and rear differentials removed

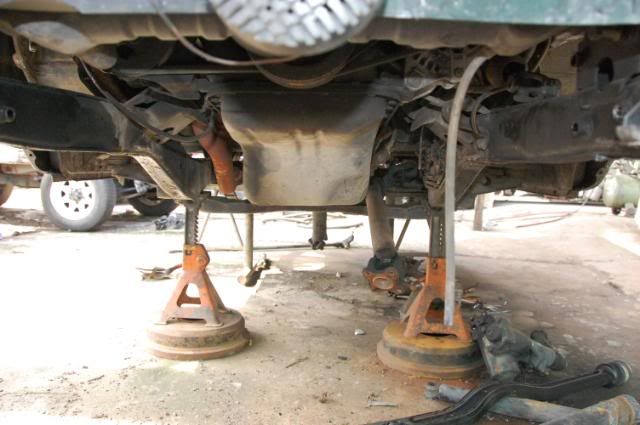
The rear axles that still needs to be removed.
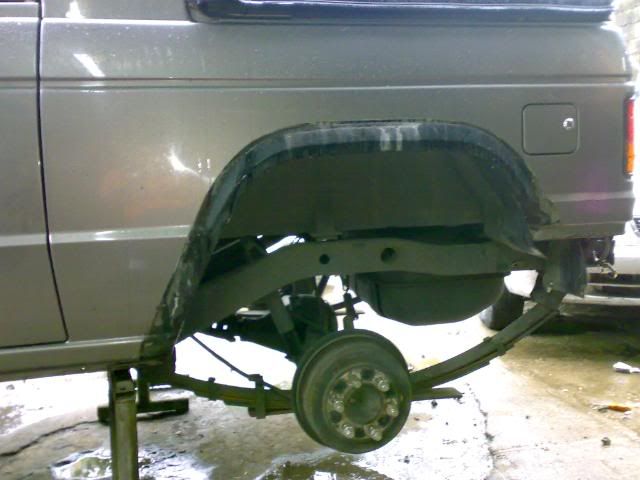
The plan is too extend the wheelbase slightly by extending the location of the front and rear axles.
It is now currently waiting for the LC40 axles for the installation.
Some people have been telling me that lock right is only recommended for 33" tires or smaller diameter. Is this true? Im trying to minimize my expenses also for this project and have determined that lock right is
much cheaper than ARB.
BTW town fiesta races in the Philippines is a combination of mud, hills, water crossing as high as the engine hood and boulders all in one race track.
Thanks for looking.

Posted: Sat Aug 16, 2008 10:06 pm
by cms
nice one! keep up the step by step and piccys please!
are you going to have to mod the LC front axle much to swap?
Posted: Sun Aug 17, 2008 5:51 am
by monmendoza
cms wrote:nice one! keep up the step by step and piccys please!
are you going to have to mod the LC front axle much to swap?
Yes, the LC 40 pumpkin is located in the passenger side while a mitsubishi propeller shaft is located in the driver side so a switch is necessary. We will also be using prado (bundera) components and LC40 axles for the solid axle coil spring front.
As of now we are still waiting for the surplus prado (bundera) parts and LC40 axles before we can proceed. Hopefully I can post a batch of pictures again next week.

Posted: Sun Aug 17, 2008 7:09 pm
by cms
thought so, always wondered tho how is the switch done?
Posted: Thu Aug 21, 2008 12:49 am
by monmendoza
The LC40 axles have not arrived. There is also a possibility that we may change axles to LC80 series instead of the 40 series due to built in disc brakes and stronger birfields of the 80 series axles, That is assuming the LC40 axle supplier wont be able to deliver until next week.
The trailing arms we are going to use are from the Nissan Safari. It has the right lenght that we need. Just enought to extend the wheelbase a little bit.
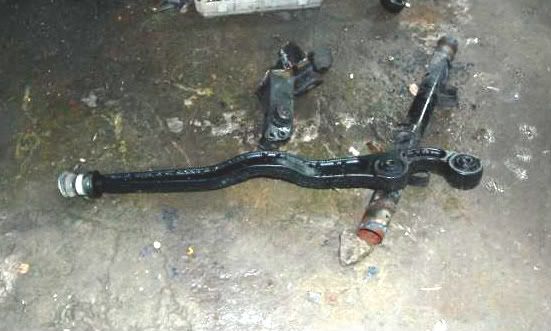
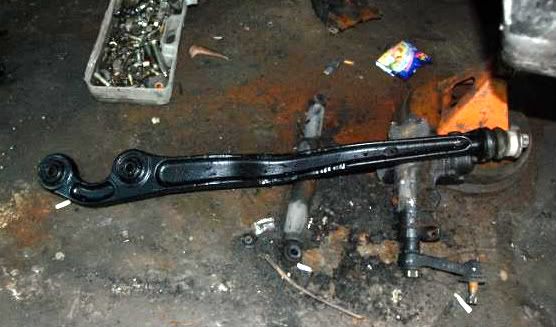
We also decided to remove this leaf spring which acts as a stffener to improve the articultaion of the pajero.
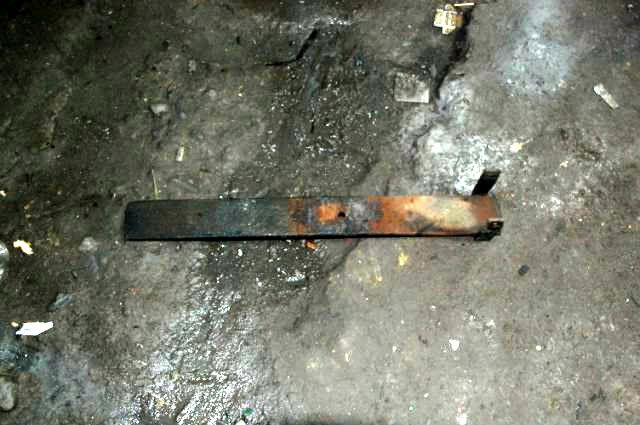
Hopefully next week the axles will arrive and more meaningful work will be done. I will keep you posted.

Posted: Mon Aug 25, 2008 11:34 pm
by monmendoza
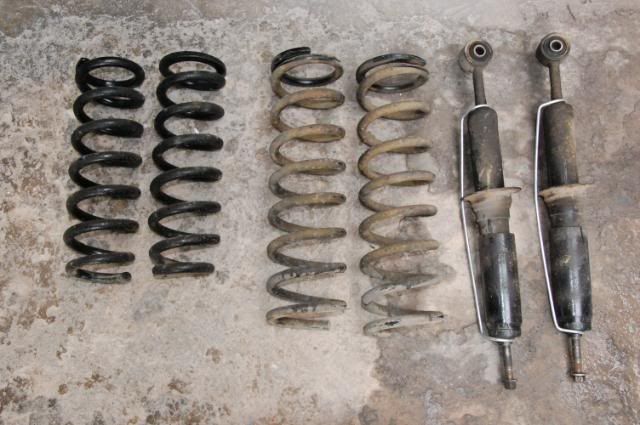
I have some spare coils springs (less than 1 year old) that I remove from my Toyota Fortuner when I replaced the coils and the shocks with OME.
Is there an engineering way to know if a pair of coil springs is suitable for the job? Or is the only way to find out is via trial and error?
Here is a picture of the Front and rear coils and the front shocks.
Here is the Toyota Fortuner where the coils and the shocks came from.
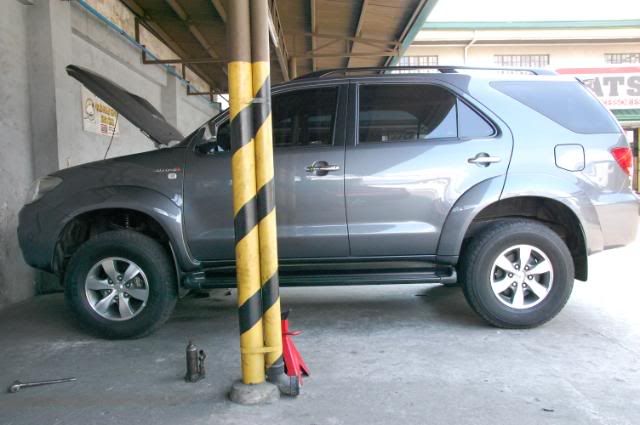
I am still waiting for the LC40 axles.

Posted: Tue Aug 26, 2008 1:03 pm
by NJV6
Project sounds good. Looks pretty tidy to be cutting.
Any good spring manufacturer/supplier should be able to tell you the spring rate. It is done by measuring how much weight it takes to compress the spring by 1 inch.
Your old front ones from the toyota would be far to small as I'd guess it was coil sprung independant? I think trial and error would be the way but you can get a pretty good guess by tacking mounts on then resting the weight on the springs to see how it will sit.
Re Axles:
I would be trying to use the 80's if you could.
Reasons -
Wider for more stability,
Smaller high pinion front diff for clearance & improved driveshaft angles
Coil mounts already supplied on axles
Bigger CV's (Birfields)
Disc brakes
Glen
Posted: Fri Aug 29, 2008 3:00 am
by monmendoza
The front axles of the LC40 has not arrived but the rear axles have . I decided to push through with the 40 series because my mechanic and the shop has already ordered it and respect their commitment .
I also would like to consult you regarding the rear pumpkin offset of the LC 40 series. I just realized that the pumpkin offset of the 40 series is huge! while the pajero rear propeller shaft is centered on the vehicle.
My mechanic has assured me that he has done many similar conversions in the past without any problems, but I am worried that the angled propeller shaft might cause instability and vibration. Anybody have experienced with this in the past?
I have other options:
1. Change to Dana44 for the rear because it has a center pumpkin but I lose the 6.17 gearing of the Dyna truck for the LC40.
2. Change to Hilux rear axle which has an almost center pumpkin. again I will lose the 6.17 gearing
3. Change the transmission with something compatible with the 40 series axles, but I don't know what possible problems it will create when interface with a 4G54 engine or a 4g63turbo engine that I have on standby.
6.17 gearing ( or anything similar) is important to me because there is a possibility that I might upgrade to 38" tires. I need your comments please. Thank you.
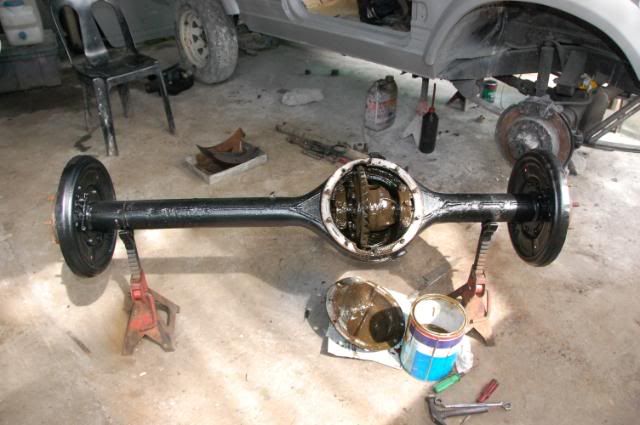
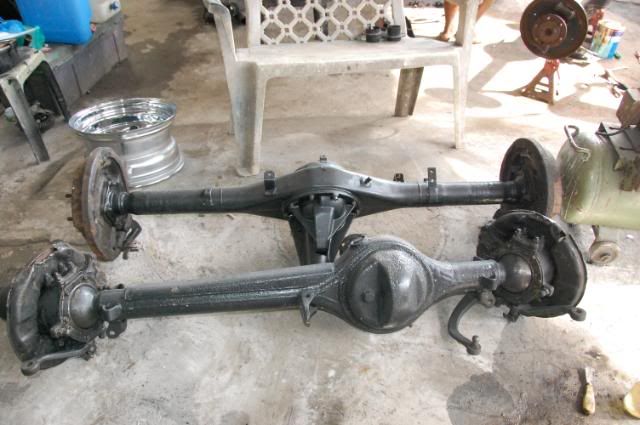
Here is the picture of the rear axle of the LC40. Take note of the
pumpkin offset.
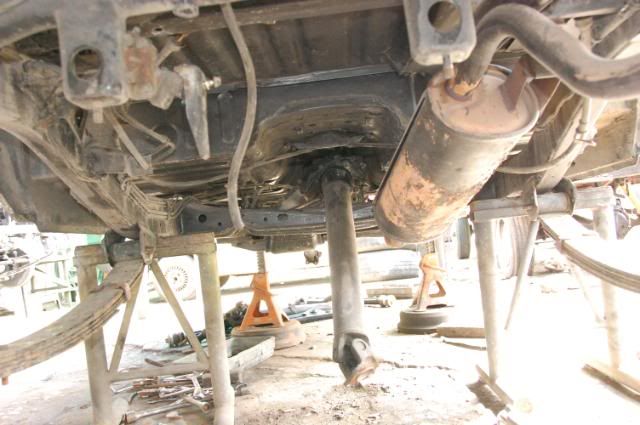
Here is a picture of the pajero rear propeller shaft. Take note of its center position.
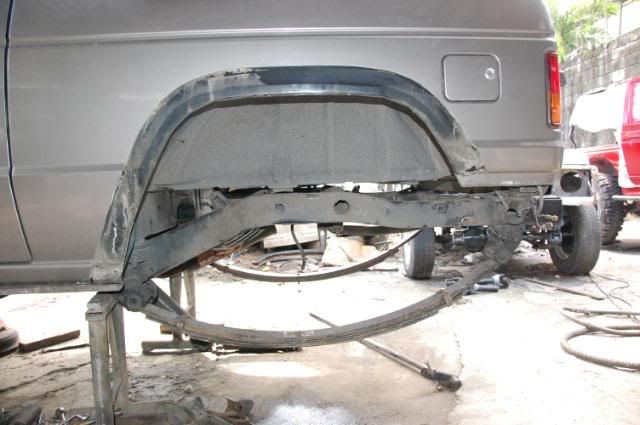
My mechanic said that he will move back the location of the rear axles effectively extending the wheel base, thus even if the 40 series axles has an offset, it will still work properly with acceptable angles.
Here are some of the pictures of hilux axles that has an almost center rear pumpkin. But it is less robust than a 40 series, it does not have a 6.17 gearing and may not survived when a 38" tires will be installed.
Here is a picture of the front propeller shaft. Take note that the shaft is offset to the right. (driver side for LHD, passenger side for RHD vehciles)
Posted: Fri Aug 29, 2008 9:34 am
by WACKO
i would go with option 4. cut the housing, centralise the pumpkin reweld the housing and get cusom axles made. you end up haveing to remanufacture axles but in the end its cheaper than installing a new transfur and you should have no probs with vibrations.
if your mechaninc extends the wheelbase enough you should get away with it, but you will also need to lift it quite a bit to get 38s on it. that could bring the angles back in to vibration zone as if you lift a short wheelbase they can get vibs evn with out the offset pumpkin.
if your going to run 38s i would be doing everything i could to keep that 6.17 gearing.
Sam
Posted: Fri Aug 29, 2008 9:37 am
by WACKO
you could possibly even save a bit of $$ by cutting down the long side axle and resplining it.
Posted: Fri Aug 29, 2008 12:54 pm
by NJV6
Yea, I'm with Sam on this one, you'll get some good vibes on a short with offset diff centre, the Range Rover guys do it with centred diffs but complain of the vibs and usually end up changing it, they are a good 5 inchs longer in the wheelbase.
Way back at the start you mentioned off road race vehicle. Is it really important to keep the 6.17 gearing? That is an awesome cog but also alot of work to get it to fit.
Posted: Fri Aug 29, 2008 4:28 pm
by monmendoza
WACKO wrote:i would go with option 4. cut the housing, centralise the pumpkin reweld the housing and get cusom axles made. you end up haveing to remanufacture axles but in the end its cheaper than installing a new transfur and you should have no probs with vibrations.
if your mechaninc extends the wheelbase enough you should get away with it, but you will also need to lift it quite a bit to get 38s on it. that could bring the angles back in to vibration zone as if you lift a short wheelbase they can get vibs evn with out the offset pumpkin.
if your going to run 38s i would be doing everything i could to keep that 6.17 gearing.


Sam
Hello Sam, thank you for the advice. Although I don't know of any company in the Phiippines that do custom axles service .But somebody told me that Dana 44 and LC40 series axles is an exact fit with 30 spline. The only difference is Dana 44 has a centered pumpkin. I might proceed having a hybrid dana 44/ LC40 axles for the rear wheels. I will keep you posted.
@NJV6.
The exact 6.17 Gear ratio is not important. As long as the gear ratio is numerically high from 5.8 and above I guess it would be okay.
Posted: Sun Sep 07, 2008 7:09 pm
by monmendoza
We solved the problem of an offset pumpkin of the LC40 for the rear axle by using the axle of the Toyota Dyna Truck instead. It uses LC40 internals but with a center pumpkin. I will post the pictures when we the dyna axles with us.
I will also post the pictures of the front LC40 axle and how we will reverse the pumpkin location by next week.
Posted: Mon Sep 08, 2008 11:29 pm
by monmendoza
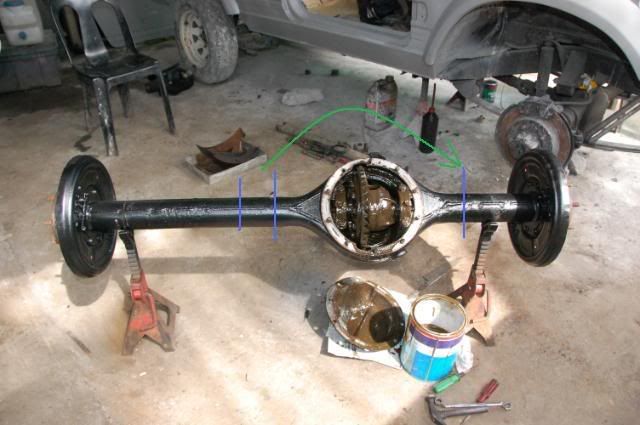
This is how we intend to reverse the pumpkin of the LC40 from the left side to the right side without having to cut and weld the axles.
Without changing the position of the R&P and other internals, we will rotate the front axles.
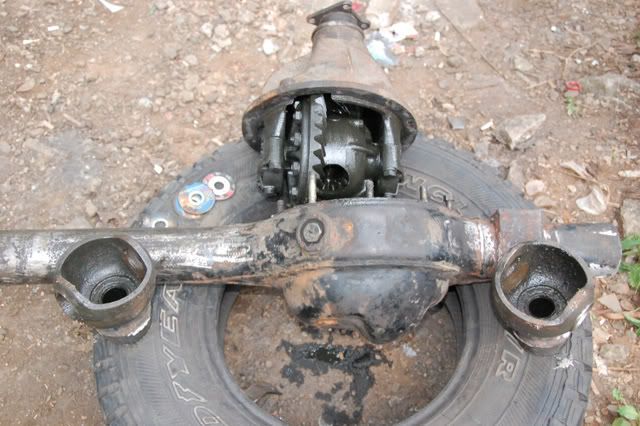
Take note that by rotating the front axles, the oil drain plug will now be situated on top instead of the bottom. We will make a new drain plug to the new bottom location.
Take note also that the pumpkin will now be on the right side which is what we need for the Pajero.
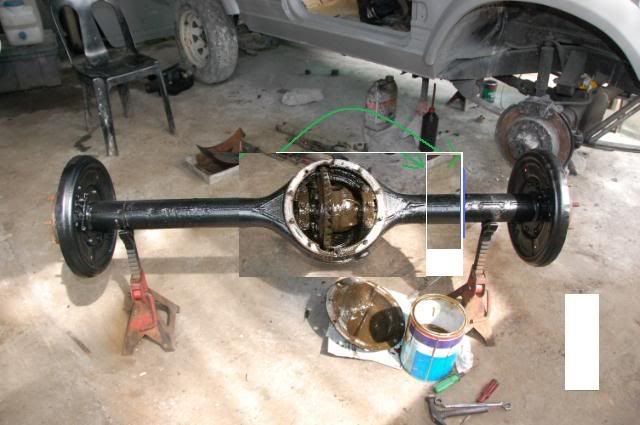
Take a look closely also on the pinion and the front axle cover. The front axle cover has a bulge that will accomodate the pinion but it is now on the wrong side. A machine shop will remove the front cover and rotate it so that it will be on the proper side to accomodate the pinion.
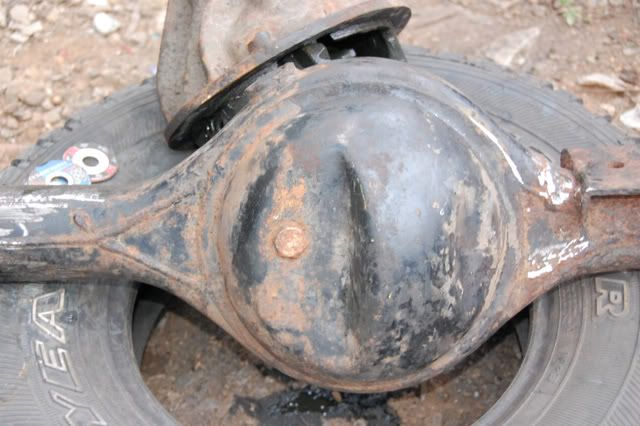
There are also two long screws in the cover that needs to be swap with
the short screw because of the axle rotation.
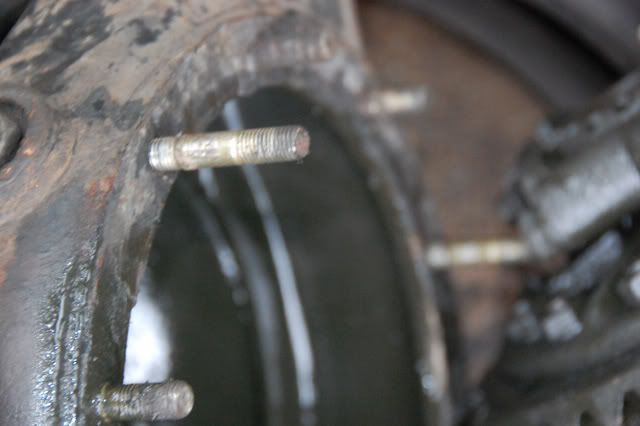
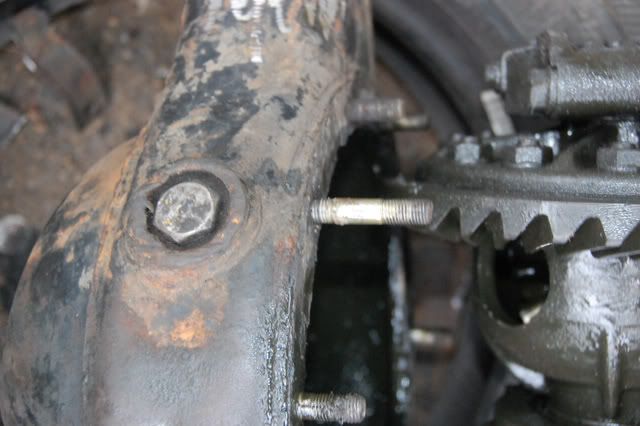
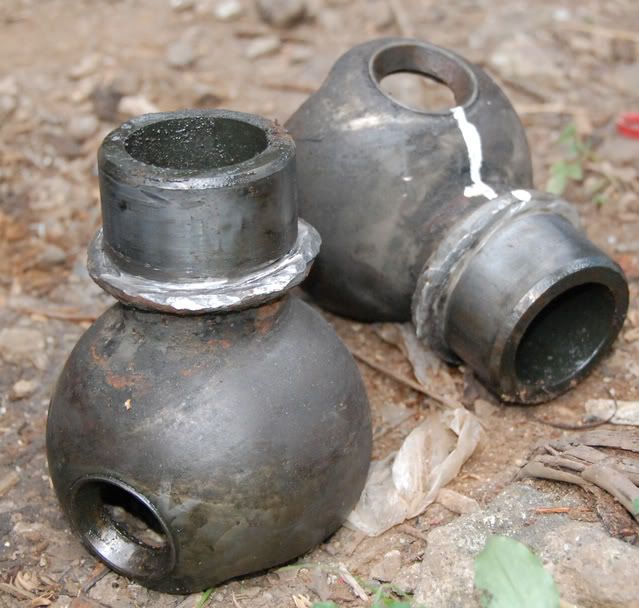
These 2 components ( are these called Birfields ?) will be shave to have bulldozer type of steering.
Posted: Fri Sep 12, 2008 3:36 am
by monmendoza
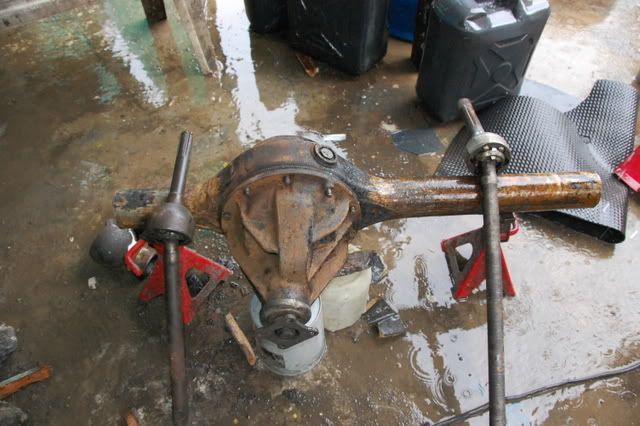
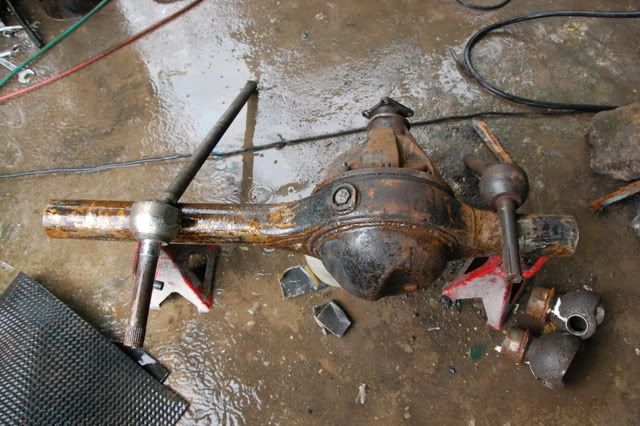
The front LC40 axle with the reverse pumpkin has been completed.
All that is needed is a new drain plug located at the bottom as the old one
is now located on top and a new breather hose which we will be locating in the old drain plug hole.
Here are two pictures, take note that the pumpkin is now located on the driver side of a left hand drive vehicle, which is at the same side as the front shaft propeller of the pajero.
Posted: Sat Sep 13, 2008 11:28 am
by Bitsamissin
If it were me I'd be going 80 Series front and rear with coils.
Bigger brakes, CV's, rear discs, wider track, full floater rear etc.
If you want outright strength then Nissan GU Patrol.
The lowest ratio you can get for the Nissan stuff is 4.88 but there are 5.29 and 5.7 ratio's for the Tojo stuff.
It's a very tall order to ask a 4 banger to turn 38's and most comp guys opt for an engine swap to turn rubber that big rather than try to compensate with gearing. The trouble with the Tojo stuff is that IMHO the C&P just aren't strong enough for above 35/36"s.
The combo you are proposing has been tried and tested resulting in numerous busted C&P's.
I had 3.0 V6 5sp with a front HP 8" Tojo diff and the Mitsi 9" rear with 5.29's ARB locker and treated CV's running 35"s (35.6") without any drama's but I always felt that was the limit of that combination. I did break the standard CV's but couldn't break the treated ones.
Some friends were running 36"s without issues on the same front axle combo as mine in their Tojo's so that is possible.
My problem was breaking the 28 spline rear axles.
The truck had good clearance and drove onroad ok I also had 2.85 t/case gears so 1st low range was 60:1 (not too bad).
There is also the question of ground clearance the larger diff you go the bigger the tyres you need to keep the clearance the same.
A Dana 44 is roughly the same size & strength of a Tojo 8" diff and axles so your going to break stuff running 38"s with a stock D44 of course you can upgrade from the numerous US aftermarket industries.
I know it's tough to decide as there are various permutations so good luck.
Posted: Sun Sep 14, 2008 2:12 am
by pigletracing
go either the 80series or nissan safari running gear, safari rear pumpkin is pretty close to center, saffari (gq) running gear is stronger than 80series,
with biger CVs that are harder to break than 80s,but not as strong as GU running gear.. I put GU front & GQ rear under the FATROZA
Posted: Sun Sep 14, 2008 2:30 am
by monmendoza
@Bitsamissin - Thanks for the advice. Your not the first who mentioned about the weakness of toyota 9.5" axles for tires greater that 35". I have reconsidered my plan and will probably put 36" swamper tires rather than 38" . Thanks

@pigletracing - I asked your advice in a different thread (feroza) and followed it buying a pajero for the solid axle swap. But I decided against the Patrol because parts are hard to come by here in the Philppines and there are no R&P numerically higher than 5. The availability of surplus toyota parts in the Philippines is still hard to beat

Next week I will post pictures of the Rear Dyna Axles and start the SAS assembly of the front axles.
Posted: Sun Sep 14, 2008 2:37 am
by pigletracing
looking forward to it .. have been watching your build up,looks like things are progressing nicely.. just 1 thing...someone put the steering wheel on the wrong side of the car.....anly jokes ..keep up the good work..PIGLET
Posted: Tue Oct 07, 2008 5:19 am
by monmendoza
After moe than 2 weeks waiting for the dyna axle, we started working with the Pajero again today. We lowered the transmission and the rear propeller shaft to permanently fixed the old short slip yoke and cut the propeller shaft and put a new and longer slip yoke for more rear suspension travel and articulation.
Observe the very short travel of the old slip yoke.

Posted: Thu Oct 09, 2008 7:49 pm
by vk7ybi
I'm interested to know more about how you permanently fixed the transfer case output slip yoke spline, do you have more pictures of this area?
Posted: Sat Oct 11, 2008 5:52 am
by toastmaster
Delica vans have the factory SYE look it up in the caps program at the top of the page.
Is that what you are using to eliminate the slipyoke?
Posted: Sat Oct 11, 2008 6:48 pm
by vk7ybi
monmendoza wrote:The front LC40 axle with the reverse pumpkin has been completed.
All that is needed is a new drain plug located at the bottom as the old one
is now located on top and a new breather hose which we will be locating in the old drain plug hole.
Rather than intalling a new drain plug, just change one of the lower 3rd member studs to a bolt.. To drain the oil, simply remove the bolt.. Saves having a drain plug and protector to get dinged up in the rocks..
Posted: Sun Oct 12, 2008 1:44 am
by monmendoza
vk7ybi wrote:I'm interested to know more about how you permanently fixed the transfer case output slip yoke spline, do you have more pictures of this area?
Hello VK7, I will get pictures of the transfer case to be able to show better how we fixed the slip yoke and install a longer one.
@toastmaster
We will actually fix the original slip yoke because of its very short travel and cut the propeller shaft to install a longer one. The longer slip yoke will come from a weapons carrier truck.
Posted: Sun Oct 12, 2008 12:19 pm
by toastmaster
Posted: Sun Oct 12, 2008 3:43 pm
by Bitsamissin
Yeah I looked at those.
The early Delica auto's had the SYE and remote t/case operation. The 5sp manuals did not.
The later 2.8TDI's I think were standardised and all versions had the SYE and direct lever operated t/case.
The Delica 2.8TDI super select t/case should be a direct bolt into a 3.5 V6 Paj you would need the tailshafts as well so they can be modded to suit.
A good mod if you could get hold of a t/case and the half shafts cheap if you are doing a SAS or drive a shit load of mud but other than that $$$ are better spent elsewhere.
Posted: Wed Oct 15, 2008 12:20 am
by monmendoza
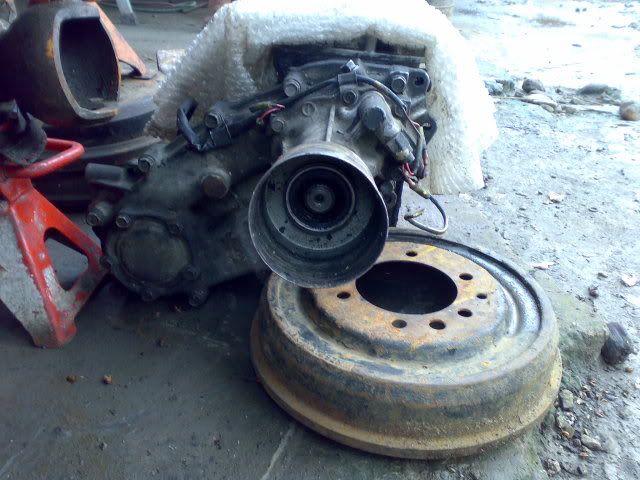
Here is a picture of the transmission with the hole in the center. this is connected to the slip yoke then to
the propeller shaft. What the machine shop will do is put a thread this hole then place a bolt on the slip yoke
to permanently fixed it.
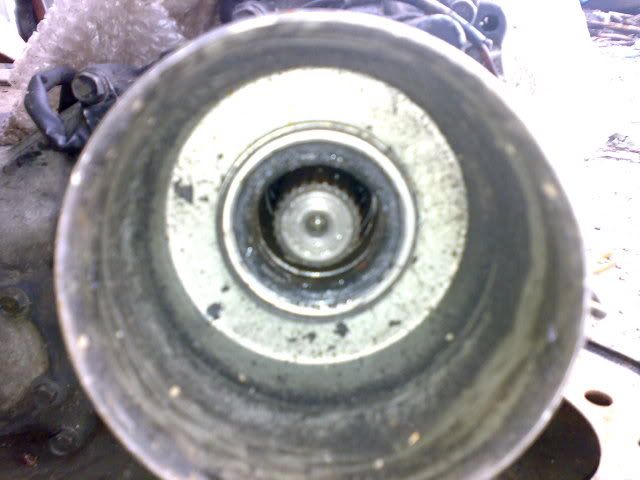
here is a wider view of transmission
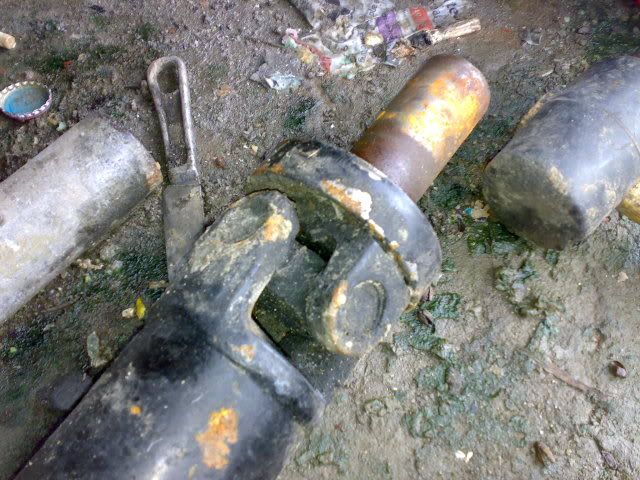
here is the slip yoke. A bolt with be place in this to permanently fix it to the transmission. then the propeller
shaft will be cut to accomodate a longer slip yoke coming from a weapons carrier.
I hope I made some sense in what I am saying.
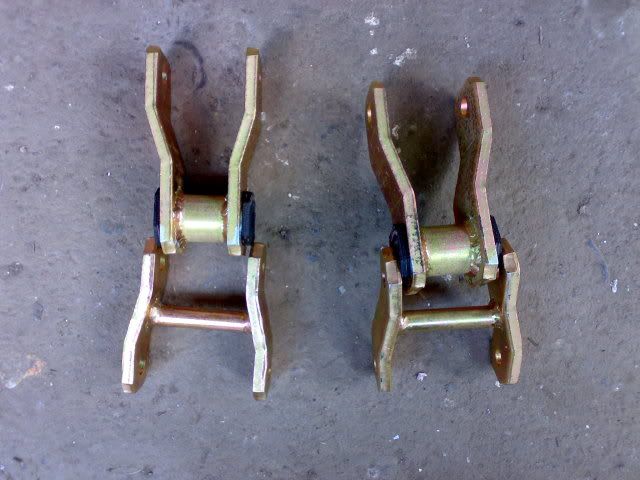
Below is a picture of the folding extended shackles that we will place in the rear leaf springs.
this will increase downward articulation and fold up during normal use or during up travel.
Posted: Wed Oct 15, 2008 5:37 pm
by Bitsamissin
Be careful with this mod.
I was going to do exactly the same and was strongly advised not to do it.
You need a special cobalt drill bit (expensive) to drill into the shaft and there were questions about possibly weakening it by drilling a 8-10mm hole. Others suggested it will work loose without staking the bolt. Also how do you remove it ? You would have to remove the uni to get access to the bolt ? It's not like the flange arrangement of a SYE set up.
What we ended up doing for the rear was installing a 15mm spacer between the diff & propshaft and this made sure there was always 40-50mm spline engagement and full travel. Mine had an A frame 4 link rear with massive flex and at full travel the slip yoke would never pop out.
For the front we made up a custom shaft using a 60 Series sliding joint and kept the original slip yoke arrangement but with Toyota 29mm uni joints (the 25mm Mitsi one at the yoke end would flog out too quickly due to the angle). We did this by machining out the Mitsi yoke holes to 29mm (heaps of meat to do this). With the angle at full flex the slip joint would move and not the slip yoke.
Never had a problem with either of the propshafts or uni's after we upgraded to the larger Toyo 29mm ones for the front.
Posted: Wed Oct 15, 2008 10:57 pm
by monmendoza
Bitsamissin wrote:Be careful with this mod.
I was going to do exactly the same and was strongly advised not to do it.
You need a special cobalt drill bit (expensive) to drill into the shaft and there were questions about possibly weakening it by drilling a 8-10mm hole. Others suggested it will work loose without staking the bolt. Also how do you remove it ? You would have to remove the uni to get access to the bolt ? It's not like the flange arrangement of a SYE set up.
What we ended up doing for the rear was installing a 15mm spacer between the diff & propshaft and this made sure there was always 40-50mm spline engagement and full travel. Mine had an A frame 4 link rear with massive flex and at full travel the slip yoke would never pop out.
For the front we made up a custom shaft using a 60 Series sliding joint and kept the original slip yoke arrangement but with Toyota 29mm uni joints (the 25mm Mitsi one at the yoke end would flog out too quickly due to the angle). We did this by machining out the Mitsi yoke holes to 29mm (heaps of meat to do this). With the angle at full flex the slip joint would move and not the slip yoke.
Never had a problem with either of the propshafts or uni's after we upgraded to the larger Toyo 29mm ones for the front.
Thanks Bitsamissin, I will print your comment and give it to my friend who is doing the actual conversion. This is an important and valuable information. Do you have a picture of the 15mm spacer between the differential and the propshaft? I have a hard time visualizing it. Thanks also for your advise on how to do the front SAS conversion and the installation of the front propshaft. Im glad I posted this project on the forum.

Posted: Thu Oct 16, 2008 4:54 pm
by Bitsamissin
Unfortunately I don't have a pic of it as such.
If you imagine a 15mm thick plate in between the propshaft flange and the rear diff flange with the same hole pattern (longer bolts are required).
This was to ensure there was maximum spline engagement when the car was level. At full flex there was still 40-50mm spline engagement.
Check out the last 4 pics on this page and you will see what I'm talking about. They used a 25mm spacer for this Suzuki to overcome the same issue. So you can see your not the only one to ever have this problem.
I only needed a 15mm spacer to achieve the same effect as we rotated the axle for the conversion to get the best possible tailshaft angle after the lift and being a long wheel base wasn't as bad as a shortie.
long pic link


