Page 1 of 2
Guard chop!!
Posted: Fri Nov 21, 2008 7:31 pm
by get it up there
If you have done a guard chop, firewall chop, or headlight thingy chop, please post your pics up!! I would start, but i havent done it "yet".

Posted: Fri Nov 21, 2008 7:37 pm
by 11_evl
front i have done virtuial lift and full ruf and maybe 2"bump extentions and it doesnt scrub with worn 35 simex measure just over 34".
rear i havnt checked on the 34"tyre but virtuial lift and 32" simex (33'') dont rub. with 3 or 4 "extended bumpstops
Posted: Fri Nov 21, 2008 9:26 pm
by Kitika
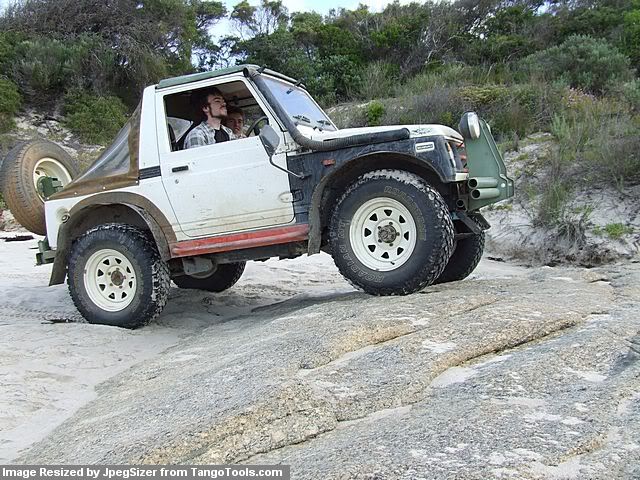
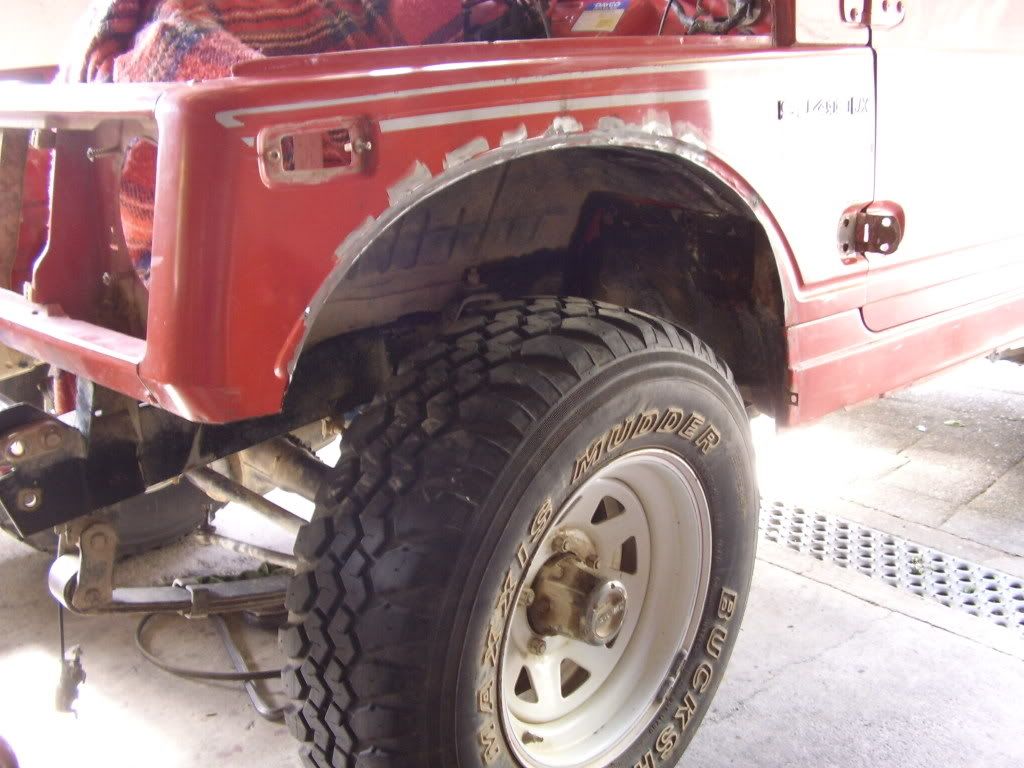
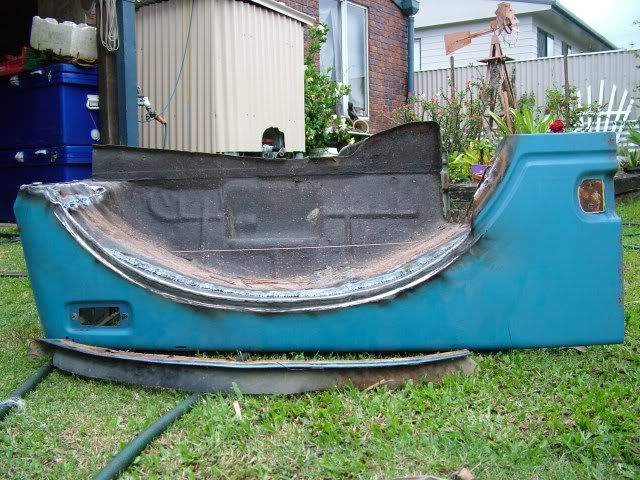
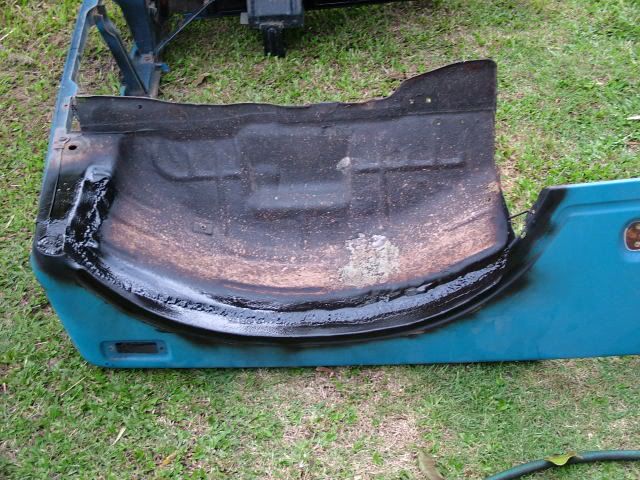
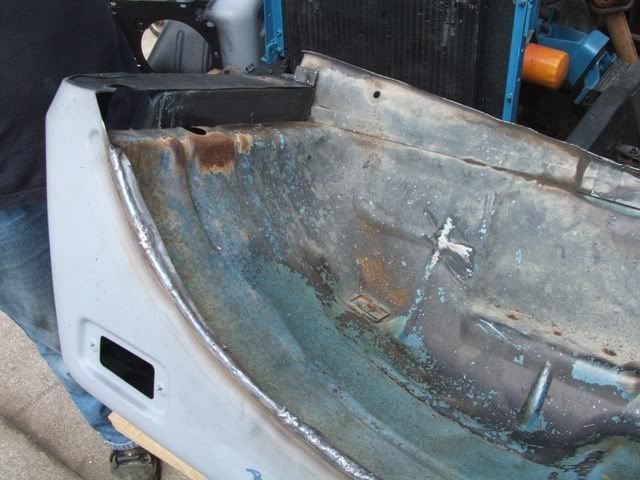
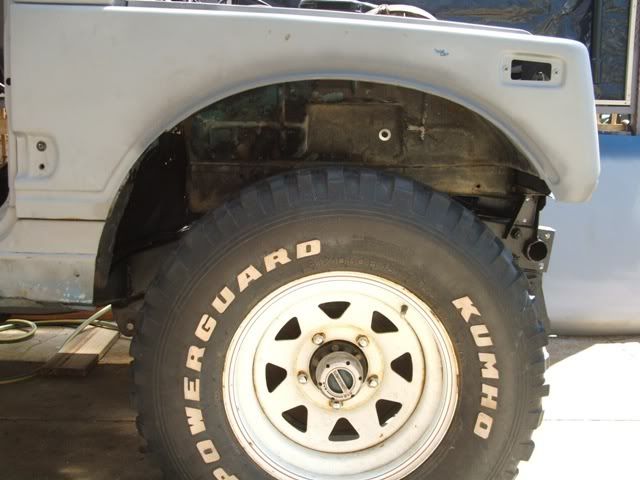
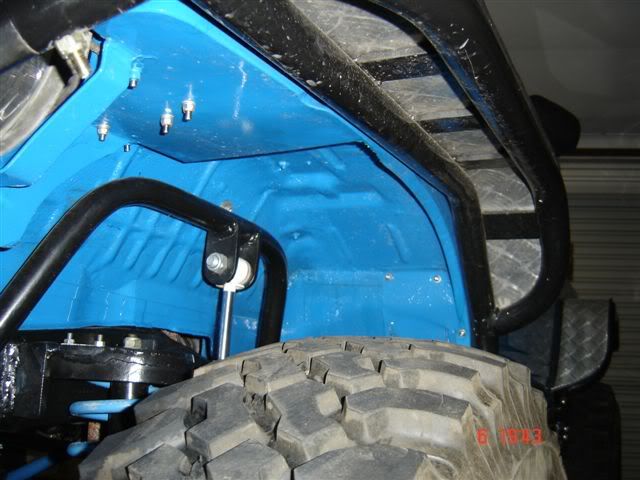
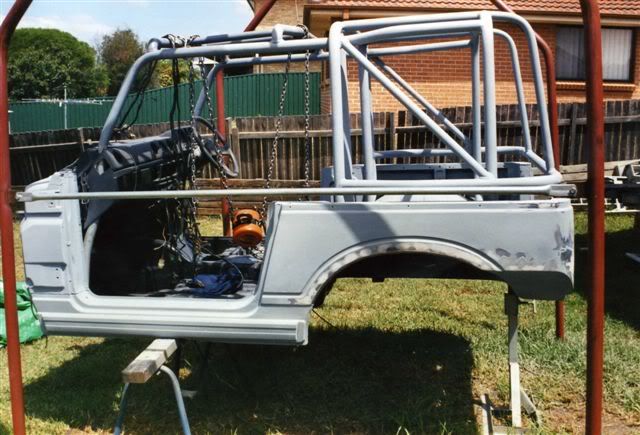
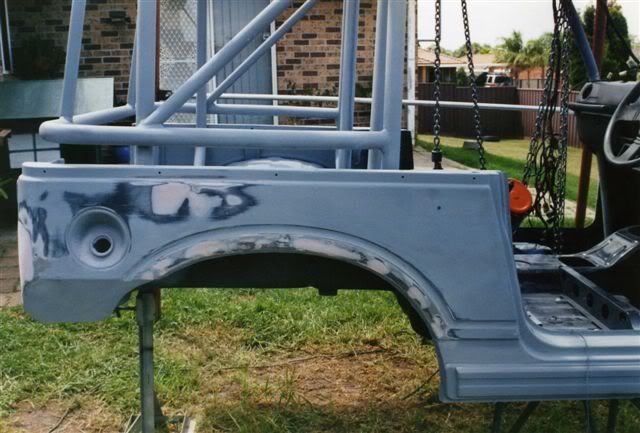
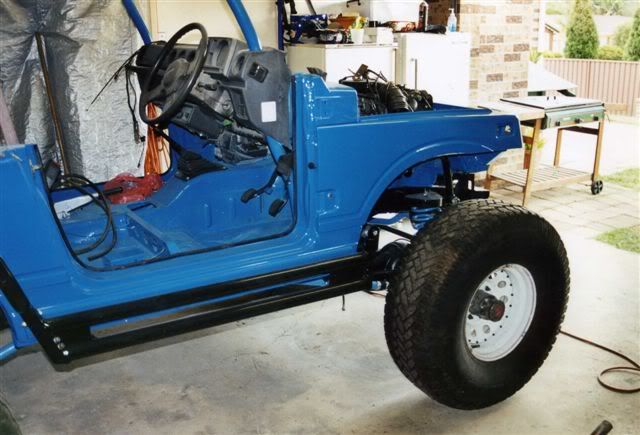
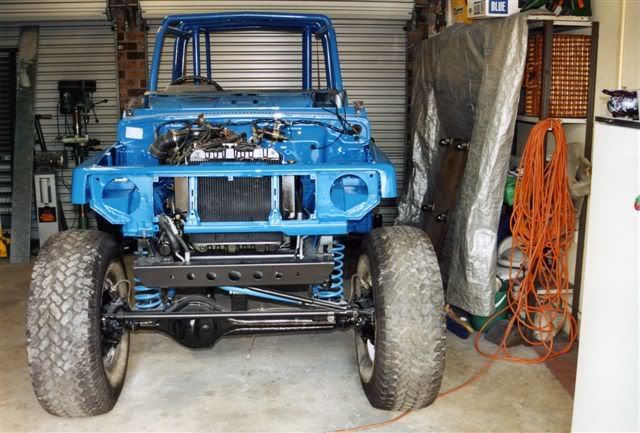
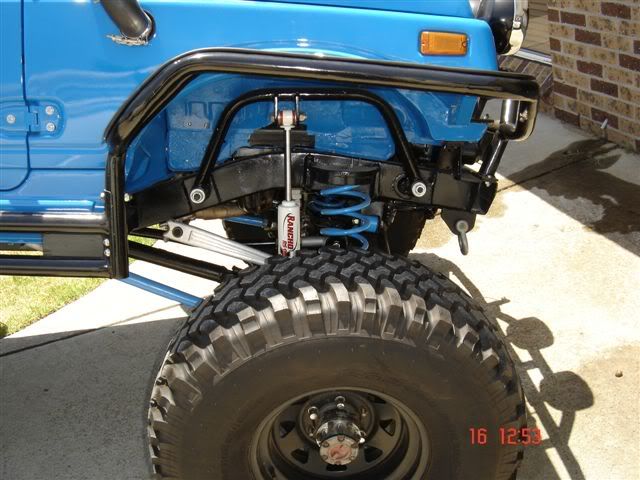
Here's some pics of the chop I did.
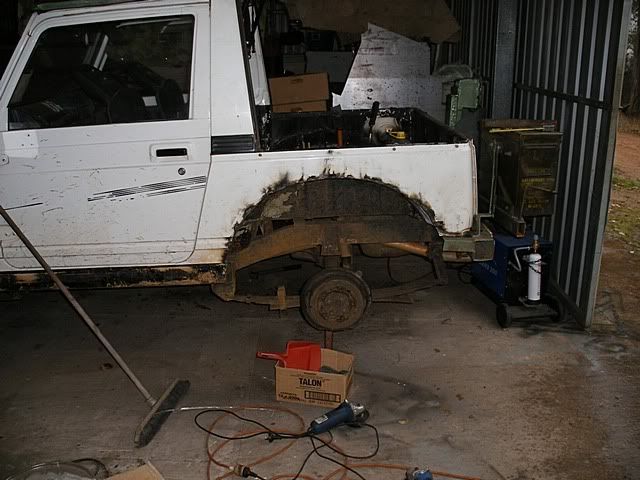
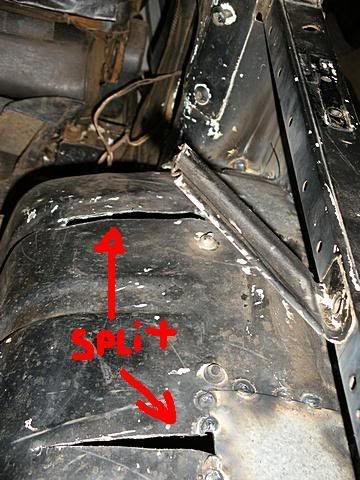
I cut the front twice cos I didn't enough out the first time

For the head light buckets I just beat the steel into shape until it wouldn't move anymore without wrecking the headlight mounts.
Posted: Fri Nov 21, 2008 9:37 pm
by GRPABT1
I'm thinking I will have to try this soon and get me some Q78 swampers for play tyres, keep the pics coming!
Posted: Fri Nov 21, 2008 9:49 pm
by Kitika
I say give it a go! I have no previous experience in panel work and needed to fit my 32's without any lift (lack of funds basically) and to remove the accumulating rust.
Tools needed:
6 inch angle grinder
assortment of hammers
welder of some type or Pop rivets if you'd rather do it that way
gap filler(bog)
paint
and some courage to make the first cut!

Posted: Fri Nov 21, 2008 11:16 pm
by jimbo jones
Posted: Sat Nov 22, 2008 3:28 am
by hooki
Posted: Sat Nov 22, 2008 9:55 am
by get it up there
Jimbo.. Do you have any pics of your rear guard please?
Posted: Sat Nov 22, 2008 11:18 am
by alien
christover had great pics of his headlight buckets... im sure someone can search for that one. (bags not doing it).
Posted: Sat Nov 22, 2008 11:22 am
by jazuki
I just got my local pannel beater to roll me four pieces of steel like this
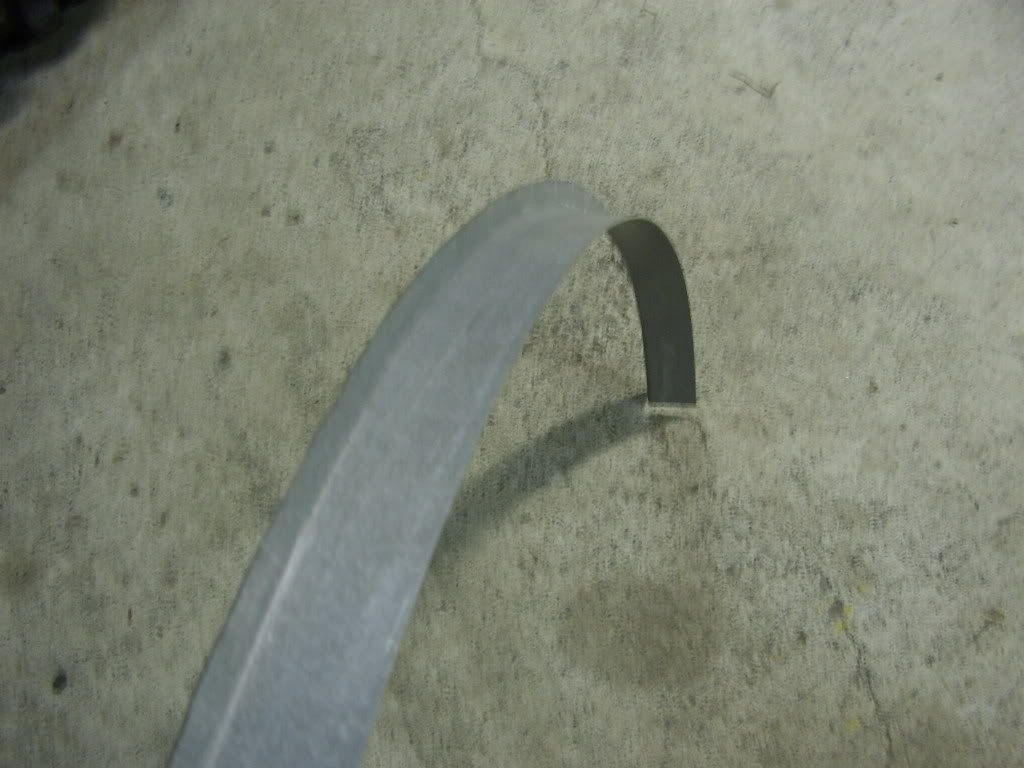
Then i just welded the new piece in and cut the gaurd out afterwards
Posted: Sat Nov 22, 2008 3:52 pm
by MART
Posted: Sat Nov 22, 2008 11:10 pm
by jimbo jones
get it up there wrote:Jimbo.. Do you have any pics of your rear guard please?
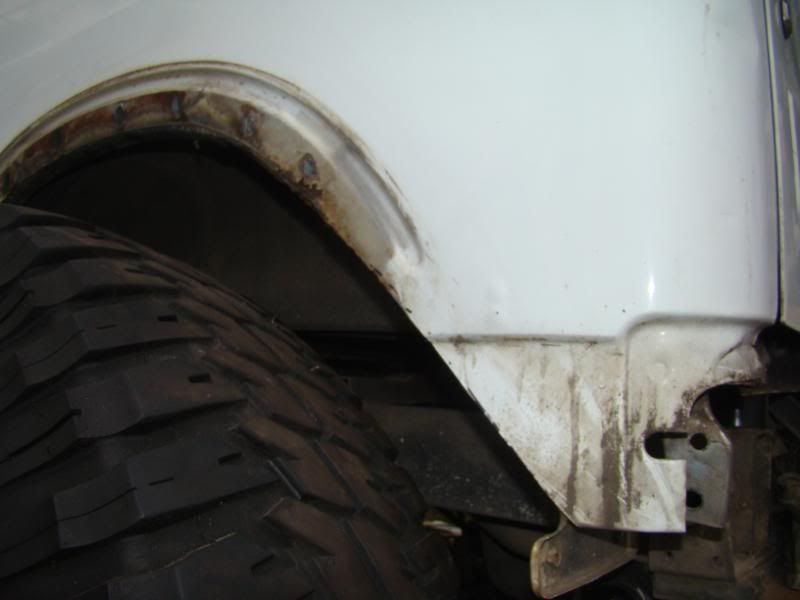
didn't need to chop as much as the front as rear flex is limited
Posted: Sun Nov 23, 2008 4:58 pm
by get it up there
Kitika wrote:I say give it a go! I have no previous experience in panel work and needed to fit my 32's without any lift (lack of funds basically) and to remove the accumulating rust.
Tools needed:
6 inch angle grinder
assortment of hammers
welder of some type or Pop rivets if you'd rather do it that way
gap filler(bog)
paint
and some courage to make the first cut!

Any pics buddy?
Posted: Sun Nov 23, 2008 5:27 pm
by UBZ
Long time reader, first time poster.
After hours of web surfing i am finally in the middle of doing virtual lift at the moment. Wish i had had my pics to look at first.
NT, Worn 31x10.5, 2 inch spring, 1" shackle
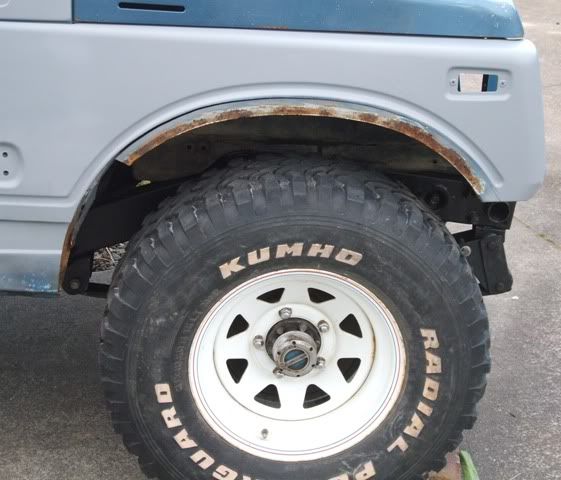
I cut along a line just below the scallop on the guard with a hack saw blade.
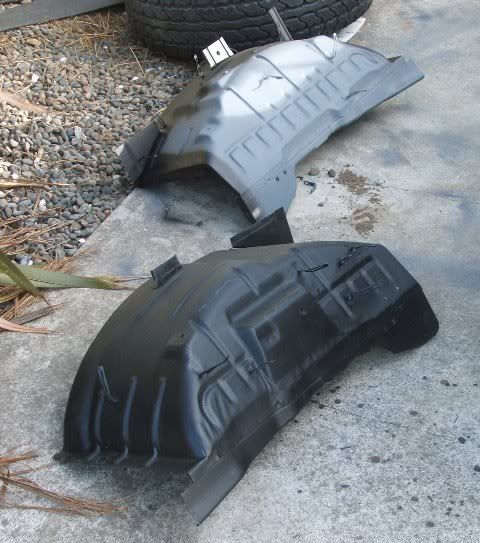
cut the inner guard from the outer.
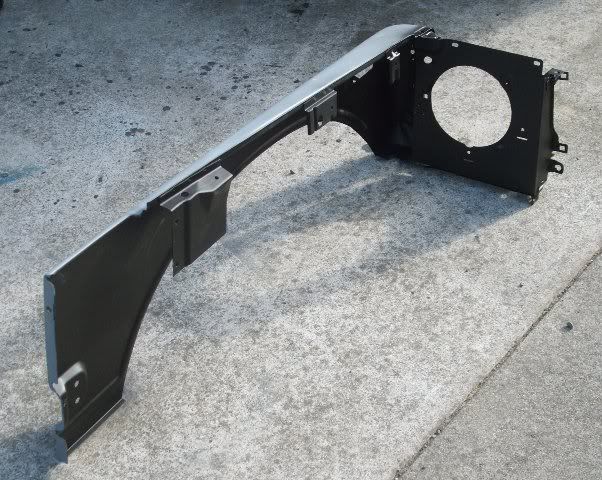
left all the head light mounting intact.
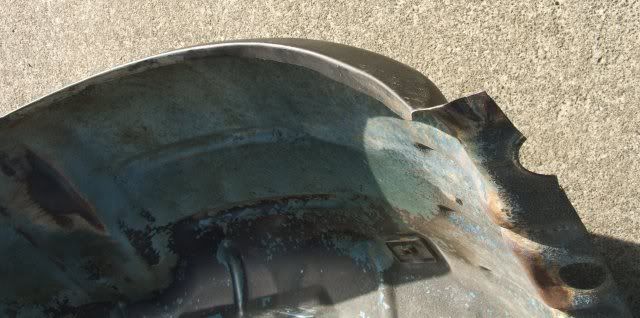
Ground off the remaining bit of the outer guard from the inner.
Have retained the factory shape and strength of the inner guard.
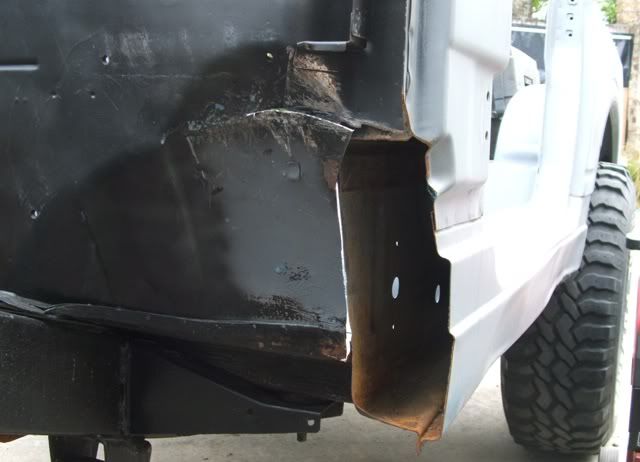
Massaged the firewall to follow the same line.
Currently have the passenger side inner guard lifted up 30mm to meet to new guard line in prep for welding .Lines up perfect. Firewall welds complete.
Should give me the same clearance as a 30mm body lift, with no firewall rub at all.
Will post up some more pics when i have them.
Posted: Tue Nov 25, 2008 5:02 pm
by greg
I don't have any photos of my "virtual lift", but it was done in a not dissimilar manor to the what other members have done.
The aim was to fit a 35x13.5 on a 15x10 rim.
basically cut the guards out of the car, chopped all the way around at a height greater than the rib that surrounds the stock guards.
At the rear, relocate the fuel filler, and then go through the very painful task of re-boxing the area at the front of the wheel well where the floor drops away. The front part of the wheelwell now sits flush with the chassis mount.
At the front, for bonus points, the firewall has been pulled back so that it sits flush with the body / chassis mounts... this has some affect on accelerator pedal position etc... Then for double bonus points, rather than chopping the back of the headlight bucket, we chopped 100mm out of the center of the grill and narrowed the whole front end to match the bonnet... this keeps the headlights away from the tyres... then modified the front inner guards to suite and lifted them 2 inches approx.
This was all done on a car with a 2" body lift.
It was the RUF that necessitated the narrow front end. i.e. the front end moved forward under compression.
Posted: Tue Nov 25, 2008 5:18 pm
by Gwagensteve
the inner guards were also cut and moved up 25mm in the front and the rear was tubbed.
I don't have any photos of the work in progress, but as you can see, Greg ended up with quite a large front guard.

The sills are 130mm shorter than a stock sierra.
Steve.
Posted: Tue Nov 25, 2008 5:58 pm
by ofr57

when i am going to do my chop i was going to do this and then split the seam and cut some of the fire wall out back to the body mount and then plate/ spot weld back together ... does that sound right?
Posted: Tue Nov 25, 2008 7:41 pm
by Gwagensteve
you don't really have to cut the firewall out. You can split the seam along the floor and up the inner kick panel, then pull it all back and then bend the floor up at the body mount to meet the new location of the firewall.
You can also cut the whole sill out and cut out 65mm and weld it back in to meet up with the new firewall position- then the pinch weld etc all looks stock in the guard.
I've done them very quick and rough, quick and rough, and gregs, which took forever but looks super neat.
Steve.
Posted: Wed Nov 26, 2008 6:03 pm
by want33s
All this talk of guard chops I thought I better do mine BEFORE I get bigger tyres.
What I started with... NT front clip.
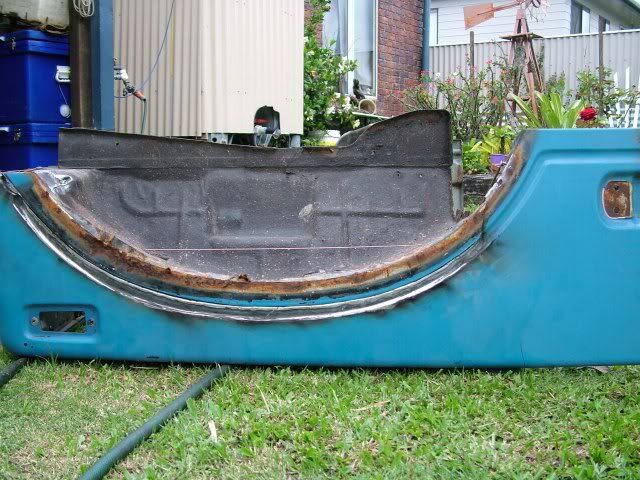
I cut up to the bottom of the swage line. Into the inner guard just enough so the bit left had no roll down to the lip.
Filled with a strip approx 800 X 35 x 1.6mm
And body deadened..
Still a bit to cut at the back but will get to it later.
Jas.
Posted: Wed Nov 26, 2008 6:16 pm
by zookimal
want33s wrote:

Jas.
My old car was near identical to this in the front. With this one I plan on much more, mainly from the headlight bucket.
Posted: Thu Nov 27, 2008 8:33 pm
by get it up there
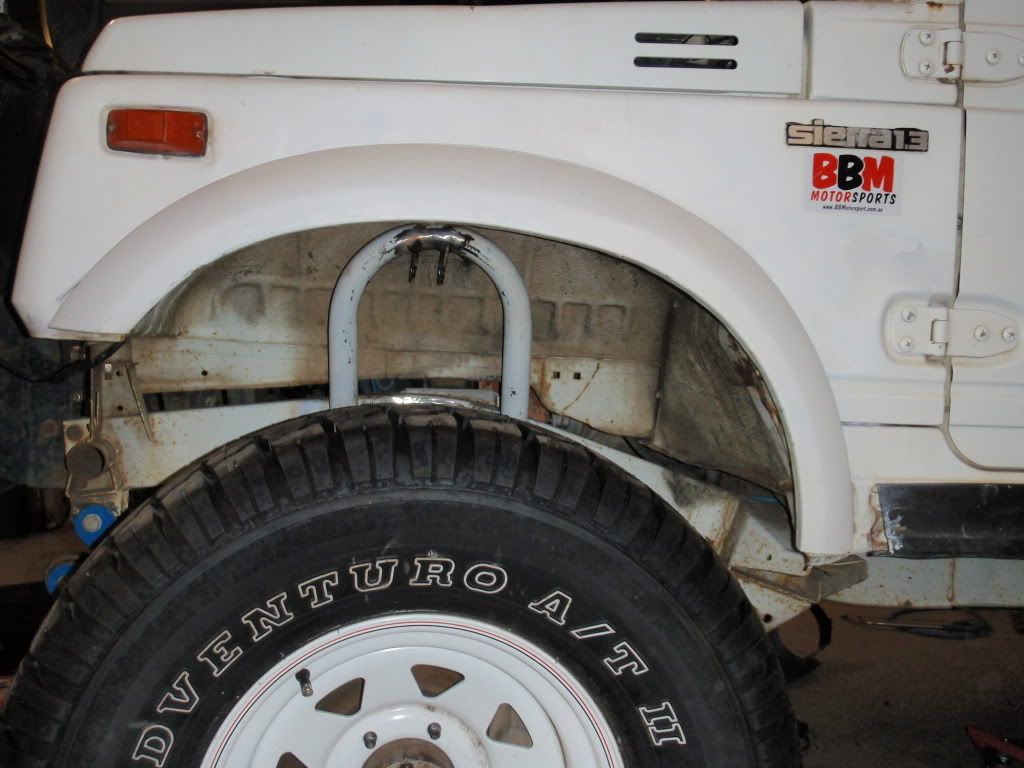
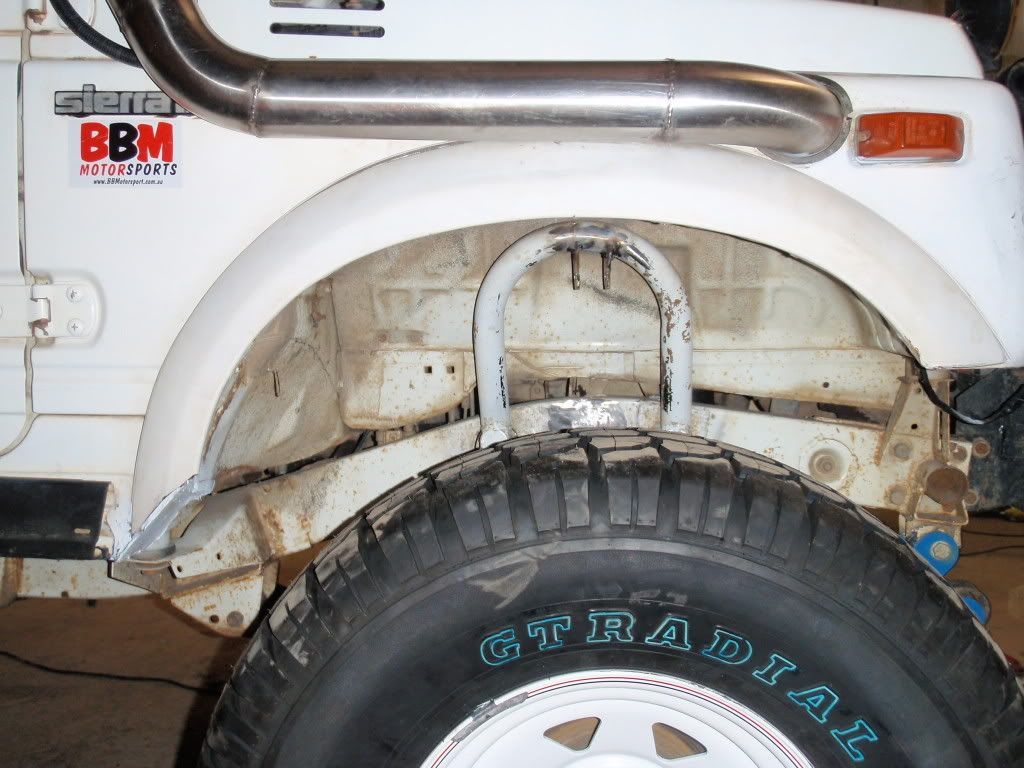
Getting ready for the 35's!! I cut it out, made a bit of plate up.. pop-rivited it on, then used sikaflex. These are "true" 33" tires.. i'll be running silverstone 35's. Hopefully they wont rub!

Before:
After! (but the other side)

Posted: Thu Nov 27, 2008 9:20 pm
by get it up there
oh, and that gave it an extra 2" of clearance.
Posted: Thu Jan 08, 2009 8:54 am
by UBZ
Thought i should post a couple more pics for the progress we are slowly making

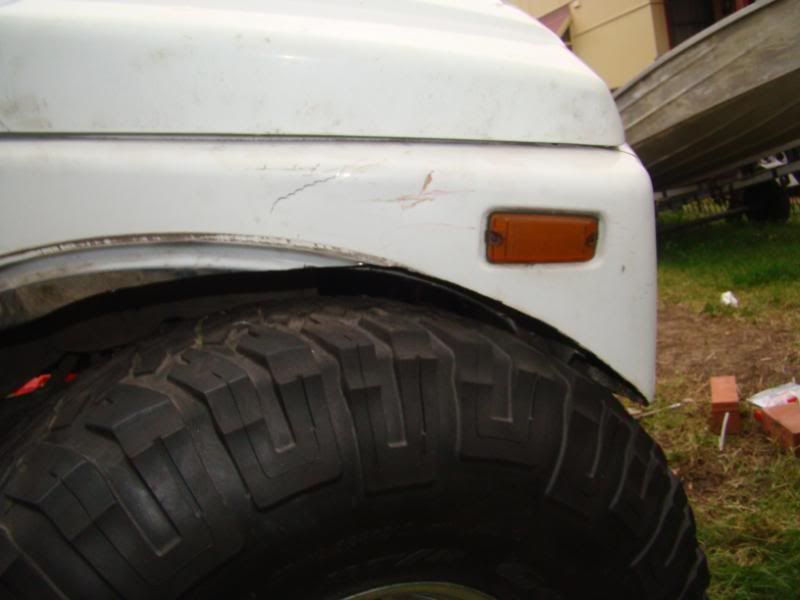
Inner guard welded to outer but 30mm higher.
.
Showing the clearance gained. Half worn 31x10.5
Want to move diff forward 20mm and run 32's
Posted: Thu Jan 08, 2009 9:07 am
by tassietoyuki
That looks realy neat. top job

Posted: Thu Jan 08, 2009 10:22 am
by Gwagensteve
Very neat UBZ.
Posted: Thu Jan 08, 2009 1:50 pm
by lexplay
good thread. bet ill be doing this to mine sooner than later
Posted: Mon Jan 12, 2009 2:30 pm
by Ridge
when i get my winch on, ill be attacking mine with the grinder too

Posted: Mon Jan 12, 2009 7:49 pm
by waandy
can anyone tell me if i will need to do this when i put the 33 silverstones on my car? got a 2 inch body and 2 inch shackles on a nt. cheers
Posted: Mon Jan 12, 2009 7:53 pm
by just cruizin'
If you talking the extremes and you can find a set as to the best of my knowledge they aren't doing the 33's anymore. Yes the will fit, the tyres are only a 31.5 real size and with 2" spring + 2"BL I get no rub.
Posted: Mon Jan 12, 2009 7:58 pm
by waandy
just cruizin' wrote:If you talking the extremes and you can find a set as to the best of my knowledge they aren't doing the 33's anymore. Yes the will fit, the tyres are only a 31.5 real size and with 2" spring + 2"BL I get no rub.
i got a second hand set for 550 1 brand new


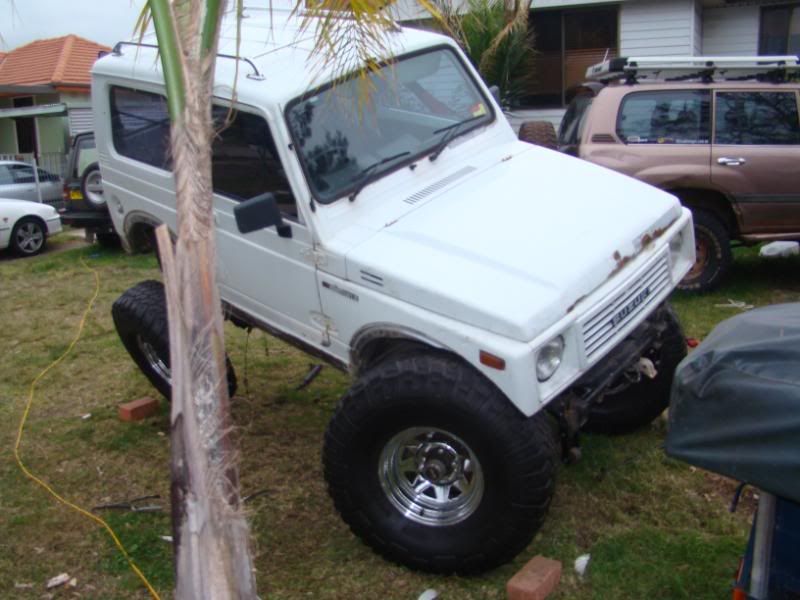
fark spewin. looks like il just have to go bigger next

and try not to roll the bloddy hi top






 .
.