4.0 to 3.9 engine conversion in 95' ser1 Disco (Guide)
Posted: Sun May 10, 2009 9:46 pm
This is a guide i wrote and posted on an overseas landrover site after i had little or no help with information on how to convert a 4.0 series 2 motor to run in a series 1 disco i hope this helps Cheers!
Well Its done,
But missing a few key things such as : oil leaks, boiling water, strange vacuum sounds, misfiring etc...
Its purring and to all that have a reasonable amount of skill with a spanner, this should be a pretty straight forward conversion.
To add salt to the wound we purchased this 4.0 motor from a wrecker in Sydney Australia on Ebay for $1500.00 Aud.... Its was out of a 2000 model car that was dismantled in 2004 and sat on a shelf till now because nobody liked it!
The following is only a guide of the conversion I did to my car (I'm not a mechanic so don't consider this to be advice or information from a Landrover professional, I'm just another enthusiast like you!)
The two engines look totally different when you first look at them but once you strip them down they are the same block.
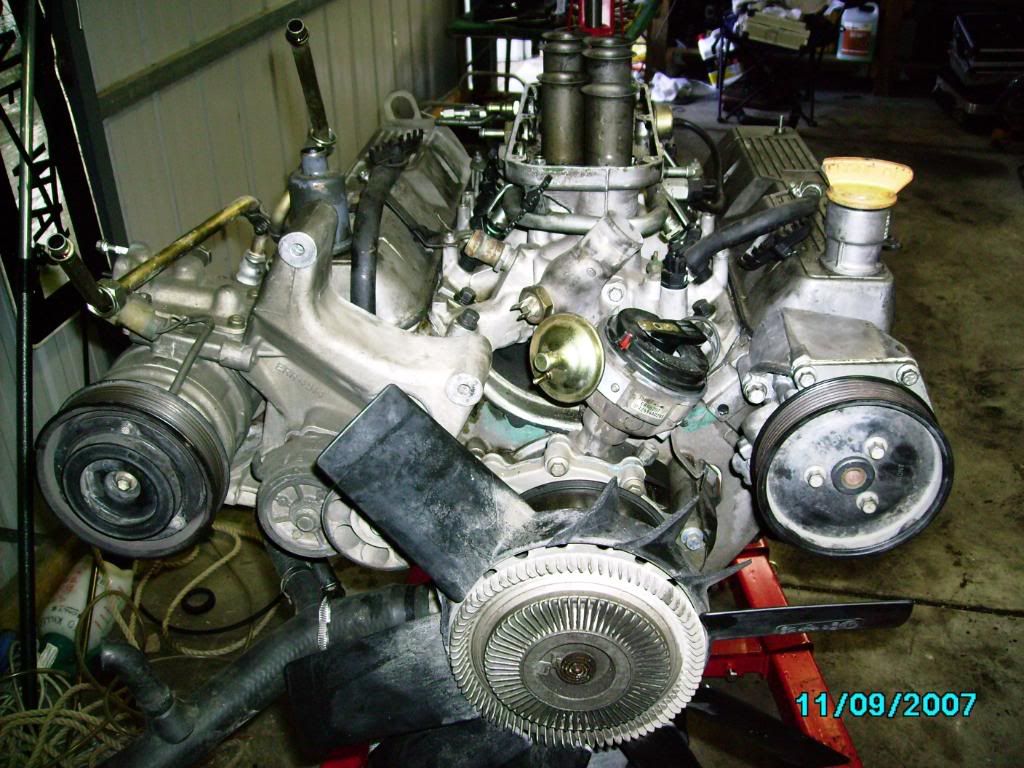
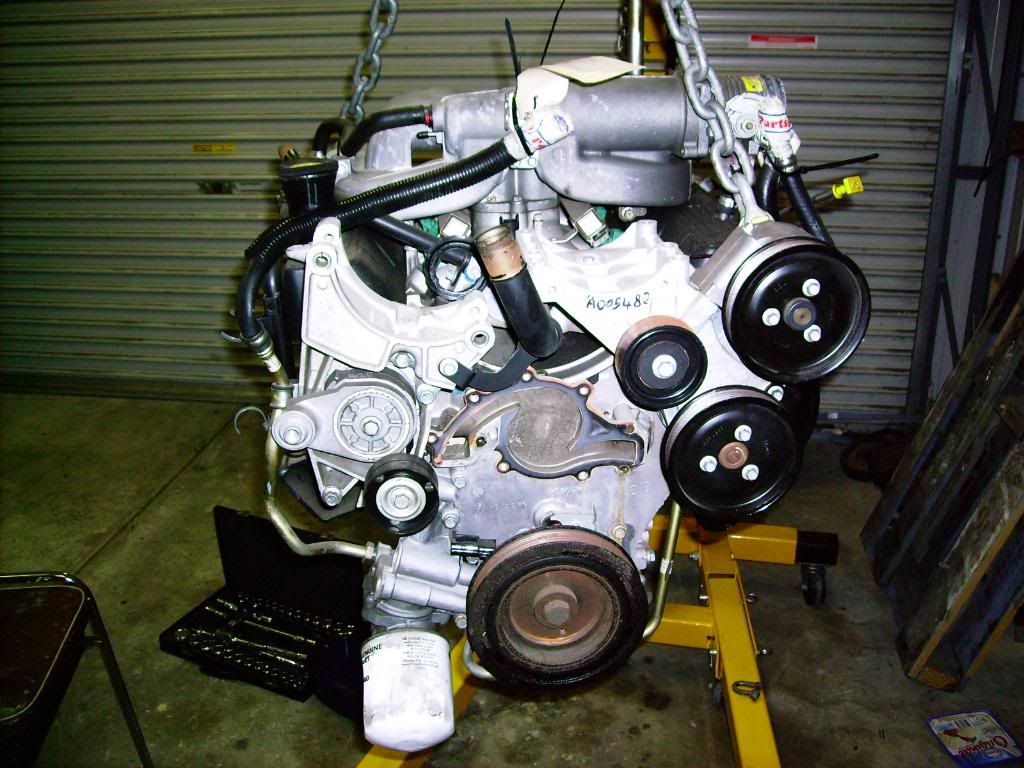
I then moved through to stripping down the engines so i could remove the cam from the 3.9 and set it up in the 4.0 so i could set up the missing distributer.
Remembering for those who don't own a Series 2 4.0 they don't run a distributer, so we need to swap the cam shafts and the timing case cover from the 3.9 to the 4.0 as they supply the drive and place to put the dizzy.
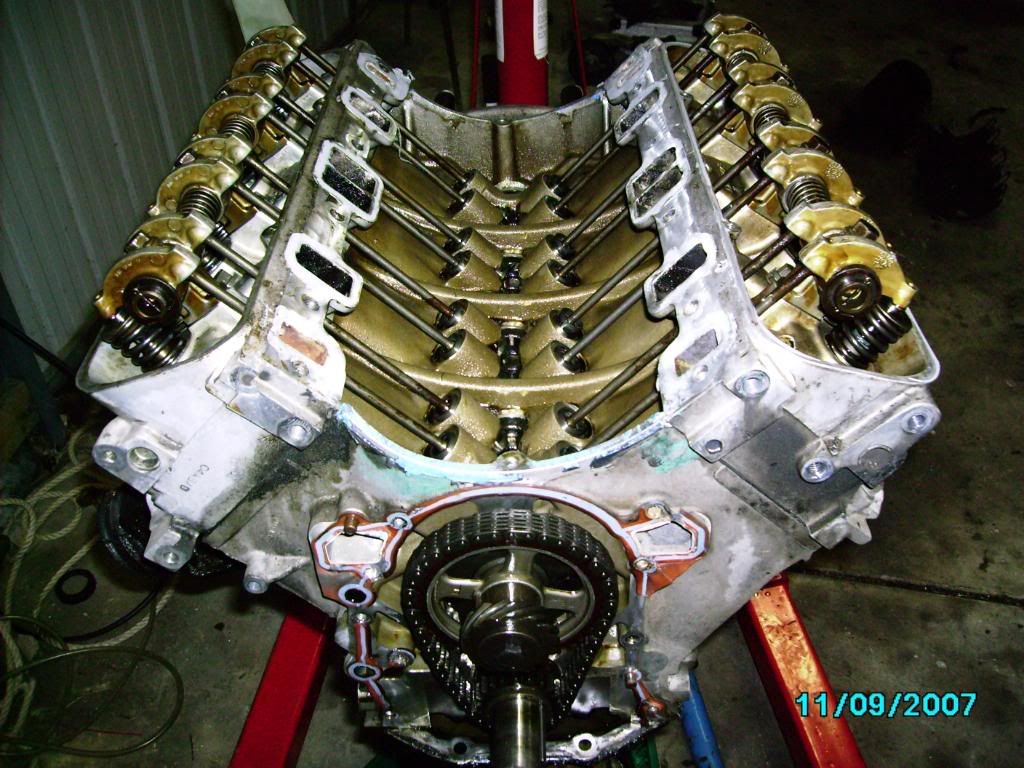
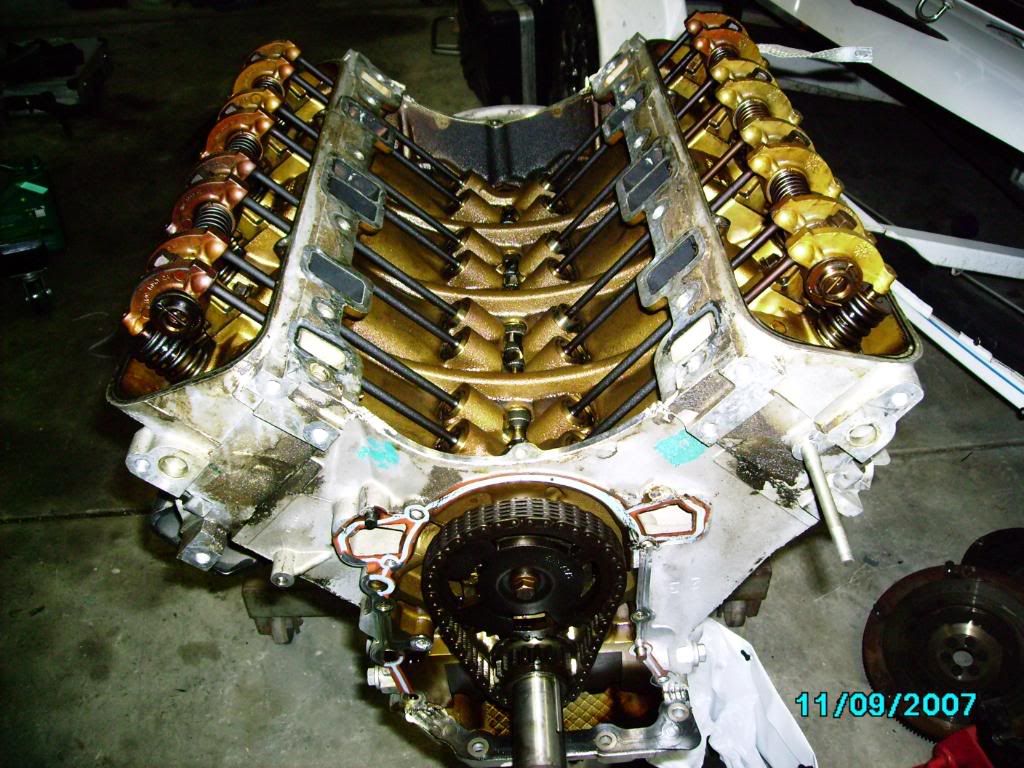
Next PART,
The cam swap from the 3.9 to the 4.0 block is a slip out slip in affair (pun intended)but great care should be taken in timing of the two engines to the same (tdc) position
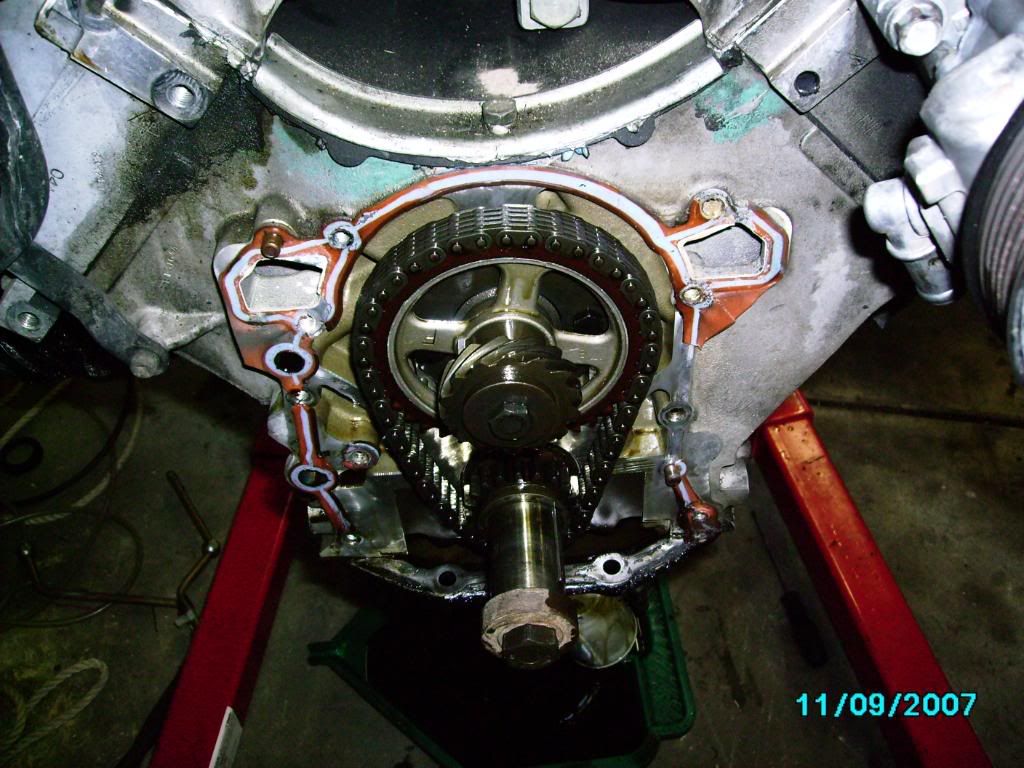
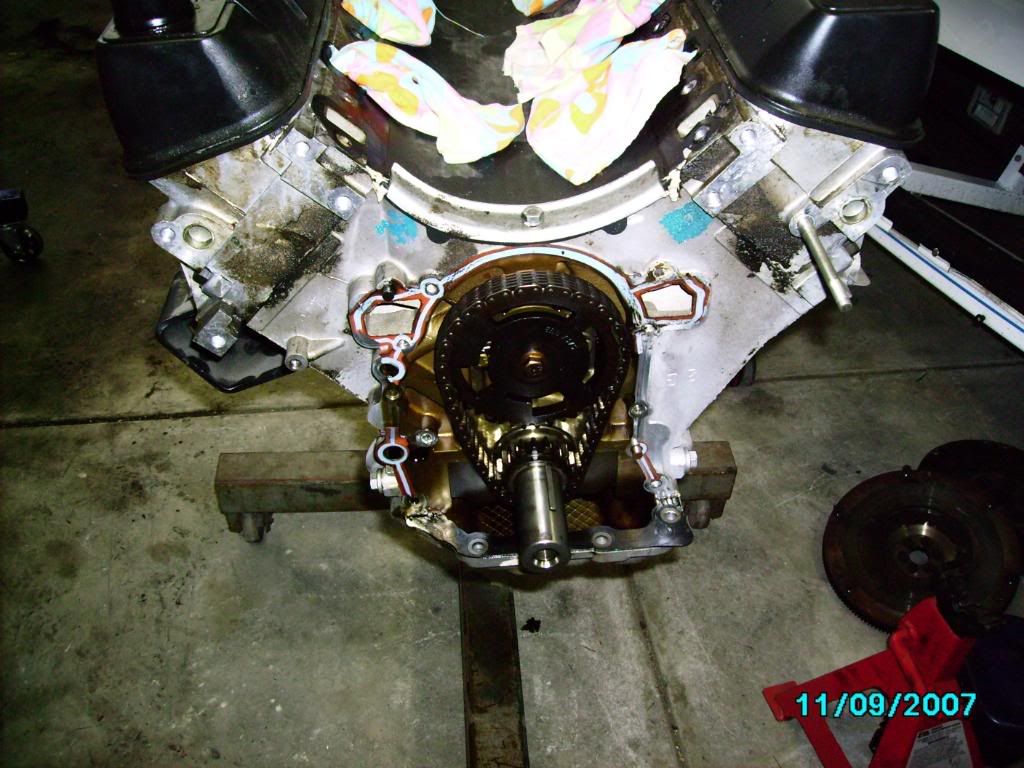
As the guide books all explain, All the rocker arms and the push rods should be removed in order and marked in order so they can be refitted in the position that they came from. (I laid them all out on this specialised form sheet from the recycling bin!)
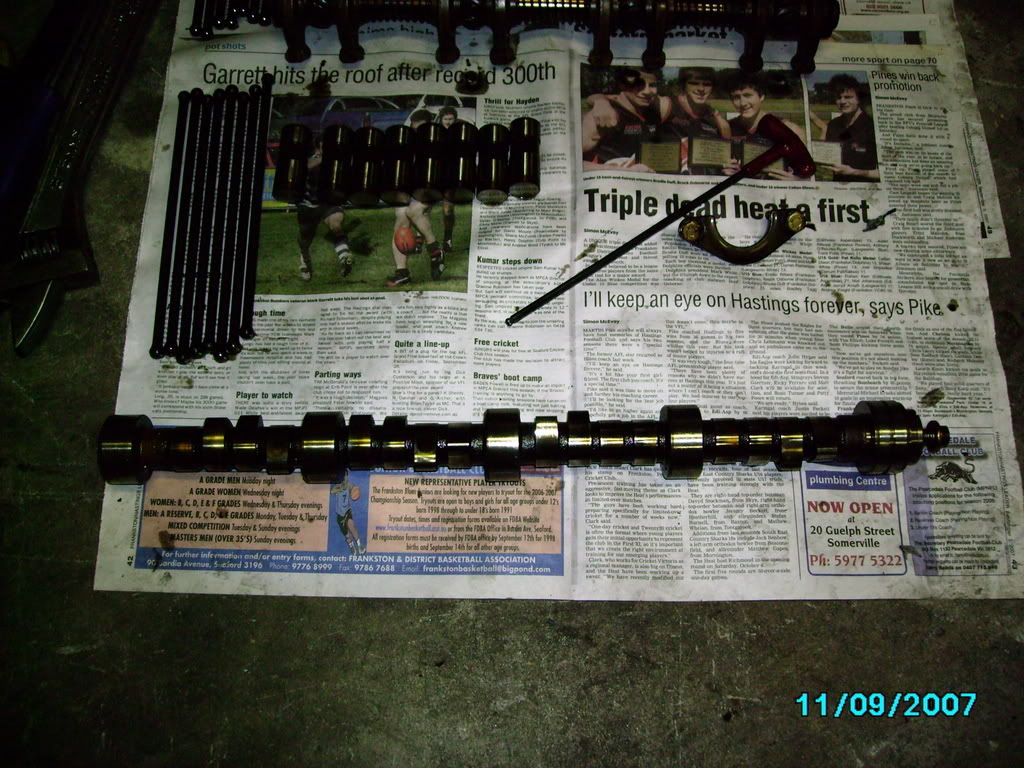
I placed the two engines side by side to make things easier and then swapped the cam over.
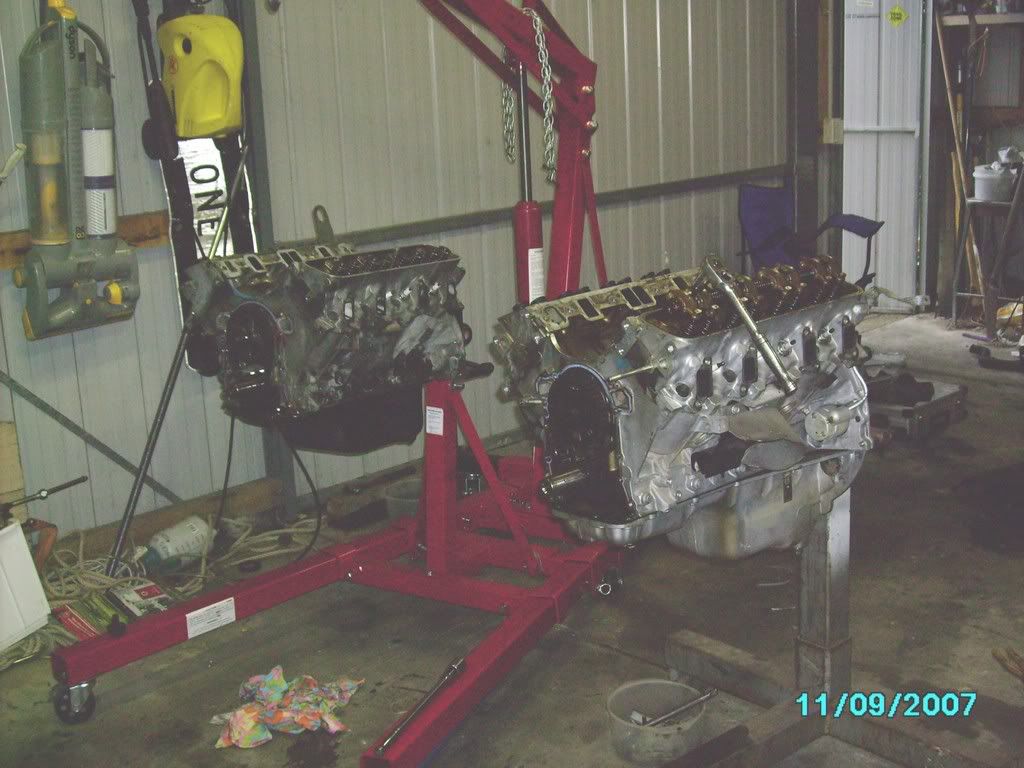
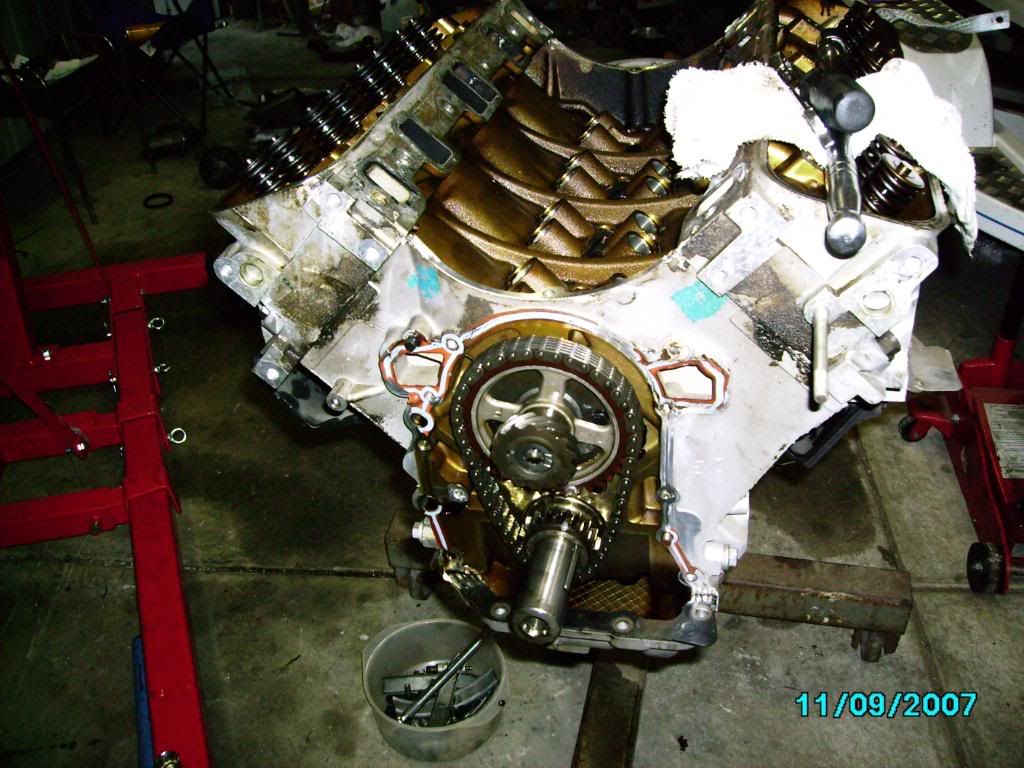
Great care should be taken with the cam swap as both engines should be timed to the same position so the cams, chains and sprockets can be swapped with minimal problems
I was also advised that the alloy sump from the 4.0 motor was not usable as the clearances under the motor may be an issue.
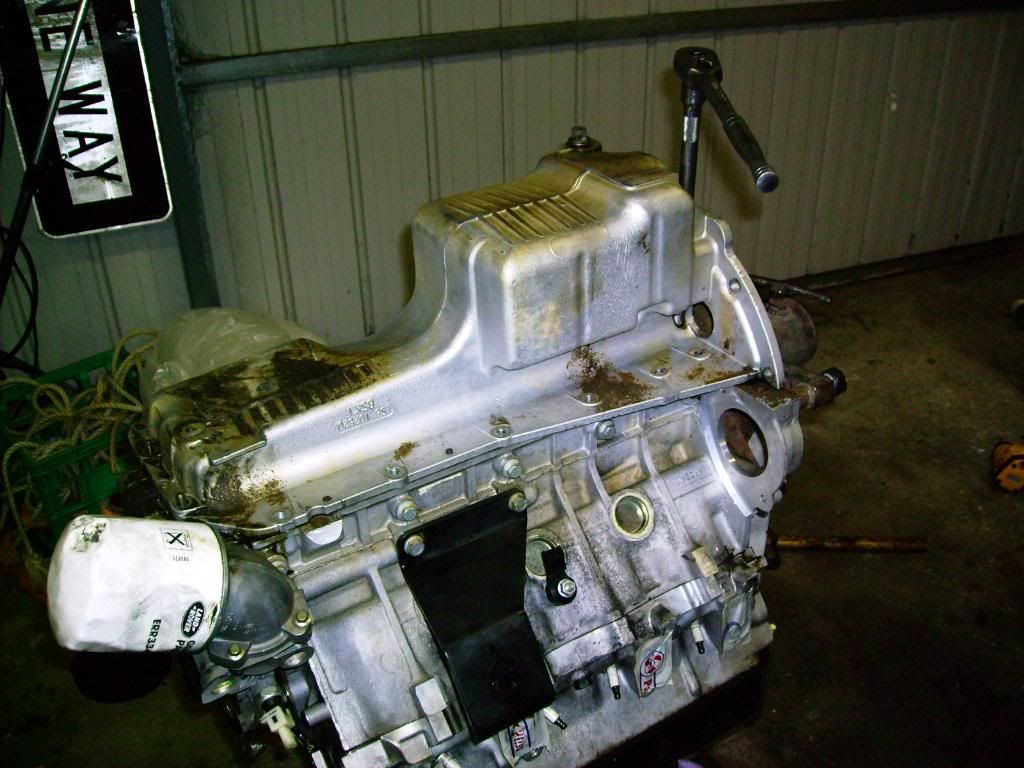
Both rocker covers were also swapped out as these had all sorts of hoses and fittings that I couldn't use.
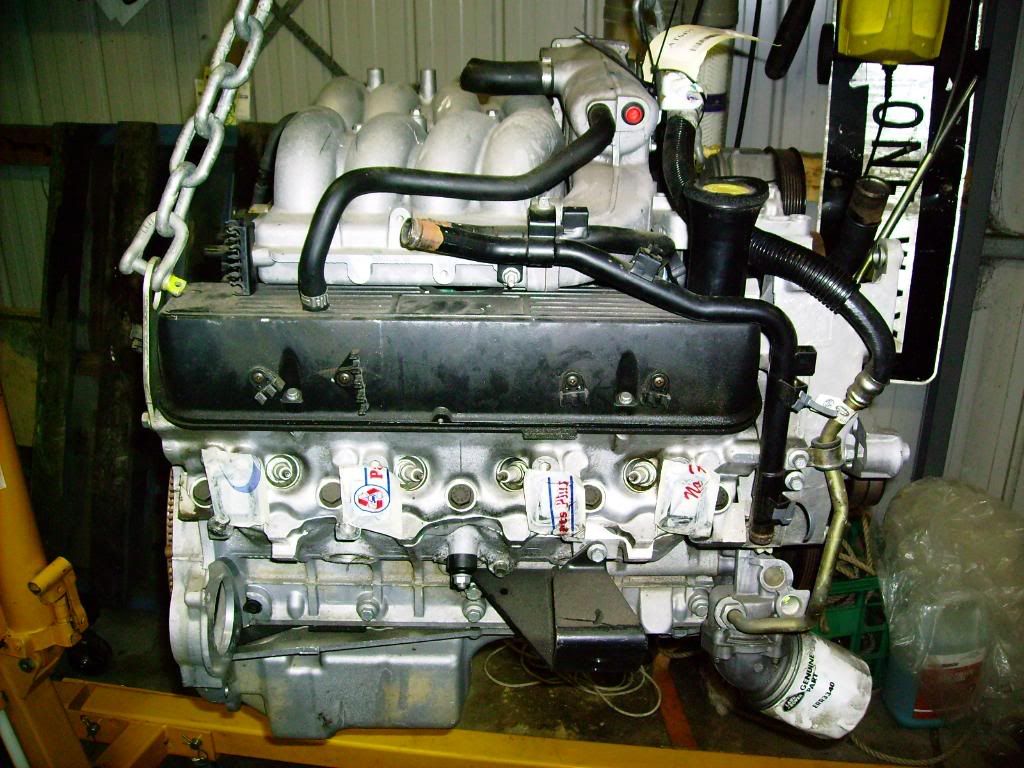
So I trimmed off the small dowel on the crankshaft
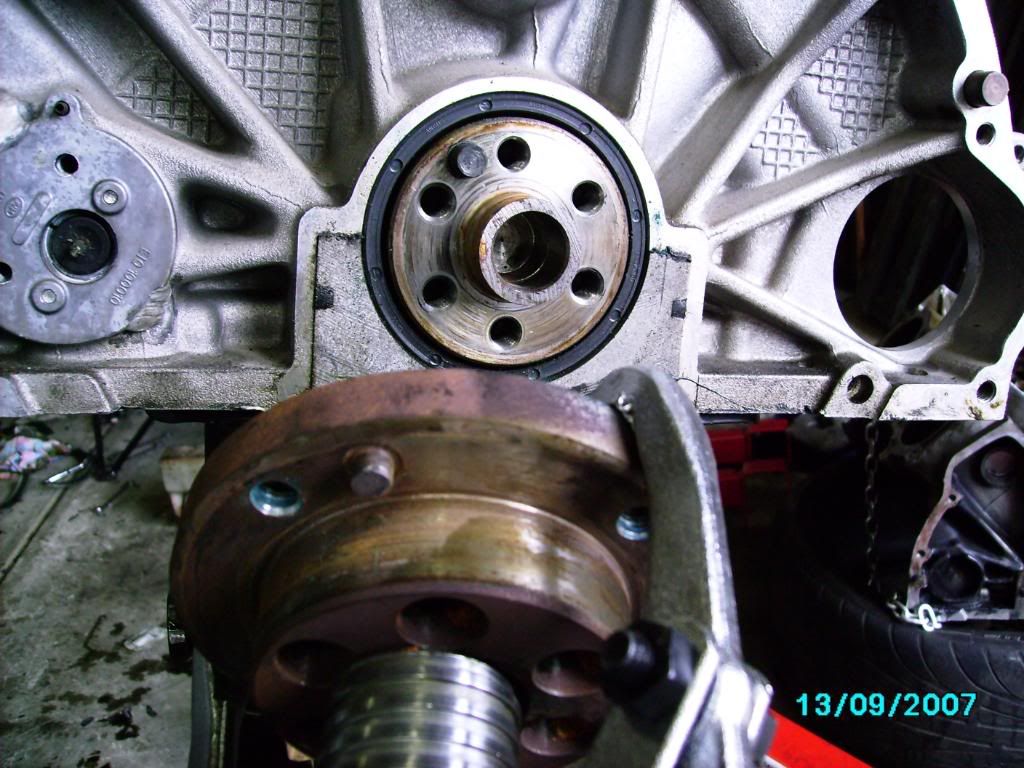
I fitted a new rear main seal take note of the direction
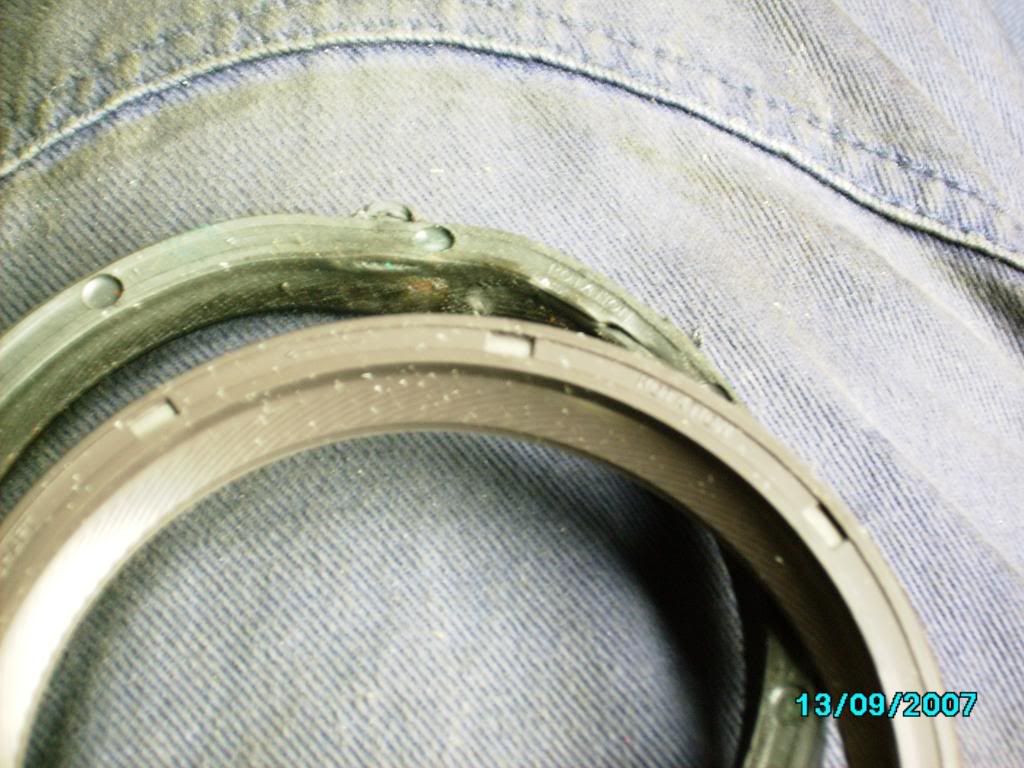
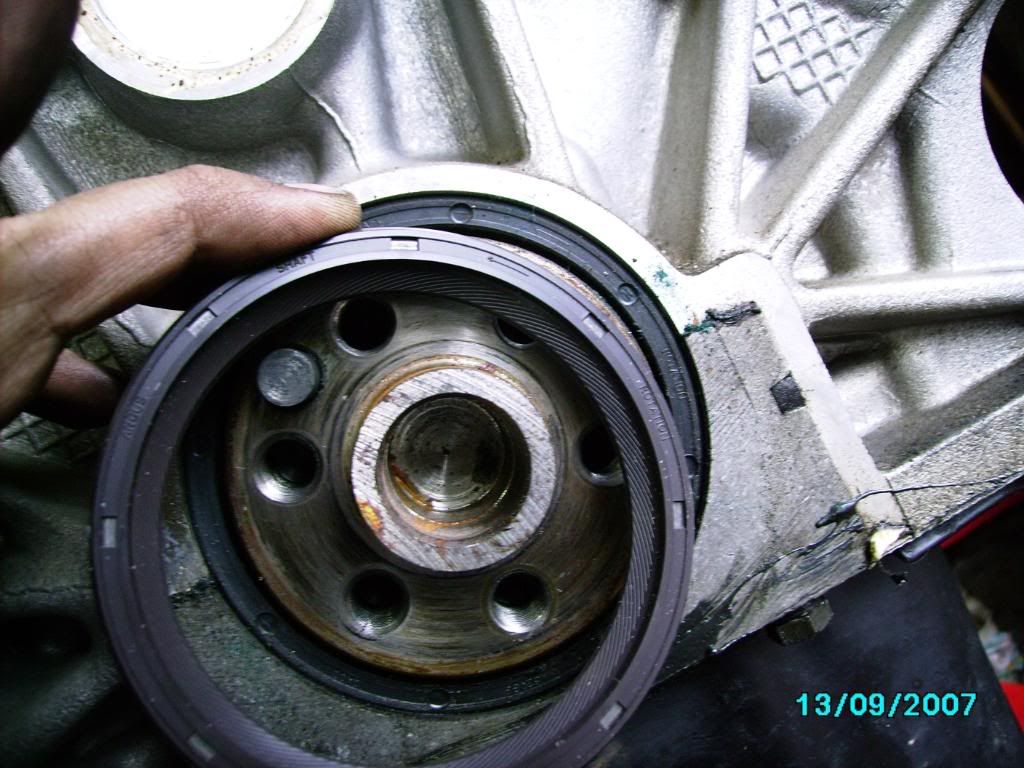
And the flywheel and clutch, note that there is a bronze bush inside the end of the crankshaft that you need to put into the end of your new crank if you have a manual gearbox or (stick shift) as it is the bearing for the end of the gearbox spigot or shaft or the pointy bit in the picture
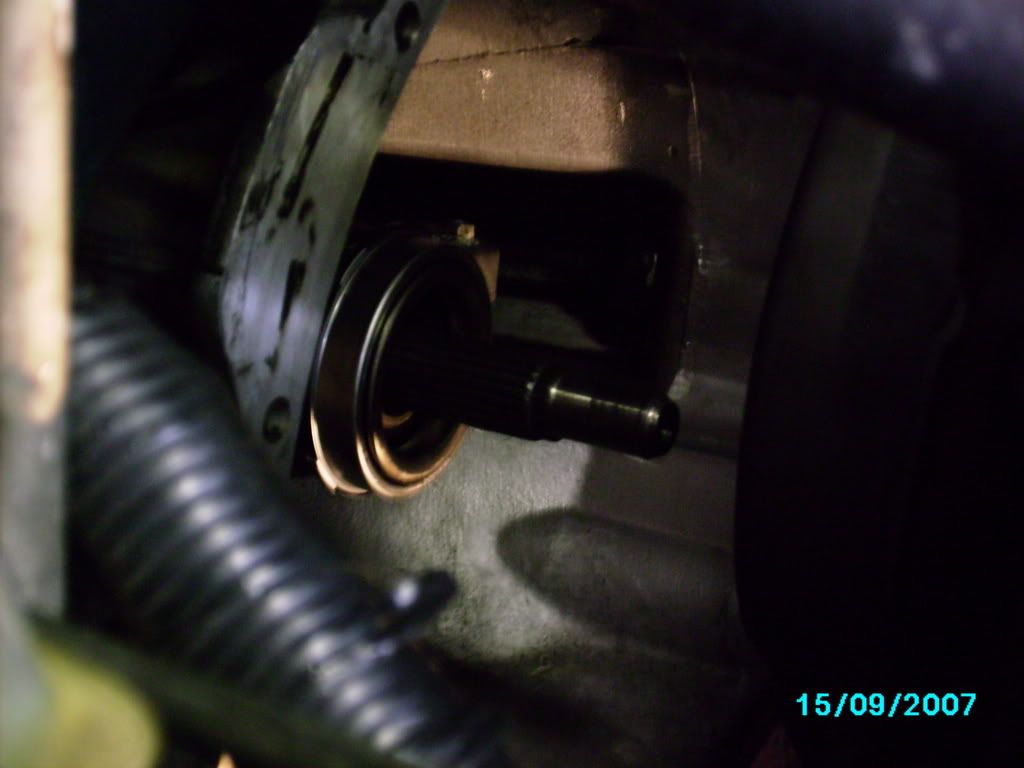
Whoops I didn’t get a pic of the flywheel before I fitted the new clutch! It is tapped into the end of the crankshaft and can be seen though the hole in the pressure plate.
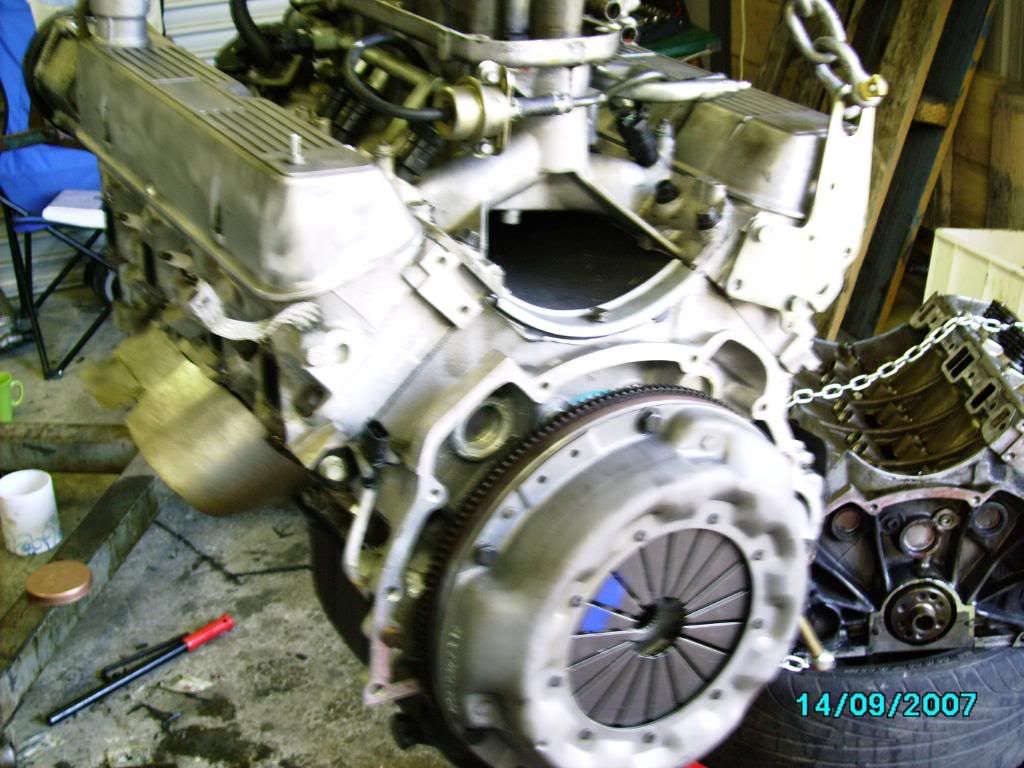
With all of this going well I moved back to the front of the motor to find where the mysterious spacer made of unobtanium goes…!
Turns out that the crankshaft on these 4.0 motors is a little longer about 20mm longer at the front of the motor, so when I tried to torque up the retaining bolt for the harmonic balancer it wouldn't pull down it needed a spacer!!!(there you go!).
You can see in the picture that the shaft is way longer than the shoulder in the inside of the pulley
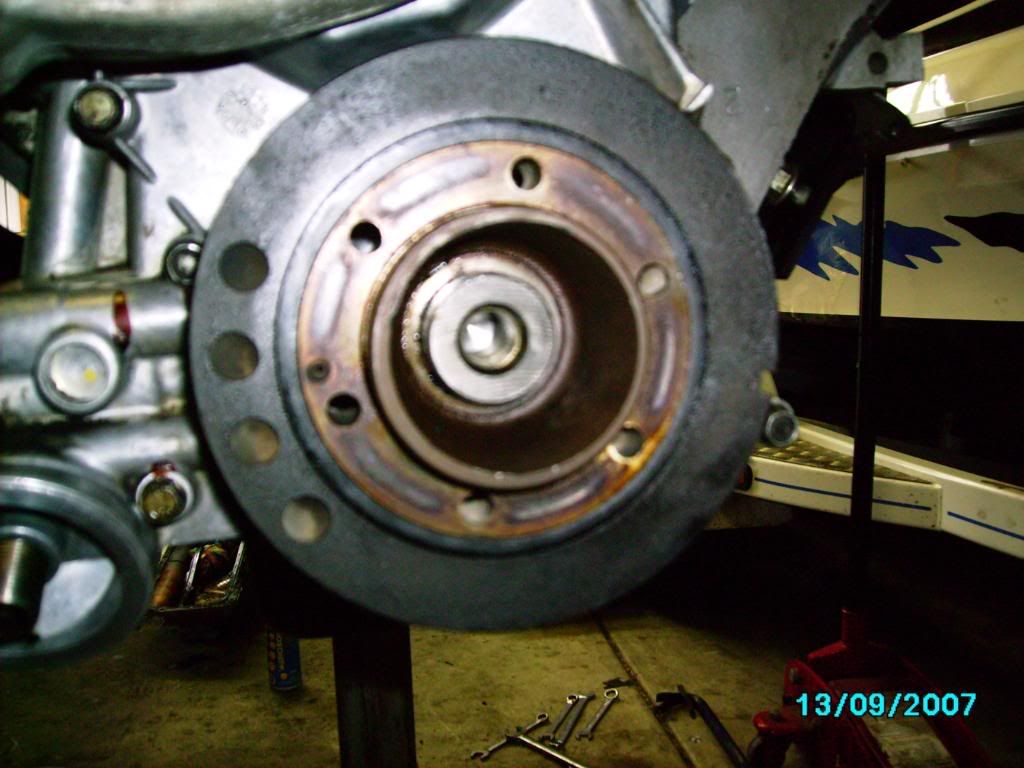
I could of got in the car and driven to a mates factory and spun up a spacer that would suit but I got to thinking, what else amongst all this left over crap fits on this shaft.

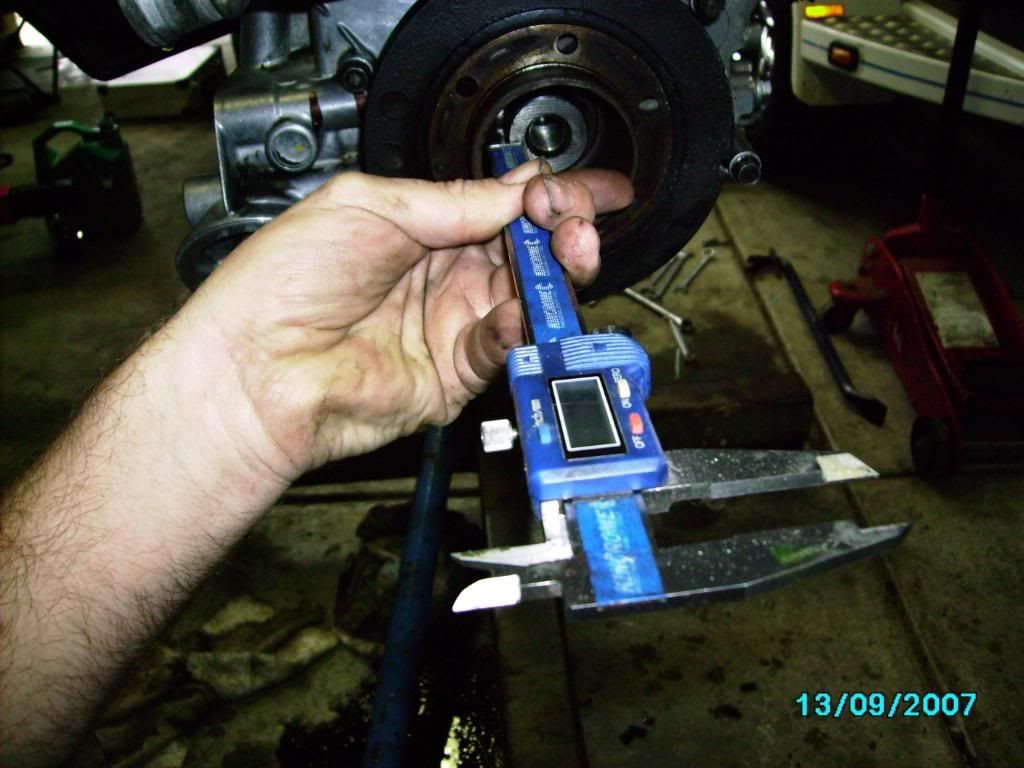
Yep so took measurements ( in this case 18mm) so the spacer would end up being about 2mm longer than the shaft and proceeded to trim and file my own!
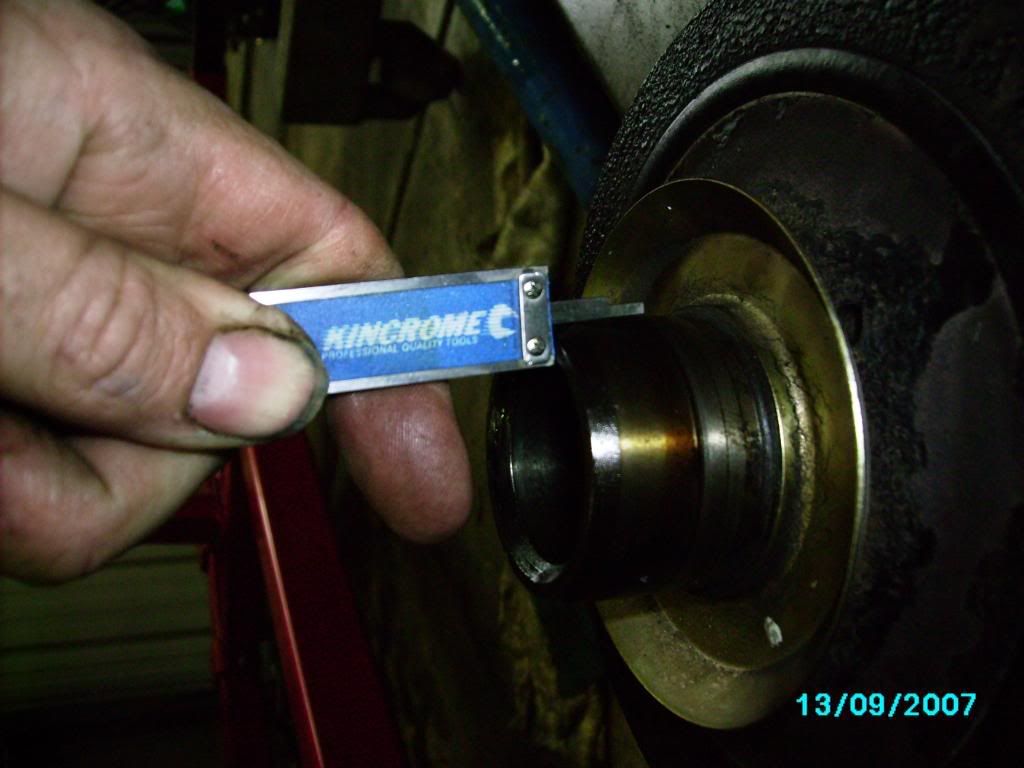
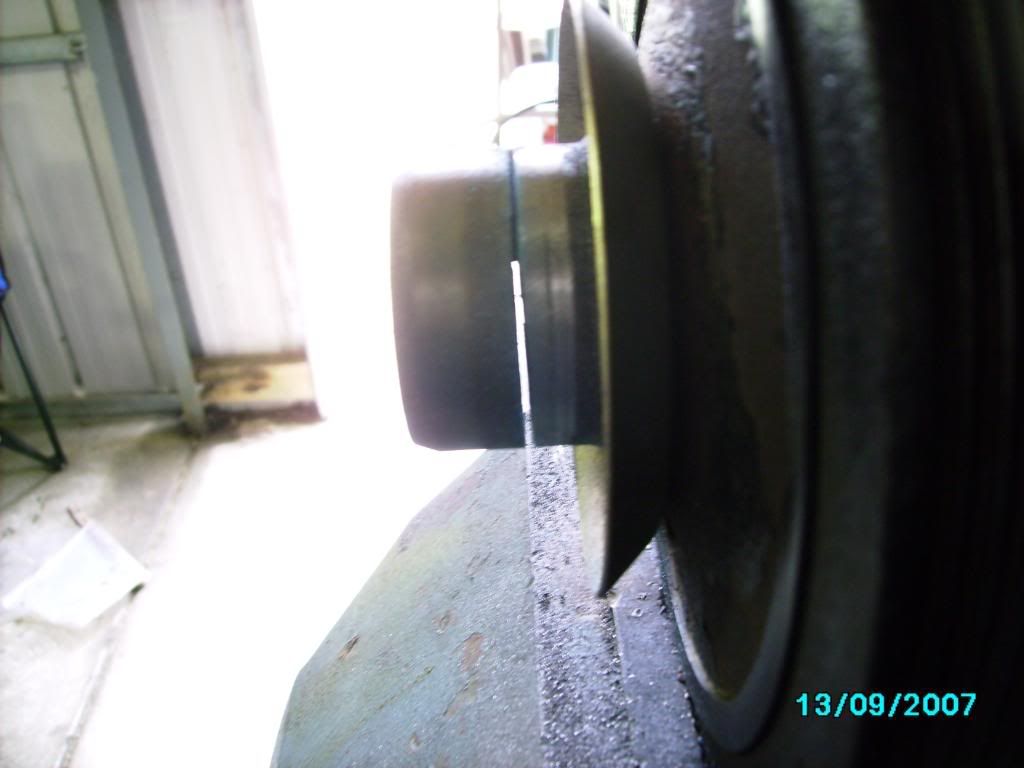
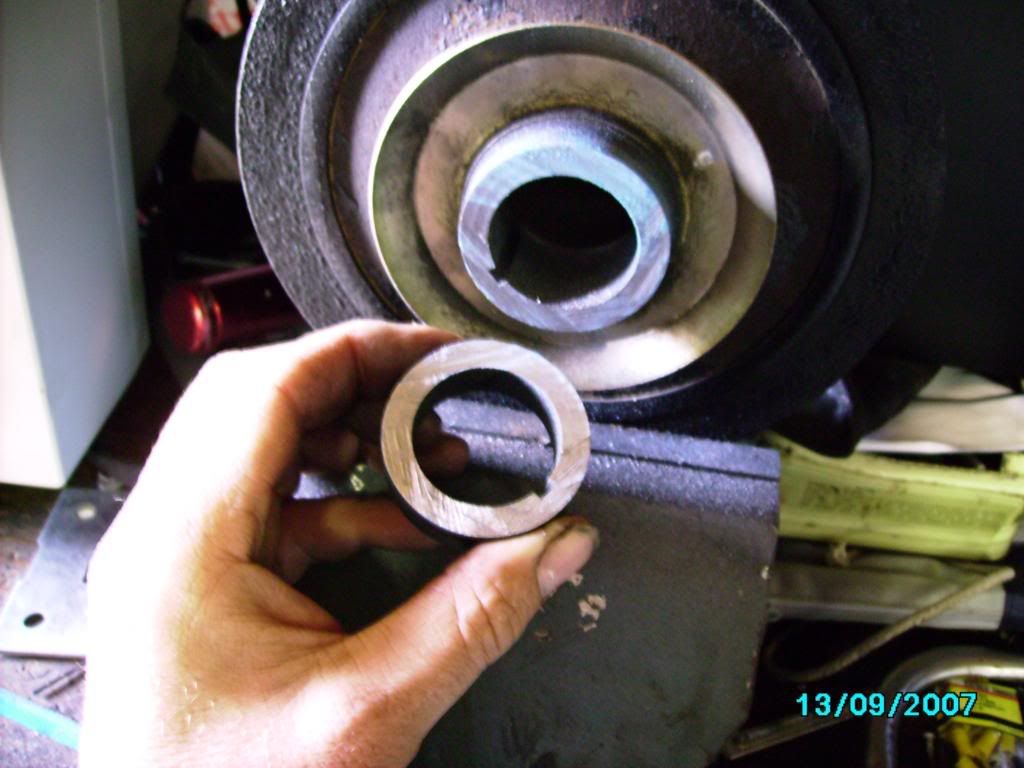
So I put it in and torqued up the bolt hey presto home made spacer!
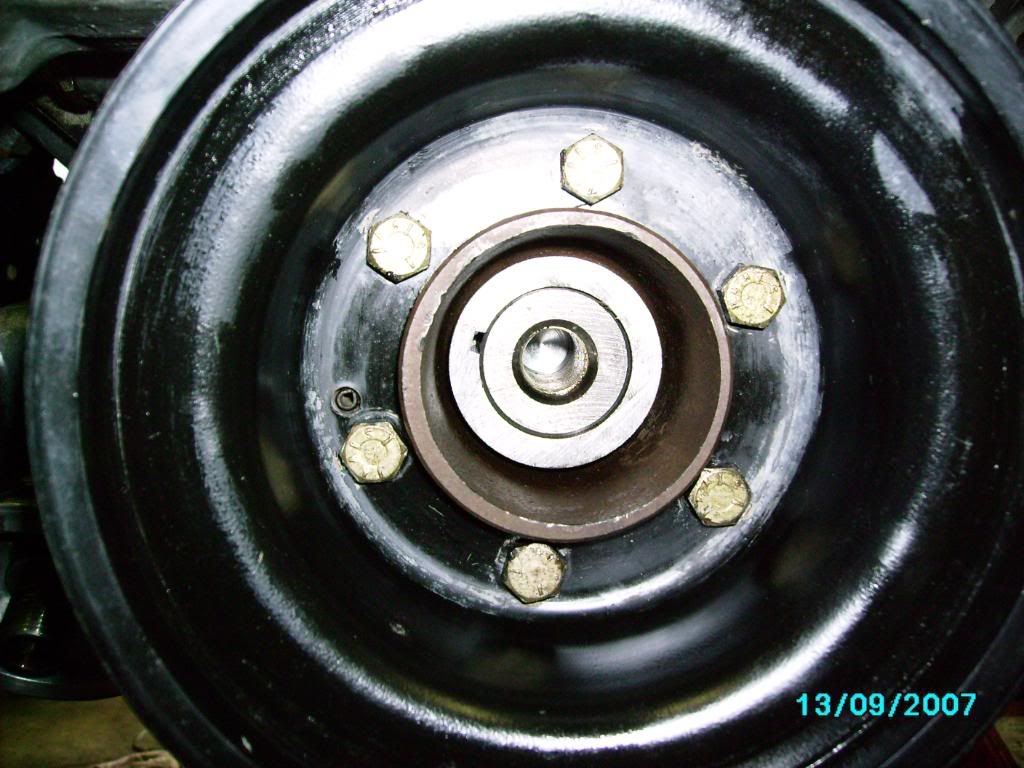
When I was bolting back on all of the front bracket for the aircon..etc I noticed that the belt tensioner was also a little rattley (tired bearing)
You guys probably know all about this one but I'll show it for the newbies.
If you mount the contraption in a vice you can get enough leverage to undo the main bolt through the tensioner pulley
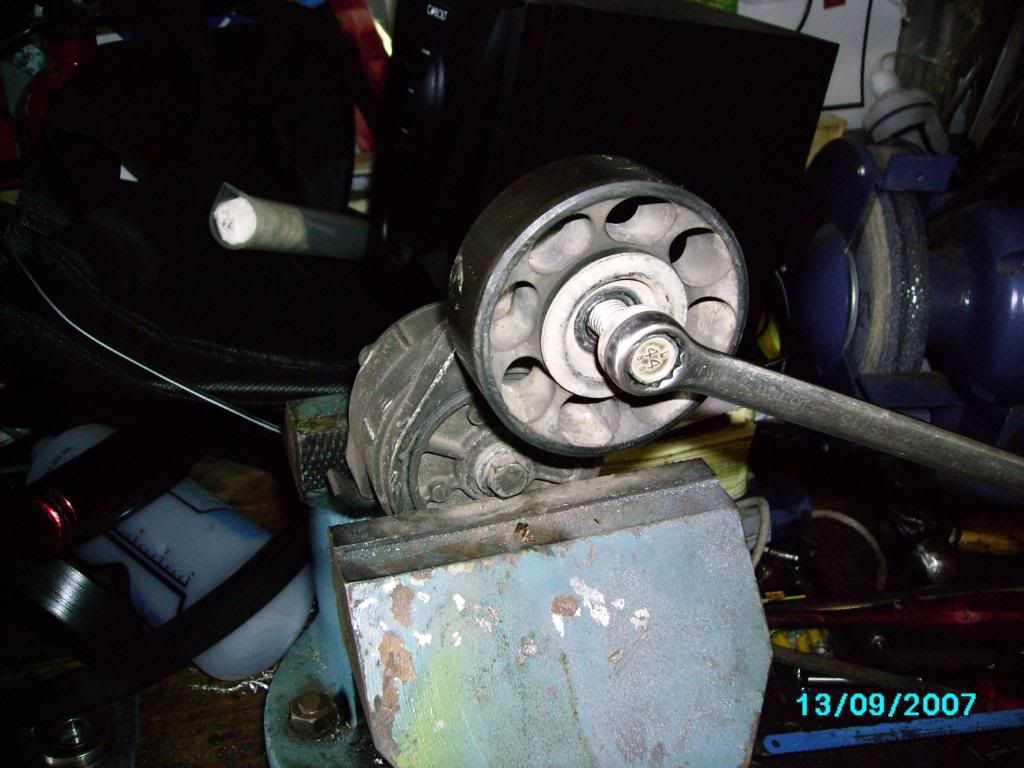
If you can get that undone (locktight!!) you will be able to remove the retaining circlip and tap out the bearing with a long punch
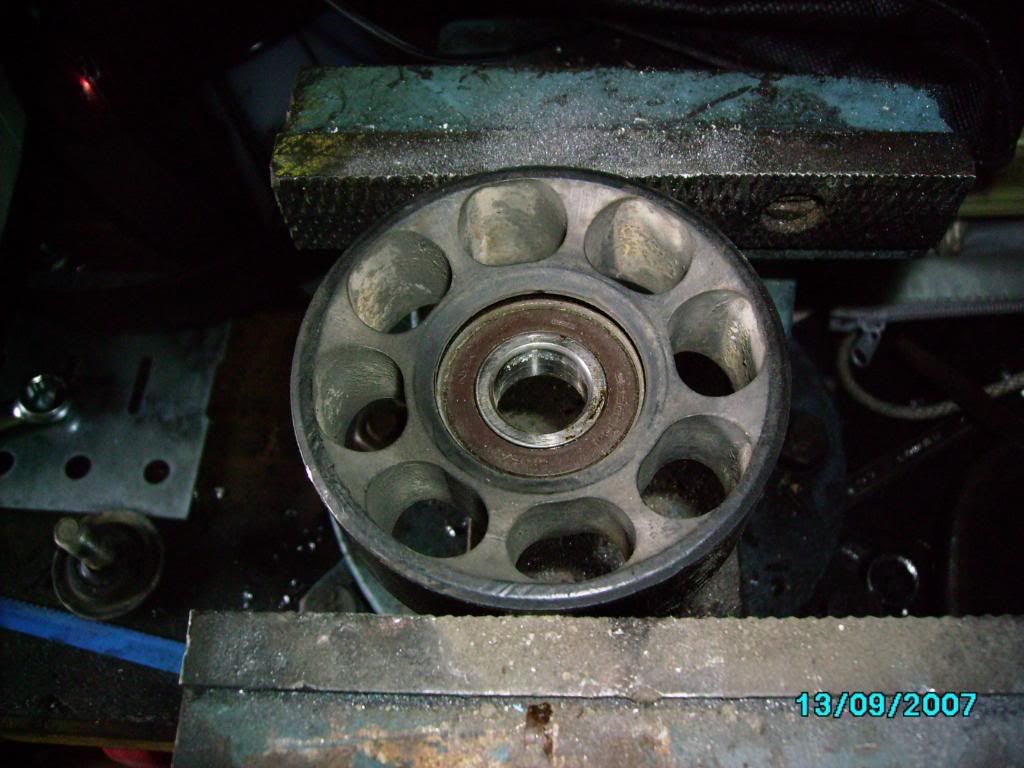
For all of your info its a 6203 bearing on this type of pulley and should be quite cheap to come by from any good bearing supplier.
I paid $5.00 Aud for mine and bolted her back together.
Final List of New Parts !
1 :New Front and Rear Main Seals
2 :New Rocker Cover Gaskets
3 :New Valley Cover and end Seals
4 :New Top and Bottom Radiator Hoses
5 :New Clutch Kit
6 :New Timing Case Gaskets
7 :New Exhaust Manifold Gaskets and Joining Gaskets
8 :New Heater Hoses
9 :New Fan Blades (Oops smashed it pulling out the motor)
So this has been quite time consuming but very rewarding. The disco is still running very well.
The 4.0 as supplied (now in my garage)
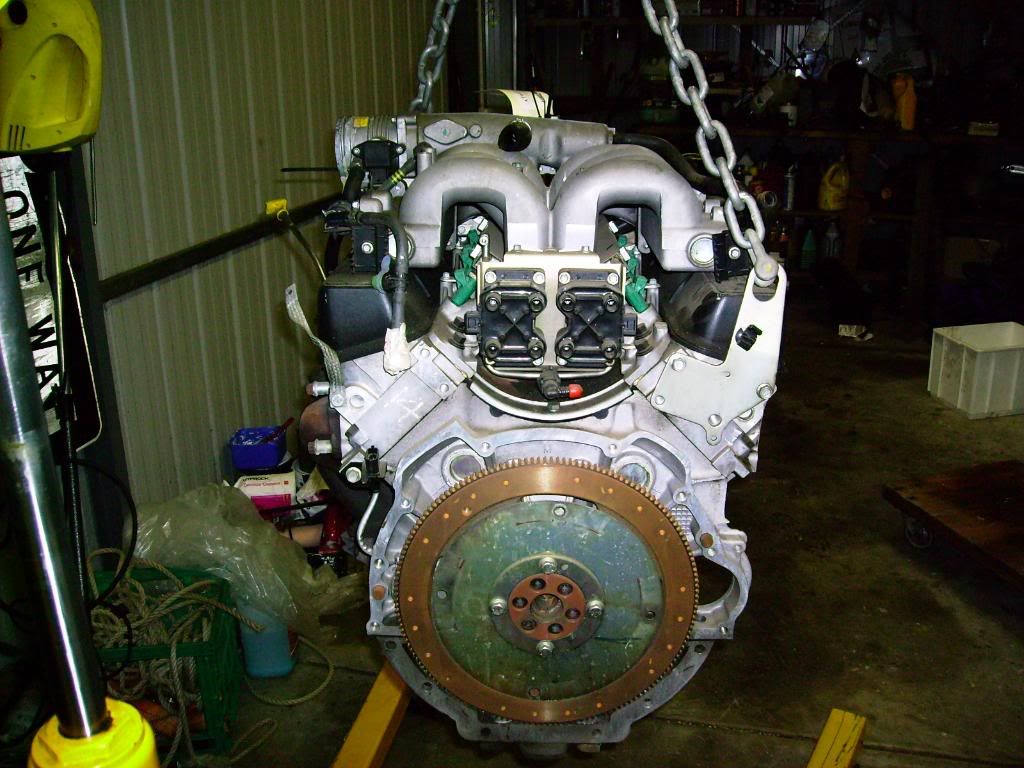
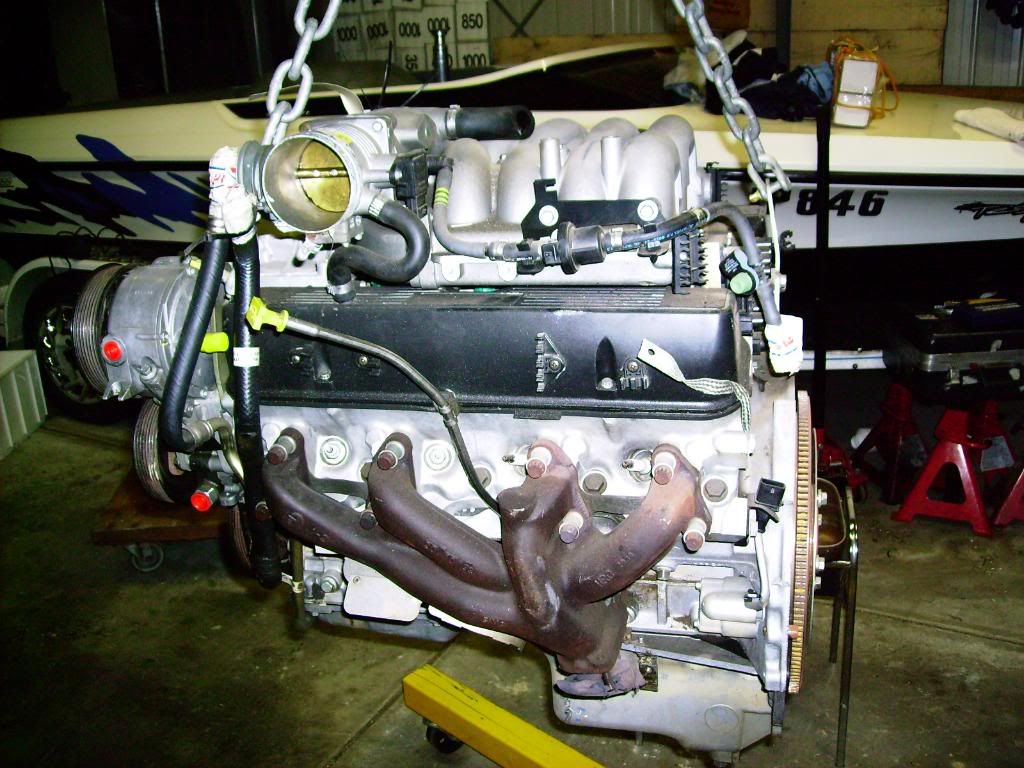


And completed ready to be fitted
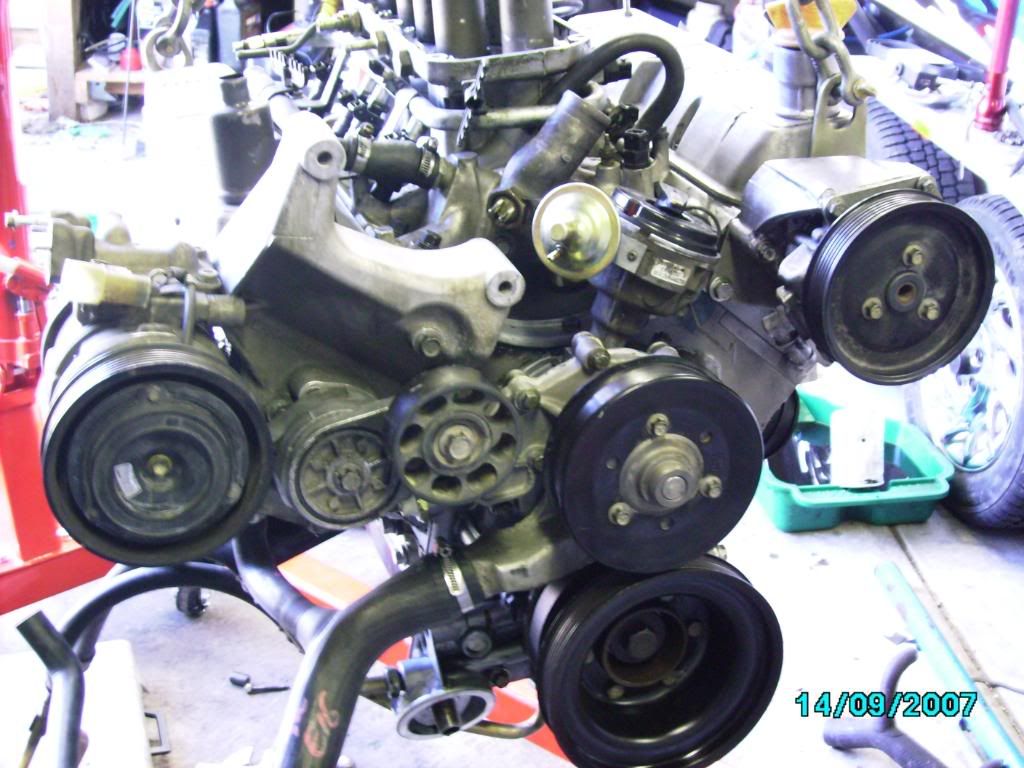
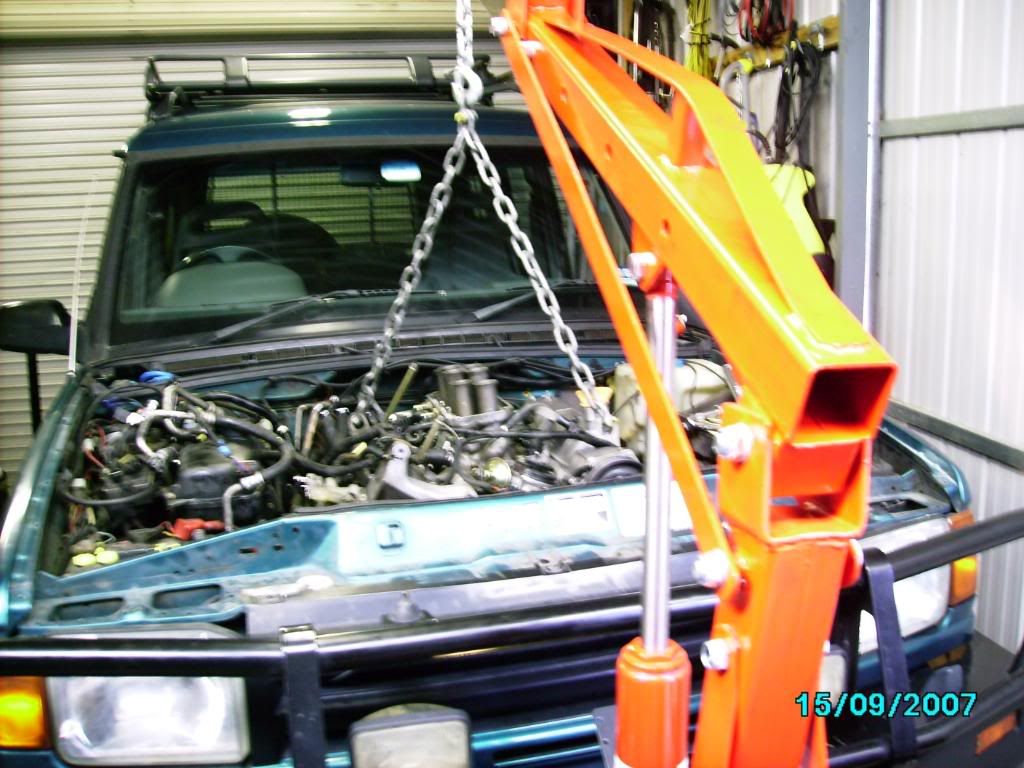
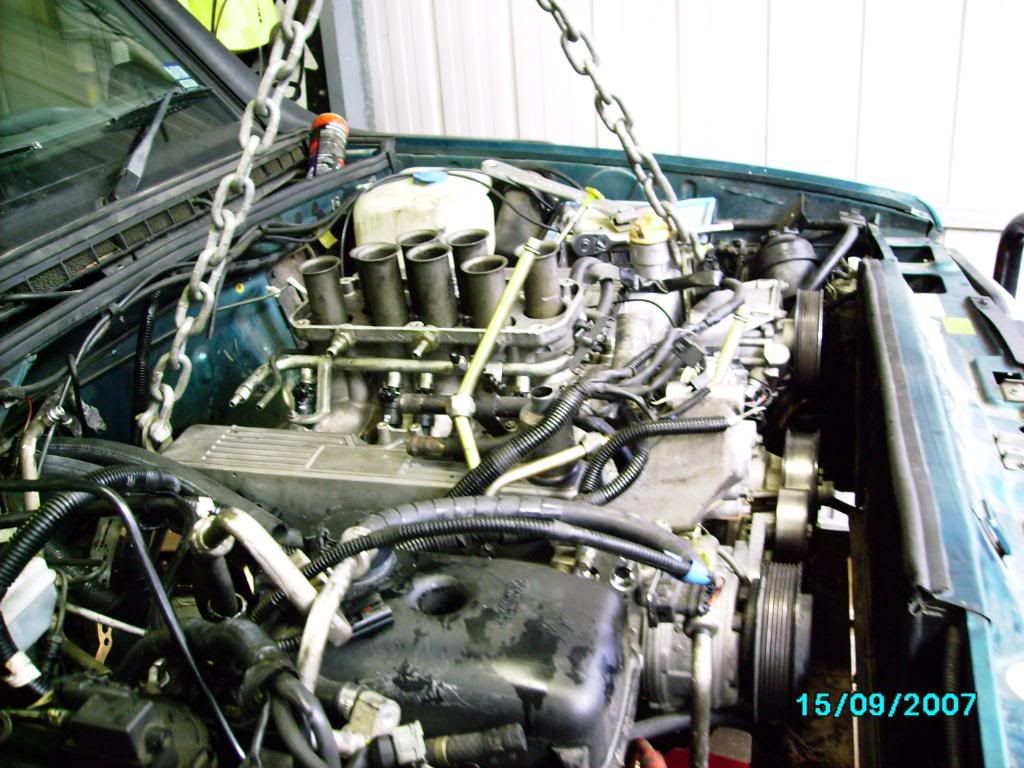
P.s Did this a while back Done around 40,000ks still goin strong! ( Hope this helps)
Well Its done,
But missing a few key things such as : oil leaks, boiling water, strange vacuum sounds, misfiring etc...
Its purring and to all that have a reasonable amount of skill with a spanner, this should be a pretty straight forward conversion.
To add salt to the wound we purchased this 4.0 motor from a wrecker in Sydney Australia on Ebay for $1500.00 Aud.... Its was out of a 2000 model car that was dismantled in 2004 and sat on a shelf till now because nobody liked it!
The following is only a guide of the conversion I did to my car (I'm not a mechanic so don't consider this to be advice or information from a Landrover professional, I'm just another enthusiast like you!)
The two engines look totally different when you first look at them but once you strip them down they are the same block.


I then moved through to stripping down the engines so i could remove the cam from the 3.9 and set it up in the 4.0 so i could set up the missing distributer.
Remembering for those who don't own a Series 2 4.0 they don't run a distributer, so we need to swap the cam shafts and the timing case cover from the 3.9 to the 4.0 as they supply the drive and place to put the dizzy.


Next PART,
The cam swap from the 3.9 to the 4.0 block is a slip out slip in affair (pun intended)but great care should be taken in timing of the two engines to the same (tdc) position


As the guide books all explain, All the rocker arms and the push rods should be removed in order and marked in order so they can be refitted in the position that they came from. (I laid them all out on this specialised form sheet from the recycling bin!)

I placed the two engines side by side to make things easier and then swapped the cam over.


Great care should be taken with the cam swap as both engines should be timed to the same position so the cams, chains and sprockets can be swapped with minimal problems
I was also advised that the alloy sump from the 4.0 motor was not usable as the clearances under the motor may be an issue.

Both rocker covers were also swapped out as these had all sorts of hoses and fittings that I couldn't use.

So I trimmed off the small dowel on the crankshaft

I fitted a new rear main seal take note of the direction


And the flywheel and clutch, note that there is a bronze bush inside the end of the crankshaft that you need to put into the end of your new crank if you have a manual gearbox or (stick shift) as it is the bearing for the end of the gearbox spigot or shaft or the pointy bit in the picture

Whoops I didn’t get a pic of the flywheel before I fitted the new clutch! It is tapped into the end of the crankshaft and can be seen though the hole in the pressure plate.

With all of this going well I moved back to the front of the motor to find where the mysterious spacer made of unobtanium goes…!
Turns out that the crankshaft on these 4.0 motors is a little longer about 20mm longer at the front of the motor, so when I tried to torque up the retaining bolt for the harmonic balancer it wouldn't pull down it needed a spacer!!!(there you go!).
You can see in the picture that the shaft is way longer than the shoulder in the inside of the pulley

I could of got in the car and driven to a mates factory and spun up a spacer that would suit but I got to thinking, what else amongst all this left over crap fits on this shaft.


Yep so took measurements ( in this case 18mm) so the spacer would end up being about 2mm longer than the shaft and proceeded to trim and file my own!


So I put it in and torqued up the bolt hey presto home made spacer!

When I was bolting back on all of the front bracket for the aircon..etc I noticed that the belt tensioner was also a little rattley (tired bearing)
You guys probably know all about this one but I'll show it for the newbies.
If you mount the contraption in a vice you can get enough leverage to undo the main bolt through the tensioner pulley

If you can get that undone (locktight!!) you will be able to remove the retaining circlip and tap out the bearing with a long punch

For all of your info its a 6203 bearing on this type of pulley and should be quite cheap to come by from any good bearing supplier.
I paid $5.00 Aud for mine and bolted her back together.
Final List of New Parts !
1 :New Front and Rear Main Seals
2 :New Rocker Cover Gaskets
3 :New Valley Cover and end Seals
4 :New Top and Bottom Radiator Hoses
5 :New Clutch Kit
6 :New Timing Case Gaskets
7 :New Exhaust Manifold Gaskets and Joining Gaskets
8 :New Heater Hoses
9 :New Fan Blades (Oops smashed it pulling out the motor)
So this has been quite time consuming but very rewarding. The disco is still running very well.
The 4.0 as supplied (now in my garage)


And completed ready to be fitted


P.s Did this a while back Done around 40,000ks still goin strong! ( Hope this helps)