Hilux CT20 Turbo oil seal replacement / Rebuild - How To
Posted: Wed Dec 21, 2011 9:06 pm
A little over a year ago now I installed a CT20 Turbo from an early model 2L-T motor onto my 3L powered Hilux.
As the Turbo was so old it was leaking oil past the compressor wheel quite badly. This got me googling CT20 oil seal replacement which turned up a few results - mostly pointing to either replacing the Turbo with a Chinese copy or installing an ebay seal/rebuild kit. I decided to go the ebay kit route which cost me around $70 for the kit and a further $110 odd for ballancing the wheel shaft.
Over a year later and it's still going strong so I've decided to write up what I did. I should point out I had never touched a Turbo before so bear that in mind when following what I did. There was one problem I encountered which I put down to amatuer error (more on that later) but apart from that it wasn't a very hard task.
The first thing to point out is that my Turbo was an older non water cooled model that had a 'Carbon' seal. It was a 54030 model (identified by the number cast into the flange where it mounts to the exhaust manifold.
By installing the kit from ebay I effectivley changed it to a 'Dynamic' seal - see the links below for the difference.
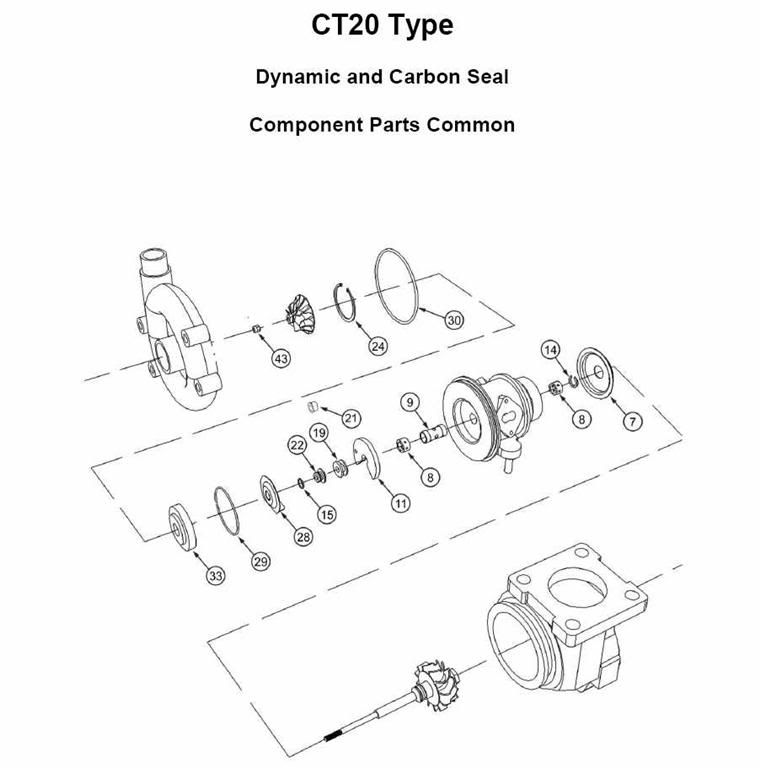
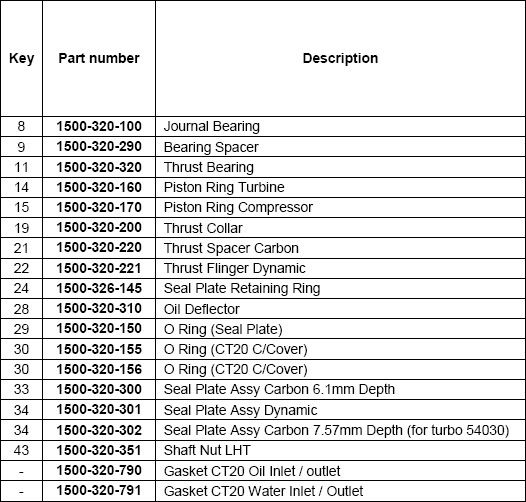
I downloaded a PDF from Melett Turbo's that had the exploded view of the Turbo and listed the parts. It can be found at the link below:
http://www.performancesmotorsport.com/t ... a_CT20.pdf
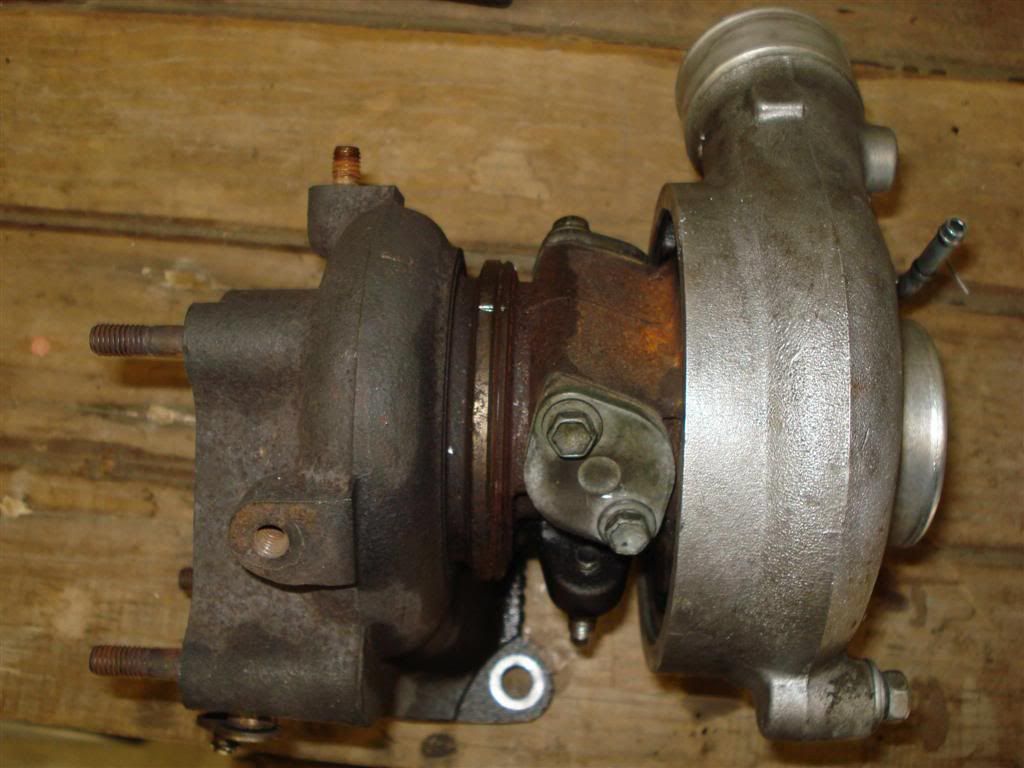
Here's my turbo before starting
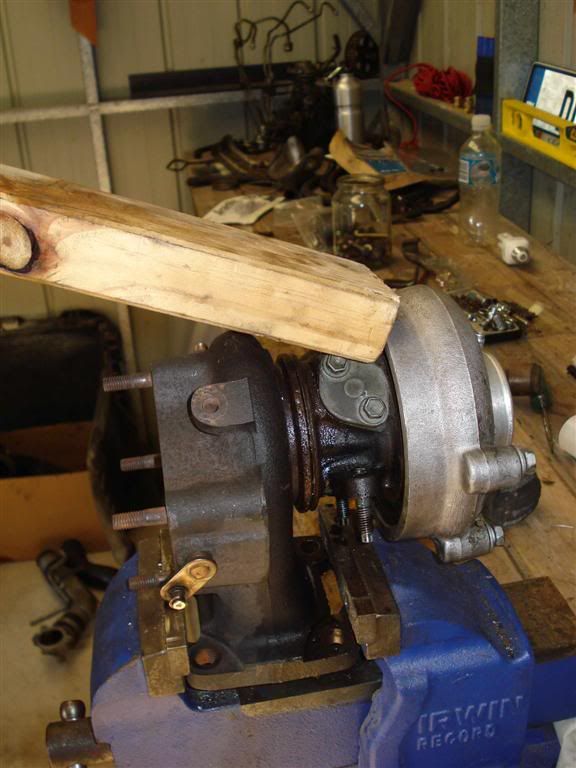
The first challenge (the only real challenge I found) is getting the housing apart. Unless it's recently been apart it isn't going to come apart easily.
You obviously need to remove the collar that holds the two parts together. I then attempted to use wd40 to help get it apart be hand but that was never going to work. I marked the housing so I would be able to put it back in the same position but there are locating pins built in for this.
Care is needed if you use the method I did - a sudden separation could damage the shaft or wheels.
That said mine certainly wasn't a quick seperation. I mounted mine in a vice and used a block of wood and hammer to tap it apart - moving the wood around to get it apart evenly to avoid hitting the wheels inside the housing.
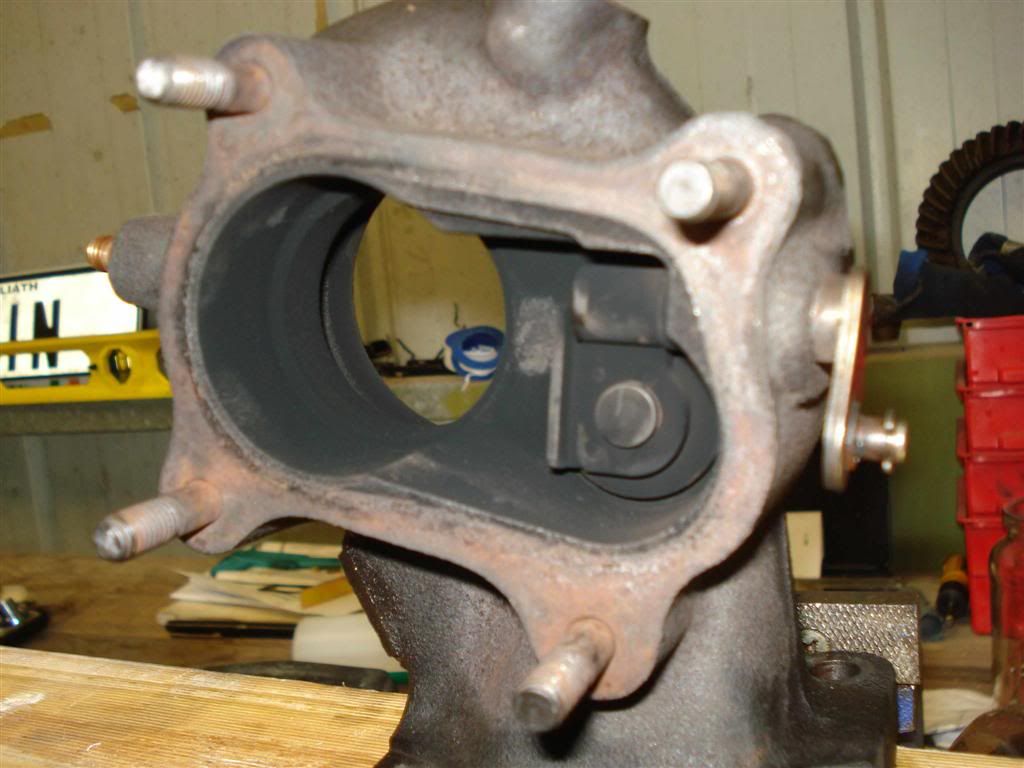
Safely apart - exhaust housing and wastegate
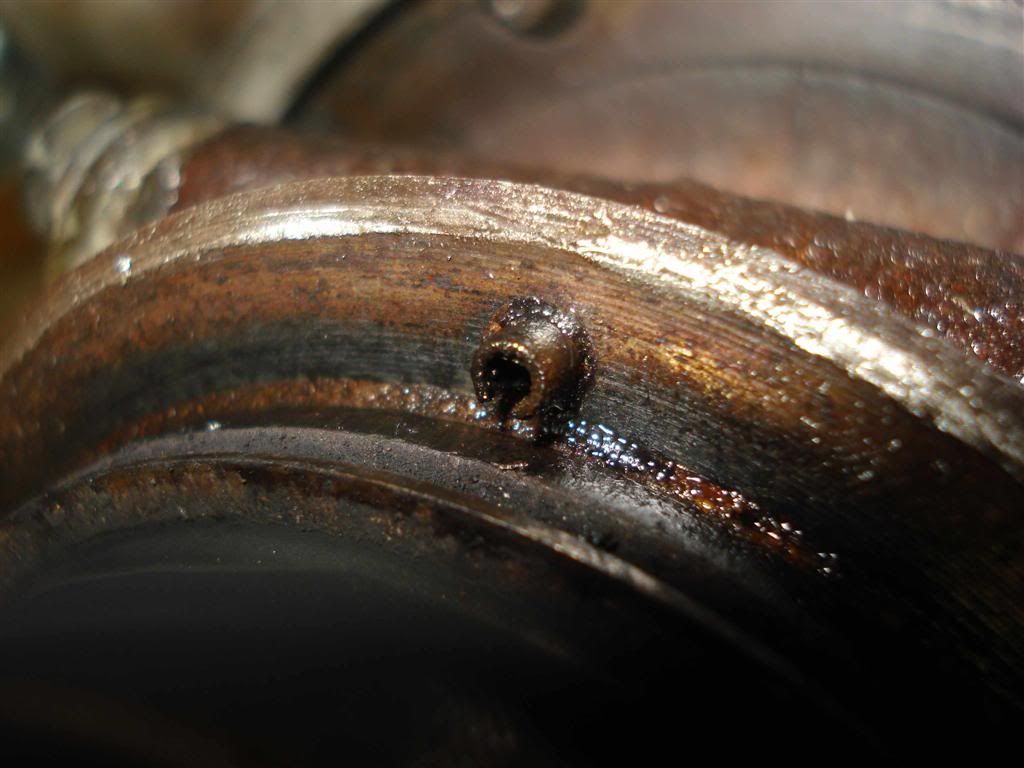
The locating pin
Compressor side with the rest of the Turbo still attached. You can see the snap ring that holds the compressor housing on.
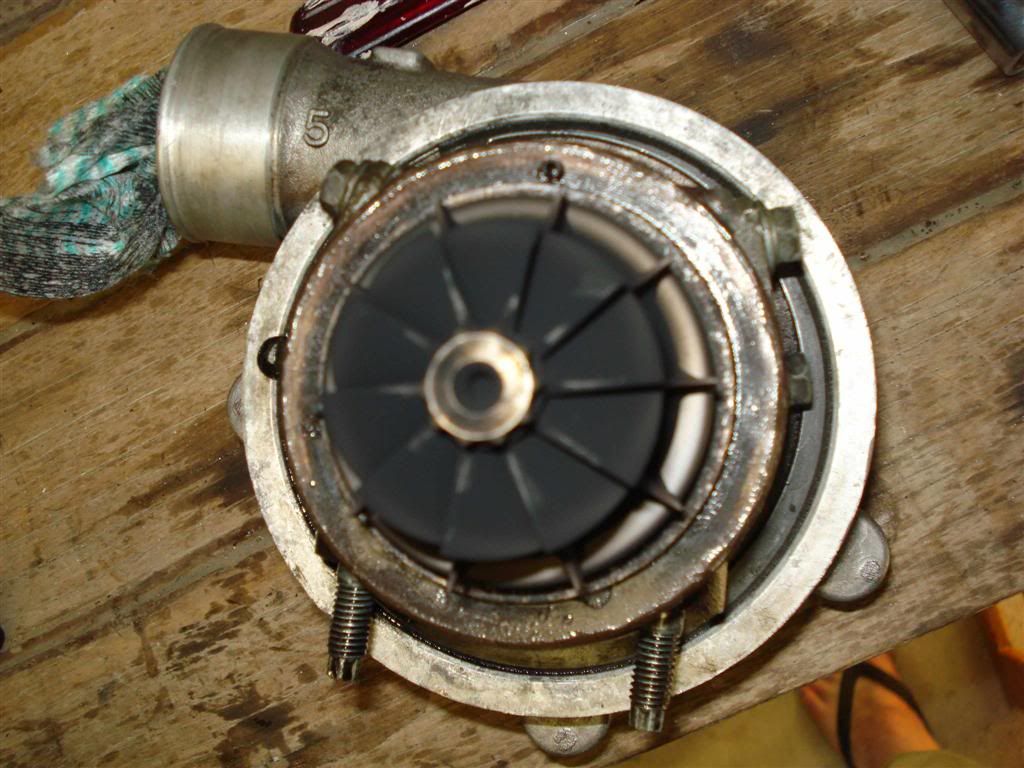
The next step is to remove the compressor housing from the central housing. This requires a fairly beefy snap ring removal tool as it's a big snap ring the diameter of the alloy housing opening shown below. You can see the notch that allows you to get the edge of the snap ring out.
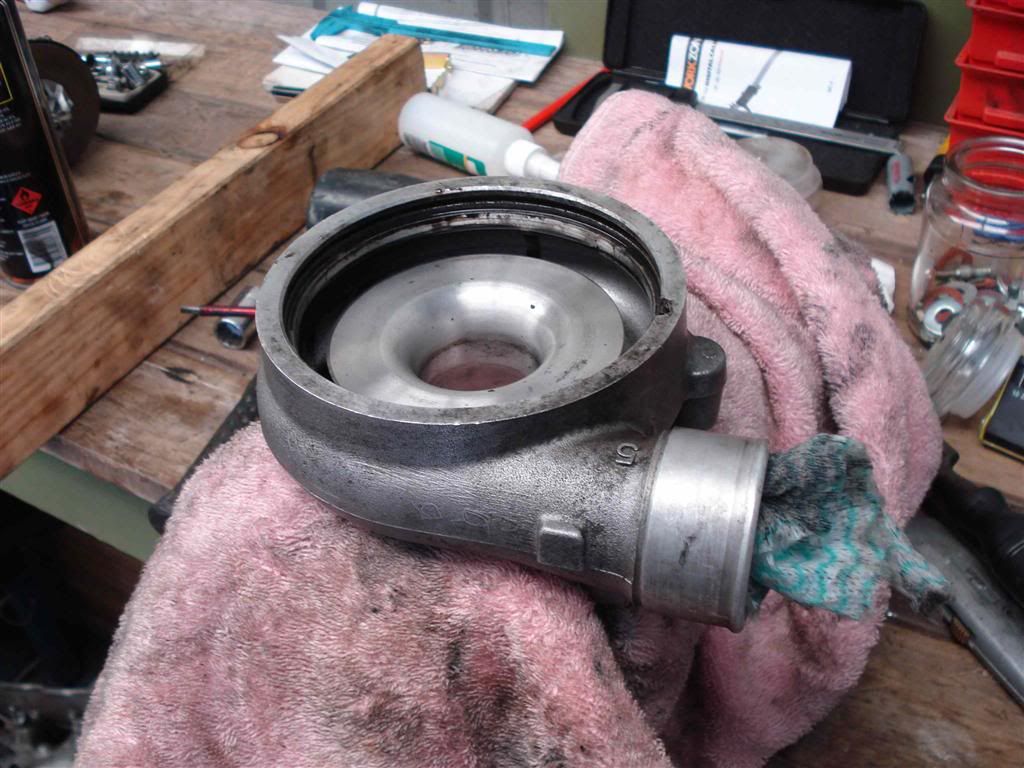
Here it is once the compressor housing is off
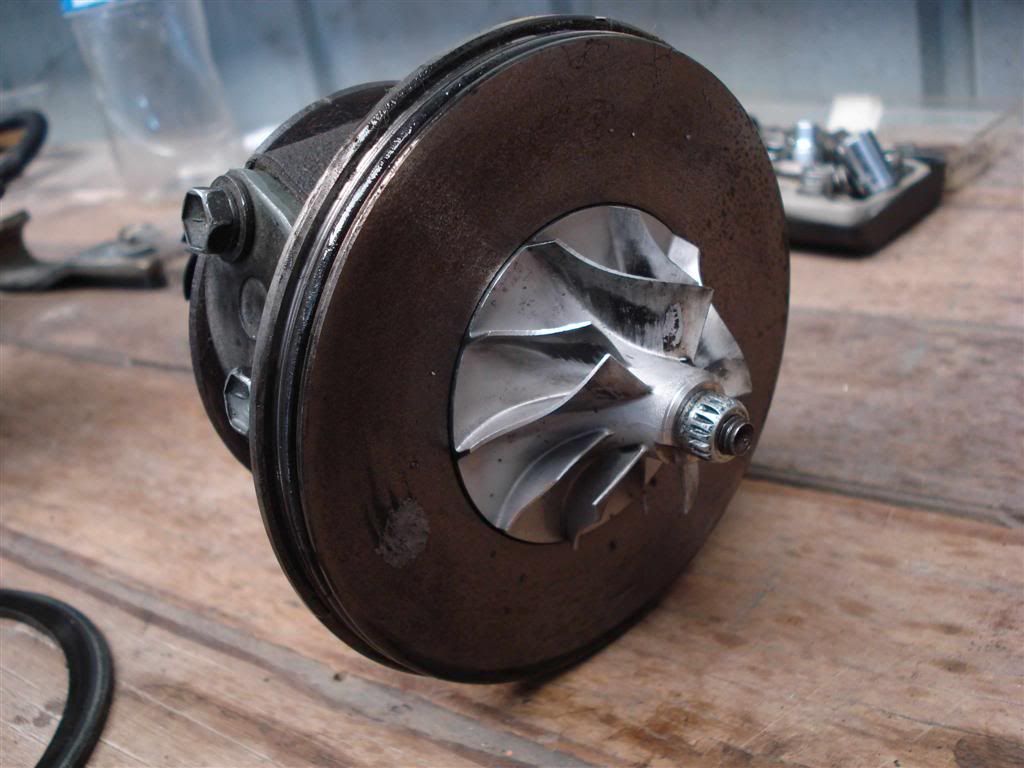
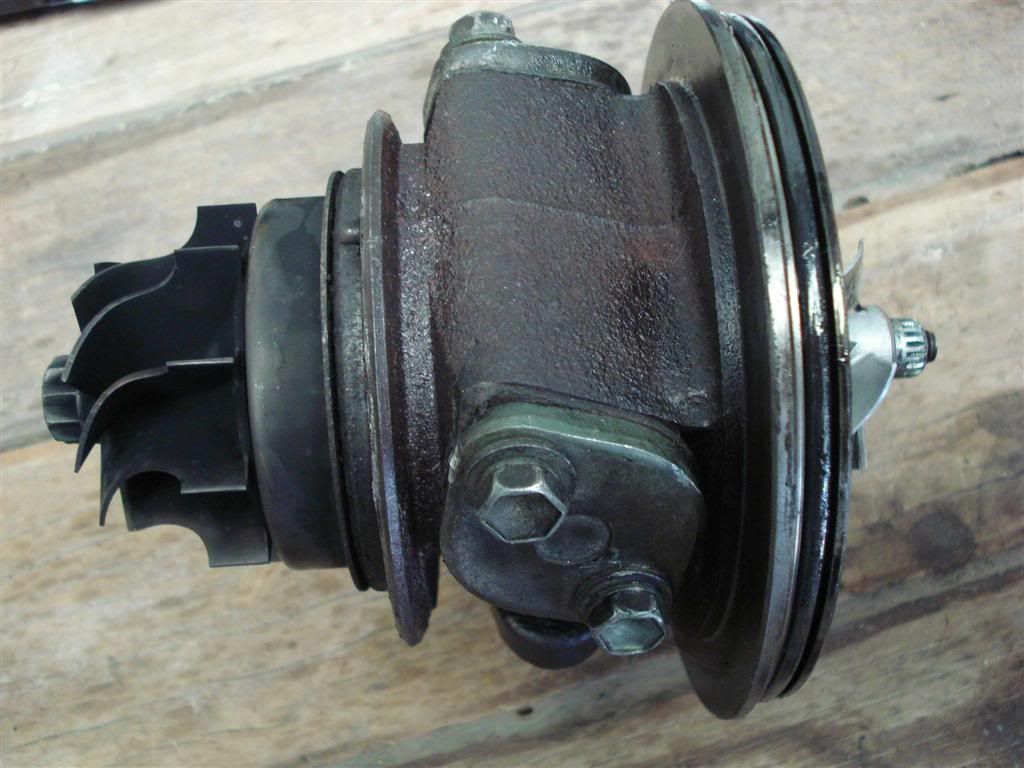
Now to remove the compressor wheel so you can disassemble the rest of the Turbo.
This would be the point where knowing what you are doing is important. I should remind you that I was going off google research so if there is a better way to go I'm sure someone will comment.
You should mark the nut, compressor wheel and shaft before undoing so you now where to align and torque it back to. This is important for balance.
From what I read to balance it properly it needs to taken in to be balanced with the new items from the kit which is what I did. Others on the net seemed to suggest that by marking and reinstallig to the marks that would be good enough.
I took mine to MTQ in Acacia Ridge and it cost around $110 I think (a year ago).
One thing to note is that the nut holding the compressor wheel on is reverse thread!
I found mounting it in a vice as below the easiest way to do it.
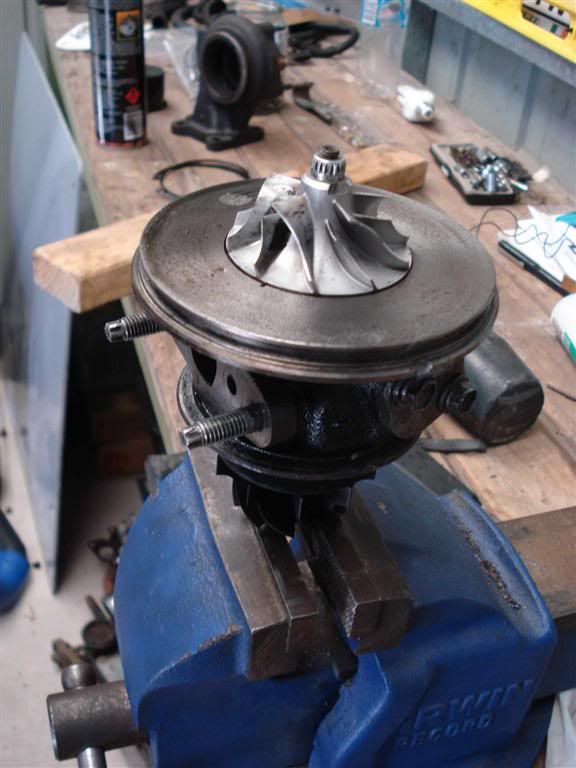
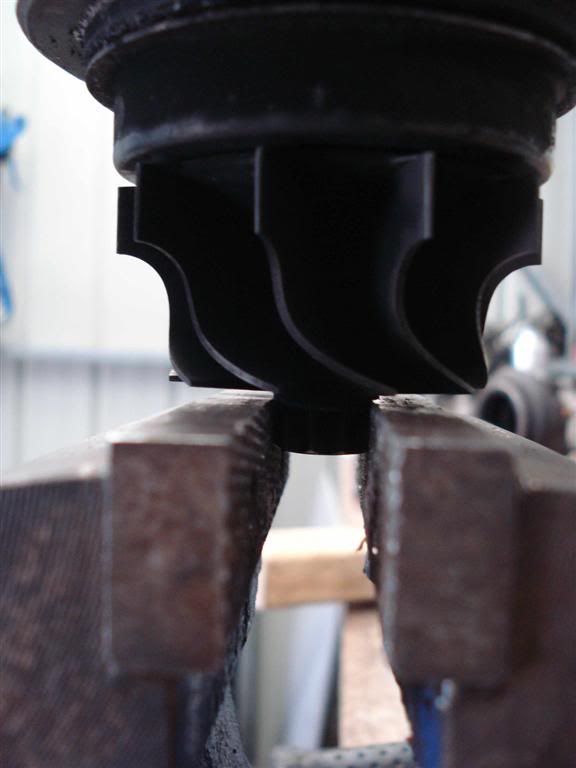
Once the compressor wheel is off you can see the seal plate (Carbon in my case), snap ring that holds it in, and the oil that was leaking passed it.
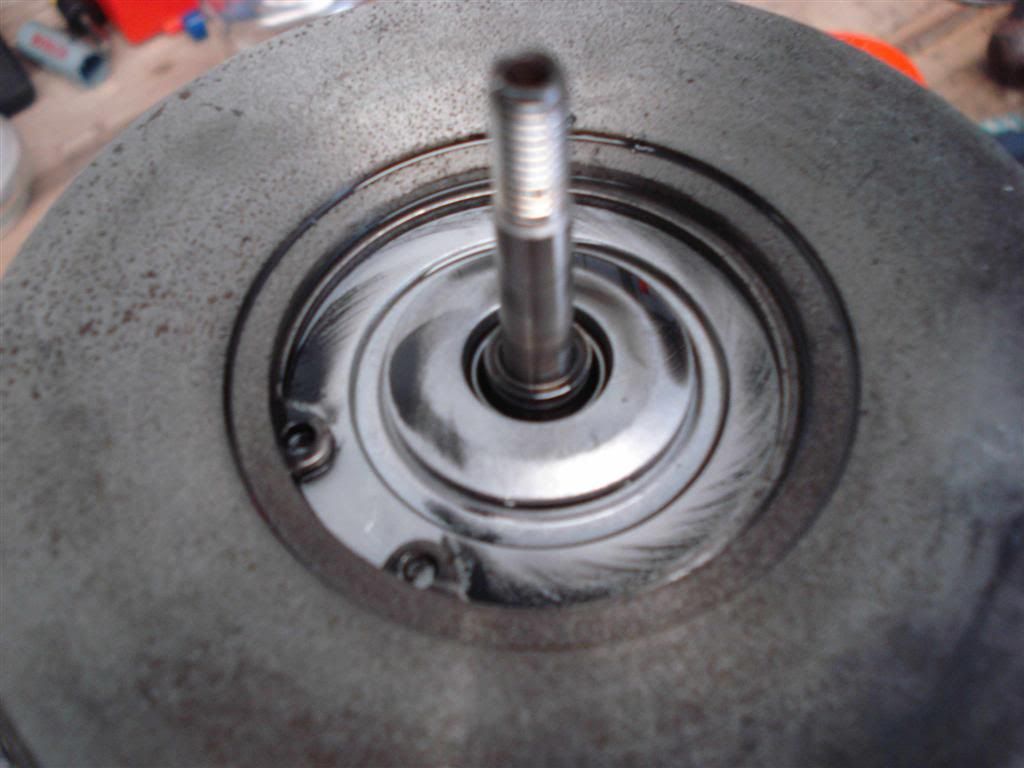
Seal plate removed
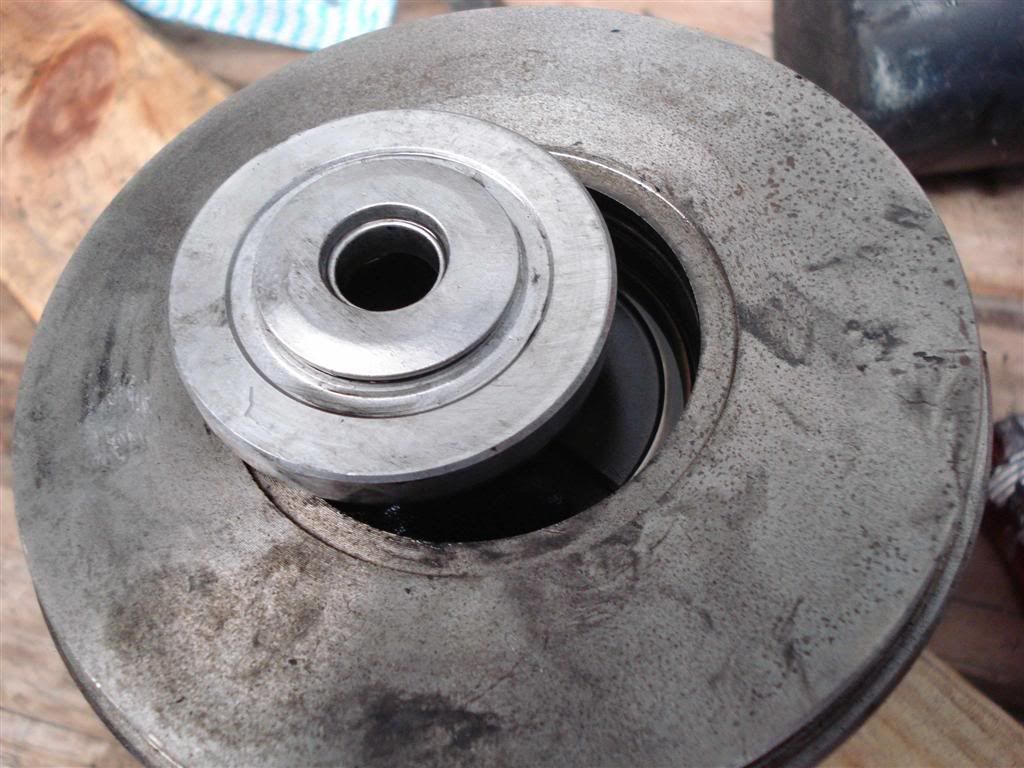
Old carbon seal
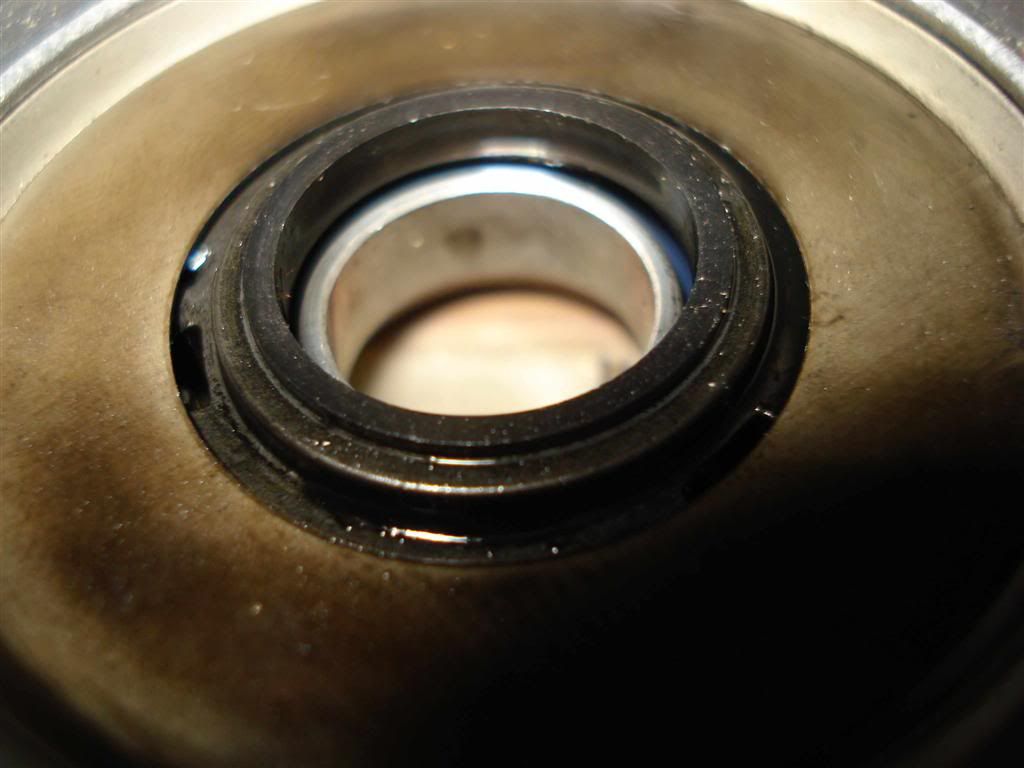
Thrust bearing below the seal plate
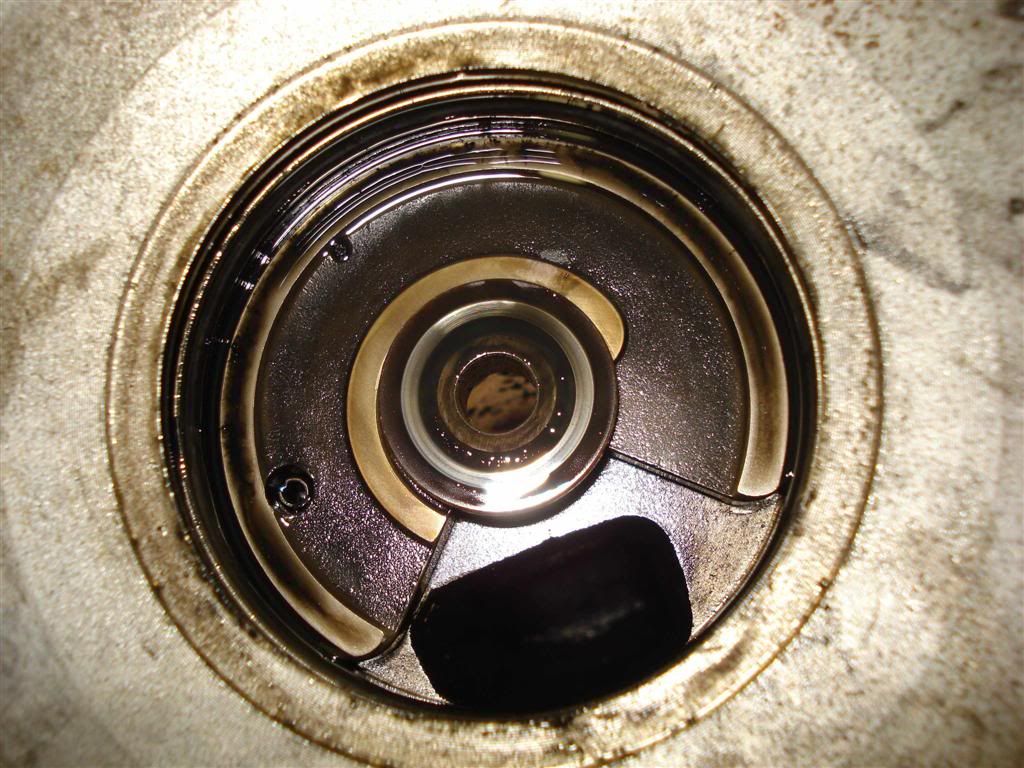
Journal bearings and spacers after lifting the central housing off the shaft
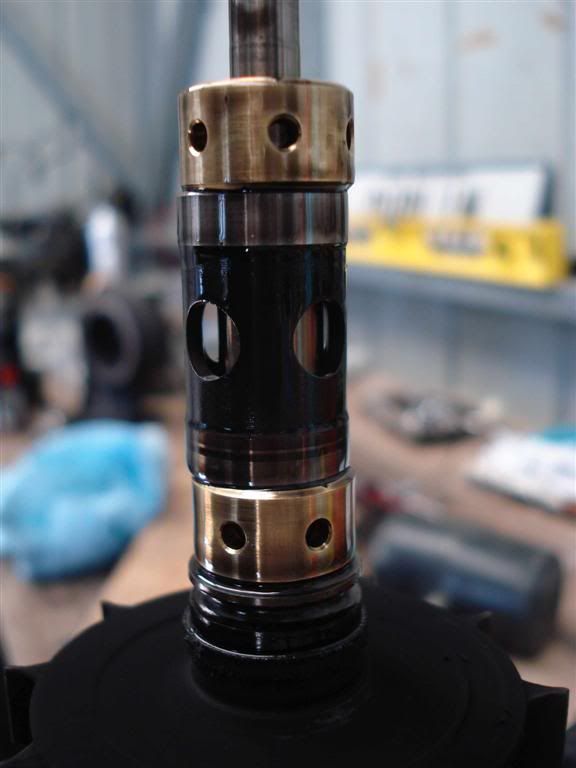
Fully disassembled
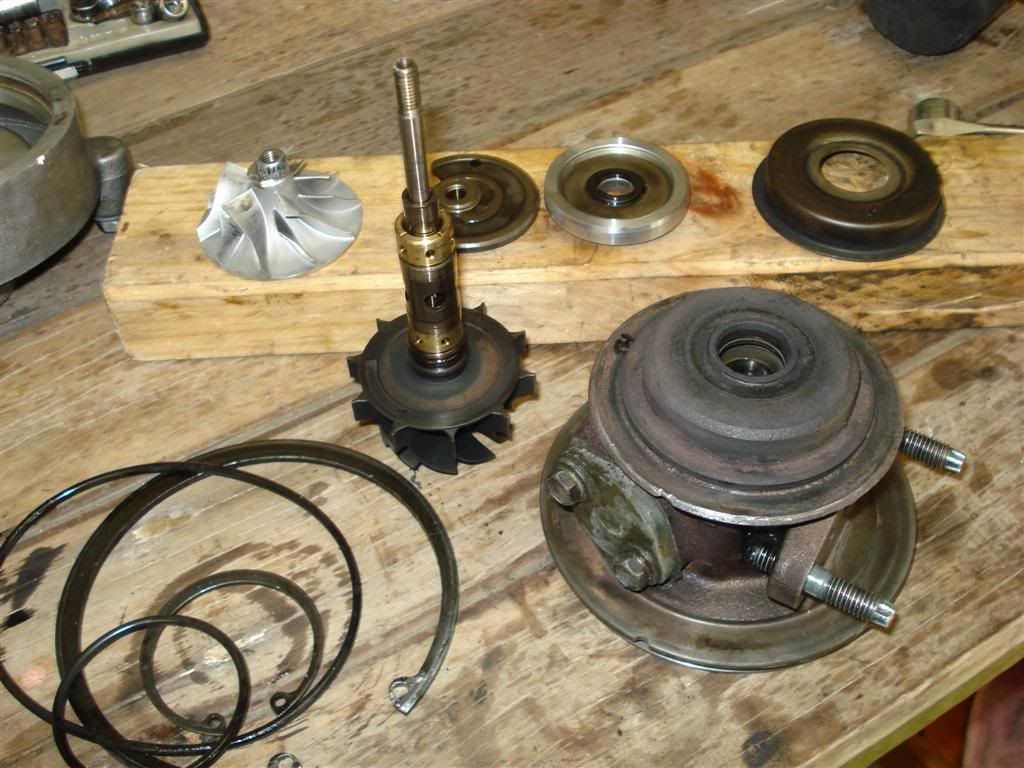
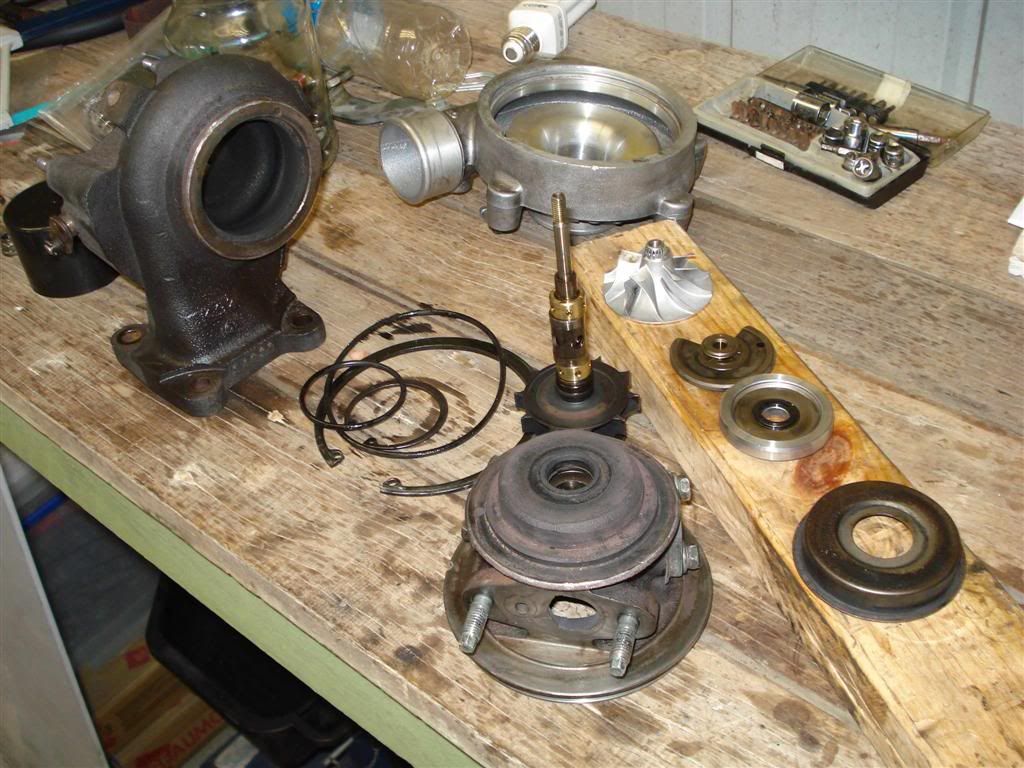
Old Parts
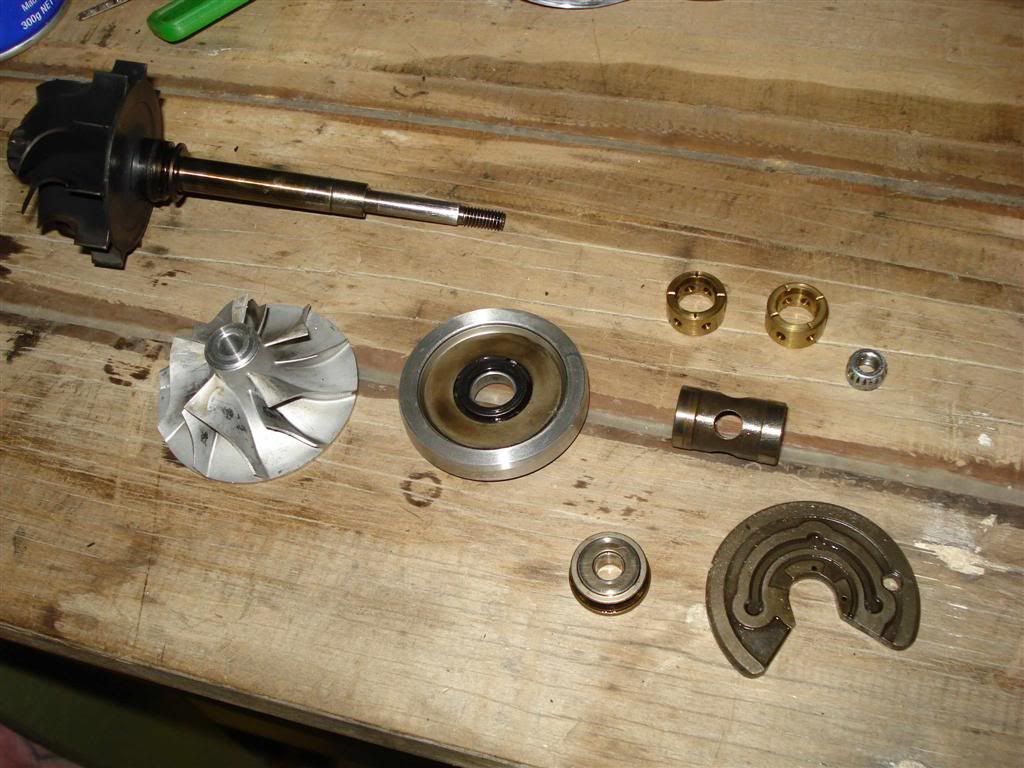
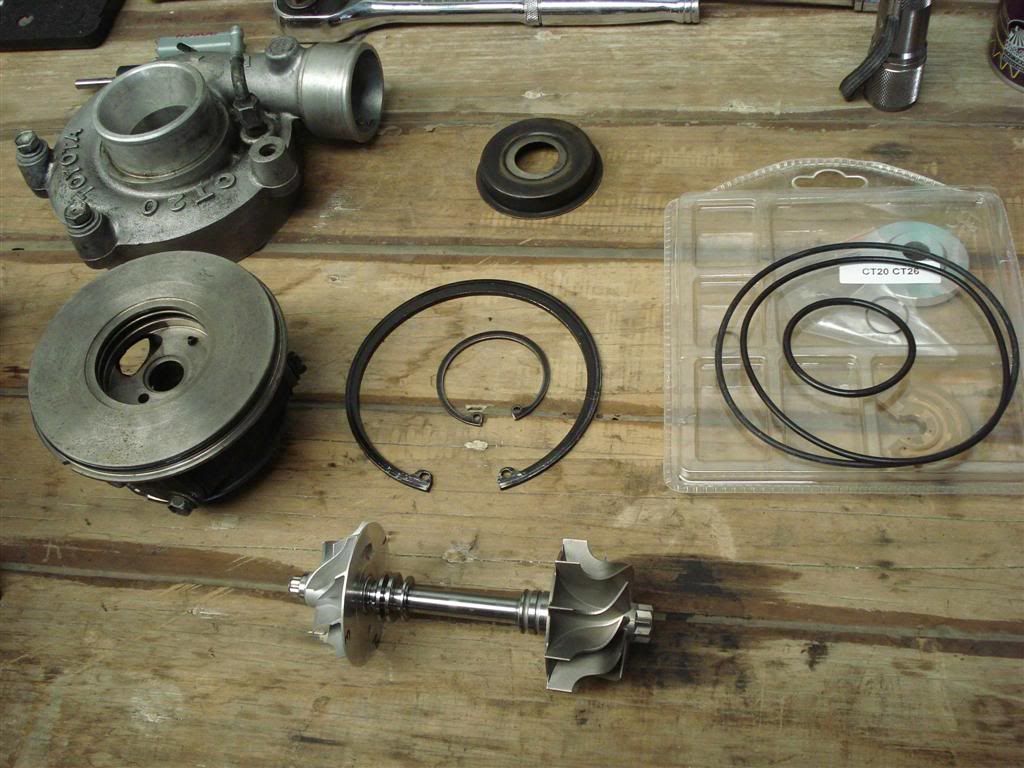
New kit parts and balanced shaft
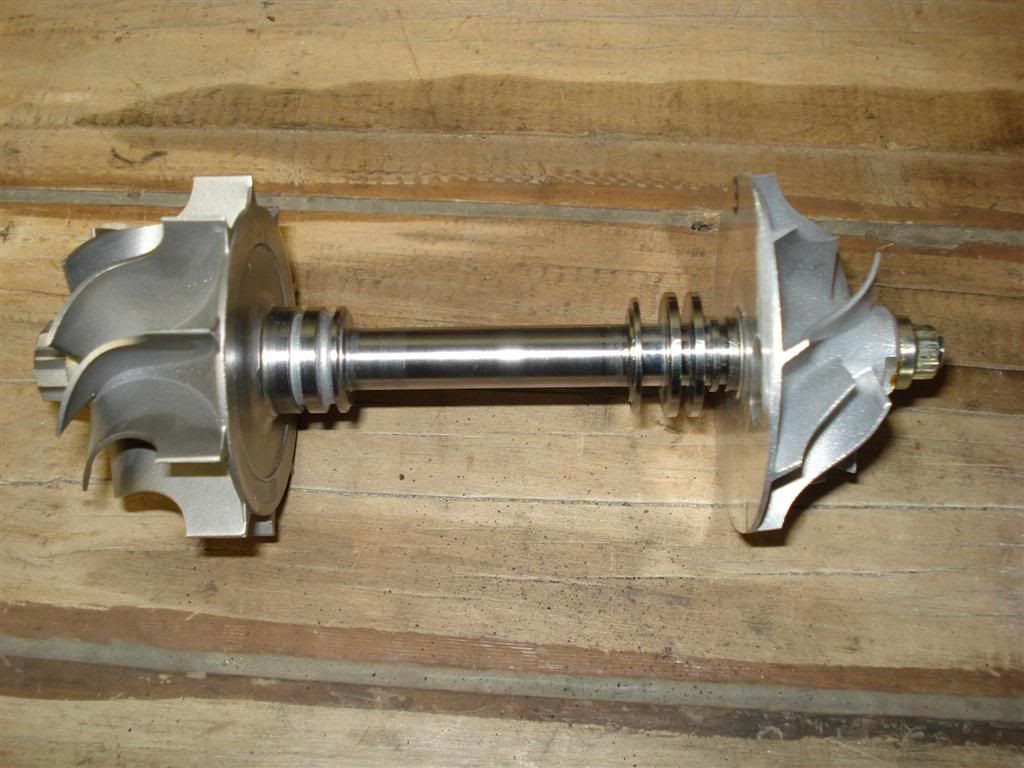
Shaft after balancing
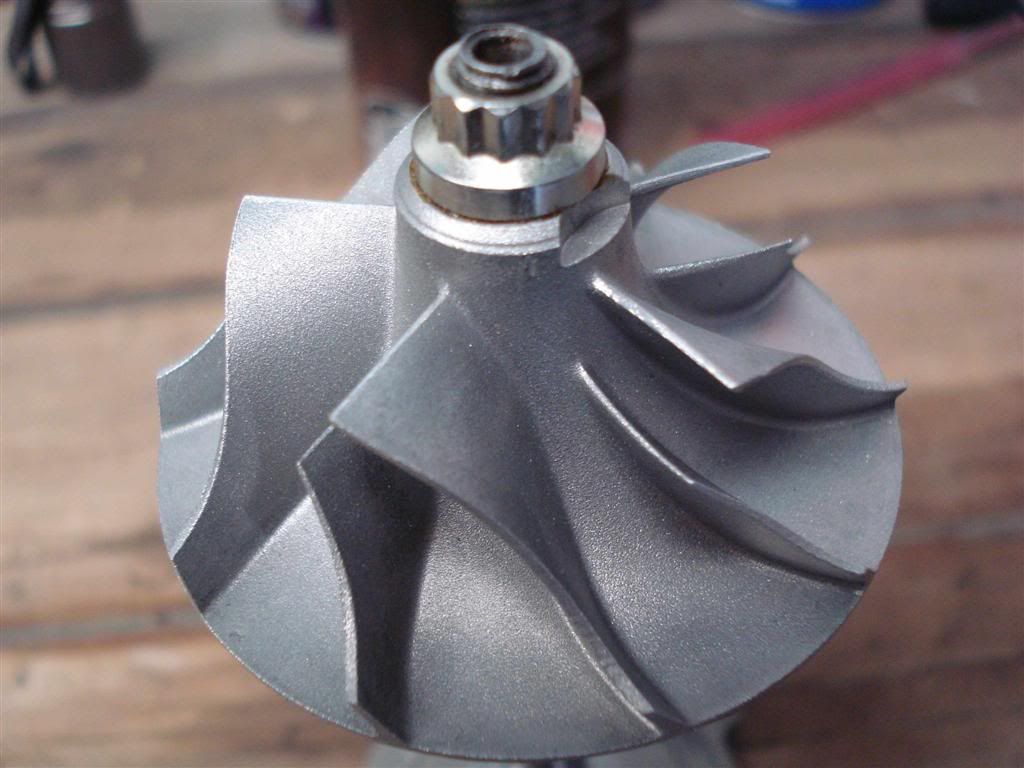
Marks on the wheel, nut and shaft to guide reassembly - all parts on the shaft were marked
Reassembly - this is where my mistake occured.
The piston ring (shown below) at the turbine wheel effectively holds the shaft in position inside the turbo.
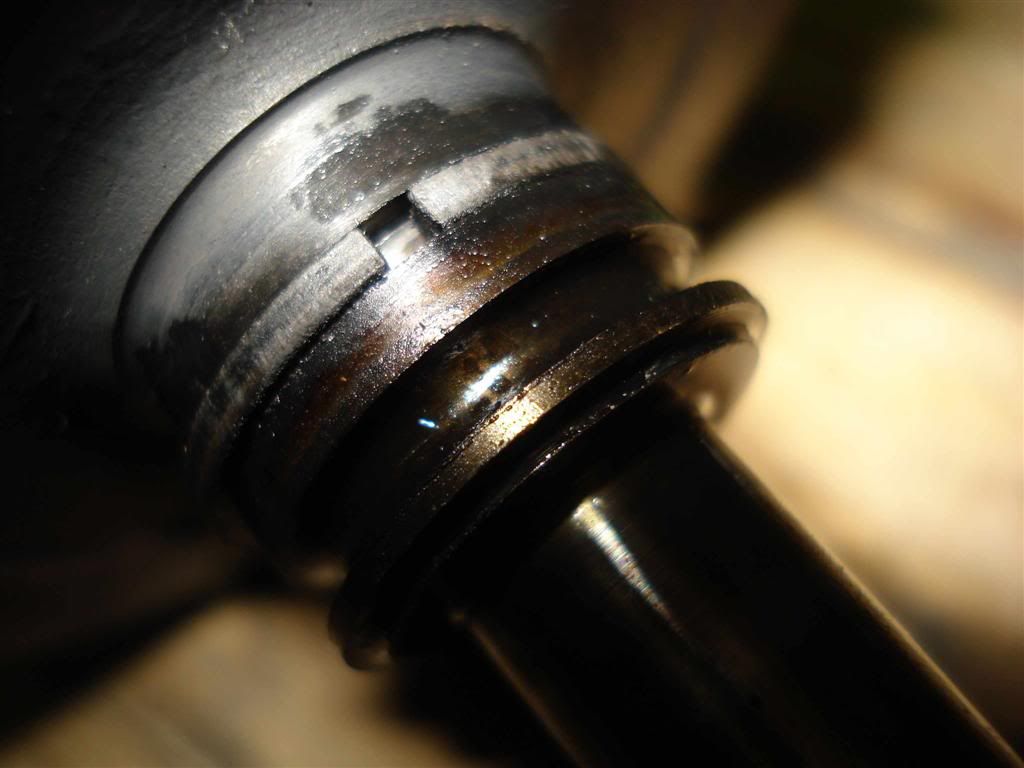
When I installed mine it wasn't spread out enough to fully lock into the groove it mates with on the housing. This would either be because it came like that and I didn't notice or it got compressed during my reassembling of the turbo.
Either way it meantthat under boost my compressor wheel pushed forward into the alloy housing making a rather loud scraping noise.
Below is the resulting damage.
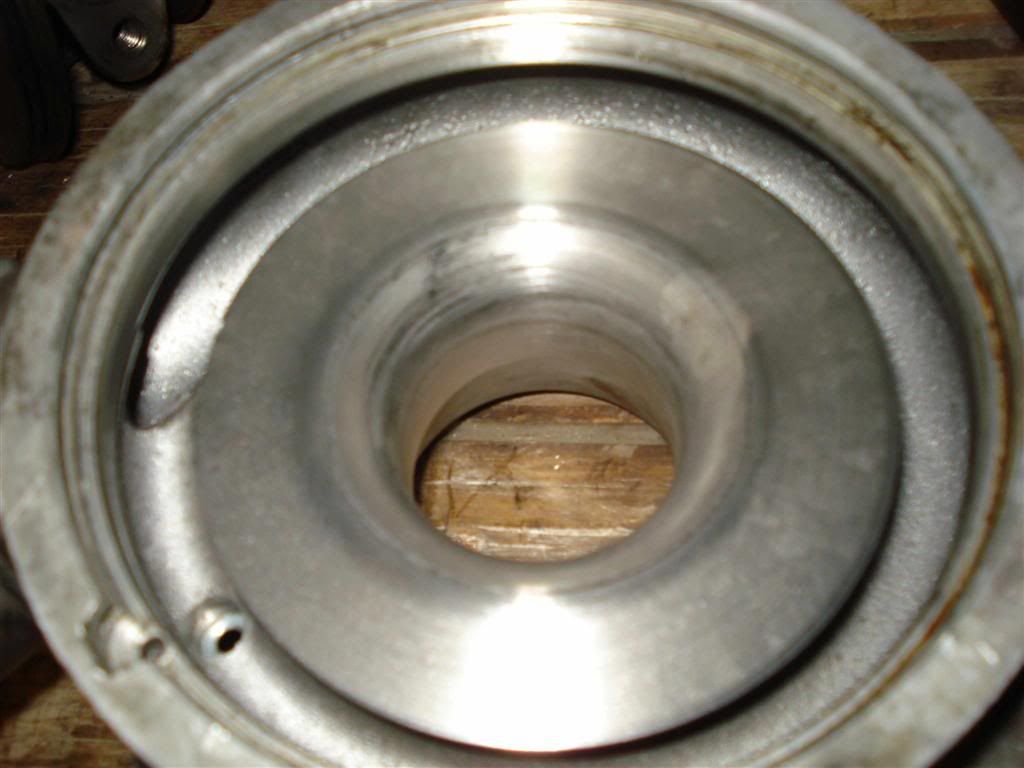
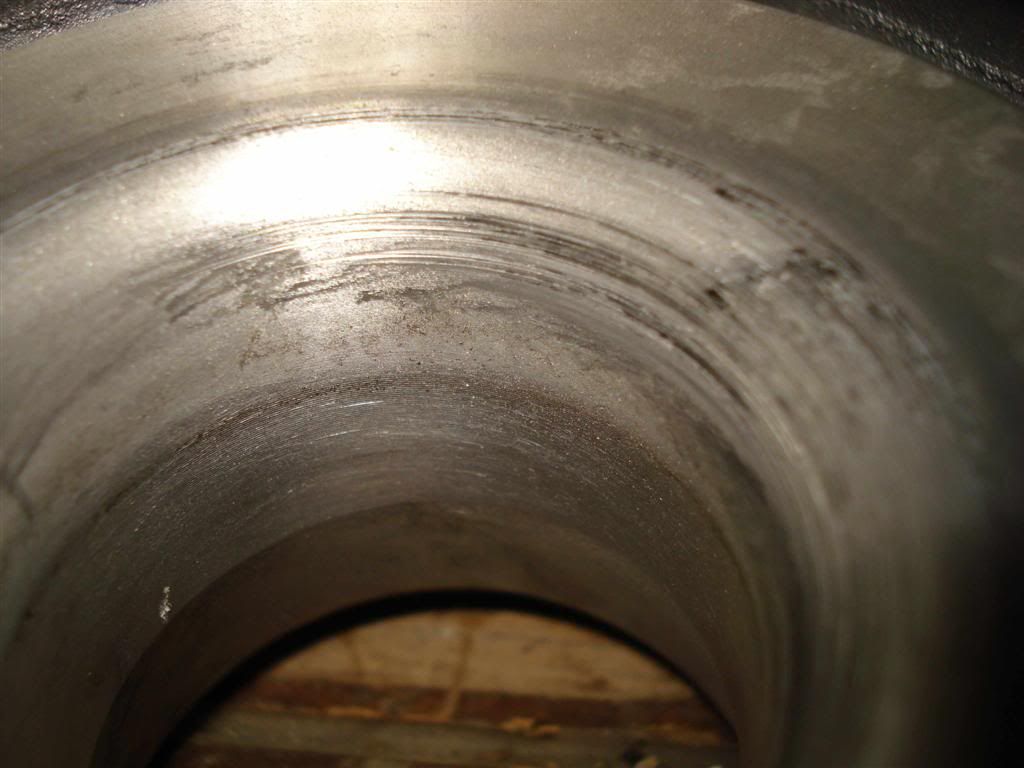
There goes my $110 balance...
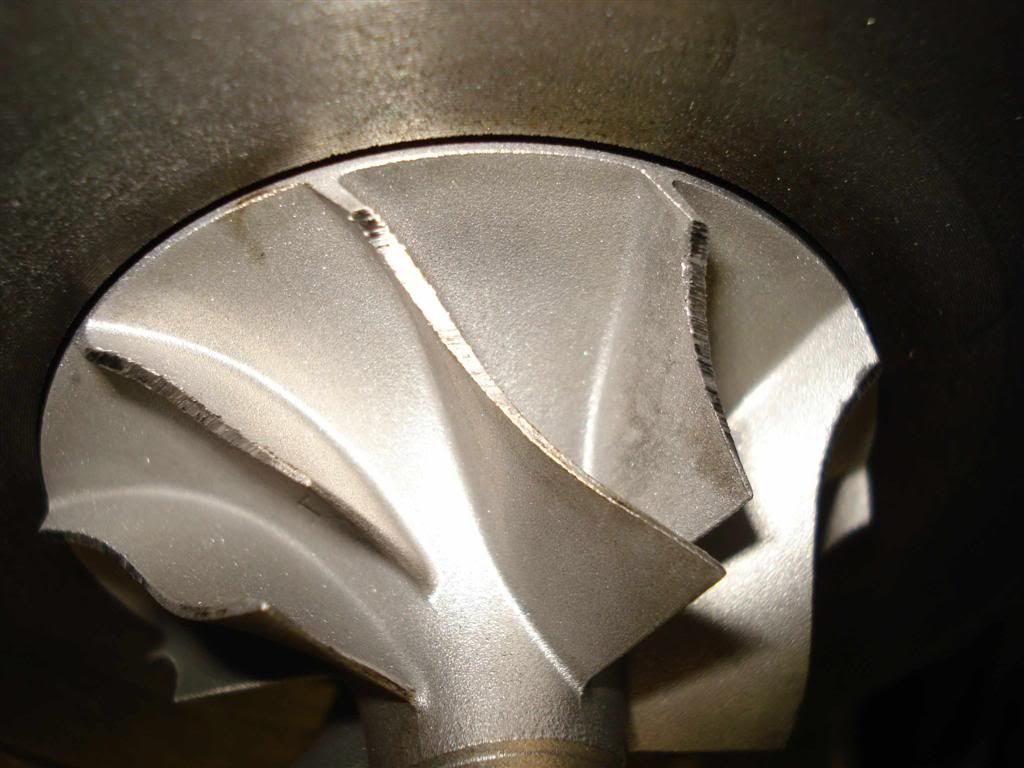
Anyway back to the reassembly after mounting the piston ring you snap the shaft back into the center housing, Install the journal bearings, spacers, thrust bearing seal plate and o-rings then snap rings - essentially the reverse order of disassembly which is fairly ovious once you've pulled it down.
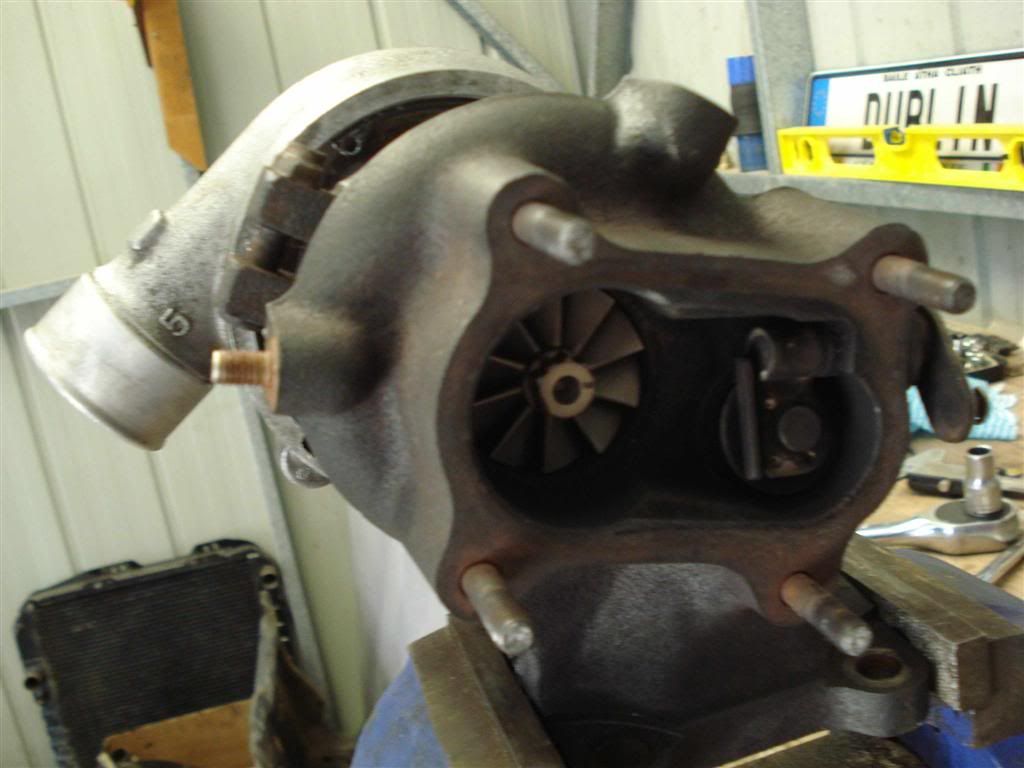
Here's mine mostly reassembled.
In summary:
Apart from my one, admittidly fairly major, stuff up the rebuild went well. The turbo has been running fine for a year now and if it fails I'll look for another or a chinese ebay special. It doesn't leak oil into the inlet like it used to which was the main reason to replace the seals.
As the Turbo was so old it was leaking oil past the compressor wheel quite badly. This got me googling CT20 oil seal replacement which turned up a few results - mostly pointing to either replacing the Turbo with a Chinese copy or installing an ebay seal/rebuild kit. I decided to go the ebay kit route which cost me around $70 for the kit and a further $110 odd for ballancing the wheel shaft.
Over a year later and it's still going strong so I've decided to write up what I did. I should point out I had never touched a Turbo before so bear that in mind when following what I did. There was one problem I encountered which I put down to amatuer error (more on that later) but apart from that it wasn't a very hard task.
The first thing to point out is that my Turbo was an older non water cooled model that had a 'Carbon' seal. It was a 54030 model (identified by the number cast into the flange where it mounts to the exhaust manifold.
By installing the kit from ebay I effectivley changed it to a 'Dynamic' seal - see the links below for the difference.
I downloaded a PDF from Melett Turbo's that had the exploded view of the Turbo and listed the parts. It can be found at the link below:
http://www.performancesmotorsport.com/t ... a_CT20.pdf


Here's my turbo before starting

The first challenge (the only real challenge I found) is getting the housing apart. Unless it's recently been apart it isn't going to come apart easily.
You obviously need to remove the collar that holds the two parts together. I then attempted to use wd40 to help get it apart be hand but that was never going to work. I marked the housing so I would be able to put it back in the same position but there are locating pins built in for this.
Care is needed if you use the method I did - a sudden separation could damage the shaft or wheels.
That said mine certainly wasn't a quick seperation. I mounted mine in a vice and used a block of wood and hammer to tap it apart - moving the wood around to get it apart evenly to avoid hitting the wheels inside the housing.

Safely apart - exhaust housing and wastegate

The locating pin

Compressor side with the rest of the Turbo still attached. You can see the snap ring that holds the compressor housing on.

The next step is to remove the compressor housing from the central housing. This requires a fairly beefy snap ring removal tool as it's a big snap ring the diameter of the alloy housing opening shown below. You can see the notch that allows you to get the edge of the snap ring out.

Here it is once the compressor housing is off


Now to remove the compressor wheel so you can disassemble the rest of the Turbo.
This would be the point where knowing what you are doing is important. I should remind you that I was going off google research so if there is a better way to go I'm sure someone will comment.
You should mark the nut, compressor wheel and shaft before undoing so you now where to align and torque it back to. This is important for balance.
From what I read to balance it properly it needs to taken in to be balanced with the new items from the kit which is what I did. Others on the net seemed to suggest that by marking and reinstallig to the marks that would be good enough.
I took mine to MTQ in Acacia Ridge and it cost around $110 I think (a year ago).
One thing to note is that the nut holding the compressor wheel on is reverse thread!
I found mounting it in a vice as below the easiest way to do it.


Once the compressor wheel is off you can see the seal plate (Carbon in my case), snap ring that holds it in, and the oil that was leaking passed it.

Seal plate removed

Old carbon seal

Thrust bearing below the seal plate

Journal bearings and spacers after lifting the central housing off the shaft

Fully disassembled


Old Parts

New kit parts and balanced shaft

Shaft after balancing

Marks on the wheel, nut and shaft to guide reassembly - all parts on the shaft were marked

Reassembly - this is where my mistake occured.
The piston ring (shown below) at the turbine wheel effectively holds the shaft in position inside the turbo.

When I installed mine it wasn't spread out enough to fully lock into the groove it mates with on the housing. This would either be because it came like that and I didn't notice or it got compressed during my reassembling of the turbo.
Either way it meantthat under boost my compressor wheel pushed forward into the alloy housing making a rather loud scraping noise.
Below is the resulting damage.


There goes my $110 balance...

Anyway back to the reassembly after mounting the piston ring you snap the shaft back into the center housing, Install the journal bearings, spacers, thrust bearing seal plate and o-rings then snap rings - essentially the reverse order of disassembly which is fairly ovious once you've pulled it down.
Here's mine mostly reassembled.

In summary:
Apart from my one, admittidly fairly major, stuff up the rebuild went well. The turbo has been running fine for a year now and if it fails I'll look for another or a chinese ebay special. It doesn't leak oil into the inlet like it used to which was the main reason to replace the seals.