DIY pressurised brake bleeder
Posted: Sun Jan 29, 2012 9:00 pm
I've just finished a brake system overhaul on my Hilux that included front caliper rebuild, rear disc brake swap (using subaru calipers), extended brake line install and a master cylinder upgrade to a 1" 80 series master to suit the rear discs.
Needless to say after all this I needed to bleed the brake system from a totally dry starting point.
Being the impatient type and wanting to get back on the road ASAP I didn't want to wait until I could get someone to help me with the normal two man bleeding opertaion.
After searching on the net I found the 'power bleeder' made by motive products in the US and after watching a few testimonial videos on youtube I thought it looked pretty good.
So I decided to make up my own pressure bleeder based on the power bleeder. The main parts to make the power bleeder can be bought from bunnings for around $20.
Pressure sprayer - $11
50mm pvc plumbing end cap (high pressure endcap thick walled) -$4
Rubber reducing collar 50mm -> 40mm -$6
Other parts that are also required but I already had were:
6mm tail fitting
6mm pvc hose (5m at bunnings is around $6)
pressure guage (I'm sure a cheap tyre guage could be used if you needed to)
The end cap, tail fitting and reducing collar
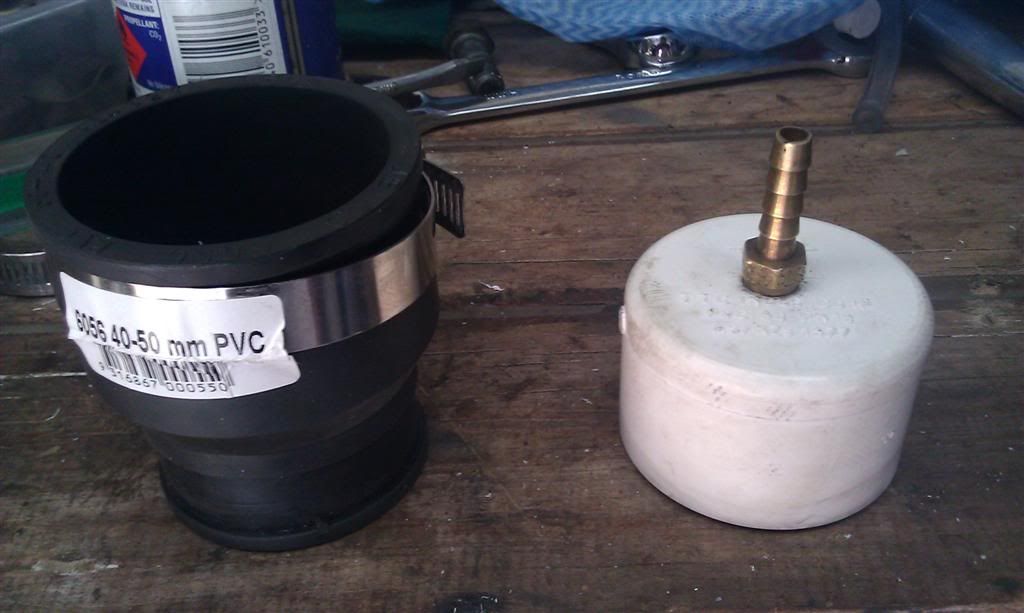
How they go together
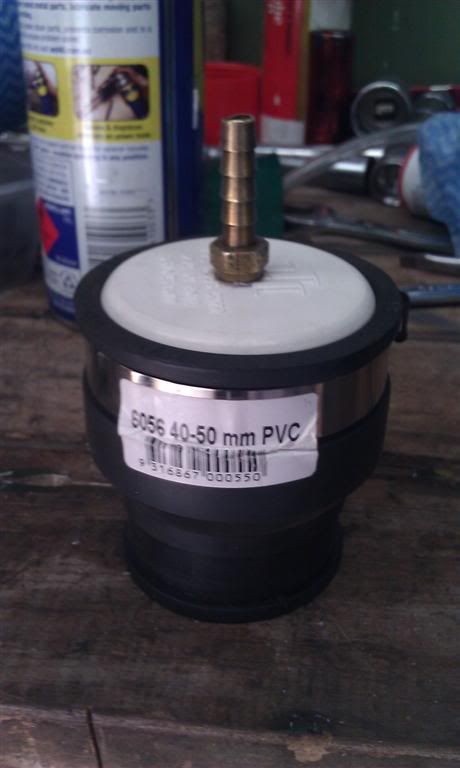
How it attaches to the master cylinder
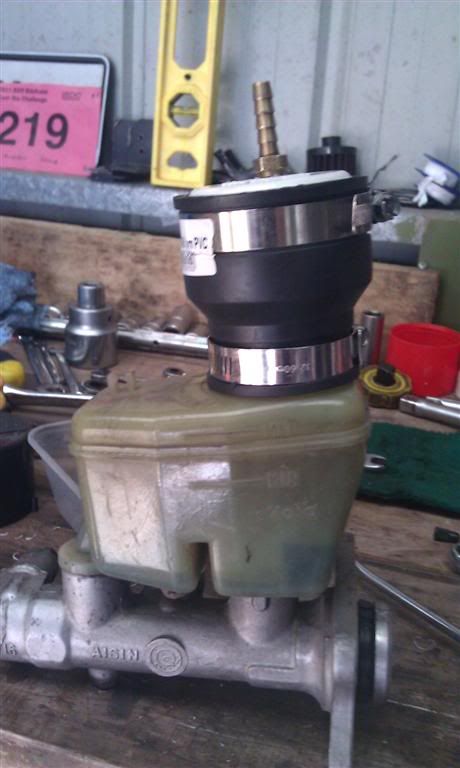
The fully assembled bleeder - I replaced the standard black feed hose with clear and shortened it after pressure testing
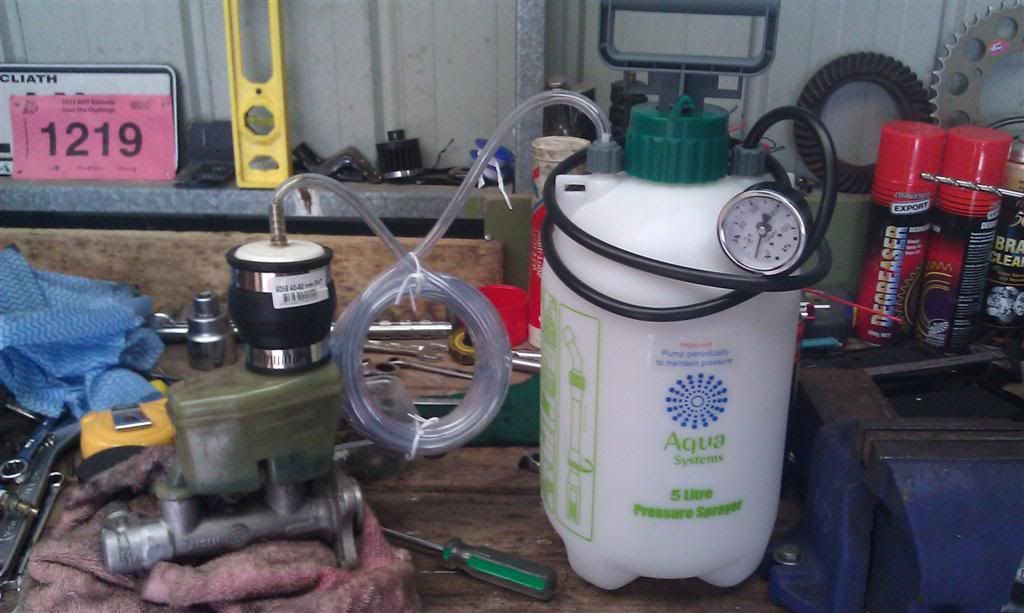
Here it is in operation
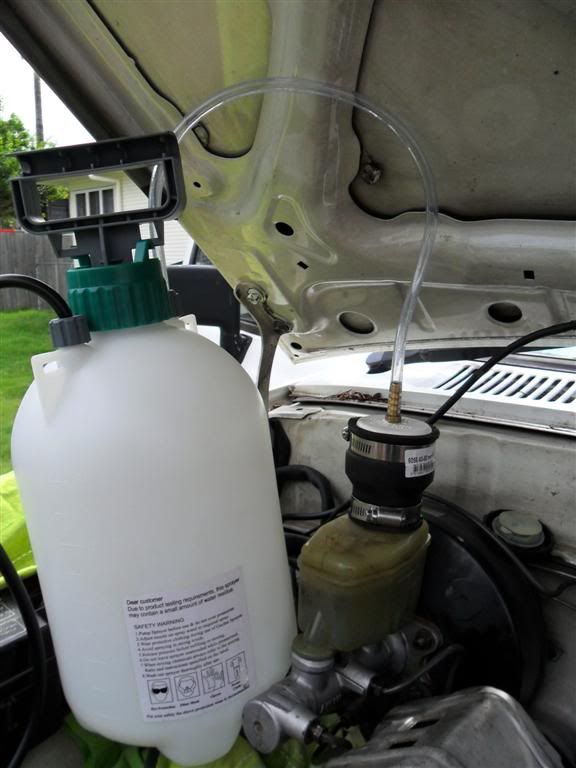
The bleeder operates by pressurising the brake system to 15psi (the noinated pressure by motive for their bleeder) so when you crack the bleed nipples you don't need someone on the brake peddle to create pressure to force the air out.
Another advantage is that the master cylinder won't run dry as you can put plenty of fuid in the pressure bottle which keeps the master topped up while bleeding.
I had great success with this cheap contraption so I thought I'd share it. All up it took me half an hour to bleed the system after I attached the bleeder. It also fits onto the clutch master as well for when you need to flush that.
Needless to say after all this I needed to bleed the brake system from a totally dry starting point.
Being the impatient type and wanting to get back on the road ASAP I didn't want to wait until I could get someone to help me with the normal two man bleeding opertaion.
After searching on the net I found the 'power bleeder' made by motive products in the US and after watching a few testimonial videos on youtube I thought it looked pretty good.
So I decided to make up my own pressure bleeder based on the power bleeder. The main parts to make the power bleeder can be bought from bunnings for around $20.
Pressure sprayer - $11
50mm pvc plumbing end cap (high pressure endcap thick walled) -$4
Rubber reducing collar 50mm -> 40mm -$6
Other parts that are also required but I already had were:
6mm tail fitting
6mm pvc hose (5m at bunnings is around $6)
pressure guage (I'm sure a cheap tyre guage could be used if you needed to)
The end cap, tail fitting and reducing collar

How they go together

How it attaches to the master cylinder

The fully assembled bleeder - I replaced the standard black feed hose with clear and shortened it after pressure testing

Here it is in operation

The bleeder operates by pressurising the brake system to 15psi (the noinated pressure by motive for their bleeder) so when you crack the bleed nipples you don't need someone on the brake peddle to create pressure to force the air out.
Another advantage is that the master cylinder won't run dry as you can put plenty of fuid in the pressure bottle which keeps the master topped up while bleeding.
I had great success with this cheap contraption so I thought I'd share it. All up it took me half an hour to bleed the system after I attached the bleeder. It also fits onto the clutch master as well for when you need to flush that.