Page 1 of 1
Changing a CV boot on a 97 Rodeo???
Posted: Tue Mar 08, 2005 1:22 pm
by Utemad
Can anyone tell me what is involved with changing the rubber CV boot on the drivers side. I have a tear in the inner CV boot.
I've never played with CV's before.
I got quoted $15 for the inner and another $15 for the outer from Autobarn
Thanks.
Posted: Tue Mar 08, 2005 3:33 pm
by rainsey
Utemad,
If you like, PM me your email and I will send you a couple of pages printed out of the TF Rodeo Service manual CD. I tried to post them on the forum but PDF files are not allowed (or at least thats the response I got).
They are typical lame service manual diagrams but may point you in the right direction.
Cheers
Rainsey
Posted: Tue Mar 08, 2005 4:42 pm
by Utemad
PM sent. Like I mentioned in the PM I have a Rodeo workshop CD that does not work anymore. It used to but now I get an error message that says:
16 Bit Windows Subsystem
C:\Windows\System32\Autoexec.NT
The system file is not suitable for running MS-DOS and Microsoft Windows applications. Choose close to terminate the application.
Anyone know what the hell that means?
Posted: Tue Mar 08, 2005 9:04 pm
by Westoztroopa
This should be what you're after...
http://www.4x4wire.com/isuzu/tech/CVboots/?
Cheers,
Noel
Posted: Tue Mar 08, 2005 9:06 pm
by Westoztroopa
Posted: Tue Mar 08, 2005 9:44 pm
by Utemad
Thanks Westoz.
I tried Planetisuzoo this afternoon but the site was doing weird things at the time.
That 4x4wire HowTo is fantastic though. I'll be trying that out on Friday.
Posted: Tue Mar 08, 2005 10:04 pm
by Westoztroopa
No worries mate. Hope it all goes well.
Noel
Posted: Thu Mar 10, 2005 6:00 pm
by Utemad
Got my CV boots today so it's all happening tomorrow. Hopefully it all goes well and I can get back to organising my bodylift

Posted: Fri Mar 11, 2005 1:23 pm
by Utemad
Replaced the CV boots this morning
Took me exactly 3 hours however I can see that it could be shortened. For example it took me 45mins just to get the upper ball joint off the upper control arm

It is very straight forward and I would recommend to anyone that you can do it yourself. The only CV I have ever seen before is on the internet and I managed it. The only problems I had other than chasing the steel balls down the driveway numerous times

was doing up those steel band things that hold the boots on. I managed to stuff the one that holds the inner boot to the diff housing so that is held on by a zip tie atm. The one on the brake end is not so flash either but is on all the same. I'll get two more bands and fix them before I go 4bying next. If you are tightening them with cutters or pliers then I reckon (after I busted two) that the best way is to push against the clippy bit with a screwdriver and pull the tab with pliers or cutters. You'll know what I mean when you see the band clamps.
The only thing I did differently to the 4x4wire HowTo was to undo the top nut holding the shock absorber in and then moved the shock out of the way. I would have removed it all together had I been able to undo the lower bolt.
All in all it was a fairly easy job
Give it a go.
Posted: Fri Mar 11, 2005 10:22 pm
by rainsey
Doh...
O/K... im next at doing this. Just has the suspension upgraded and noticed my driverside boot is ripped in two.
One thing that I have learn't over the years.... cable ties are your best friend... it is amazing what you can hold together with them... including a CV boot after breaking the steel clamp.
Might only be short term but I carry a load of them in my under rear seat storage compartment ( raised my rear seats so the kids did not feel like midgets) for times like this.
I'll take your advice on board.
Cheers
Rainsey
Posted: Sat Mar 12, 2005 12:42 pm
by Utemad
rainsey wrote:One thing that I have learn't over the years.... cable ties are your best friend...
Zip ties rule!!! On my ute I have the front licence plate, inner CV boot, rear canopy brake light, trailer light socket, fridge power socket and of course kms of wiring all held on with zip ties. Of course it's temporary
rainsey wrote:under rear seat storage compartment ( raised my rear seats so the kids did not feel like midgets) for times like this.
I was thinking about cutting a big hole under the rear passenger bench seat to make a storage compartment like the existing one for the jack. Seems to be a fair bit of wasted space under there. Also trying to make the rear seat tilt forward like on newer versions. Too hard to adapt a later model backrest though. Shouldn't be too difficult to modify the existing backrest.
Posted: Sun Mar 13, 2005 7:17 am
by rainsey
I was originally looking at doing the same but the diesel fule tank is sitting right underneath!
I made a wooden frame that sits between the metal body and the seat. It has a double use, I have a boot load of storage for spare radiator hoses, filters and general bits & pieces (like cable ties), plus the kids can not sit normally without their legs wrapped up. Makes it heaps more comfortable on a long trip.
The back part of the seat I raised by drilling out the spot welded brackets and raising them the height of the wooden base. And extended the lower bolt holes by fabricating some steel extentions.
Works a treat... I'll take some photos and put them up for you to see.
Cheers
Rainesy
Posted: Mon Mar 14, 2005 8:08 pm
by Vulcanised
it would probably be a good idea to replace the balljoints at the same time.... an extra cost i know, but easier to do while you have half the front end in bits. in case you are interested, i payed $520 for brand new CV's and axles and boots all assembled......
Posted: Tue Mar 15, 2005 1:21 pm
by Utemad
I only did the drivers side but that ball joint looked ok to me. I thought of replacing it anyway but thought it didn't need to be yet.
Rainsey,
Pics of your rear seat would be great but we should probably start another thread for that. I'm investigating the fold forward option again. Hopefully start on it this weekend.
Thanks.
Posted: Tue Mar 15, 2005 10:55 pm
by rainsey
Yep, another thread is cool.
Tried taking photoes but my wide angle just isn't wide enough to get inside my cabin

Stay in touch as I will set up a new thread once I can get a decent photo
Cheers
Rainsey
Posted: Mon Apr 04, 2005 1:36 pm
by Utemad
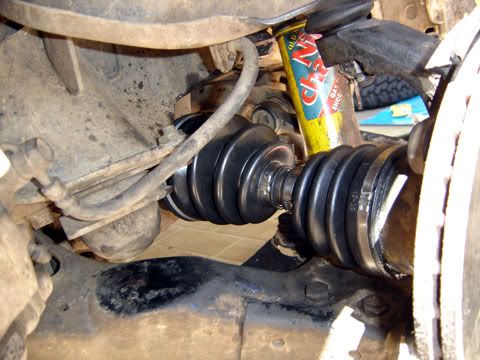
Here are some exciting CV boot changing pics
The damaged boot
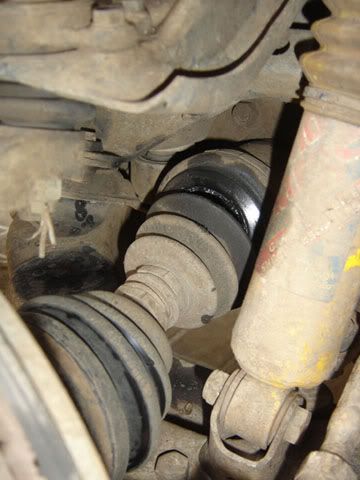
Cut off the damaged boot

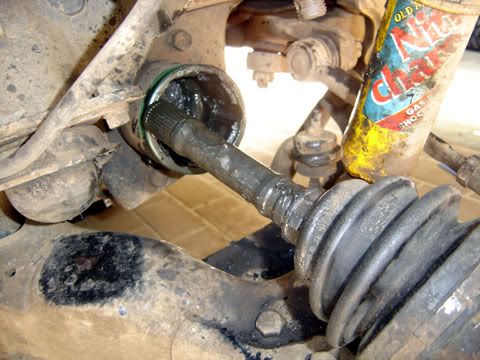
Removed the circlip, balls and holder thingo
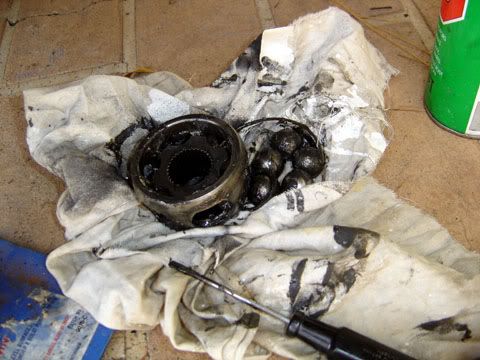
The thingos
The finished product. Notice the zip tie on the inner boot and the near buggered steel clamp on the outer boot.