Page 1 of 1
MQ 4 Link Rear Conversion
Posted: Wed Nov 01, 2006 11:06 pm
by bubs
Now that my last project a BMW with an Nissan RB20 engine conversion is complete here is the next one, with a Nissan flair again.
Here we have a leaf sprung MQ ute, it is getting a triangluated 4 link rear.
Now on to the pics.
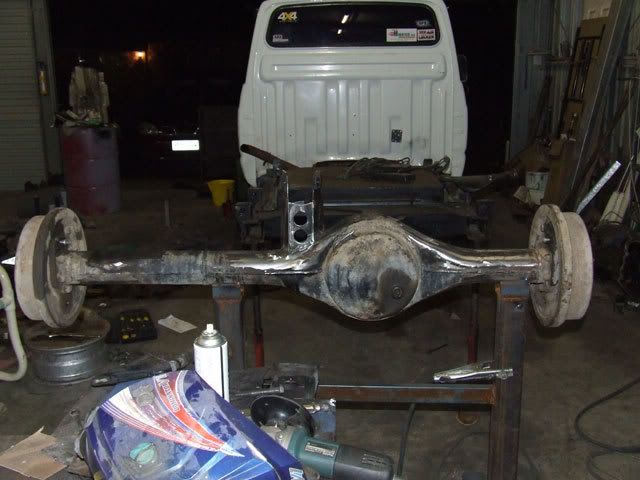
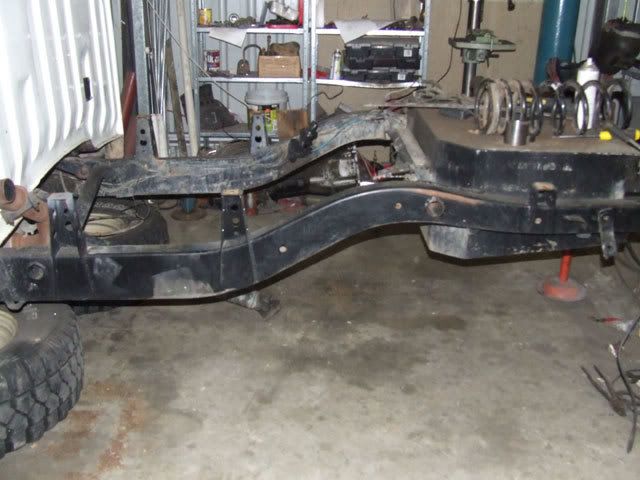
Here is the victim
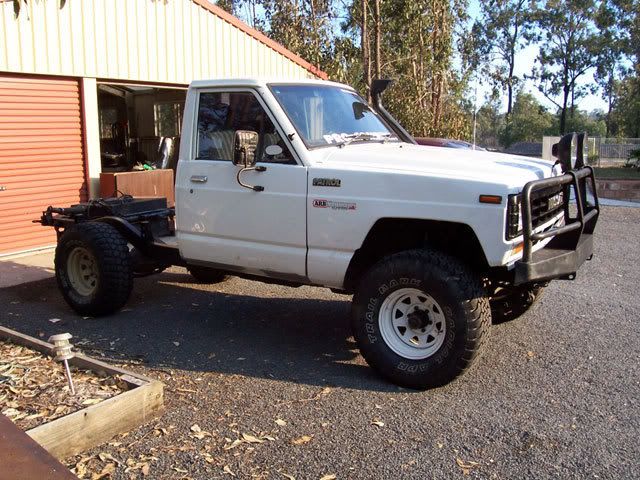
Another shot showing the original leaf suspension
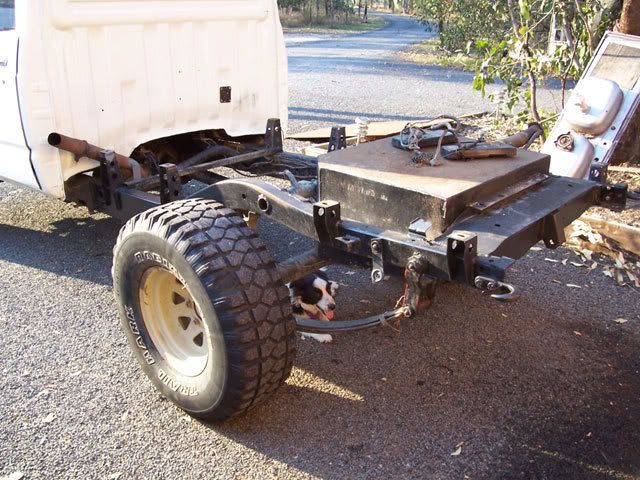
Stripping the rear end apart
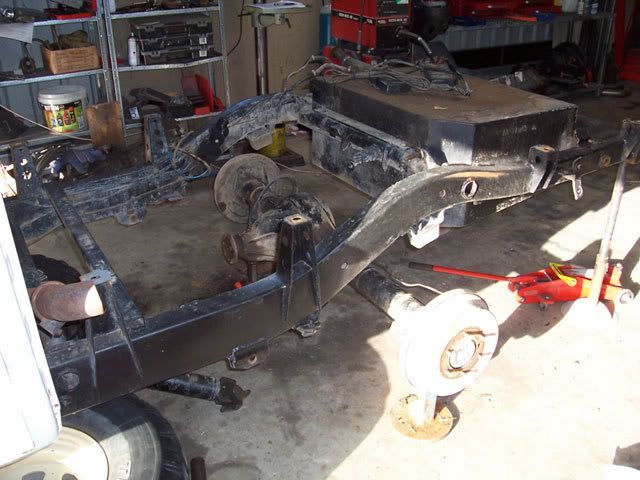
Housing out from under the patrol amd all unnessary mounts removed

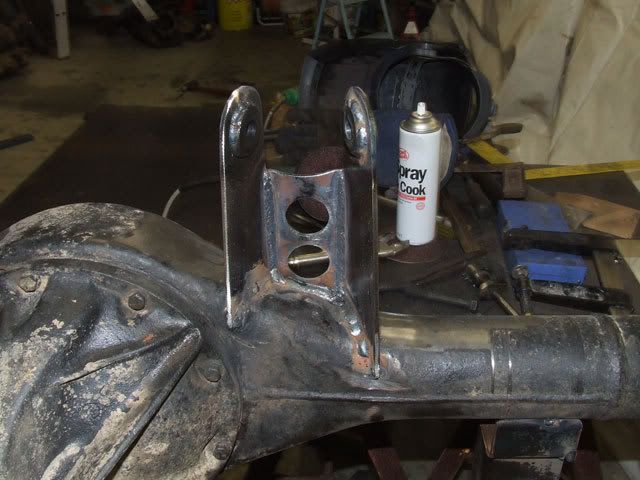
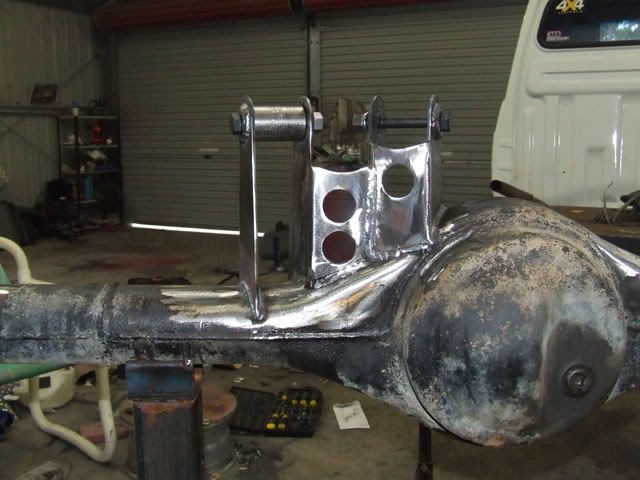
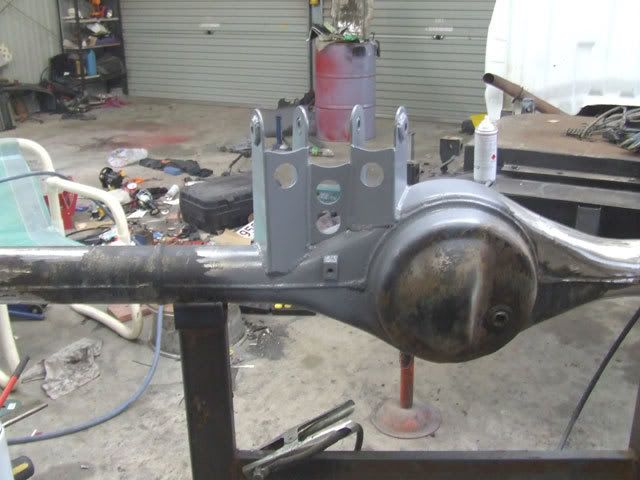
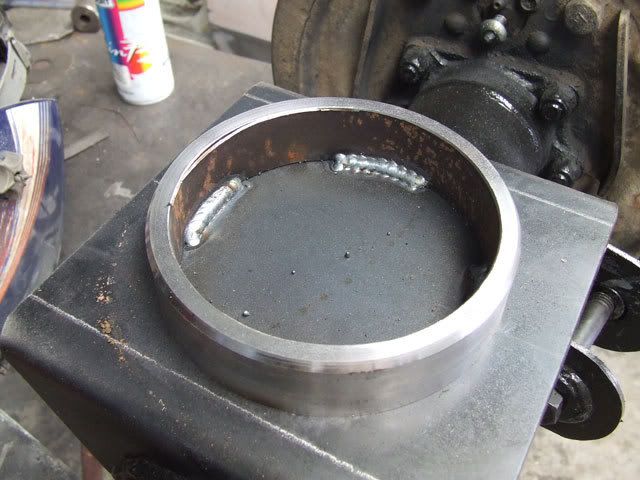
Start of upper link mounts
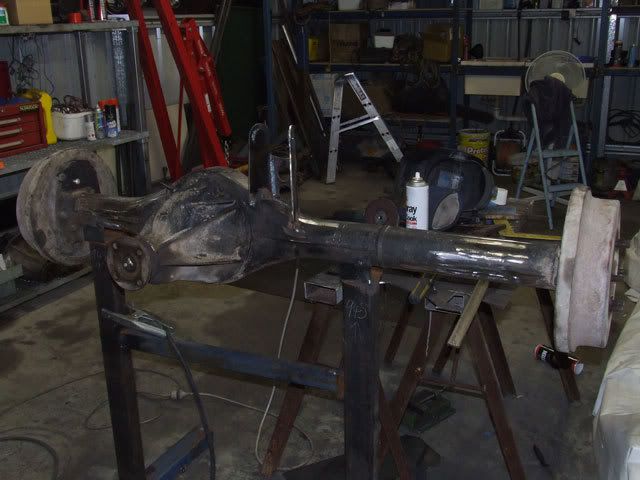
Front close up view - notice bushes welded into prevent ovaling of holes
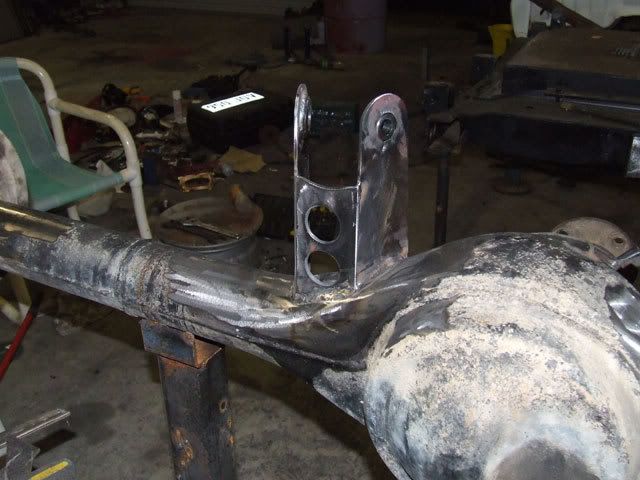
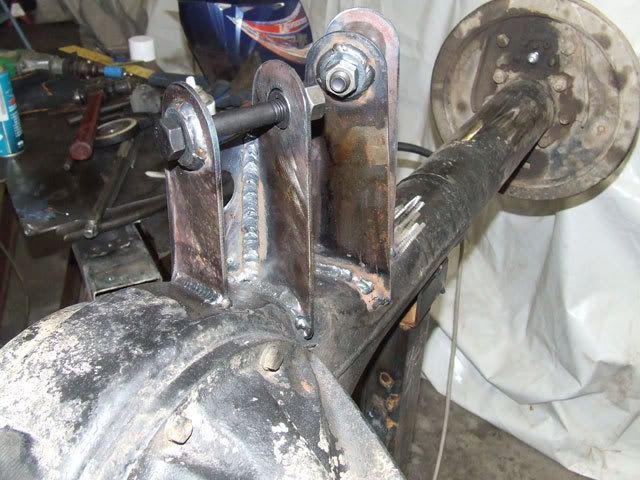
Rear distant view
Close up view
Tommorow I will complete the upper link mount and get the lower mounts hopefully installed as well. Coil mounts will be done friday to be ready to make control arms on saturday.
Enjoy
Buddy
Posted: Thu Nov 02, 2006 2:33 am
by RMP&O
Looks good man....but I would push that diff back as far as you can since doing all the custom work. Either that or hack the chassis off right behind the new suspension. Way to much overhand in the rear on all MQ/MK's IMHO.
Keep the pics coming.

Posted: Fri Nov 03, 2006 2:14 pm
by bubs
RMP&O wrote:Looks good man....but I would push that diff back as far as you can since doing all the custom work. Either that or hack the chassis off right behind the new suspension. Way to much overhand in the rear on all MQ/MK's IMHO.
Keep the pics coming.
The owner is getting a new fuel tank and will lob the back off the chassis, the wheel base is long enough as it is

Posted: Fri Nov 03, 2006 4:51 pm
by bubs
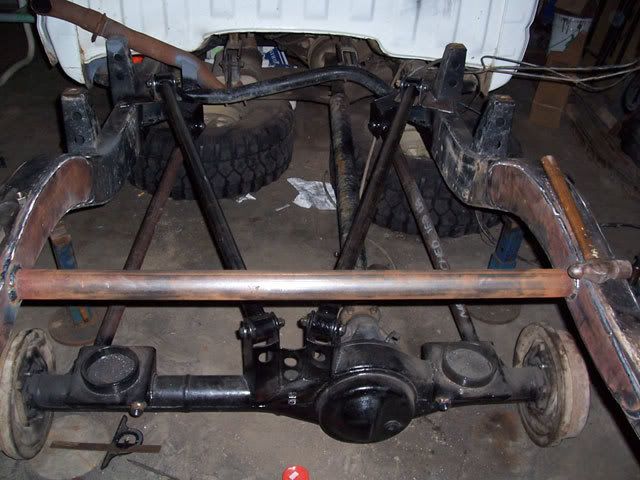
Didn't do any last night as I went out last night. But this afternoon I got an hour on it. Heres the latest
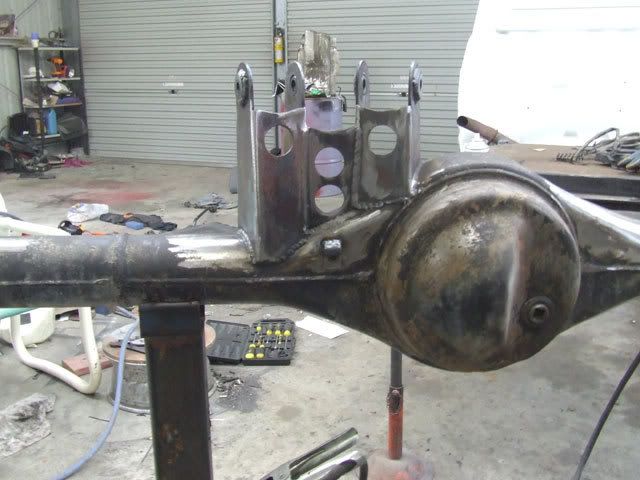
Angely rear view
Straight on rear view
Front angely view
More tommorow
Posted: Mon Nov 06, 2006 6:49 am
by shakes
nice looking welds, love the can of "spray and cook" in the background.
just one question (and forgive my ignorance cause I still got alot to learn) how are you guys working out the angles and whatnot? I understand some is basic maths but knowing what drive's & handles ok as opposed to something that handles like a pig??
Cheers
Simon
Posted: Mon Nov 06, 2006 9:40 am
by Eddy
shakes wrote:nice looking welds, love the can of "spray and cook"
best and cheapest anti spatter spray around ....
Posted: Mon Nov 06, 2006 11:48 am
by PJ.zook
Nice work love custom stuff, you gonna bugger off those stone age drum brakes and use discs?
Posted: Mon Nov 06, 2006 5:38 pm
by bubs
Eddy wrote:shakes wrote:nice looking welds, love the can of "spray and cook"
best and cheapest anti spatter spray around ....
Actually its shit the spray and cook, i was desperate, got some more real anti spatter now
Posted: Mon Nov 06, 2006 5:39 pm
by bubs
shakes wrote:nice looking welds, love the can of "spray and cook" in the background.
just one question (and forgive my ignorance cause I still got alot to learn) how are you guys working out the angles and whatnot? I understand some is basic maths but knowing what drive's & handles ok as opposed to something that handles like a pig??
Cheers
Simon
Download the 4 link calculator and read the posts by strangerover (sam) on pirate.
Posted: Mon Nov 06, 2006 5:40 pm
by bubs
PJ.zook wrote:Nice work love custom stuff, you gonna bugger off those stone age drum brakes and use discs?
Its not my car, so no I wont be
Posted: Mon Nov 06, 2006 5:41 pm
by bubs
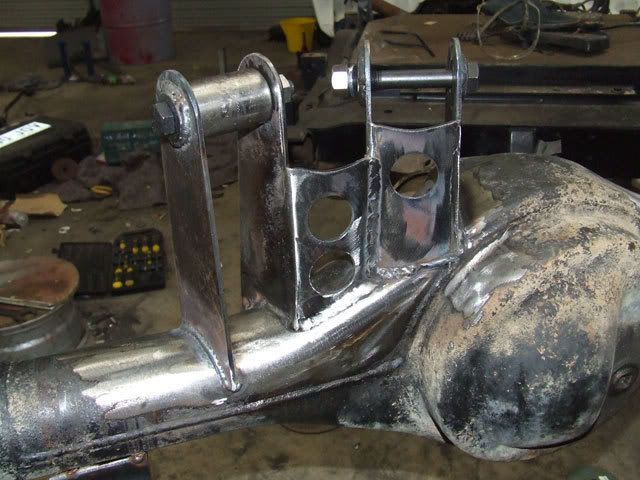
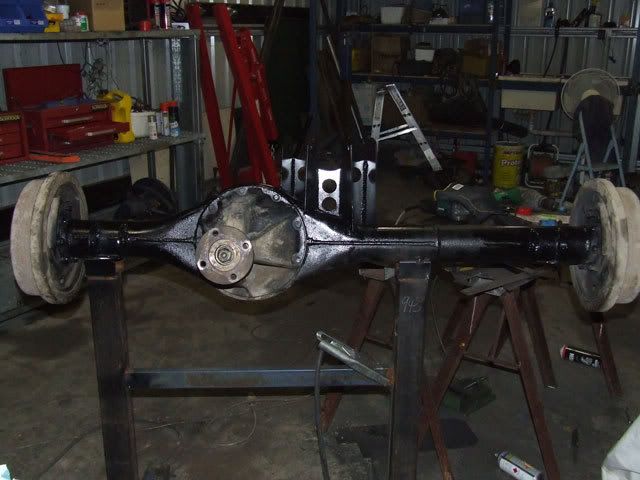
Finished upper link mounts / truss - also welded back on the brake line t-piece holder
Front View
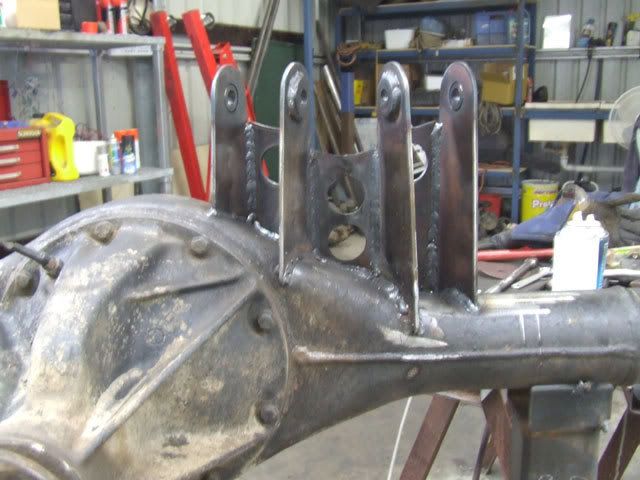
Now undercoated awaiting the end, there are a few spots that will get hit with the sander before final painting.
There is more done since these photos i'll post them tommorow
Posted: Tue Nov 07, 2006 10:12 pm
by bubs
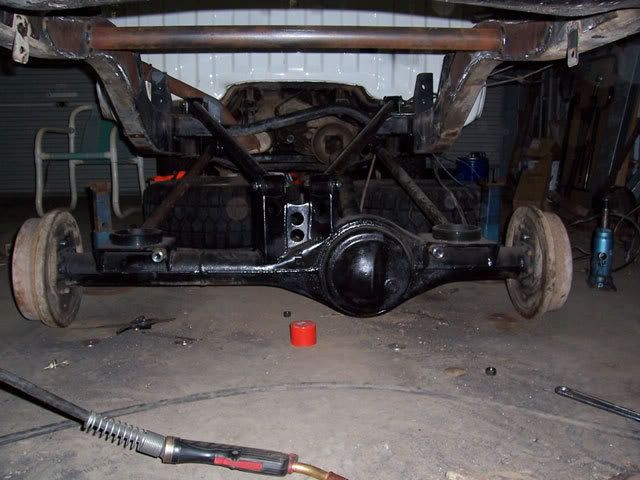
More lower mounts done
Hard to see but both lowers done
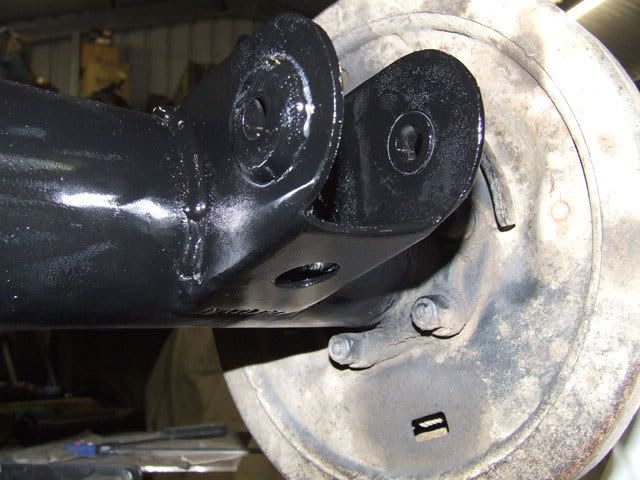
Close up
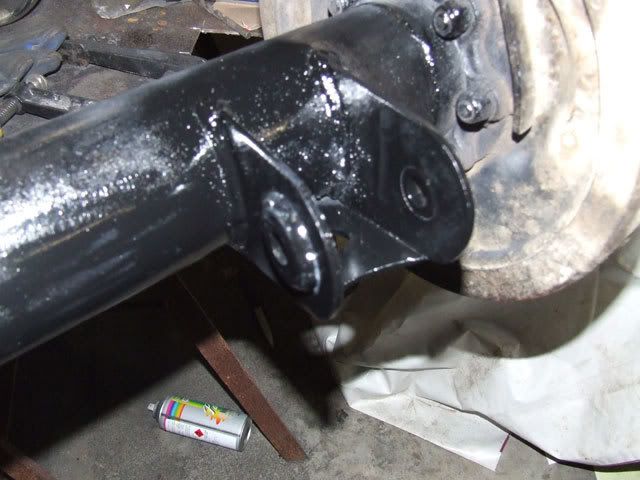
Underneath detail
Control arms are almost done to, I fawked up the coil mounts (I couldn't read my own hand writing

)so they will have to wait till tommorow.
Posted: Wed Nov 08, 2006 6:39 am
by V8Patrol
bubs wrote:Finished upper link mounts / truss - also welded back on the brake line t-piece holder
Front View
Querry ........
The material thickness ??? it looks like its 3mm pl from the pics but I'm asuming its thicker ..... yeah ?
2ndly....
past experiance has taught me that brackets welded to the diff tend to break off unless the plates extend down past the factory seam weld on the diff tube, rotational stress's seem to be the main issue especially when the bracketry has any major height over the heighest point of the pumpkin such as youve done.
I can see that the load has been spread along the length of the housing realy well, just curious as to if there's enough across the housing...
Interesting project .....
Kingy
Posted: Wed Nov 08, 2006 6:45 am
by bubs
yes the plate is thicker than 3mm
in regards to extending past the weld line of the housing I have not had that problem before. I do have about 150 degrees of the housing on each bracket. I had planned on adding more bracing along the length of the housing. As it is, it is no worse than standard GQ/GU trailing arm mounts.
Buddy
Posted: Wed Nov 08, 2006 9:56 am
by bazooked
looks like 3.2mm

Posted: Wed Nov 08, 2006 12:23 pm
by pongo
What sort of reinforcement is on the Bush holes. Is it just a washer welded on or is it a bit better than that?
Looks very

Good work
Posted: Wed Nov 08, 2006 4:57 pm
by bubs
bazooked wrote:looks like 3.2mm
wrong

Posted: Wed Nov 08, 2006 4:58 pm
by bubs
pongo wrote:What sort of reinforcement is on the Bush holes. Is it just a washer welded on or is it a bit better than that?
Looks very
Good work
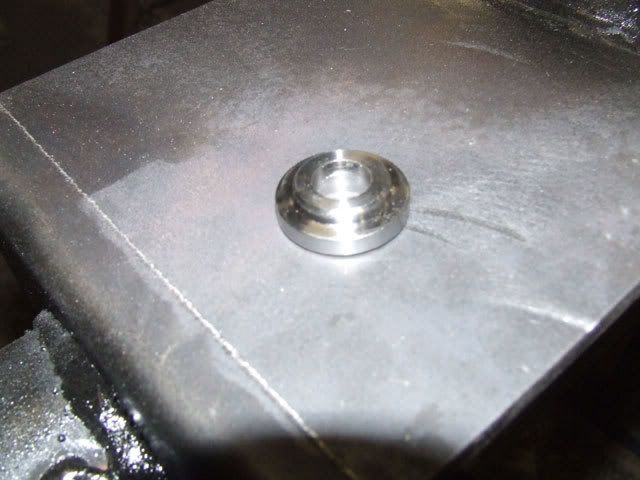
A lot better than that, i'll get a pic tonight I had 50 bushes CNC machined
Posted: Thu Nov 09, 2006 8:25 am
by +dj_hansen+
Once again bubs... that is some awesome fabrication.
No wonder you never get your own sh!t3 finished.. your always workin on some1 elses
Never the less.. that is still awesome mate... arms up
Posted: Sun Nov 12, 2006 1:56 pm
by bubs
A close up of the bush that goes in the link mounts, cause some one asked to see
Frame rails cleaned of all unesscary leaf spring stuff
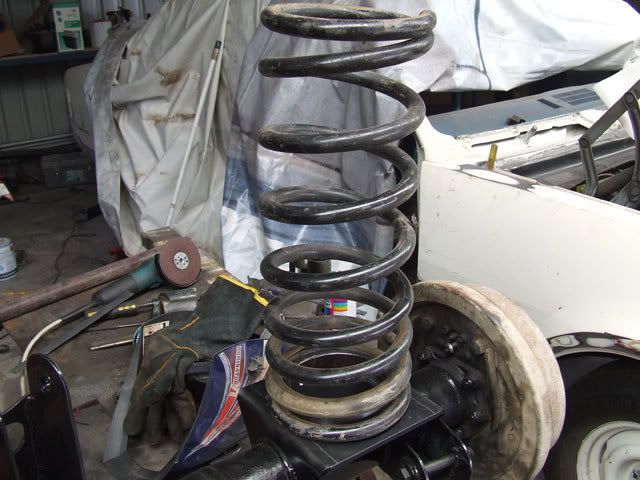
Start of coil pads

Coil in place
Close up with coil on of thingy that holds in centre
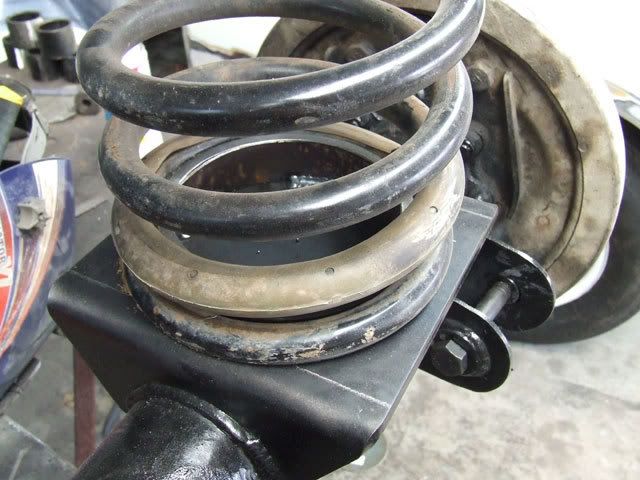
Same without coil
Posted: Sat Nov 18, 2006 12:08 am
by bubs
Hmm one step closer
- shes gone now
Links in - 9ish pm tonight
Rear shot - 9ish pm
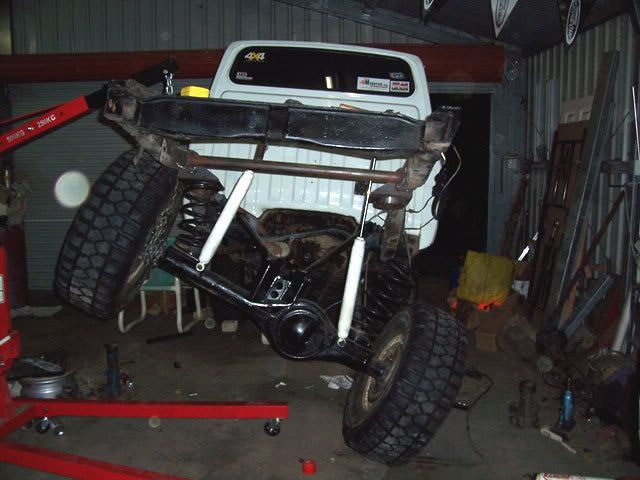
Flexing - 11pm
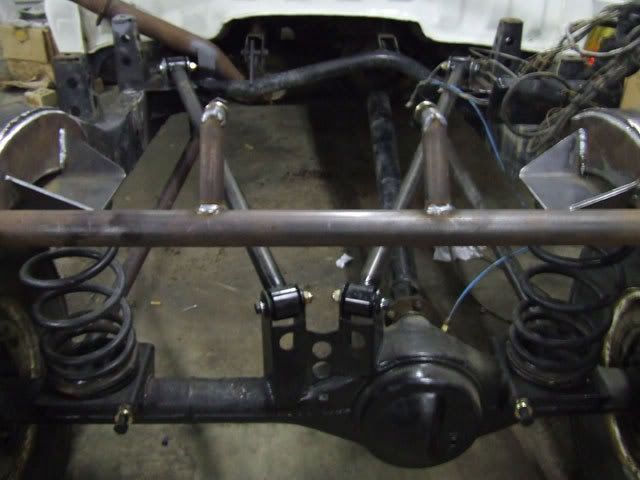
Overall - about to go on trailer at 11:30pm
Posted: Sat Nov 18, 2006 8:35 am
by redzook
just a question why didnt you just make it out of thicker material?

Posted: Sat Nov 18, 2006 11:57 am
by bubs
because thats what everyone else does
heaps of guys on pirate are using 3/16 plate for link mounts without failure, standard nissan is only 4mm plate
Posted: Mon Nov 20, 2006 2:21 pm
by Timmeh
hi, nice work on the coil set-up, and the write up which you have done!! Just a quick question, what shocks are you using with this set-up ?