
ive bought a set of rims with internal airs (Tirelock brand), my new rubber arrives on monday, im thinking about having a go at fitting them myself, mainly so if i have a problem out in the sticks i will know how to fix em. ive heard they are a bastard to fit. they dont look like they will be too hard to fit.
has anyone fitted a set themselves? i would appreciate any tips and any info on what i need to do so as not to bugger it up.
do i inflate the internal tube to seat the bead, or do i need to inflate the tyre first to seat beads then inflate the tube? any tips and info is appreciated. i bought them 2nd hand and the rims are already drilled so i dont require info about drilling.
Notice: We request that you don't just set up a new account at this time if you are a previous user.
If you used to be one of our moderators, please feel free to reach out to Chris via the facebook Outerlimits4x4 group and he will get you set back up with access should he need you.
If you used to be one of our moderators, please feel free to reach out to Chris via the facebook Outerlimits4x4 group and he will get you set back up with access should he need you.
Recovery:If you cannot access your old email address and don't remember your password, please click here to log a change of email address so you can do a password reset.
internal beadlock, anyone fitted em themselves
Moderators: toaddog, TWISTY, V8Patrol, Moderators
A few years ago i did mine myself.
i used the tubes to seat the bead.
you will need the tyres to start fitting the internals.
do you have the instructions with you?
you will need tools to put the tyre on/off(i had a beadbreaker kit)
from memory you put half the tyre on then the tube,the internal bag and then the tyre on fully. it is hard to line up the vavle(tube )to the hole in the rim..better to have small hands.
i did mine a long time ago so there may be better ways to do these now..
Bar work RDG
www.rdgengineering.com
ADRENALIN TRANSPORT
www.rdgengineering.com
ADRENALIN TRANSPORT
i dont have instructions, i do have tyre pliers and tyre levers. i just did a search on google and found a bit of info on pirate 4x4. are you still running them? if so what do you think of them?thunder wrote:A few years ago i did mine myself.
i used the tubes to seat the bead.
you will need the tyres to start fitting the internals.
do you have the instructions with you?
you will need tools to put the tyre on/off(i had a beadbreaker kit)
from memory you put half the tyre on then the tube,the internal bag and then the tyre on fully. it is hard to line up the vavle(tube )to the hole in the rim..better to have small hands.
i did mine a long time ago so there may be better ways to do these now..

I run them. They are good, but i still have trouble with mud behind the bead and air still leaking. I have 10.5 centipedes on 8inch rims so i think the tyres are a bit narrow for the rims. I dont know if i put the 10.5 on 7inch rims it will help:? Much better then standard as you can confidentially air down and not worry, helps when your go fast round corners and low pressures.If i had my time again, i would go mechanicals and tubes. Not way of ever leaking and spinning on the rim, but they're illegal. You cant win 
my $0.02
cheers Julian
my $0.02
cheers Julian
[color=red][size=150][b]CTRL + W[/b][/size][/color]
I had the early ones and had problems busting tubes and cases..
had a plug in a tyre that damaged the internal.
i sold my tyres/rims internals after 4 yrs of abuse
we done a set last year (staun i think) to a mates lux and he has done the 3 comps last yr and he is very happy wth them.
my 37 claws are on external locks
i would only do them for my 38 boggers as they are on flipped rims.
the instructions i wrote b4 are the way you do it..we also had some
white powder which you put in or near the tube but i think its crap.looked like flour.
when you do the tube just inflate a little to make sure its not twisted and then take the air back out..
at least you dont have to take the tyre off to start with.
Bar work RDG
www.rdgengineering.com
ADRENALIN TRANSPORT
www.rdgengineering.com
ADRENALIN TRANSPORT
You're better off using a narrower rim, and use lots of lube on the tyre bead. The narrower rim gives you more room to get your hand in there, and reduces the chances of dirt getting into the bead.
I also throw stacks of chalk powder on the locker tubes;- helps em slide around to where they need to be and makes repairs easier.
I also throw stacks of chalk powder on the locker tubes;- helps em slide around to where they need to be and makes repairs easier.

Instructions.
http://www.secondair.com/howitworks.htm
http://www.secondair.com/howitworks.htm
R.I.P Brock Fontanini 28-3-06 - 16-2-08
www.teamcarnage.net
www.teamcarnage.net
thanks for that, i have a couple moes Qs, as the tirelocs are slightly different to the staun ones, ill take a couple of pics later to help explain what im asking aboutausyota wrote:Instructions.
http://www.secondair.com/howitworks.htm
Best way I have found is to mount the tire by iteself and seat the rear bead. Then break the front bead and take the front off the rim (so now the rear bead is seated, and the front is not even on the tire.
Then use a ratchet strap on each side of the front bead and hang the whole thing from the roof or whatever... this leaves a gap around the whole tire (gap between the tyre and the rim) that you can squeeze your hands into.
Then mount the rear of the beadlock case, then put the tube in, then mount the front of the beadlock bag. Take some time to make sure everything is in. covered, and not twisted.
Then mount the front tire bead - the beadlock tube should be close to flat. Don't use the beadlock to set the bead - you will more than often pinch a tube... let the air completely out of the beadlock tube, and reseat the tyre bead. Then let the tyre down and pump the beadlock up, then pump up the tyre.
The thing that makes this process is hanging the tyre - makes it soooo much easier. And make sure you don't seat using the beadlock.
S.
www.TeamFireBug.com
Thanks to:
abt4x4.com - Just Customs
Staun beadlocks - Solid Axle
Cummins - Maxxis
Thanks to:
abt4x4.com - Just Customs
Staun beadlocks - Solid Axle
Cummins - Maxxis
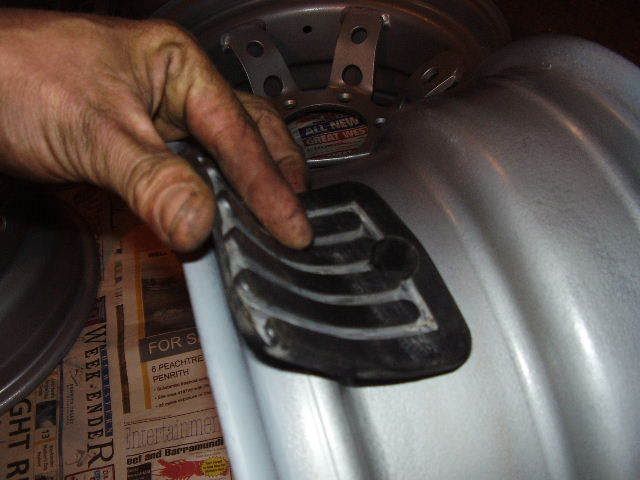
thanks for all your replies, some good tips there, i have one more Question about the valve for inflating the tyre, the tyreloc appears to be slightly different from the staun in the link above, firstly heres a pic of the valve, it has a rubber thing around it, i assume its to aid in airing down tyres
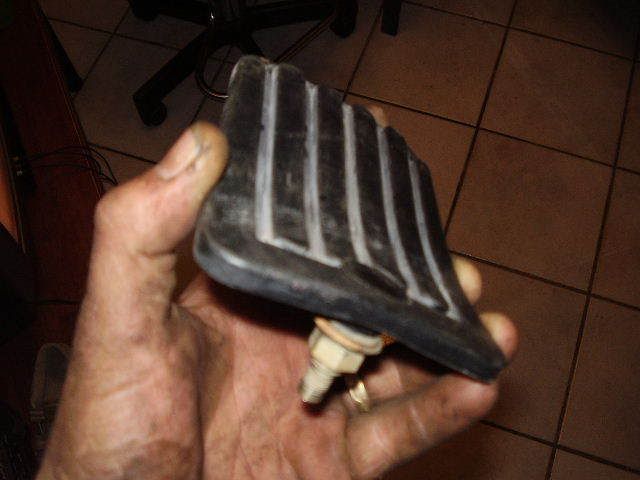
my question is this, which way around does it go on the rim. like this?
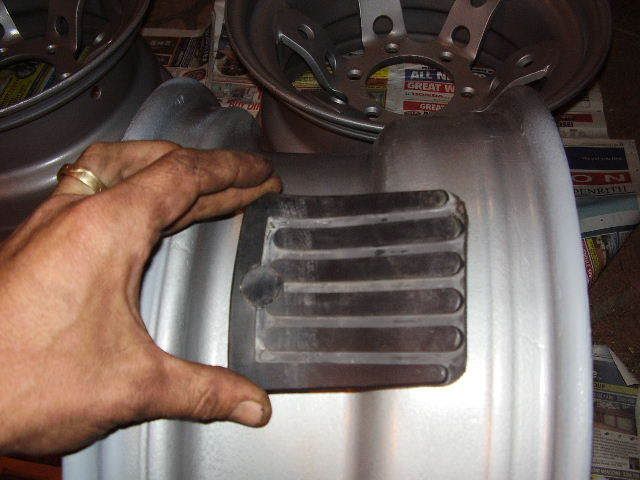
or like this? around the side of the beadlock?
my question is this, which way around does it go on the rim. like this?
or like this? around the side of the beadlock?
Last edited by Madmac on Sun May 06, 2007 11:02 pm, edited 1 time in total.
Thanks Thunder, i was just chattin to Mick who i bought them off on downunder site, he has found the original instructions and is going to scan them and forward them to me.thunder wrote:see if anyone else replys but mine were like yours and they were placed like the last picture you put up..also my drilled hole was not where yours is.it was close to the side.so i dont know if it makes a difference where the hole is
forgot to say, when you mount the outside of the tyre on the rim, start mounting on the opposite side to the valves and work around the rim towards the valves, and make sure that black rubber thing is between the tyre and the beadlock (not stuck under the bead of the tyre).
S.
S.
www.TeamFireBug.com
Thanks to:
abt4x4.com - Just Customs
Staun beadlocks - Solid Axle
Cummins - Maxxis
Thanks to:
abt4x4.com - Just Customs
Staun beadlocks - Solid Axle
Cummins - Maxxis
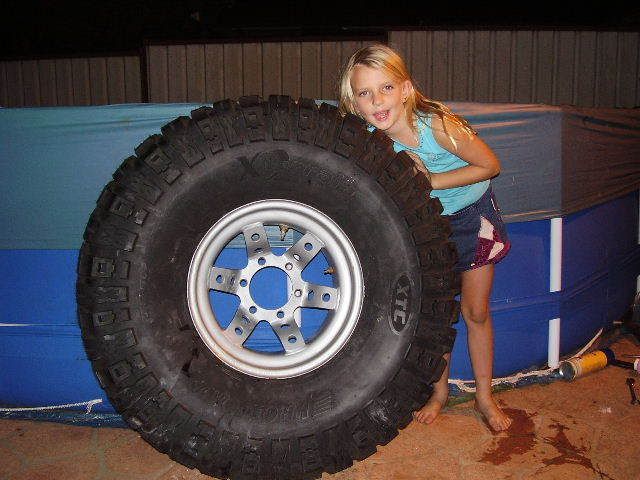
thanks a heap Firetruck and Thunder, i mounted my tyres and fitted the beadlocks this arvo, 1st one took about an hour, i struggled to get the tyre on, ended up figuring it out. the other 3 took 20-30 minutes each. with the info you blokes gave me it was fairly easy and painless. job done. thanks again. heres a pic of my daughter checking out one of my new tyres
 [/img]
[/img]Who is online
Users browsing this forum: No registered users and 3 guests