Notice: We request that you don't just set up a new account at this time if you are a previous user.
If you used to be one of our moderators, please feel free to reach out to Chris via the facebook Outerlimits4x4 group and he will get you set back up with access should he need you.
Recovery:If you cannot access your old email address and don't remember your password, please click here to log a change of email address so you can do a password reset.

Transfer chassis mount fixes and reinforcement

Tech Talk for Suzuki owners.

Moderators: lay80n, sierrajim

Post Reply
Posts: 801
Joined: Fri Sep 23, 2005 12:56 pm
Location: Darwin N.T

Transfer chassis mount fixes and reinforcement

Post by MUD-PIGSIERRA »

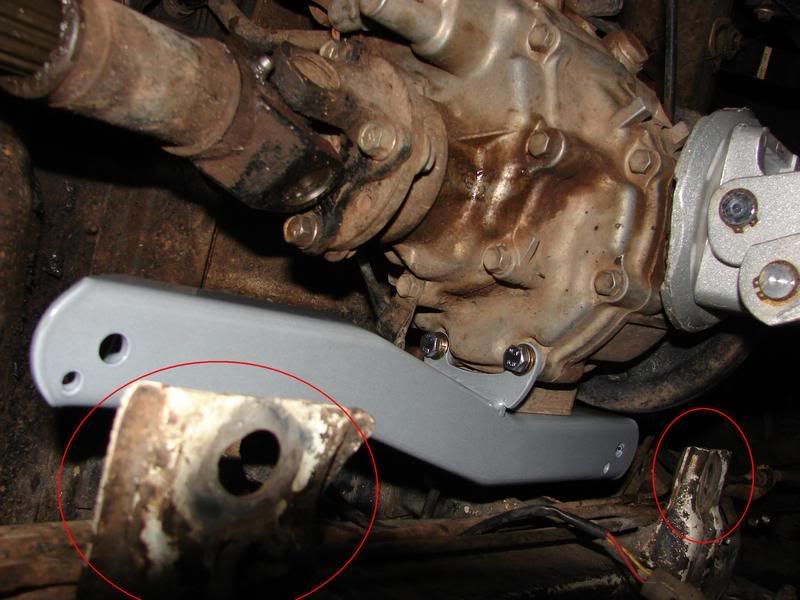
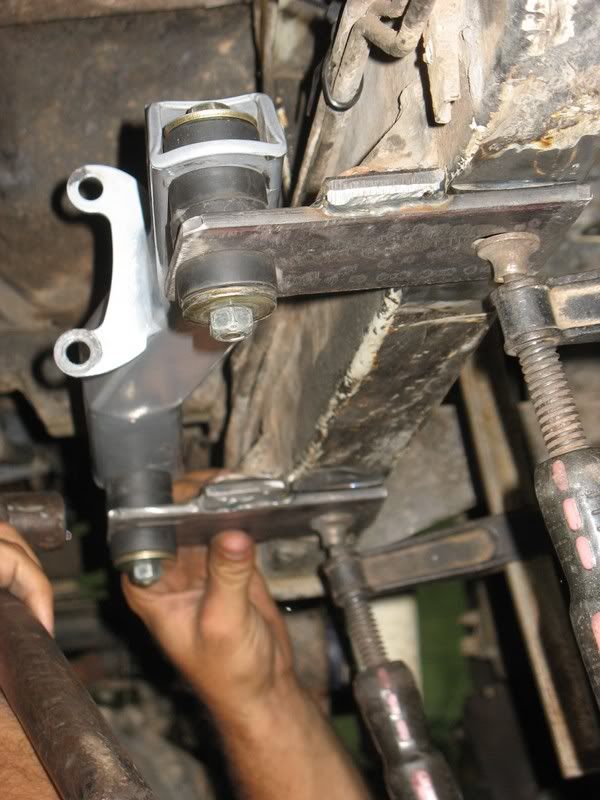
I know this has been discussed in other threads and I have had a read, mainly about actually new mounts that go onto the actual transfer case. What have people done to fix the actual mounts on the chassis to stop them from bending. Has anyone cut them of and started over pics would be awesome...? I am currently running the Spidertrax mounts which are great but have obviously moved the weak spot to th chassis.

I have read this thread
http://www.outerlimits4x4.com/phpBB2/vi ... ase+mounts

This is what Im talking about fixing red circled area. I have ripped mine and a fix is in order
Image
..wrench, wheel, wreck repeat..

check out the action @ http://www.darwin4x4.net
Posts: 801
Joined: Fri Sep 23, 2005 12:56 pm
Location: Darwin N.T

Post by MUD-PIGSIERRA »

Quick update for those that may need the info for the future... :P

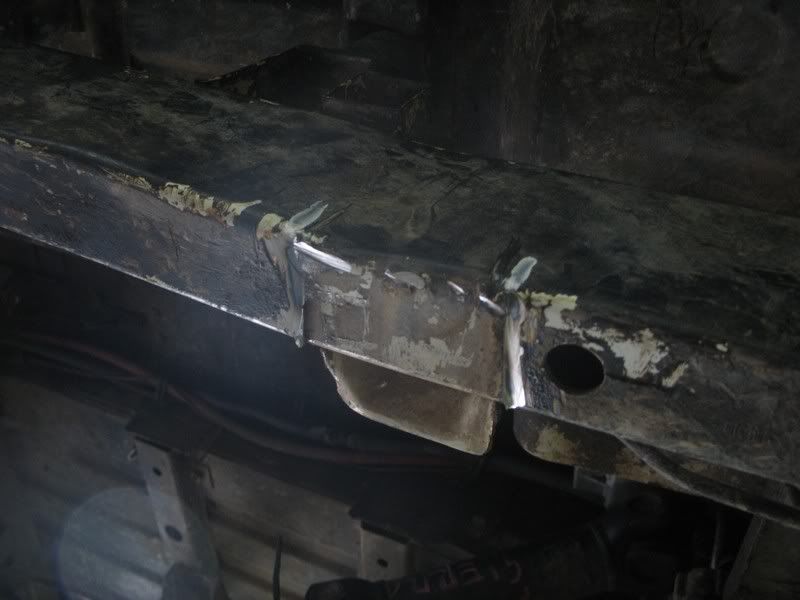
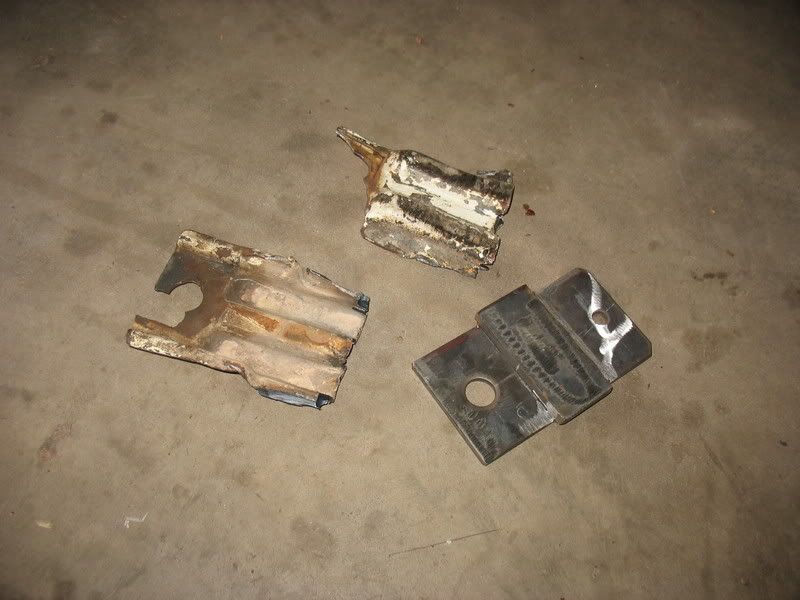
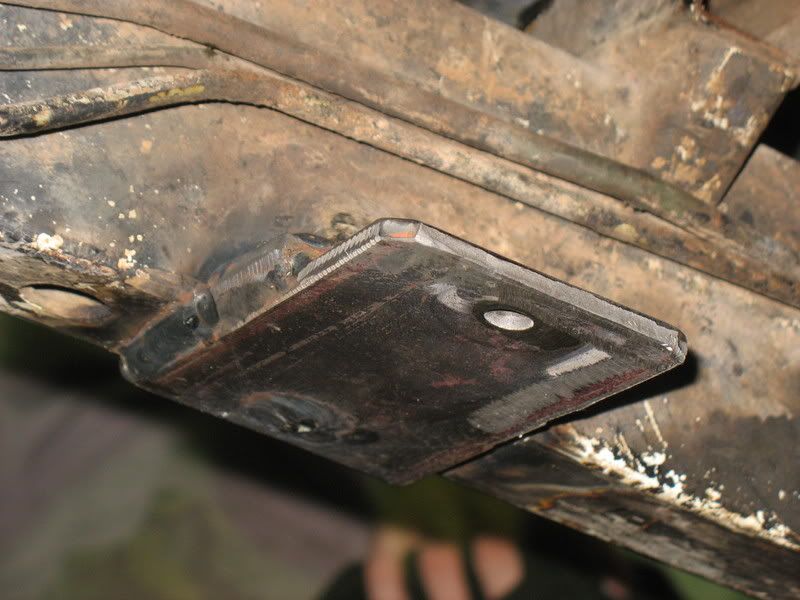
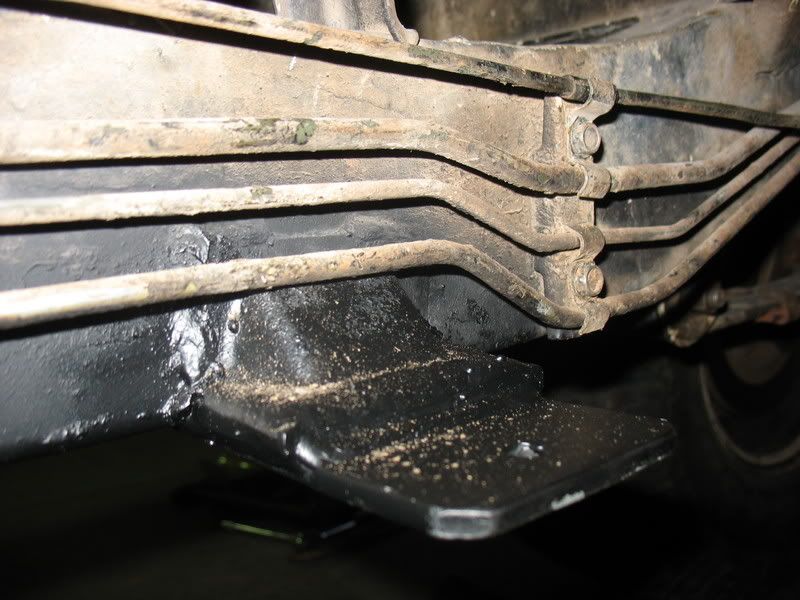
Have used 8mm plate 75mm wide 130mm long (50mm chassis width the rest used to make the distance out from the original holes measured from the original brackets). Cut the old bottom brackets that had cracked and broken of and replaced with new plate using the gusseting on the inside of the chassis for the support. WE added a bit of filling plate to get the extra hight to match up to the supports and new Spidertrax brackets which hopefully wont twist like factory ones....?

Heres some picks. As you will notice transfer case was pulled for this job

Image

Old and new
Image

Image

Keeping the lines out the way
Image

Image
..wrench, wheel, wreck repeat..

check out the action @ http://www.darwin4x4.net
Posts: 801
Joined: Fri Sep 23, 2005 12:56 pm
Location: Darwin N.T

Post by MUD-PIGSIERRA »

And finally painted, all though from painting and getting the camera all ready copped dirt on them..... :?
Image
..wrench, wheel, wreck repeat..

check out the action @ http://www.darwin4x4.net
Posts: 977
Joined: Sun Jul 20, 2003 7:57 pm
Location: Brisbane

Post by Gutless »

Mine.
Image
Image
Posts: 801
Joined: Fri Sep 23, 2005 12:56 pm
Location: Darwin N.T

Post by MUD-PIGSIERRA »

Nice ...lol where were you last week when I needed ideas....... :P
..wrench, wheel, wreck repeat..

check out the action @ http://www.darwin4x4.net
Posts: 977
Joined: Sun Jul 20, 2003 7:57 pm
Location: Brisbane

Post by Gutless »

MUD-PIGSIERRA wrote:Nice ...lol where were you last week when I needed ideas....... :P
Lying under a zook ofcoarse :D
Posts: 60
Joined: Wed Jan 11, 2006 8:34 pm
Location: Townsville

Post by Zuki98 »

have u lifted ur case Gutless? if so how far
98 zook xcab lwb coilovers winch and more
Posts: 3
Joined: Mon Dec 03, 2007 9:12 am
Location: Texas

Post by txzuk1988 »

Gutless

Dude... Like that work you did. It looks like you raised the T case? How much? did you clock it also? Did you have to midify the floor and shifter hole throught the floor?


Rich
Posts: 977
Joined: Sun Jul 20, 2003 7:57 pm
Location: Brisbane

Post by Gutless »

Its lifted 30mm, and rotated less than 10 degrees. Gave me more room for a muffler to be mounted above the bash gaurd.
Posts: 3
Joined: Mon Dec 03, 2007 9:12 am
Location: Texas

Post by txzuk1988 »

Did you have to modify the floor?
Posts: 977
Joined: Sun Jul 20, 2003 7:57 pm
Location: Brisbane

Post by Gutless »

txzuk1988 wrote:Did you have to modify the floor?
Nope. 30mm body lift :D
Post Reply

Who is online

Users browsing this forum: No registered users and 1 guest