Notice: We request that you don't just set up a new account at this time if you are a previous user.
If you used to be one of our moderators, please feel free to reach out to Chris via the facebook Outerlimits4x4 group and he will get you set back up with access should he need you.
If you used to be one of our moderators, please feel free to reach out to Chris via the facebook Outerlimits4x4 group and he will get you set back up with access should he need you.
Recovery:If you cannot access your old email address and don't remember your password, please click here to log a change of email address so you can do a password reset.
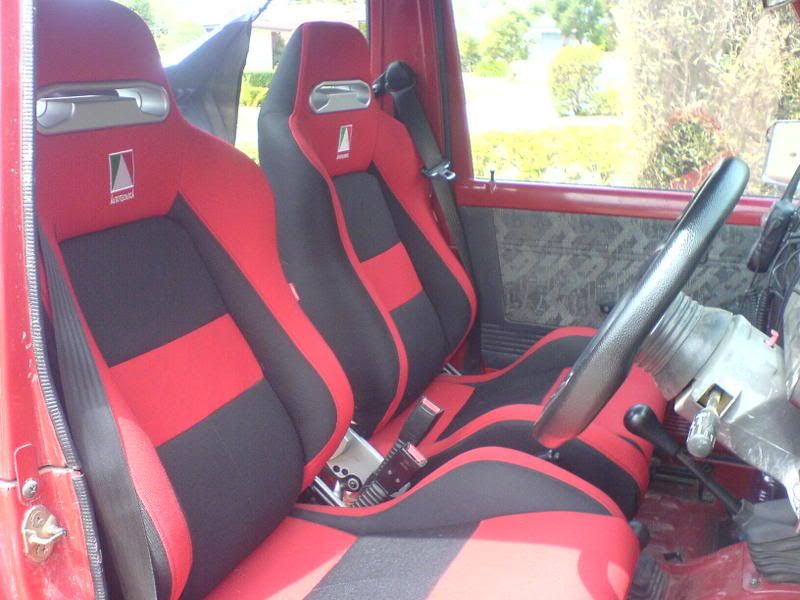
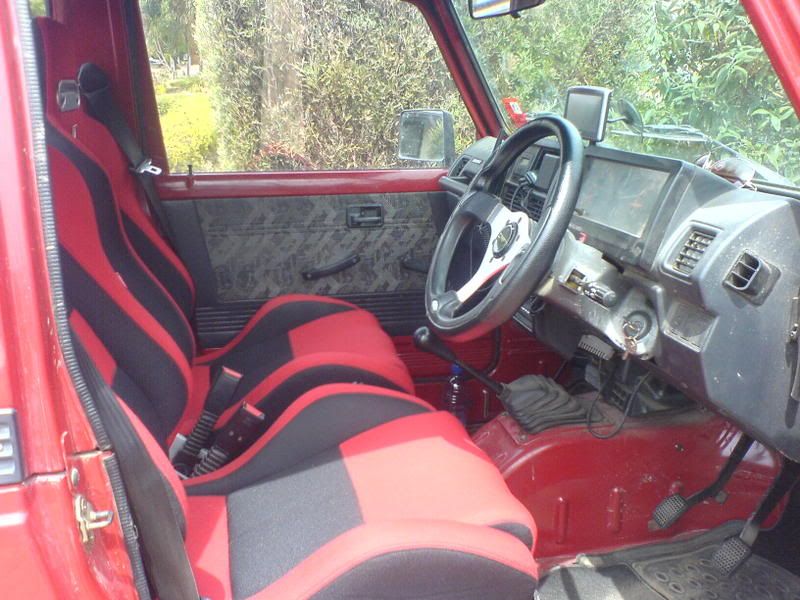
Installing aftermarket seats.
with my new seats the back drivers side bolts are as far as i can see un reachable with the seats bolted in.. i did think of that wasnt sure if thats how you go about it.
91 SWB sierra, 2in spring lift, 2in BL 32 simex ETs, Series 4 RH gearing.
[url=http://www.outerlimits4x4.com/phpBB2/viewtopic.php?t=110288&highlight=]My build up thread[/url]
[url=http://www.outerlimits4x4.com/phpBB2/viewtopic.php?t=110288&highlight=]My build up thread[/url]
With the rails out. it will make it easier to check the difference and then lengthen the holes. Width (distance between the holes across the seat) is the same as the stock seats but the distance from the front holes to the back holes are slightly larger on the aftermarket "autotechnica" seats. A round file or a honing bit on a power drill is perfect for enlargening the holes. I think (double check yourself) I enlargened the holes on the front of the rails - be careful to check this as it is crucial you take the right amount off in the right spot.
Do the driver's side first, the slide mechanism on the passenger side can be a bit of a problem. I suggest taking the whole seat and rails out and photographing the set up. It will help you reassemble the sliding mech' later.
Do the driver's side first, the slide mechanism on the passenger side can be a bit of a problem. I suggest taking the whole seat and rails out and photographing the set up. It will help you reassemble the sliding mech' later.
www.auszookers.com
due to the fact of saftey in this mod and my lack in exp and lack of correct tools and the fact i was shitting myself about stripping a bolt in the seat, i droped it off at my local mechanic this morning. spoke to him tonight he told me it had taken 1.5 hours for the 1st seat. ill get it back tomorow.
i really appreciate your effort in explaining he process to me tho. and if i have to one day, i now fully understand how this would work and how to fix any problems.
i didnt get a allot of rub on either side. it was causing my seatbelt drivers side to grab a bit and not retract easily. this may be due to the fact i fliped my zook and moved the drivers side pillar towards my seat.
Cheers
91 SWB sierra, 2in spring lift, 2in BL 32 simex ETs, Series 4 RH gearing.
[url=http://www.outerlimits4x4.com/phpBB2/viewtopic.php?t=110288&highlight=]My build up thread[/url]
[url=http://www.outerlimits4x4.com/phpBB2/viewtopic.php?t=110288&highlight=]My build up thread[/url]
Van-tastic!
Posts: 6107
Joined: Tue Apr 10, 2007 5:22 pm
Joined: Tue Apr 10, 2007 5:22 pm
Location: .."I MIGHT NOT AGREE WITH WHAT YOU SAY, BUT ILL DEFEND YOUR RIGHT TO SAY IT".
well yup everything went in ok. compared to the stockies they are a little hard but i like the posture they give and the support. and after 2 hours of freeway driving this arvo me and the girlfrind have no pain and where comfy the whole trip.
the only modification that was made was the holes in the sliders, the bolt location width wise was perfect but the front to back needed 5-10 mil of drilling.
heres some pics of the finished product.


the only modification that was made was the holes in the sliders, the bolt location width wise was perfect but the front to back needed 5-10 mil of drilling.
heres some pics of the finished product.


Last edited by vicelore on Wed Jan 30, 2008 9:08 am, edited 1 time in total.
91 SWB sierra, 2in spring lift, 2in BL 32 simex ETs, Series 4 RH gearing.
[url=http://www.outerlimits4x4.com/phpBB2/viewtopic.php?t=110288&highlight=]My build up thread[/url]
[url=http://www.outerlimits4x4.com/phpBB2/viewtopic.php?t=110288&highlight=]My build up thread[/url]
Posts: 328
Joined: Sun Jun 27, 2004 10:35 pm
Joined: Sun Jun 27, 2004 10:35 pm
Location: Pimpin' zooks to disatisfied Jeep owners ;)
Contact:
Be sure to post up plenty of pics as its on my list to do after i strengthen my t/case arms.raqmup wrote:Doing exactly what you blokes have just done, autotechnica seats into my hardtop shorty, this thread has helped a lot!
I'll take pics as we go as well.
Hardcore Wheelin' www.ozwheelers.net
- 94 Zuki - Lux diffs, SPOA, twin locked, 35's, 1.5" wheel spacers, exo, series 4 rockhoppers
- 94 Zuki - Lux diffs, SPOA, twin locked, 35's, 1.5" wheel spacers, exo, series 4 rockhoppers
Who is online
Users browsing this forum: No registered users and 1 guest