Notice: We request that you don't just set up a new account at this time if you are a previous user.
If you used to be one of our moderators, please feel free to reach out to Chris via the facebook Outerlimits4x4 group and he will get you set back up with access should he need you.
Recovery:If you cannot access your old email address and don't remember your password, please click here to log a change of email address so you can do a password reset.

Troopcarrier QTR Chop and rear bar completed

Tech Talk for Cruiser owners.

Moderators: toaddog, Elmo, DUDELUX

Post Reply
Posts: 228
Joined: Sat Dec 11, 2004 9:36 am
Location: Latrobe Valley Victoria

Troopcarrier QTR Chop and rear bar completed

Post by Troopy93 »

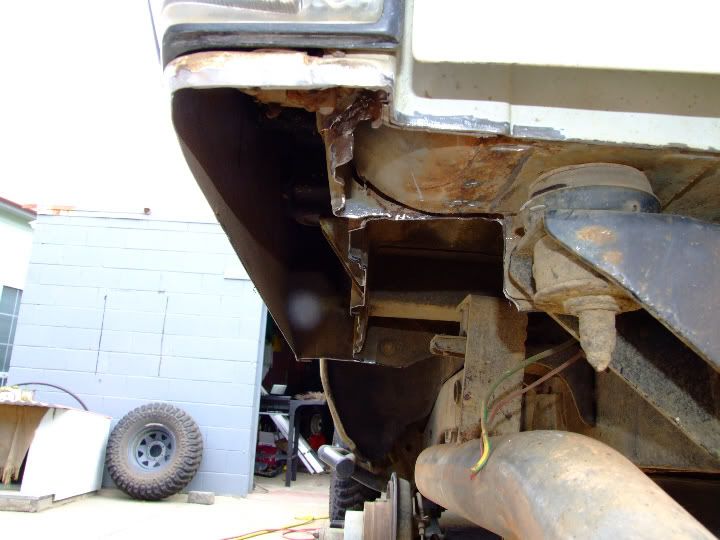
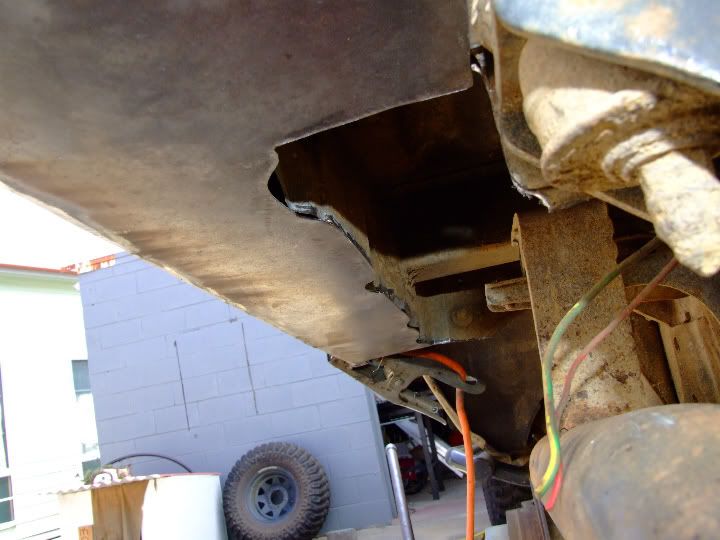
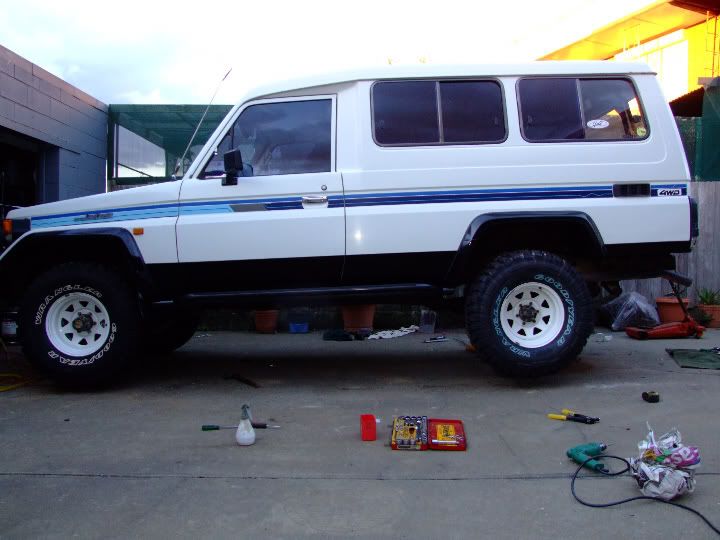
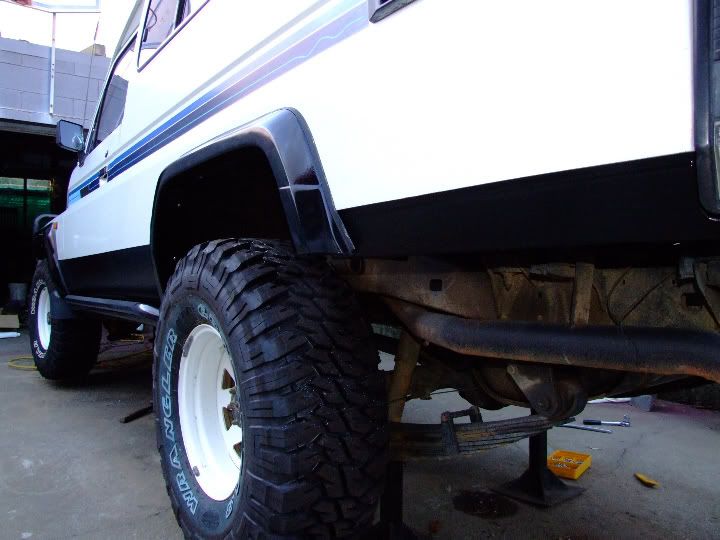
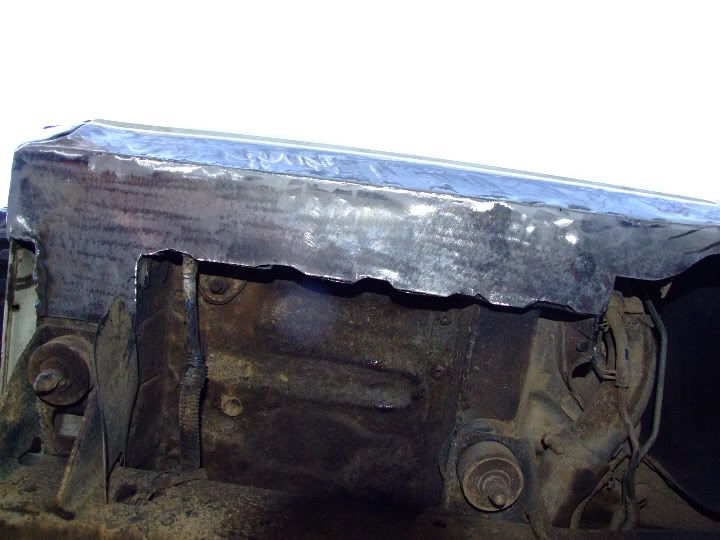
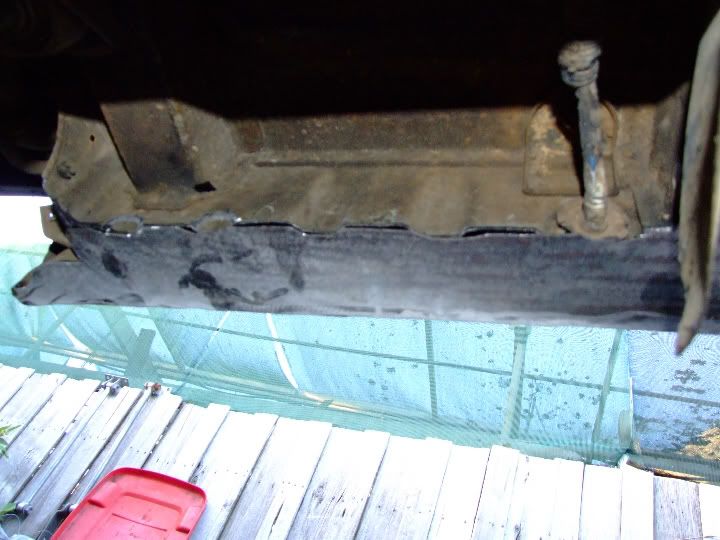
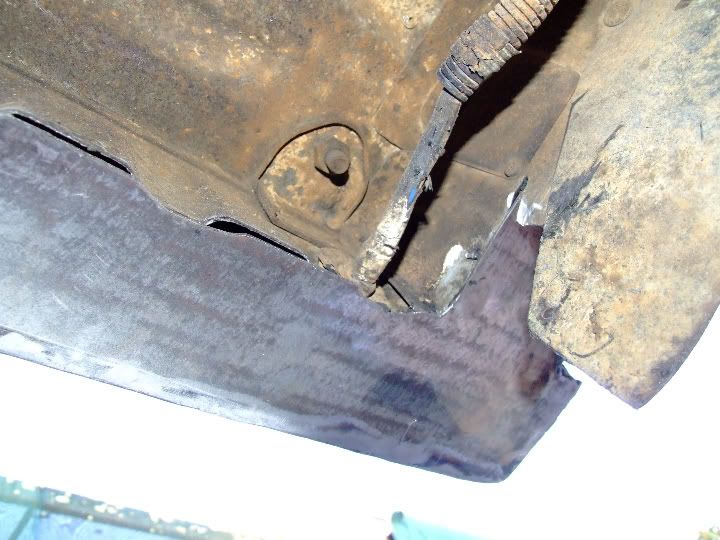
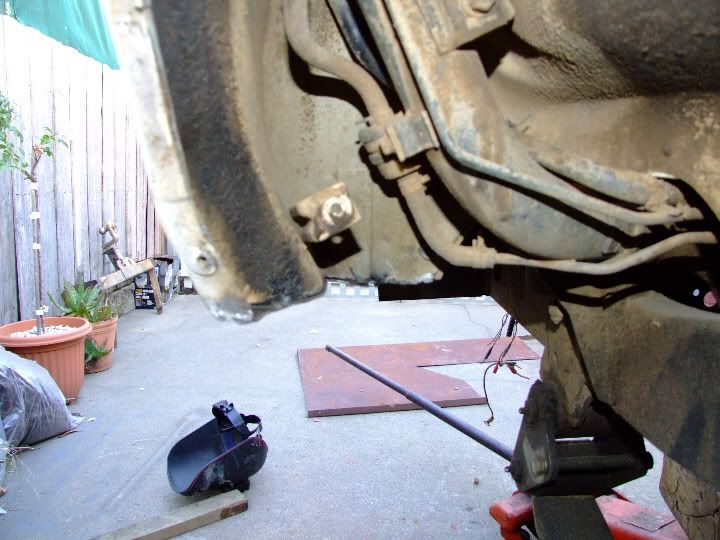
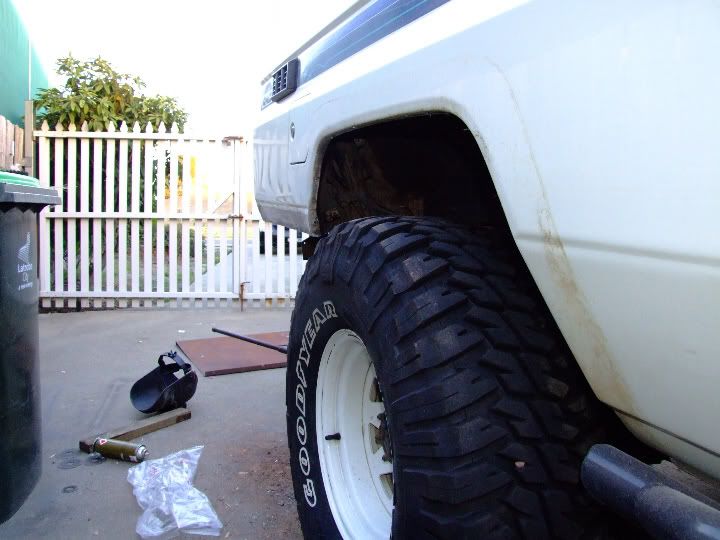
G'day all, On Tuesday 18/3 I started a rear 1/4 chop on my Troopy after denting the rh side on the Tassie Trip, also there was a little bit of white ants creeping in so what better time to do it. No pics of the cutting cos the camera battery was flat, but some of the progress so far. Cheers Gaz

Image

Image

Image

Image

Image

Image

G'day all,
I started at 10.30 Wednesday morning on the LH side and finished it at 2.45, much easier doing the 2nd side . Except for the welding cos the exhaust is in the way. Some pics from start to finish. Cheers Gaz...

Note: Well its finished except for a bit of bog and paint..

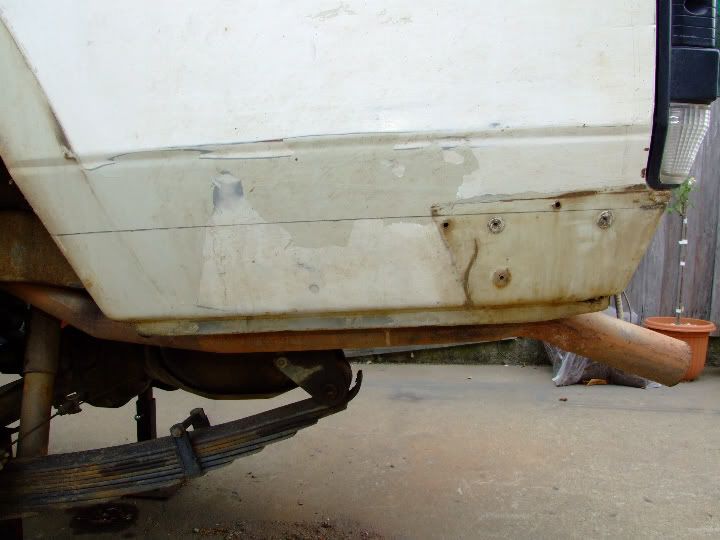
1st pic . Cut on this line
Image

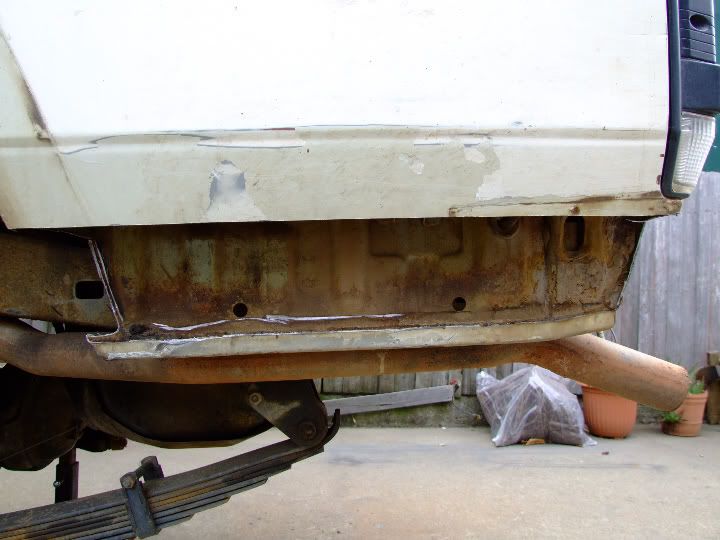
2nd pic. Section removed by cutting along Qtr panel line and then cutting the section out by following the inner support panel.
Image

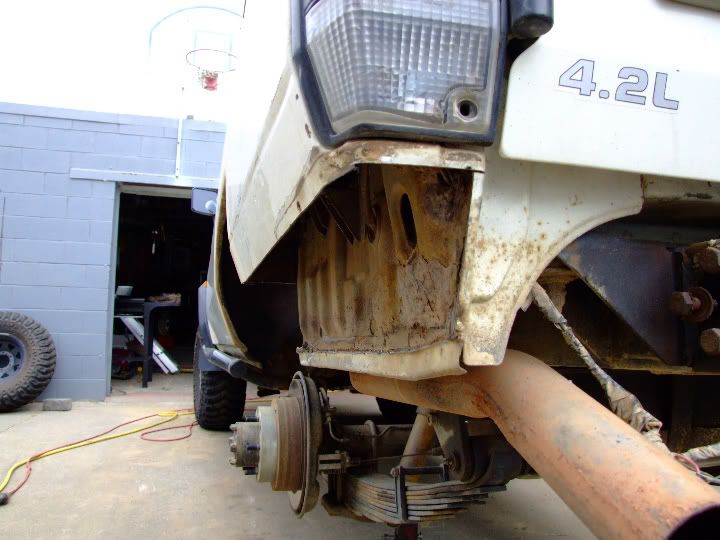
3rd pic. Same as above but looking from rear.
Image

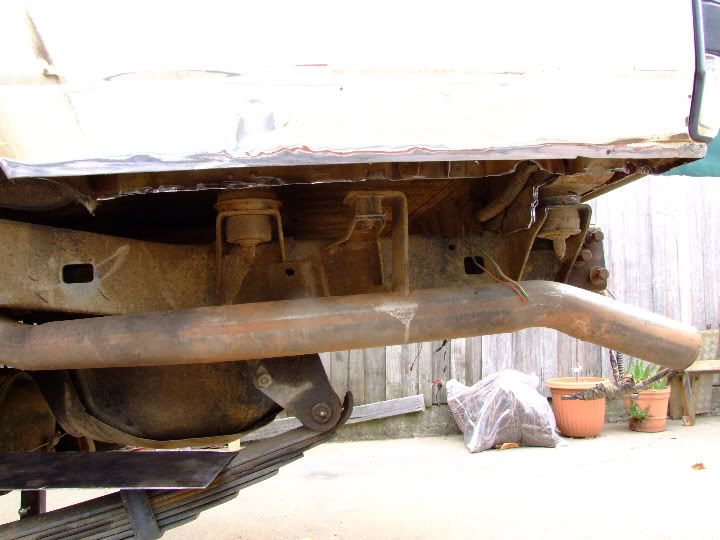
4th pic. This pic shows the inner support panel and other bits removed. This is probably the most time consuming part of the job and is made easier by using an air chisel in the hard to get to places.
Image

5th pic. Same as above but rear view
Image

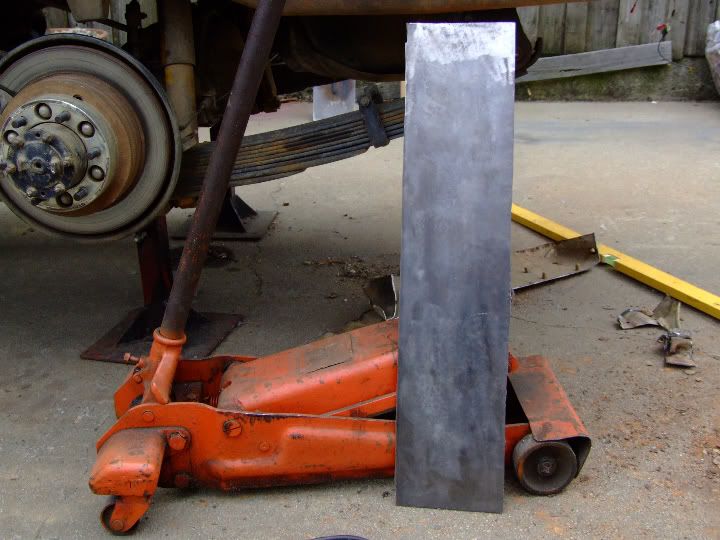
6th pic. New section of plate before marking and cutting to shape.
Image

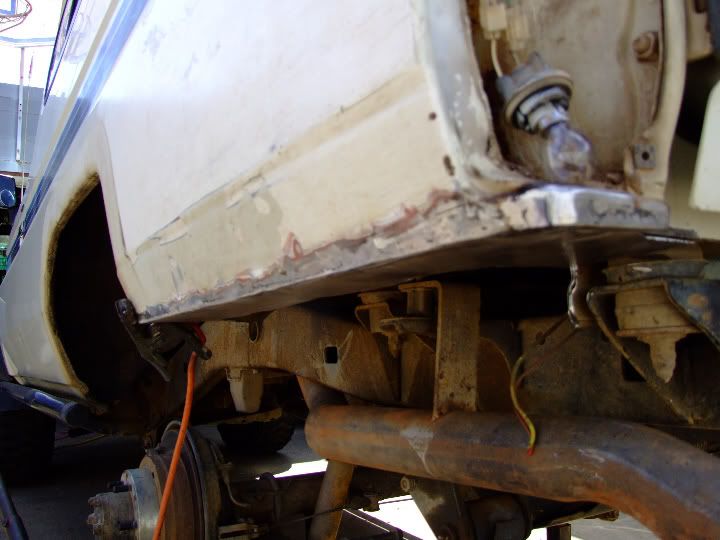
7th pic.Tacked in place and outside welded.
Image

8th pic.Inside ready to be welded.
Image

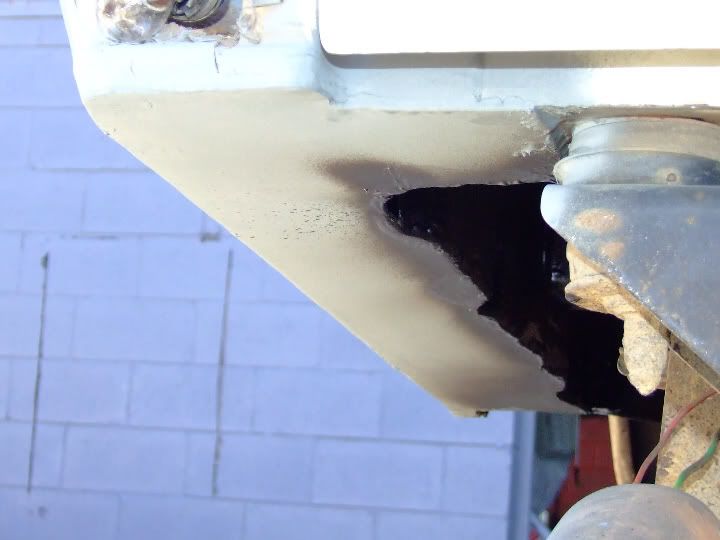
9th pic. Fully welded,Zinc coated and Body deadener applied to inner guard.
Image

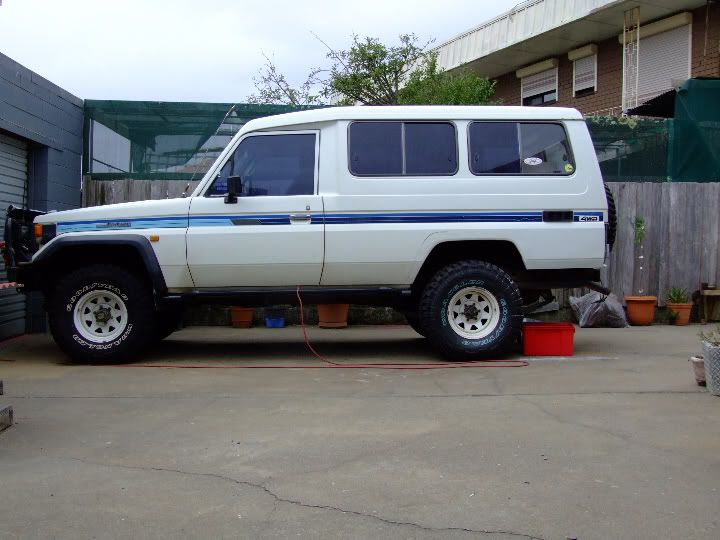
10th pic. Finished view from side.
Image

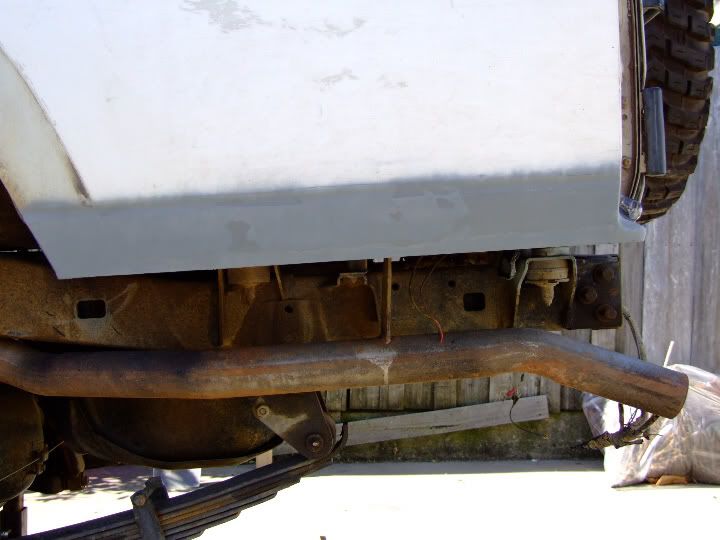
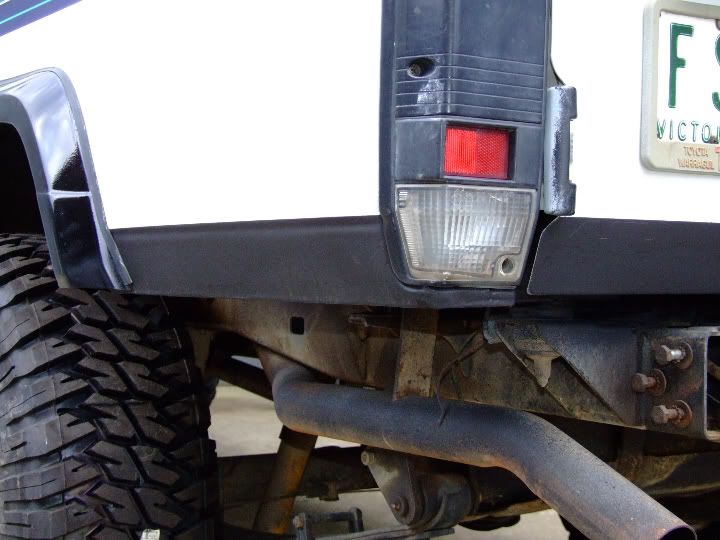
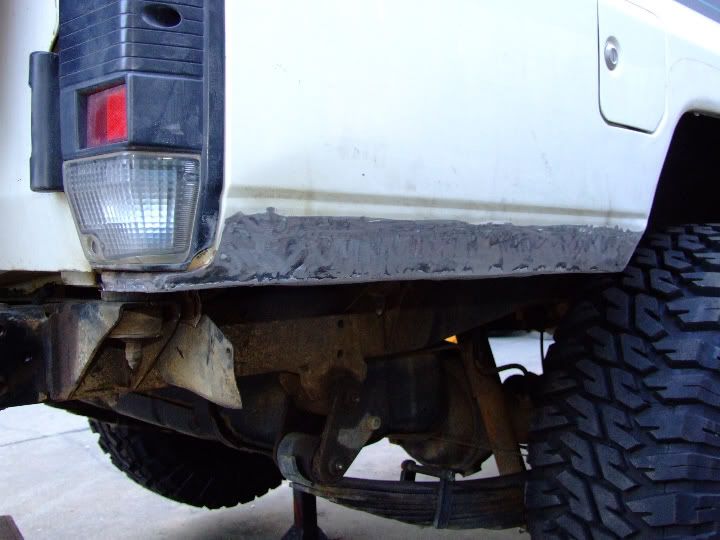
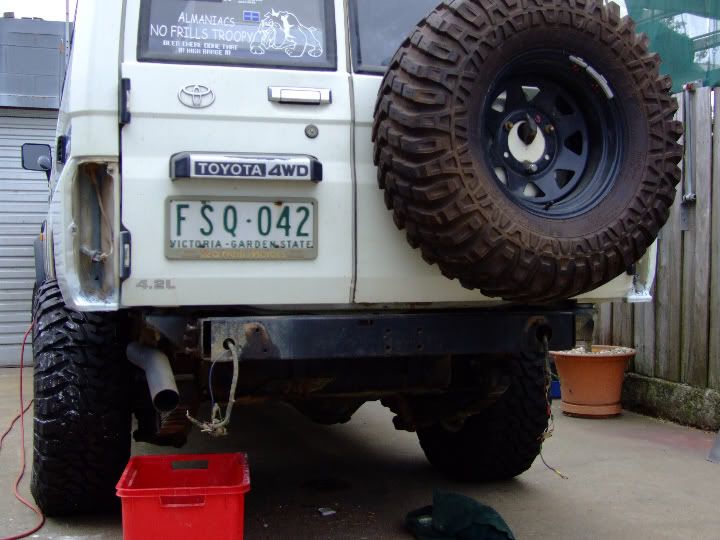
G'day all, well i finished the qtr chop yesterday (Thursday), I never ended up putting any bog on it as it's wasn't really worth the effort.

It is after all a vehicle that gets used for it's intended purpose and the welded bottom area will be hidden by the tube bar when it goes on.

I did use some stone guard to take most of the roughness away and it looks fine.Here's a couple of pics.
Cheers Gaz
Image

Image

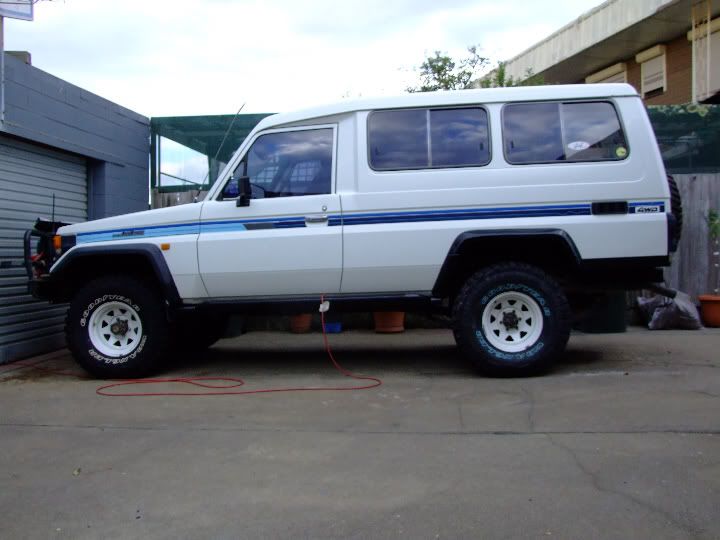
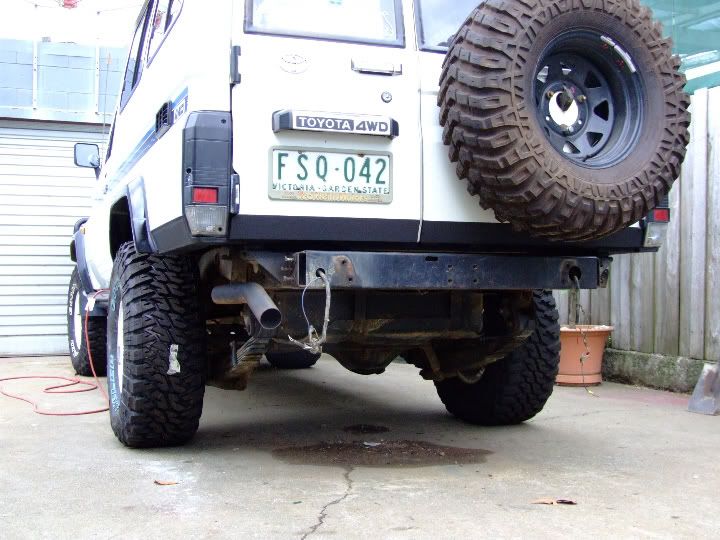
Today (Friday) I had a bit more of a play around and decided to do from the lower bodyline on the vehicle in stone guard and then paint over it in gunmetal grey. This will be happening early next week. All I did today was cut the rear flares to size and fit them up, and recoat the chop area with another coat of stoneguard. And give it a long overdue wash..
Image

Image

Image
Last edited by Troopy93 on Sun May 04, 2008 4:51 pm, edited 4 times in total.
93 1HZ Troopy Double Locked, Lifted and Gassed with NO Benefits by D-GAS

D-GAS= Dont - Give A Shit
Posts: 84
Joined: Tue Dec 20, 2005 9:13 pm
Location: stockton beach is my back yard

nicely done

Post by rod baker »

very nicely done there mate
1982 fj 60 with all late model gxl stuff 3 inches of lift ,snorkel ,lokker,bullbar,winch,ford 5 liter and a meggasquirt ECU
Posts: 89
Joined: Sun Dec 10, 2006 6:42 pm
Location: Sydney, NSW

Post by MYTANK »

Nice Effort Mate!

Trying to think if i want to attempt this on the 60 to fix the quarter damage that has already occured.

What kind of tube you going to use on the bar ?

Dan
________
0/________\0
|O|------|O|
[]----o----[]
Posts: 228
Joined: Sat Dec 11, 2004 9:36 am
Location: Latrobe Valley Victoria

Post by Troopy93 »

MYTANK wrote:Nice Effort Mate!

Trying to think if i want to attempt this on the 60 to fix the quarter damage that has already occured.

What kind of tube you going to use on the bar ?

Dan
Give it a crack Dan it's not that hard, just take your time and have a good look where your cutting.
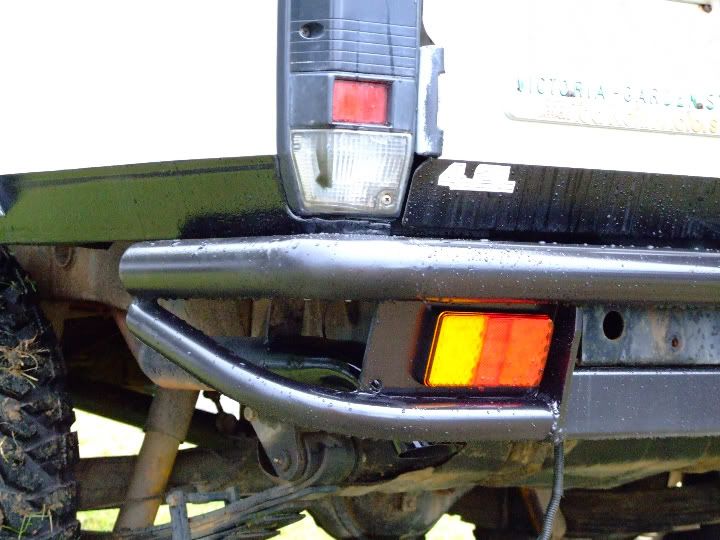
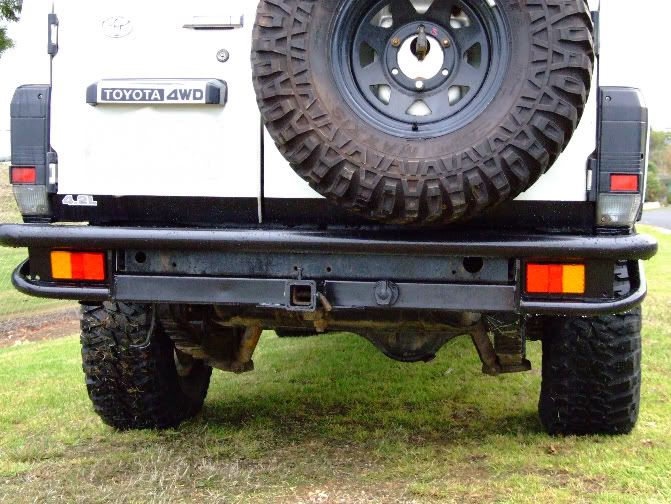
The tube bar will be 65mm OD on the top tube and 50mm OD on the lower tube. Not sure about the end design yet but will be different from the rest you usually see. It will have recessed LED stop/tail lights and indicators. cheers Gaz
93 1HZ Troopy Double Locked, Lifted and Gassed with NO Benefits by D-GAS

D-GAS= Dont - Give A Shit
Posts: 15549
Joined: Tue Oct 22, 2002 9:23 am
Location: Your Mummas House!

Post by bj on roids »

looks awesome!
hands and mums dont count!!!
Posts: 89
Joined: Sun Dec 10, 2006 6:42 pm
Location: Sydney, NSW

Post by MYTANK »

Troopy93 wrote:
Give it a crack Dan it's not that hard, just take your time and have a good look where your cutting.
The tube bar will be 65mm OD on the top tube and 50mm OD on the lower tube. Not sure about the end design yet but will be different from the rest you usually see. It will have recessed LED stop/tail lights and indicators. cheers Gaz
It's definitely something I'm considering!

I'll do a mock up pic of it using photo shop to see how it'd look.

Dan
________
0/________\0
|O|------|O|
[]----o----[]
Posts: 228
Joined: Sat Dec 11, 2004 9:36 am
Location: Latrobe Valley Victoria

Post by Troopy93 »

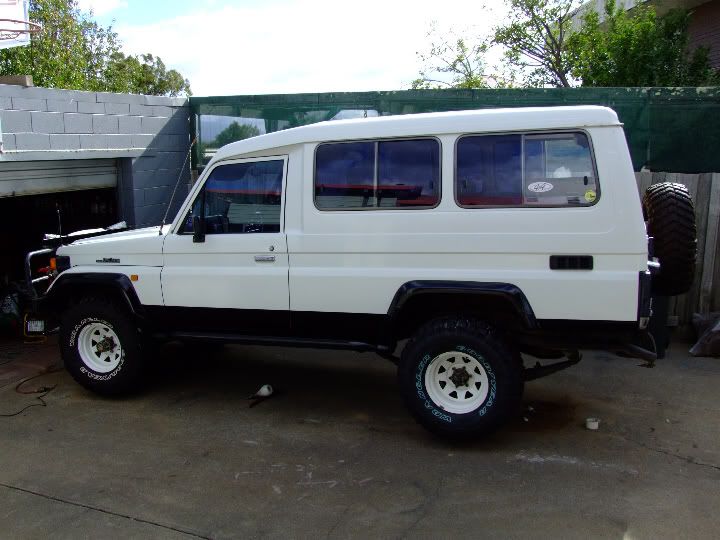
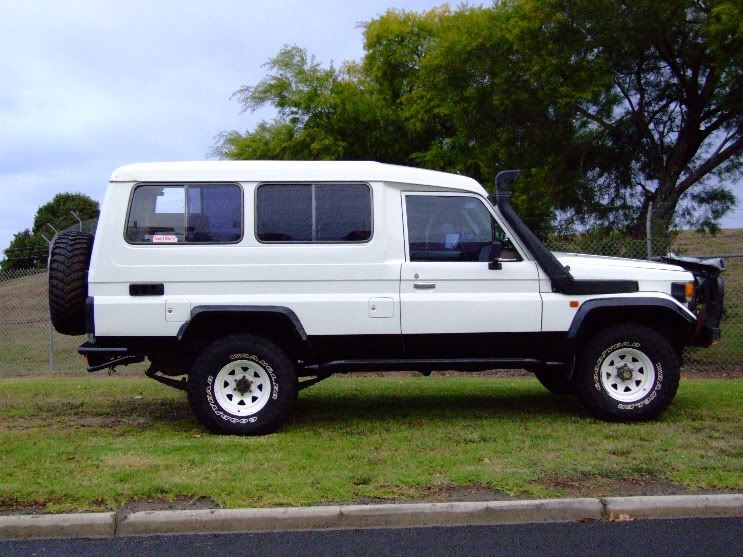
I just finished stoneguarding and painting both sides of the Troopy this arvo, ended up going Gloss Black instead of the Gunmetal Grey. Now to get the rear bar done and she'll be finished, for a while at least.

Cheers Gaz

Image

Image
93 1HZ Troopy Double Locked, Lifted and Gassed with NO Benefits by D-GAS

D-GAS= Dont - Give A Shit
Posts: 228
Joined: Sat Dec 11, 2004 9:36 am
Location: Latrobe Valley Victoria

Post by Troopy93 »

Took another look at the car yesterday after I finished it and i realised the stripes had to go, so I spent last night till 11.00pm and this morning from 8.00 till 10.30 removing them. I reckon it looks way better now.

Image
93 1HZ Troopy Double Locked, Lifted and Gassed with NO Benefits by D-GAS

D-GAS= Dont - Give A Shit
Posts: 3725
Joined: Wed Jun 30, 2004 1:45 pm
Location: Blue Mountains, or on a rig somewhere in bumf*ck idaho

Post by rockcrawler31 »

i got a bit carried away with my quarter chop..........

Image

nice work though. i was always tempted to protect my rear quarters by cutting them off.
http://www.populationparty.org.au/
Posts: 2072
Joined: Sun Feb 11, 2007 4:50 pm
Location: Hobart

Post by macca81 »

at least now you have no chance of denting them :P
[quote="Barnsey"]
Bronwyn Bishop does it for me.[/quote]
Posts: 228
Joined: Sat Dec 11, 2004 9:36 am
Location: Latrobe Valley Victoria

Post by Troopy93 »

Finally finished the rear bar. Heres a couple of pics..


Image

Image

Image
93 1HZ Troopy Double Locked, Lifted and Gassed with NO Benefits by D-GAS

D-GAS= Dont - Give A Shit
Posts: 3725
Joined: Wed Jun 30, 2004 1:45 pm
Location: Blue Mountains, or on a rig somewhere in bumf*ck idaho

Post by rockcrawler31 »

farrrk. that is slick dude.
http://www.populationparty.org.au/
Posts: 291
Joined: Wed Jun 16, 2004 10:44 am
Location: Adelaide

Post by sambo »

where did you get the tail lights. I have been looking for something like that for my rear bar.
05 Manual HDJ100R
84 HJ60 w/12HT, twin locked with longfields
Posts: 228
Joined: Sat Dec 11, 2004 9:36 am
Location: Latrobe Valley Victoria

Post by Troopy93 »

sambo wrote:where did you get the tail lights. I have been looking for something like that for my rear bar.
G'day Sambo, I got them from my local autolec's, cost $69.00.
cheers Gaz


By the way mate, if you put LED lights in the rear and you have an AP Command series cruise you will need to wire a 21watt globe into your brake light circuit or the cruise will not work. mine is wired into the rear 1/4 panel.
93 1HZ Troopy Double Locked, Lifted and Gassed with NO Benefits by D-GAS

D-GAS= Dont - Give A Shit
Posts: 291
Joined: Wed Jun 16, 2004 10:44 am
Location: Adelaide

Post by sambo »

Thanks for the tip,

How come that has to be done.
05 Manual HDJ100R
84 HJ60 w/12HT, twin locked with longfields
Posts: 228
Joined: Sat Dec 11, 2004 9:36 am
Location: Latrobe Valley Victoria

Post by Troopy93 »

The control unit looks for resistence through the brake circuit to be able to disengage the Cruise Control when you tap the brake pedal.

We only found out after installing the lights that even with the ignition off there was 1 led slightly glowing on each brake light.

After the autolec searched around for over an hour to try and fix the problem (knowing it was getting a feed from somewhere) he noticed the Cruise Control box under the dash and realised what the problem was. He wired in a 5 watt globe and the led's stopped glowing.

The only problem then was the cruise would not work (not enough resistence). So he wired in a 21 watt globe and it's all cool now.
93 1HZ Troopy Double Locked, Lifted and Gassed with NO Benefits by D-GAS

D-GAS= Dont - Give A Shit
Posts: 15549
Joined: Tue Oct 22, 2002 9:23 am
Location: Your Mummas House!

Post by bj on roids »

Also your indicators will click fast, install a timed indicator unit, rather than a load sensing one :cool:
hands and mums dont count!!!
Posts: 15549
Joined: Tue Oct 22, 2002 9:23 am
Location: Your Mummas House!

Post by bj on roids »

For more resistance you could put the seris 1 troopie lights in the rear quarter panels.

OR wire in the stock "RV" brake light (the one up high above the gutter) hook one of them up too add resistance (unless its LED too)
hands and mums dont count!!!
Posts: 416
Joined: Sun Jul 01, 2007 1:04 pm
Location: In a van down by the river.

Post by locktup4x4 »

That thing is cool. Nice job.

Jason
LOCKTUP4X4.COM.AU
LOCKTUPFABRICATION.COM
Posts: 228
Joined: Sat Dec 11, 2004 9:36 am
Location: Latrobe Valley Victoria

Post by Troopy93 »

Yeah I forgot about the indicators, all he did was wire in an extra 5watt globe in each front indicator and all fixed. Makes the fronts brighter too.
93 1HZ Troopy Double Locked, Lifted and Gassed with NO Benefits by D-GAS

D-GAS= Dont - Give A Shit
Post Reply

Who is online

Users browsing this forum: No registered users and 7 guests