Notice: We request that you don't just set up a new account at this time if you are a previous user.
If you used to be one of our moderators, please feel free to reach out to Chris via the facebook Outerlimits4x4 group and he will get you set back up with access should he need you.
Recovery:If you cannot access your old email address and don't remember your password, please click here to log a change of email address so you can do a password reset.
Fitted WT Diffs to NT
Fitted My WT Diffs, thought I'd make a bit of a step by step may help others with their mods? Have PM'ed Layto to put in the bilble too.
Front Diff
First we marked a line straight thru the locating holes on the perches and along the diff tubes this line is what will help keep the angles all correct, also centre punched the tubes where the locating hole was as a reference point to work off, we marked front and back of perch in case it fell off while checking measurments etc..
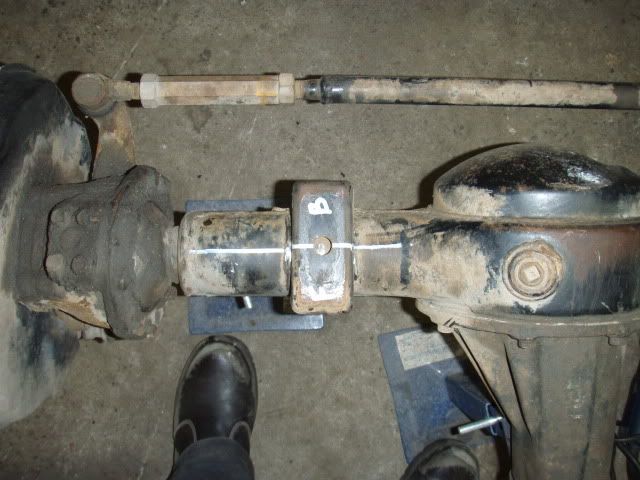
Then we proceeded to cut mounts off with an angle grinder trying not to cut into the tubes.
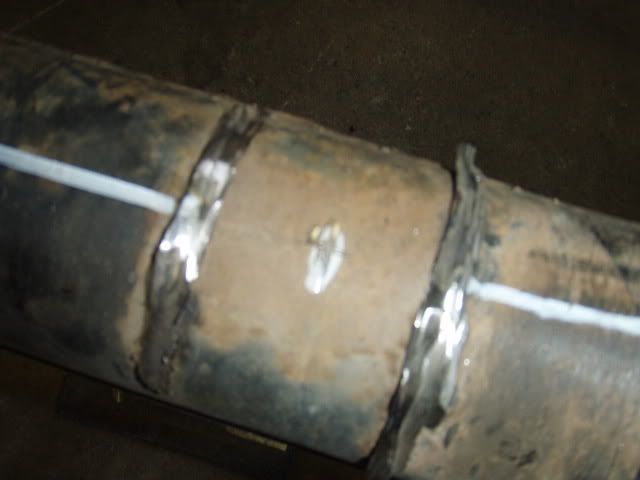
Cleaned up the the old welds with a grinding disc making sure to re-mark our lines if we removed any at any time.
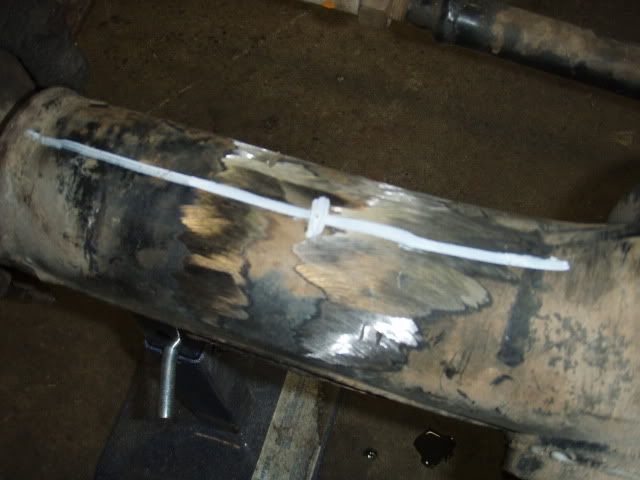
Then measured NT Diff perches locating holes (centre to centre) then measured the WT ones & devided the difference by 2 and remounted the perches to line up centre of this mark, We checked both measurements from the end of the tubes to be sure (it's roughly 150mm from inside edge of small lip on end of diff tubes.) then we tacked one on at a time and lay a straight edge on each one and eyed them up level but kept the main mark on tubes lined up! when happy we welded em up a little at a time so as not to put too much heat into one area! didn't want to warp to tubes in any way. I have also removed and refitted the U-bolt locators as well, the one on the short side we had to cut in half because it rode up on an angle and would not sit properly. Then we rewelded the hump half of it to the pumpkin and made sure that the U-bolts sat straight before tacking or welding in place.
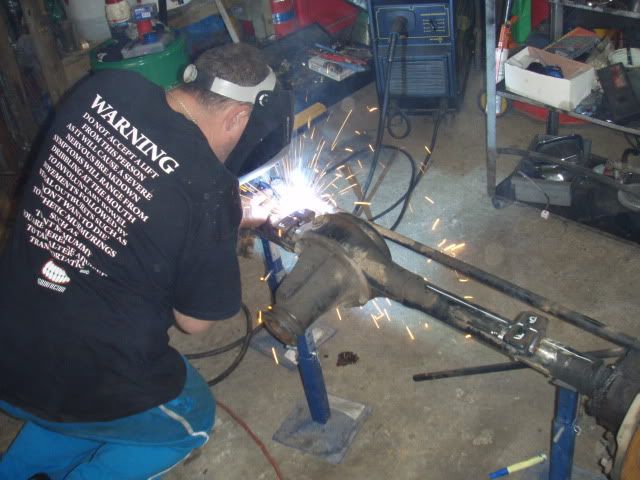
Once all welded and painted we fitted it all up using a WT Drag link and swapped the flanges on the diff and my 1ltr transfer case to NT ones or you could always redrill the WT to NT spacing at the diff if you wanted to? Now the standard 1.3 drive shaft will just bolt straight in. Fit up extended brakelines and bleed brakes, fill diff and transfer and we're all done. Now moving on to the rear.
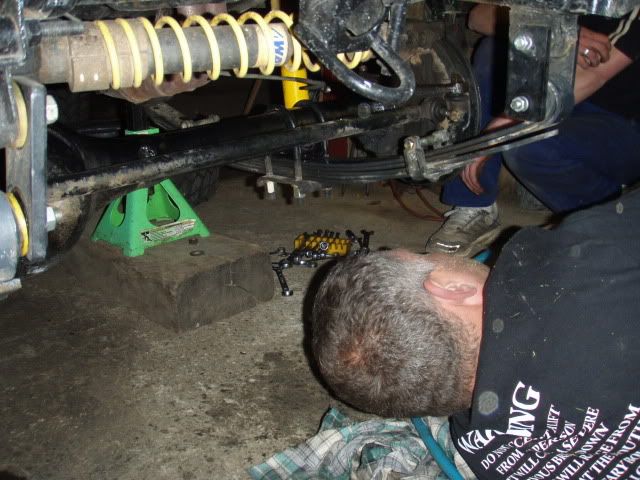
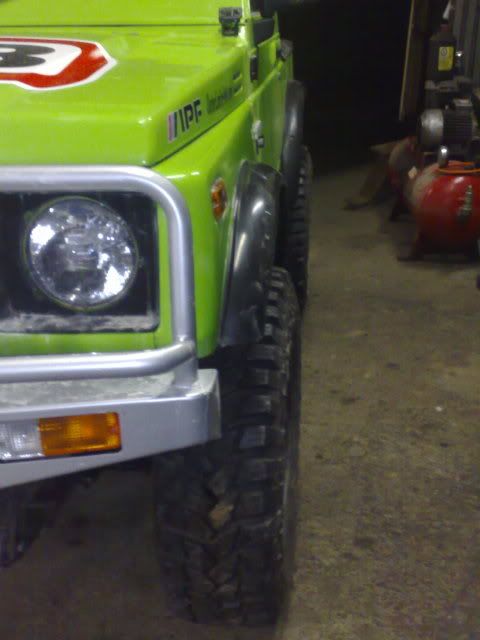
She's a good 50mm wider each side now as you can see compared to the rear!
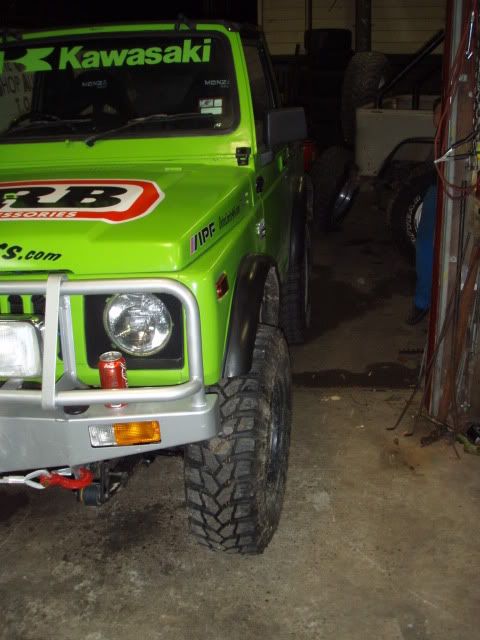
Rear Diff
Ok remove rear diff, drive shaft, brakelines as before.
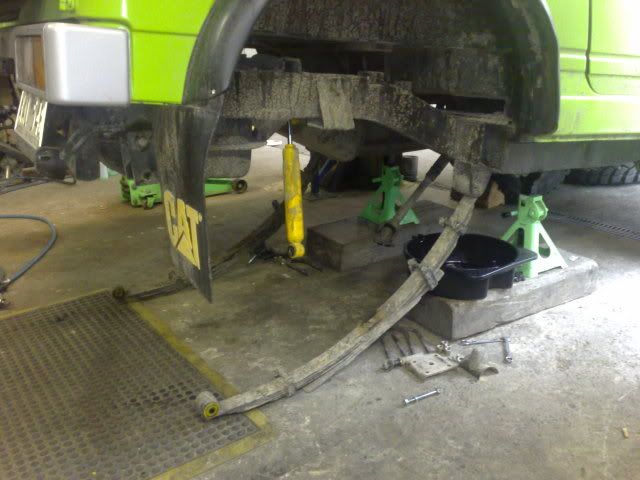
Remove all brake lines from new diff so as not to cut thru when grinding, I removed the hand brake cable set up as mine has a transfer hand brake set up now. Next mark lines on tubes thru centre of perch locator holes and then along perch as well also mark centre of locator same as before.
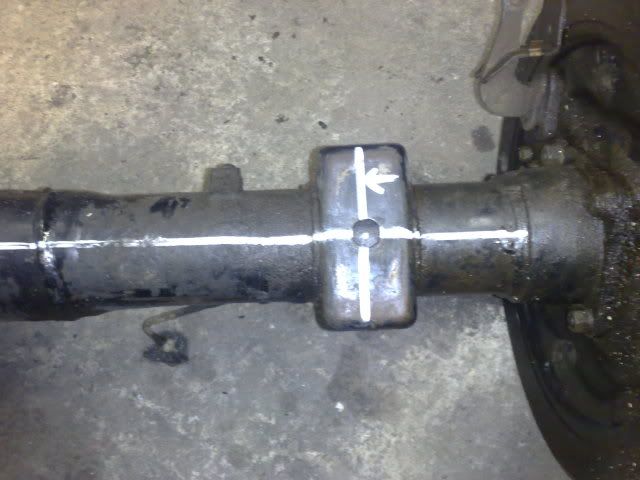
Then work out new mounting position as with front diff previously and mark and centre punch so as not to lose mark while grinding.
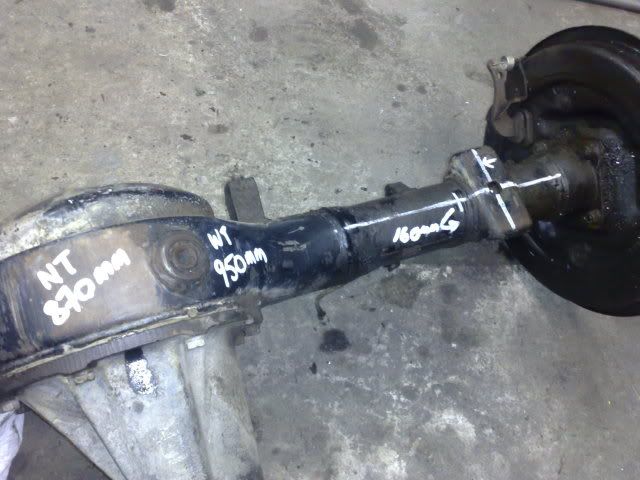
It works out to around 160mm from back of plate on the end of tube.
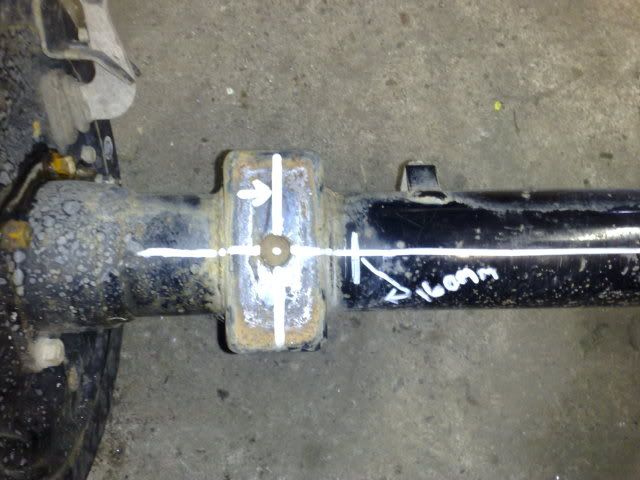
Cut mounts off again trying not to cut into tubes and move to new location, tack one in place then lay a straight edge on each as done before and eye the two up together.
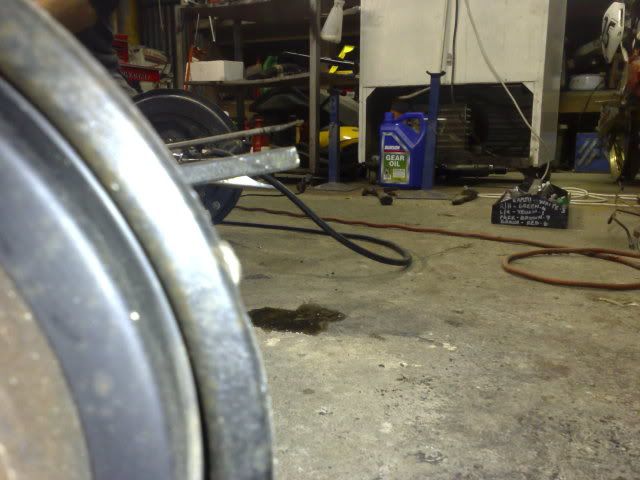
Then when happy weld in place as before.
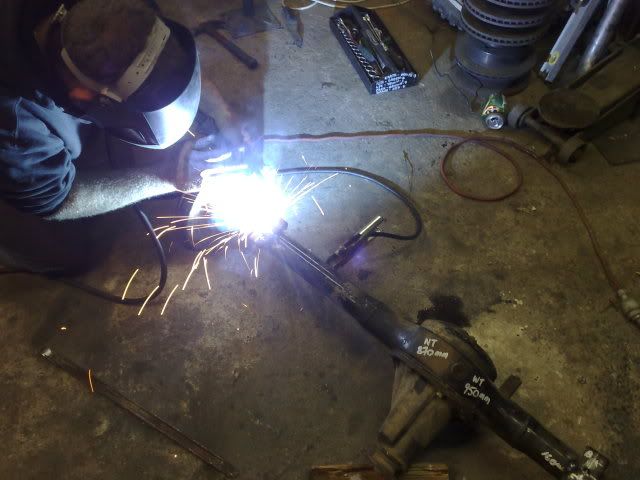
Clean up welds with a wire brush and paint.
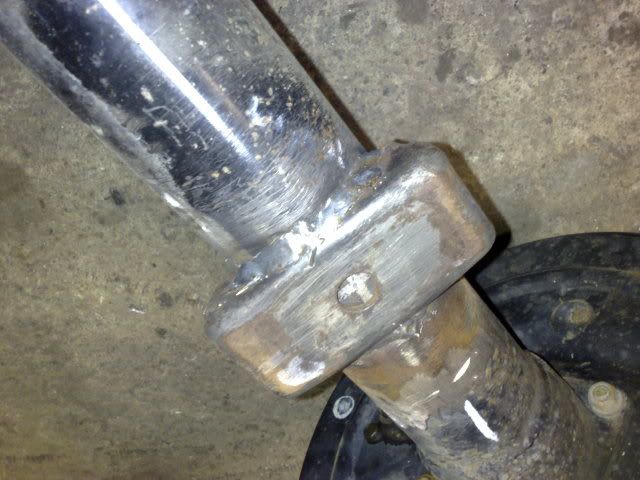
Then change diff flange to NT one.
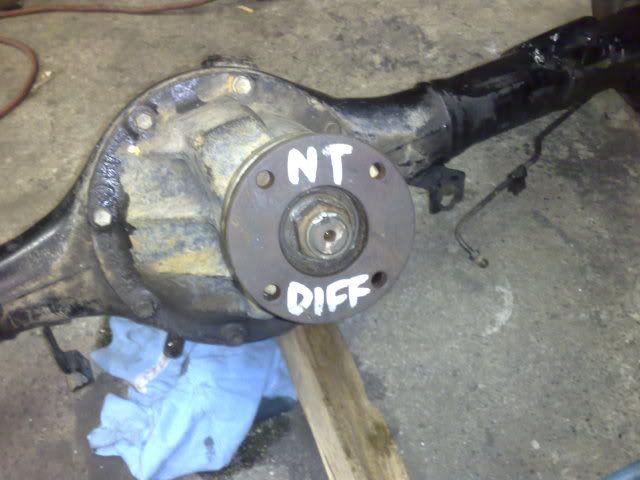
I had to change the transfer brake drum to NT 1.3 because mine has a 1ltr transfer but same as removing a flange basically, just unbolt and release hand brake and remove drum. Ok now you can fit rear diff back into car just re-use all previous conponents from before. Once all back in refit WT brake lines a little bending is needed in order to refit and if it's a 1ltr model you'll need to drill out brake line mounts on chassis to around 18mm dia to fit, then bleed, fill etc etc..
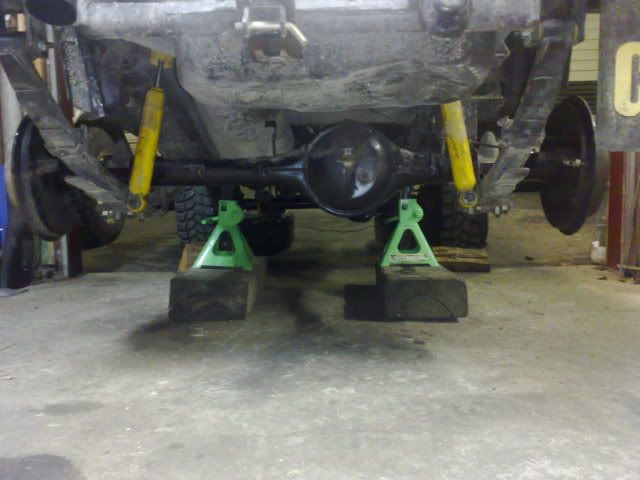
refit wheels all done!
Hope this helps a few out with their conversion? Cheers Robb.
Front Diff
First we marked a line straight thru the locating holes on the perches and along the diff tubes this line is what will help keep the angles all correct, also centre punched the tubes where the locating hole was as a reference point to work off, we marked front and back of perch in case it fell off while checking measurments etc..
Then we proceeded to cut mounts off with an angle grinder trying not to cut into the tubes.
Cleaned up the the old welds with a grinding disc making sure to re-mark our lines if we removed any at any time.
Then measured NT Diff perches locating holes (centre to centre) then measured the WT ones & devided the difference by 2 and remounted the perches to line up centre of this mark, We checked both measurements from the end of the tubes to be sure (it's roughly 150mm from inside edge of small lip on end of diff tubes.) then we tacked one on at a time and lay a straight edge on each one and eyed them up level but kept the main mark on tubes lined up! when happy we welded em up a little at a time so as not to put too much heat into one area! didn't want to warp to tubes in any way. I have also removed and refitted the U-bolt locators as well, the one on the short side we had to cut in half because it rode up on an angle and would not sit properly. Then we rewelded the hump half of it to the pumpkin and made sure that the U-bolts sat straight before tacking or welding in place.
Once all welded and painted we fitted it all up using a WT Drag link and swapped the flanges on the diff and my 1ltr transfer case to NT ones or you could always redrill the WT to NT spacing at the diff if you wanted to? Now the standard 1.3 drive shaft will just bolt straight in. Fit up extended brakelines and bleed brakes, fill diff and transfer and we're all done. Now moving on to the rear.
She's a good 50mm wider each side now as you can see compared to the rear!
Rear Diff
Ok remove rear diff, drive shaft, brakelines as before.
Remove all brake lines from new diff so as not to cut thru when grinding, I removed the hand brake cable set up as mine has a transfer hand brake set up now. Next mark lines on tubes thru centre of perch locator holes and then along perch as well also mark centre of locator same as before.
Then work out new mounting position as with front diff previously and mark and centre punch so as not to lose mark while grinding.
It works out to around 160mm from back of plate on the end of tube.
Cut mounts off again trying not to cut into tubes and move to new location, tack one in place then lay a straight edge on each as done before and eye the two up together.
Then when happy weld in place as before.
Clean up welds with a wire brush and paint.
Then change diff flange to NT one.
I had to change the transfer brake drum to NT 1.3 because mine has a 1ltr transfer but same as removing a flange basically, just unbolt and release hand brake and remove drum. Ok now you can fit rear diff back into car just re-use all previous conponents from before. Once all back in refit WT brake lines a little bending is needed in order to refit and if it's a 1ltr model you'll need to drill out brake line mounts on chassis to around 18mm dia to fit, then bleed, fill etc etc..
refit wheels all done!
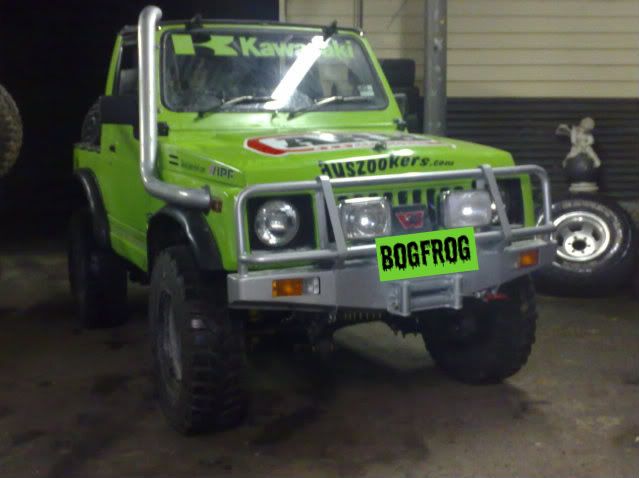
Hope this helps a few out with their conversion? Cheers Robb.
Last edited by BOGFROG on Sun Jun 21, 2009 5:40 pm, edited 2 times in total.
Suzuki Sierra: half the size, half the weight, half the cost & twice the fun :lol: why would you drive anything else?
Frog Build up:
http://www.outerlimits4x4.com/ftopic145665.php&highlight=frog
Frog Build up:
http://www.outerlimits4x4.com/ftopic145665.php&highlight=frog
Yeah still will chase up some NT centres but these will be ok for now but yes did have 1ltr NT diffs in before but just happy to be a littlle more stable and also having front disc brakes instead of the 1ltr drums she actually stops now so very happy thanks Turbo Tonka
Suzuki Sierra: half the size, half the weight, half the cost & twice the fun :lol: why would you drive anything else?
Frog Build up:
http://www.outerlimits4x4.com/ftopic145665.php&highlight=frog
Frog Build up:
http://www.outerlimits4x4.com/ftopic145665.php&highlight=frog
well done BF, I just hope you dont find yourself less capable now in those deep victorian ruts. I find that wider diffs would sit me in the ruts, where I seem to ride the sides of them with my NT's, which is the reason i havnt done the conversion.
Good write up and technicle info, possible bible material?
85 LWB w. FRP Canopy
Ca18det conversion in progress, Vit PS, RUF,
6.5:1's, 33x12.5 Bfg's, custom front and rear bars.
Ca18det conversion in progress, Vit PS, RUF,
6.5:1's, 33x12.5 Bfg's, custom front and rear bars.
Hey mate thats the centre to centre measurement for rear diff only as front diff is different measurement just need to work out the difference and devide by 2 as said it's roughly 160mm from back of plate at end of each tube. Front Diff is roughly 150mm from inside of small lip on end of diff tube.Remydog05 wrote:Great Clear Write up!
The measurements you have on top of the WT diff, the NT 870mm and WT 950mm, is that the spring spacing outside to out side or centre to center?
Great Work mate!
Thanks Spike_Sierra still narrower than most out there with diffs and offset and tyres she's still only got a 61.5 inch (1560mm) wide footprint so still quite narrow so should be fine but we'll see? cheers Robb
Suzuki Sierra: half the size, half the weight, half the cost & twice the fun :lol: why would you drive anything else?
Frog Build up:
http://www.outerlimits4x4.com/ftopic145665.php&highlight=frog
Frog Build up:
http://www.outerlimits4x4.com/ftopic145665.php&highlight=frog
God Of Emo
Posts: 7350
Joined: Sun Aug 24, 2003 7:04 pm
Location: Newy, home of the ZOOK (Rockin the 'diff)
Contact:
Who is online
Users browsing this forum: No registered users and 1 guest