The Turbo has been on the lux now for two months and it's going strong so I thought I'd do a write up on how I went about it. Not just the steps and pics of what I did but links to the many resources I found while researching the traps and pitfalls.
I'm no professional mechanic and I admit there may be better ways to do some of the work for the install but the purpose of this post is to help others like me that don't have a heap of mechanical experience.
A couple of notes before I start. My turbo came off an early 80's model 2L-T fitted hilux so it doesn't have water cooling which is one step most others will need to do as the water cooled CT20 turbo seems more common. Also I chose to run the oil return to the sump based on my research which makes the install a little more tricky.
First up here are the links to the two write ups I found that gave me the confidence to perform this mod.
http://bjblaster.homedns.org/projects/a ... index.html" onclick="window.open(this.href);return false;
you need to sign up to see this one:
http://www.4wheeling.ca/showthread.php? ... ight=turbo" onclick="window.open(this.href);return false;
As I said earlier I got the turbo off an early 80's 2L-T motor. Parts I got for the install:
1. Turbo manifold
2. Turbo and oil feed/return lines
3. Inlet manifold
4. All cross over pipes to suit
5. Complete exhaust including dump pipe and heat shields
I also got a fuel pump with boost compensator but I'm yet to do anything with that.

1. Turbo Manifold
First thing I did was the exhaust side.
The turbo manifold has an EGR (exhaust gas recirculate) pipe that connects the exhaust manifold to the inlet. Apparently it's an emission control that is best removed - see the link for details.
http://www.toyotasurf.asn.au/techsite/egr.htm" onclick="window.open(this.href);return false;
I completely removed mine and used the blank plate as a mount point for my EGT (exhaust gas temp) probe.
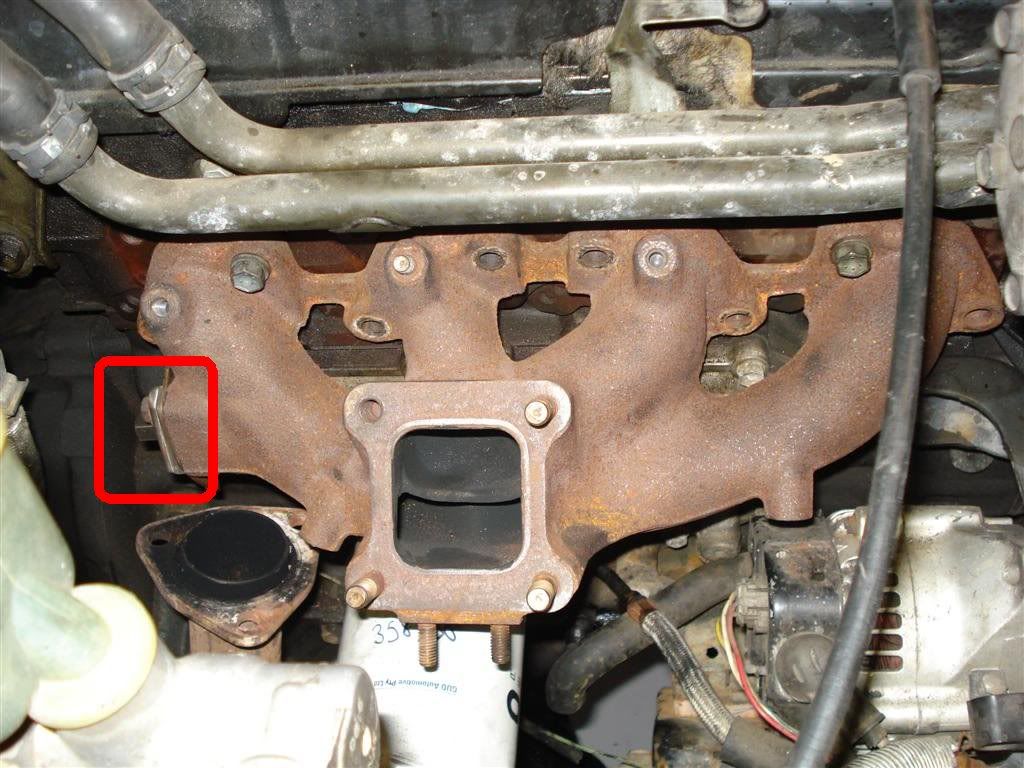
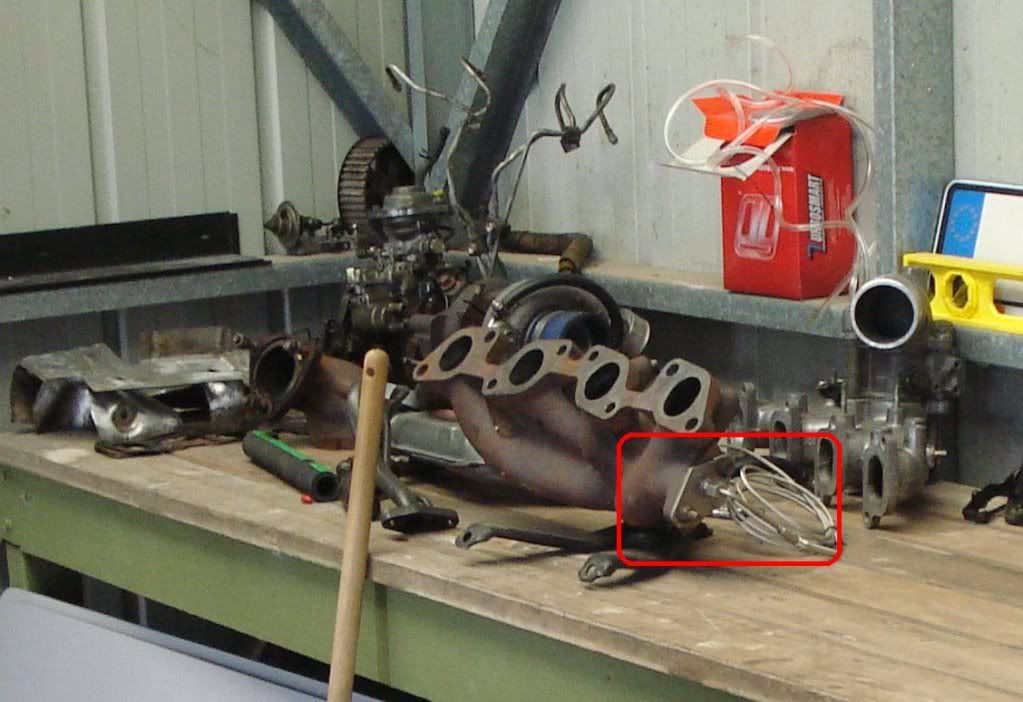
Here's the stock exhaust manifold before removal
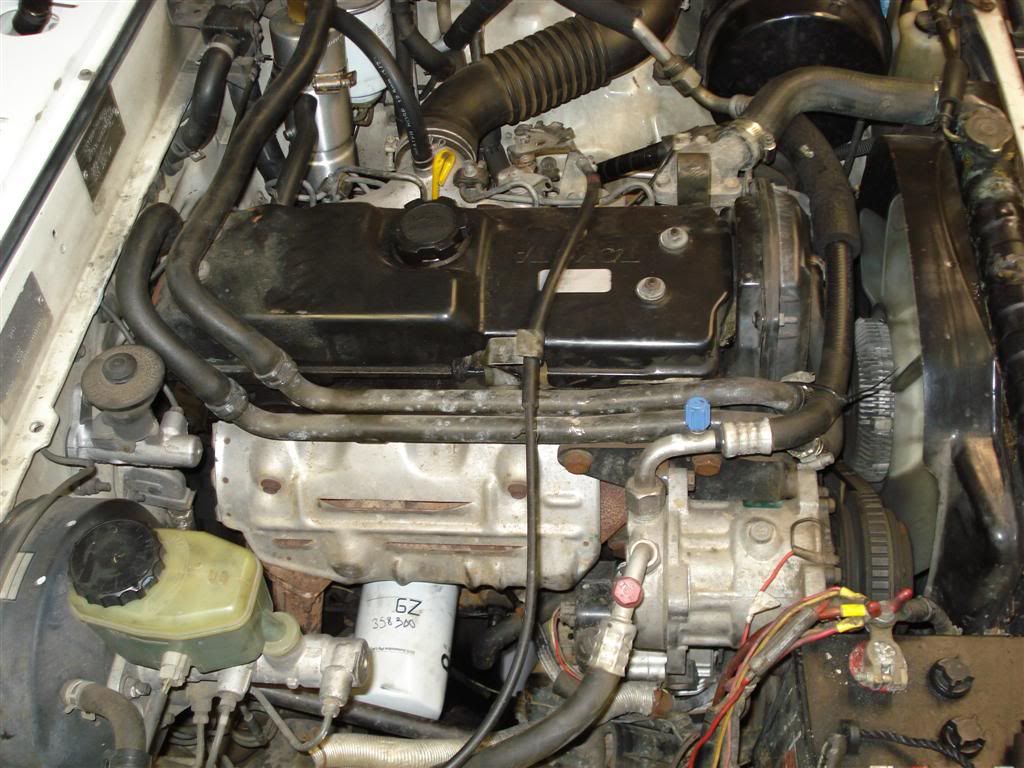
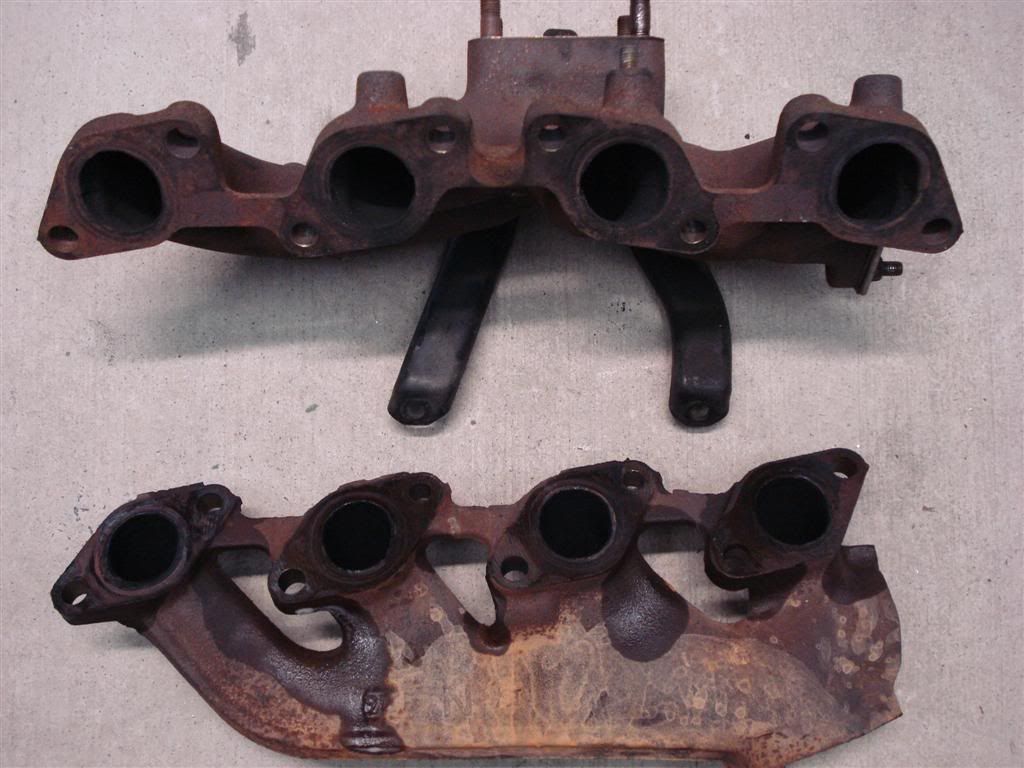
After you remove the stock exhaust manifold you move the studs into the holes I've marked.
In my case the studs came out when removing the nuts. I also recommend using wd40 to loosen the treads.
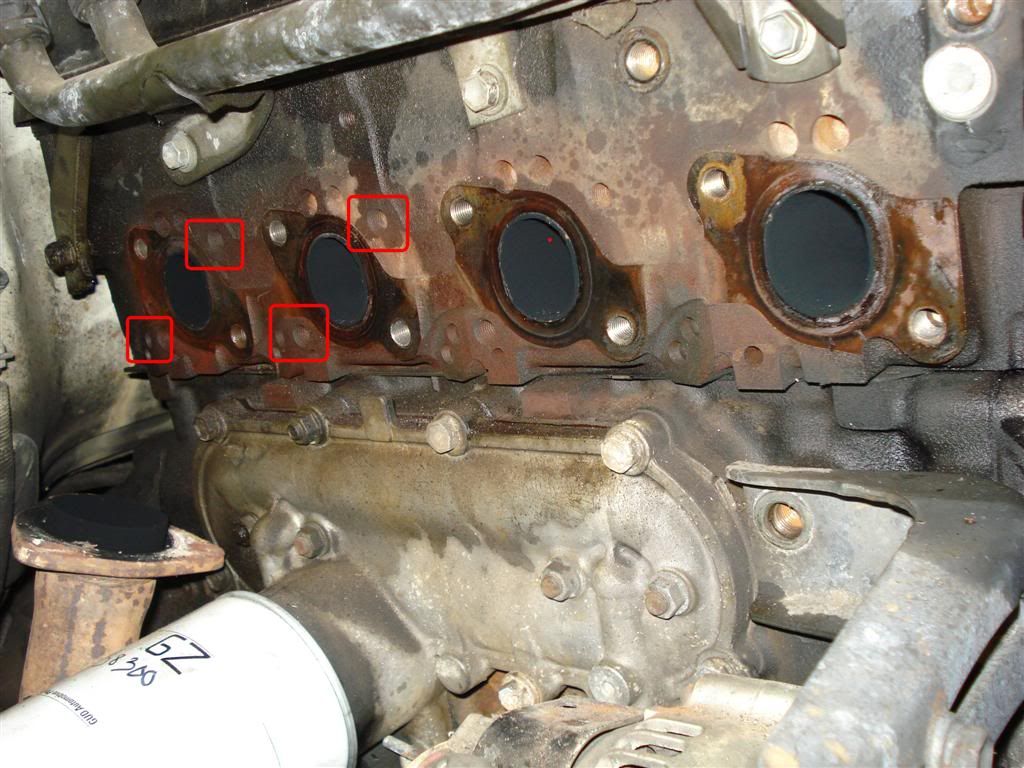
Here's why. The manifold bolt patterns are different.
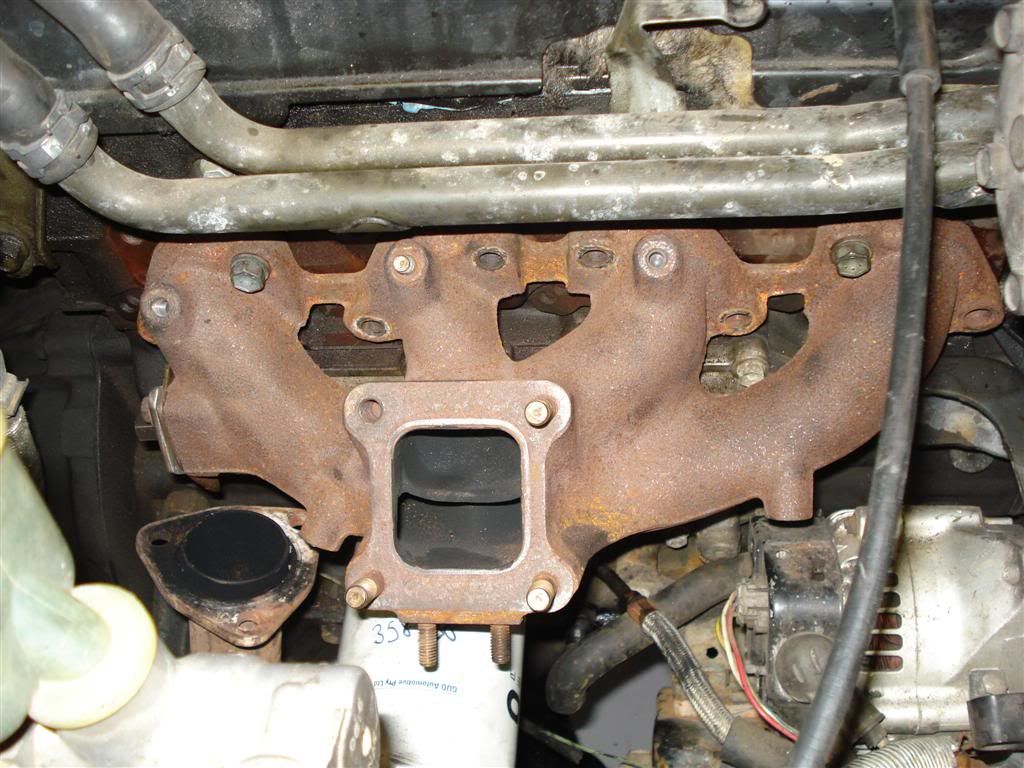
And here is the turbo manifold mounted.
2. Turbo oil lines
Next I tackled the Turbo oil feed and return lines.
At this point I deviated from the other install threads that use the alternator feed and return by teeing into them.
Oil Feed.
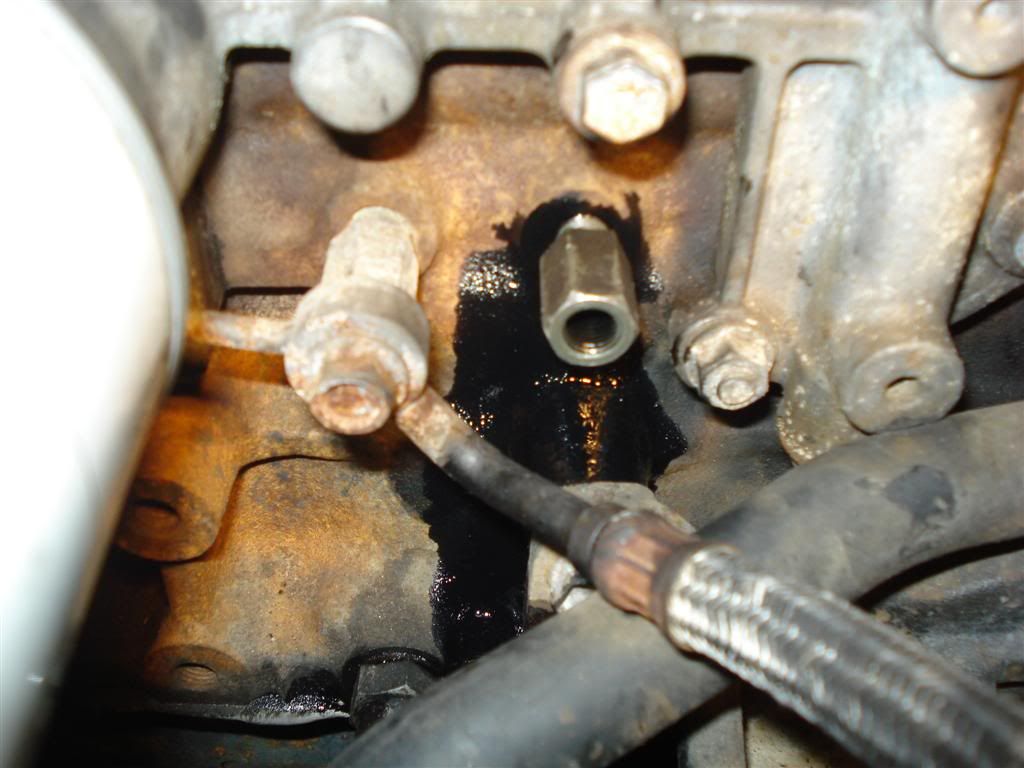
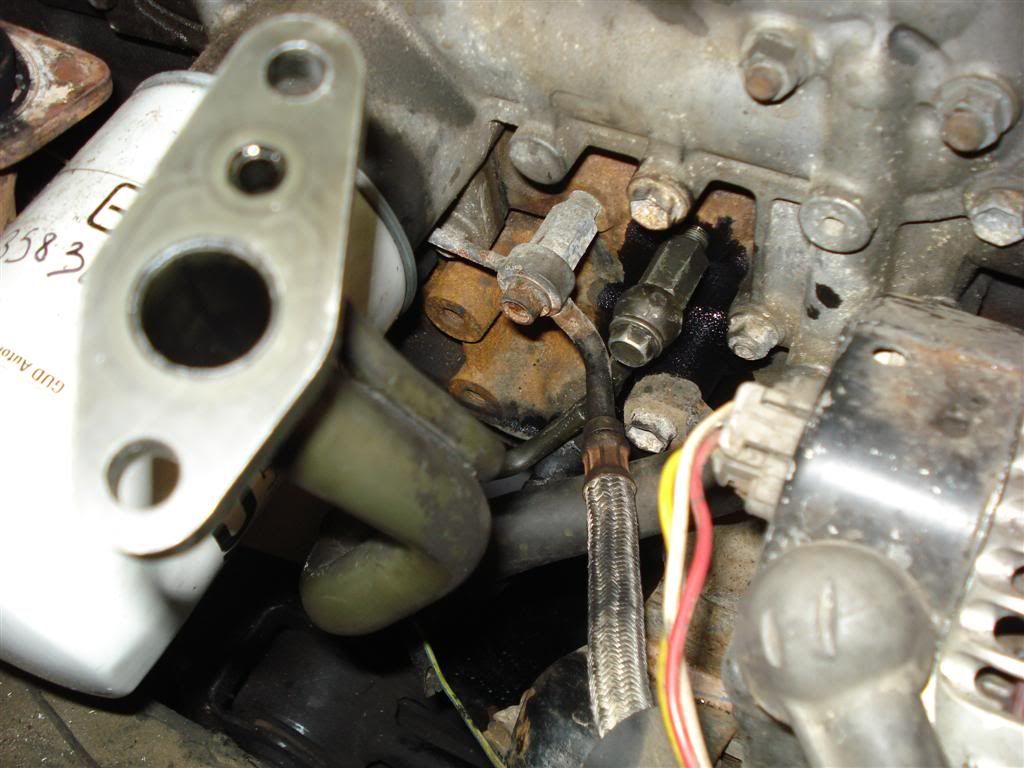
I found a spare oil feed on the 3L block that I used instead of teeing the alternator feed.
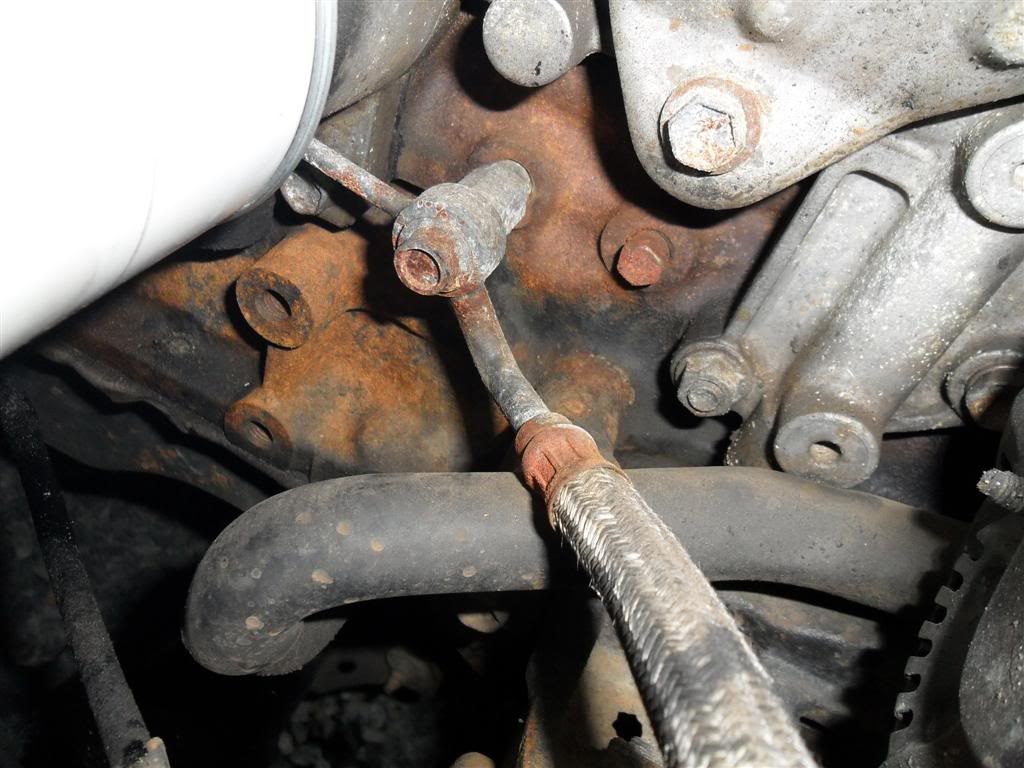
Remove the plug and fit the adaptor that the banjo screws into. I've also heard of people using a double banjo on the alternator feed (pictured next to the plug in my pic)
This is a pic of the original oil feed point on the donor. I have also heard of people swapping the oil cooler housing to get the extra feed point. The advantage of that is the oil is fresh from the filter.
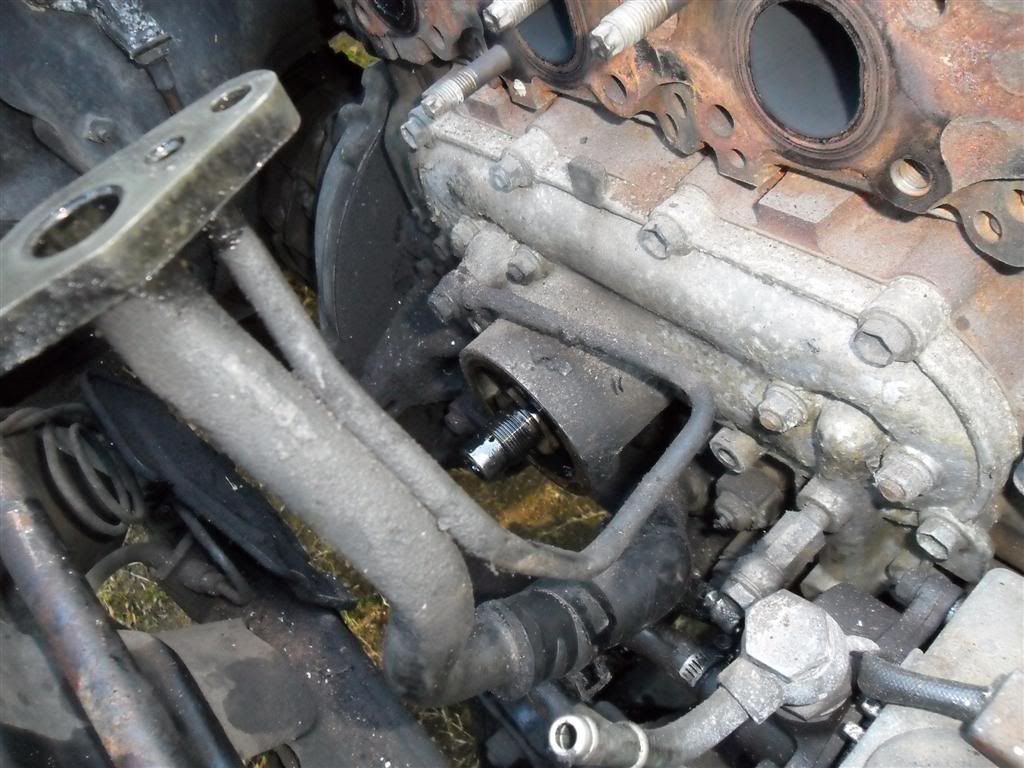
To get the oil feed line to connect to the 3L block in the way I did requires pain staking, careful bending and trial fitting with the turbo mounted so it all lines up. The original location is at the opposite end of the block.
Be very careful not to kink or split the feed while bending it. It's quite pliable but work out your bends first. I used a vice to grip the line while bending.
By doing this I save having to create a high pressure oil connection that could easily fail. Or having to get one professionally made.
Oil return.
Alternator return or direct to sump?
This is probably the issue I researched most. As plenty of people get away with teeing the feed and return; and plenty don't.
See the links below and make up your own mind.
http://www.outerlimits4x4.com/viewtopic ... 8&t=212441" onclick="window.open(this.href);return false;
http://www.outerlimits4x4.com/viewtopic ... 8&t=181769" onclick="window.open(this.href);return false;
If you don't want to read the above threads the common issue caused by teeing the return is that oil can't drain fast enough inturn building oil pressure inside the turbo which blows the oil seal either on the compressor or exhaust wheels on the turbo. Either way you get a massive smoke cloud.
The pic below shows the rather large difference in diameter between the turbo and alternator return lines.
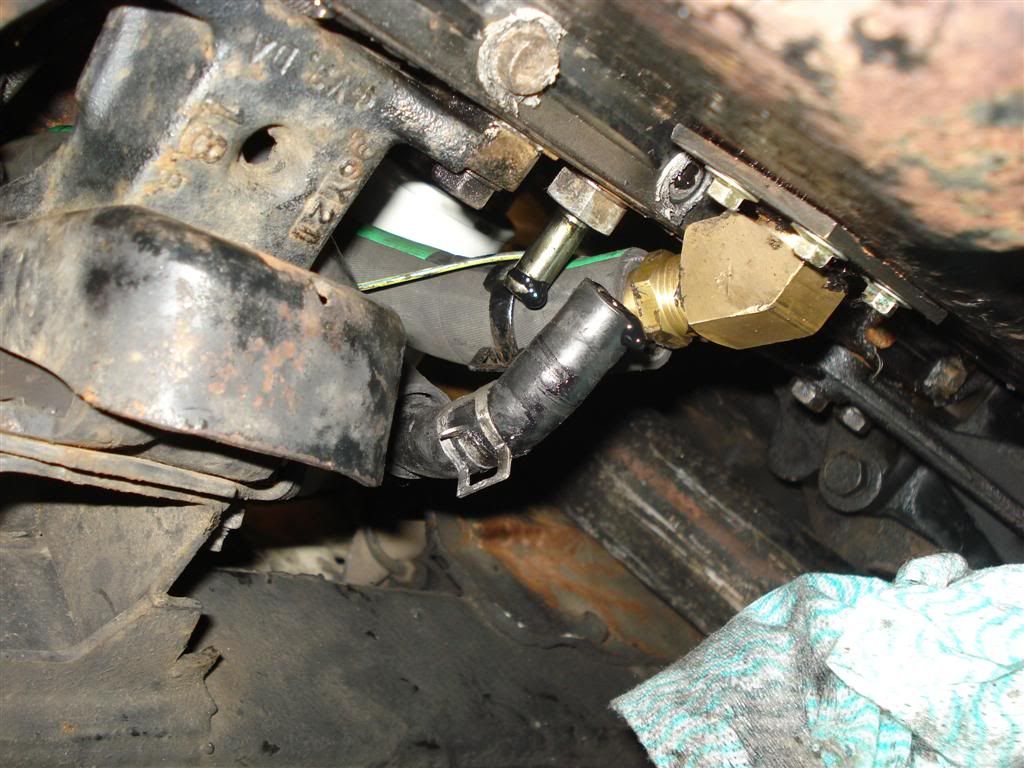
Combining both into the one smaller diameter is what can cause the issue. If you use my method of running a separate feed line you'd probably have to run the oil drain to the sump otherwise you would be feeding twice the oil into the smaller return.
The links above also provided the ideas for my oil return into the sump - I take no credit.
The best solution would have been to weld a steel fitting or braze my brass fitting I had already bought.
A combination of wanting to do it myself quickly and not being able to find anyone interested in brazing for me (I called a few places) lead me to use "one_waz"s idea of plating the sump and tapping my fitting to it with sealant in between.
Here's how I did it
Trial fitted the turbo with the oil feed/return in place to line up the return on the sump
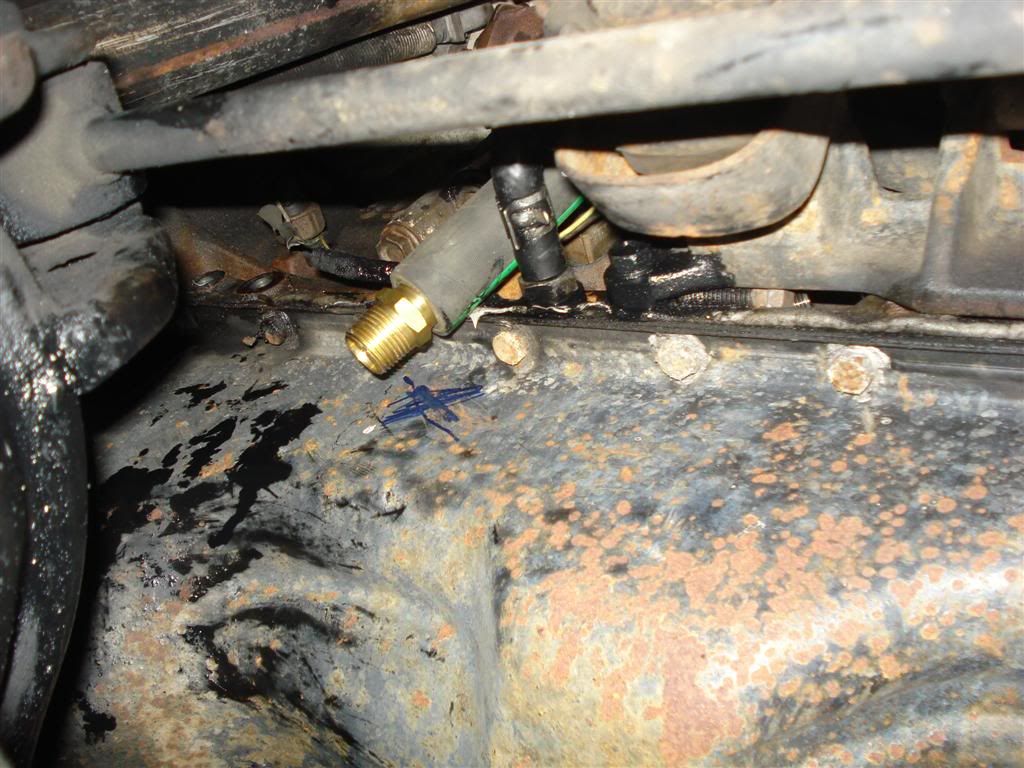
I marked the position so I could drill accurately later.
Now off with the sump pan
Once the bolts are out the pan won't fall away - it's glued on with sealant. Mine took a fair effort to coax off.
If you have a solid axel like me it's easy to get off after you break the sealant free. I found jacking the body up to get some more clearance made it easier to get the sump off and on (more clearance form the diff). Apparently IFS luxes are a fair bit more work to get the sum pan off but that's just what I read.
Another consideration I picked up in the tread links above is to keep the return fitting clear of the crank counterweights.
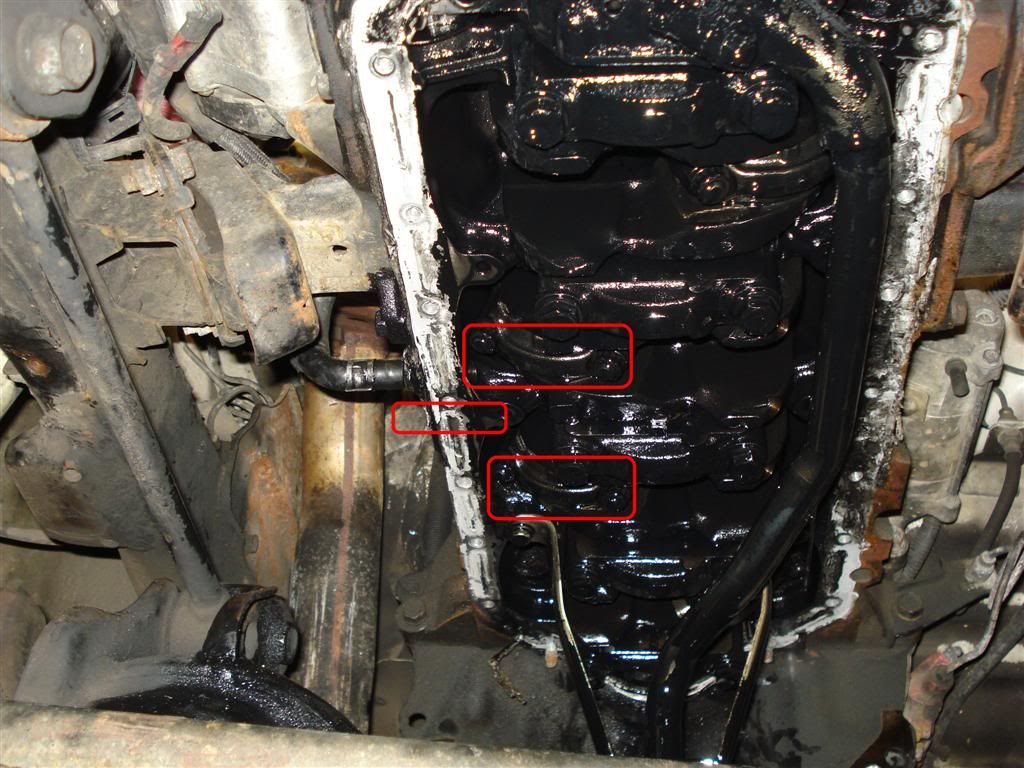
This is the final position I ended up with.
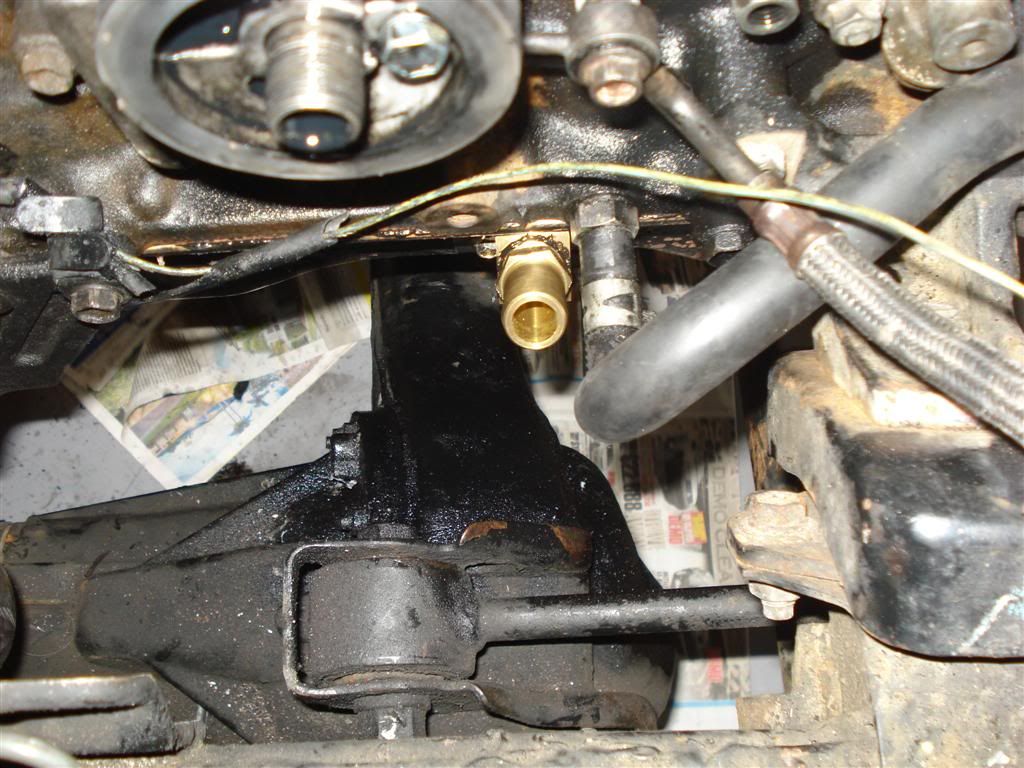
I used a piece of steel and drilled it and the sump out with a hole saw for my brass tapered fitting.
The process went like this:
drill the sump and tap it with a spare similar fitting I bought for the purpose
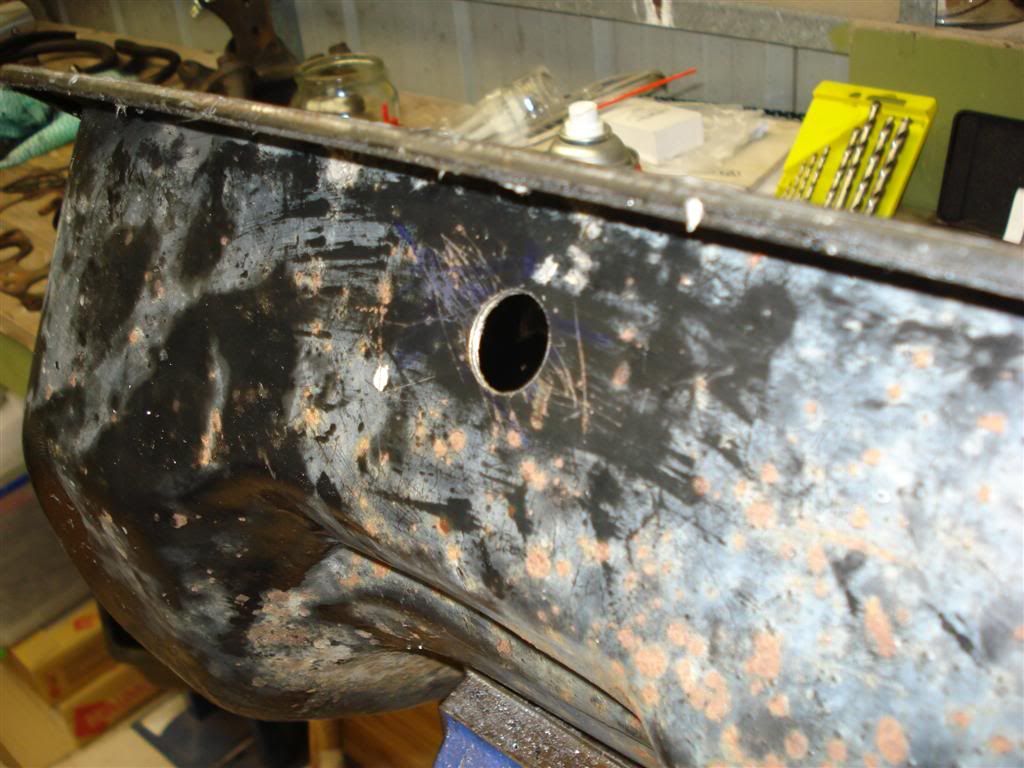
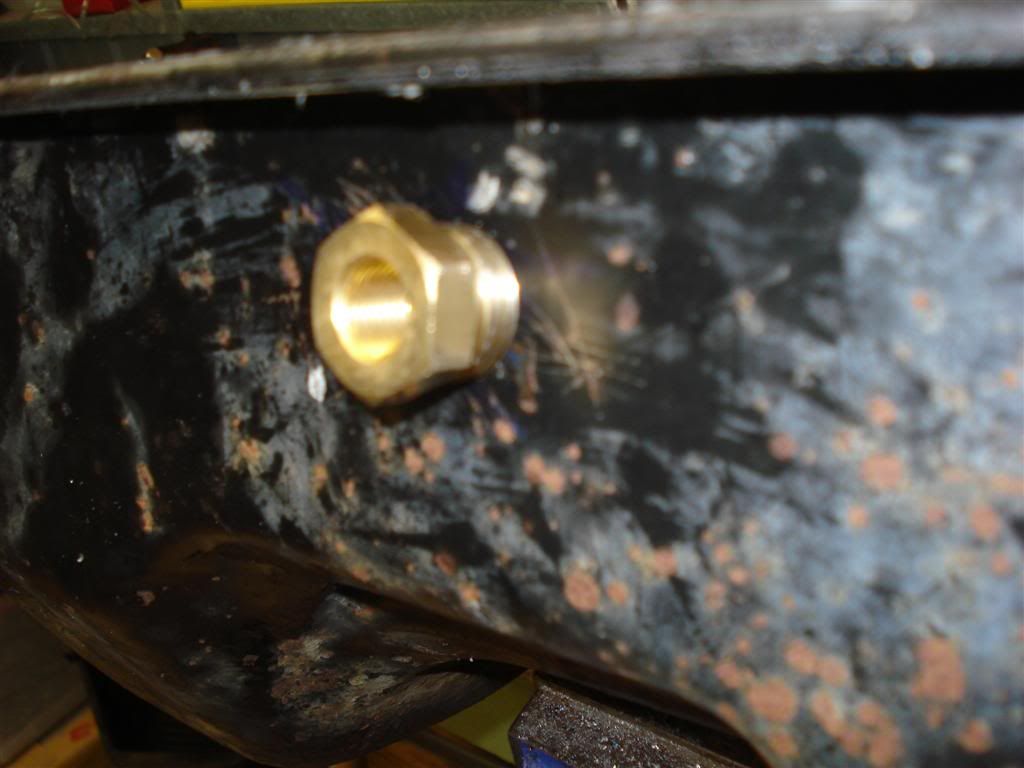
drill the plate and tap with the spare fitting
thread my fitting into the plate and then thread both into the sump
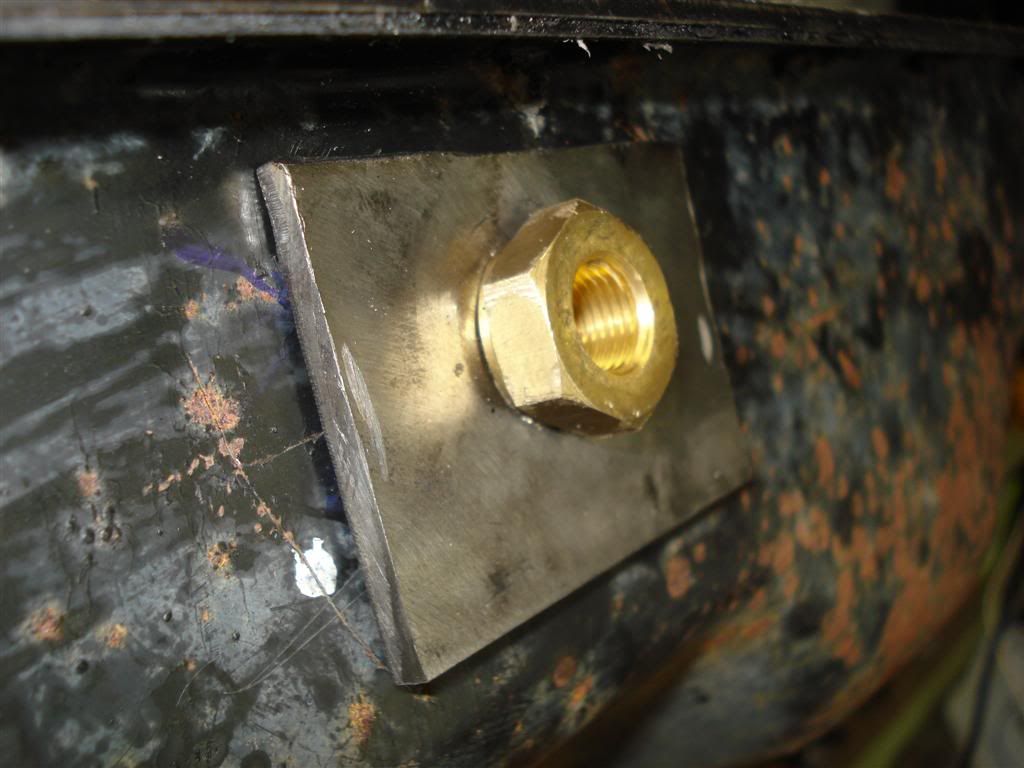
adjust so the fitting points up
drill four holes through the plate and sump for my self tapping screws that fit the plate securely to the sump
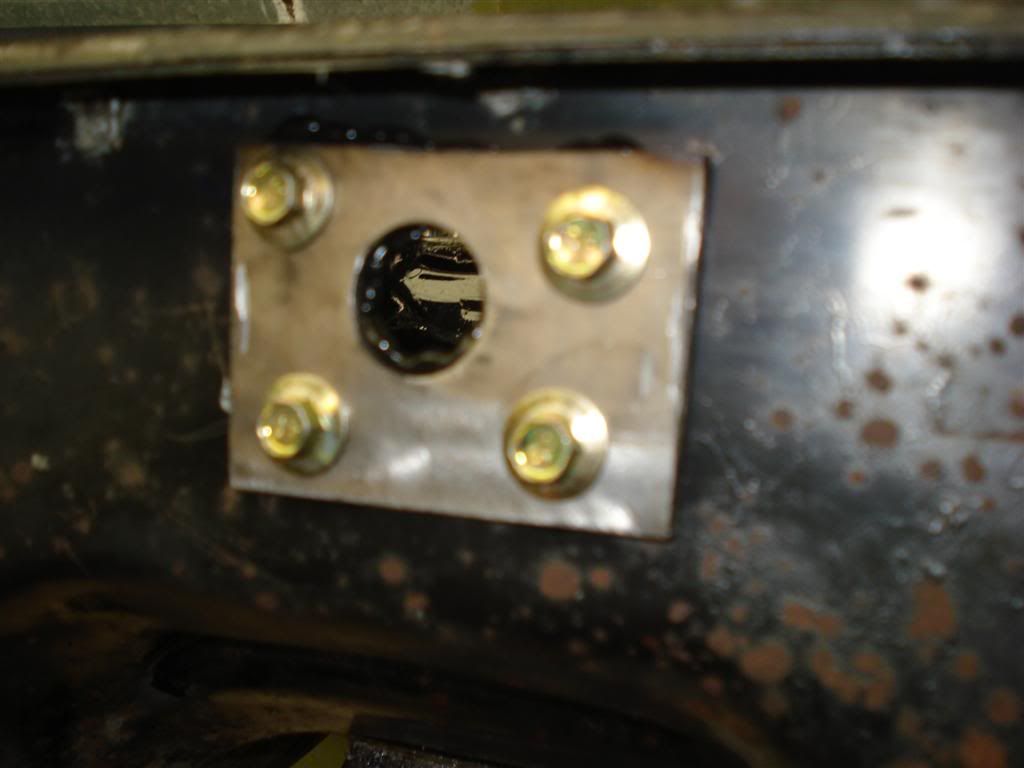
remove the whole lot and apply the goo (same goo I used for the sump gasket - some oil pan sealant) to stop any leaks
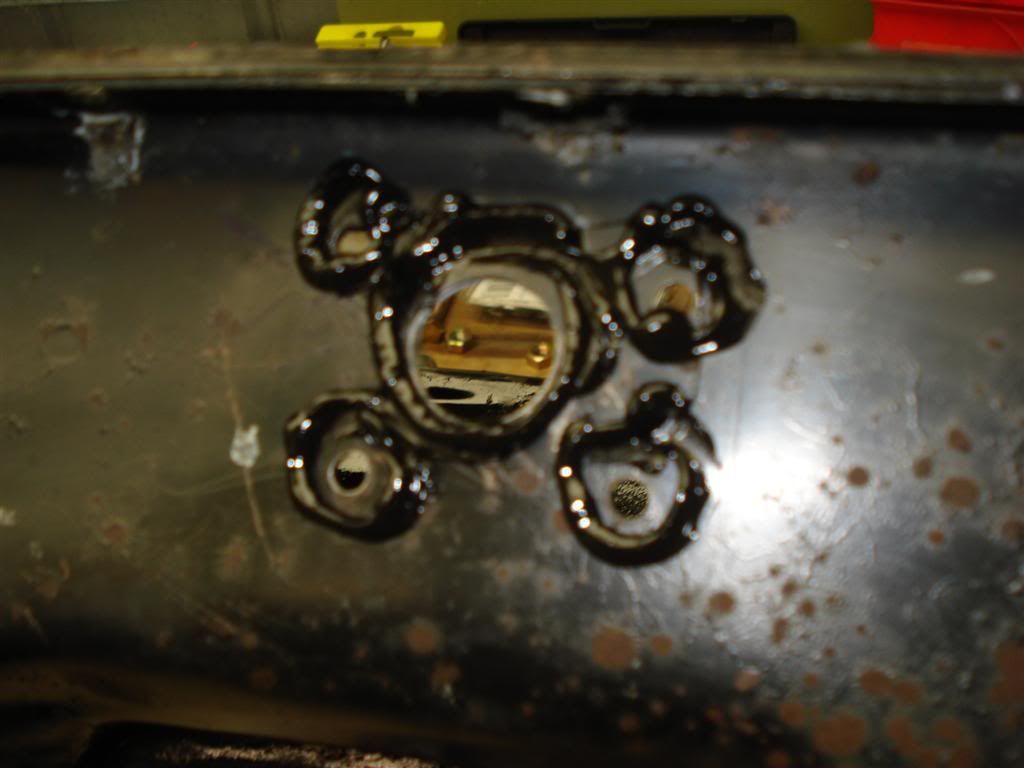
put it all back with the goo in place
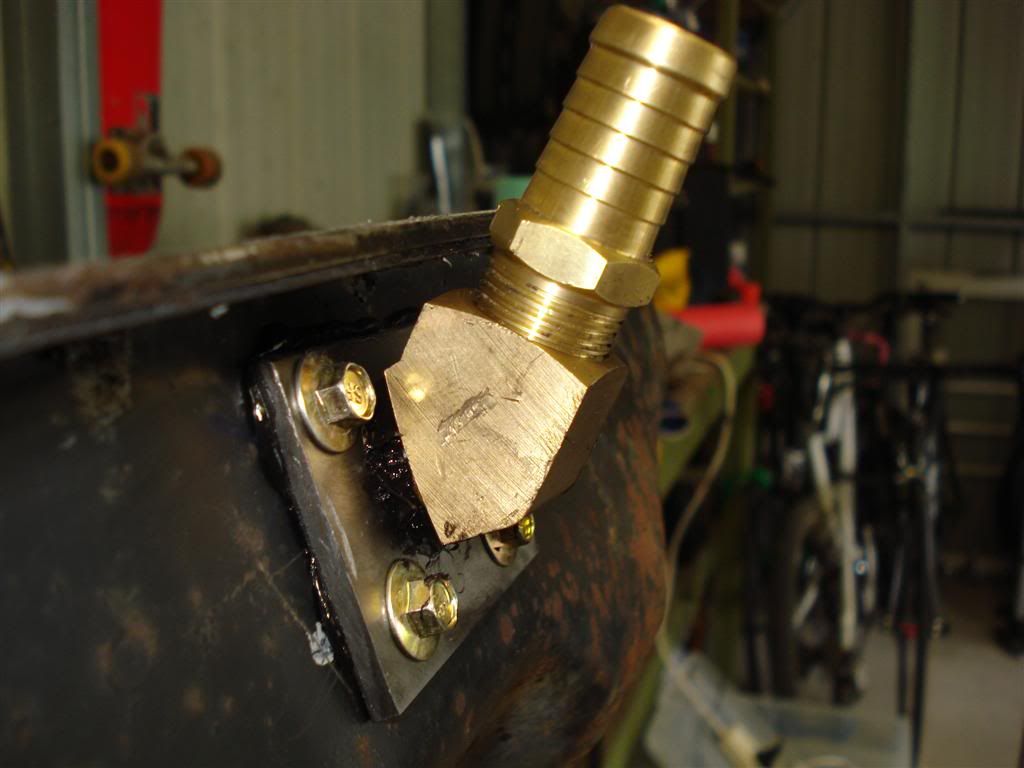
I used an angle fitting and a straight tail fitting into it so I can plug it if I ever need to remove the turbo
Now sump pan goes back on. If you have done this before you can skip over this section. I had never done this before so once again I searched and this is how it works.
Clean the mating surfaces well or risk doing it all again.
I used a wire wheel in a drill for the pan as it's steel.
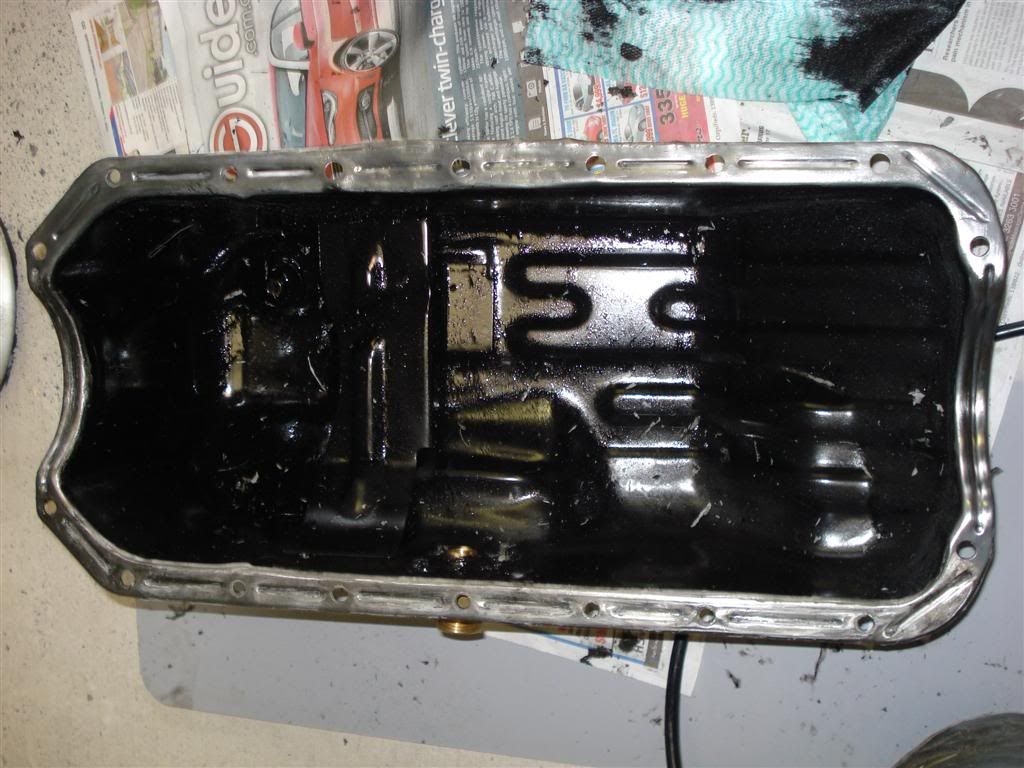
The block surface is alloy so I used a stanley blade (carefully) and solvents.
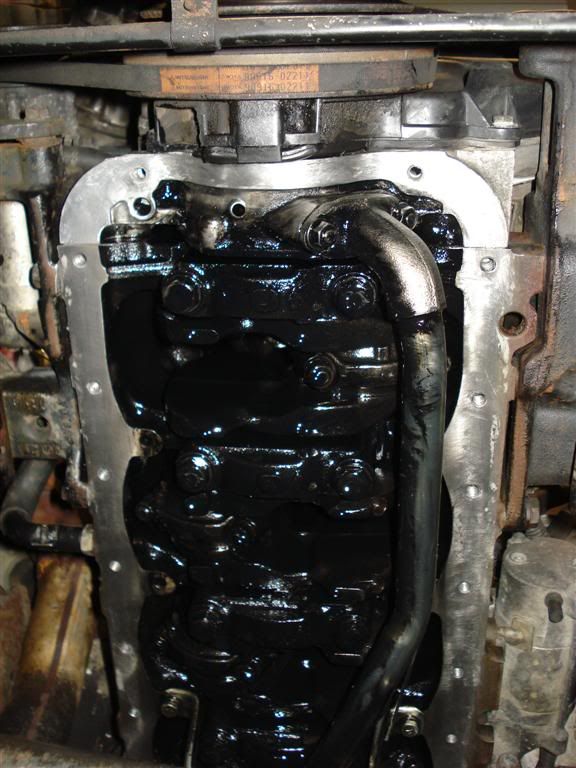
Don't go nuts with the sealant
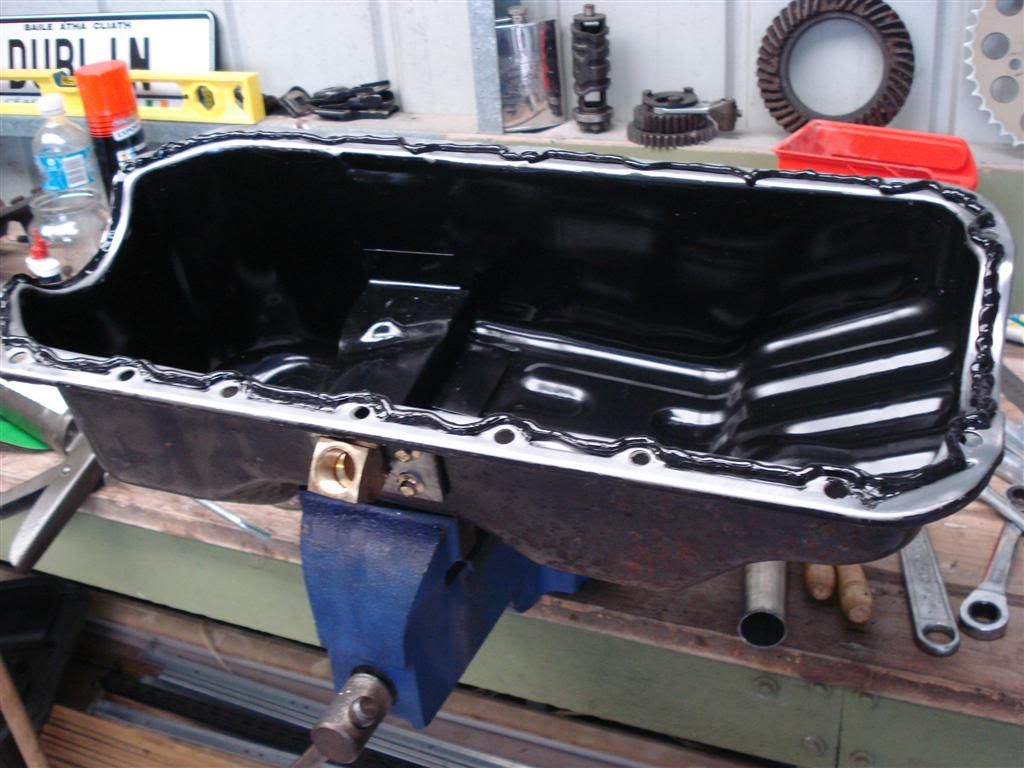
be careful you don't wipe the sealant off by hitting the engine while manoeuvring the pan past the diff
The instructions I followed recommended lightly tightening the pan back in place then torquing down after a few hours cure time so you don't squeeze all the sealant out while it's wet. Mine hasn't leaked so that must work.
Now you can mount the turbo permanently and connect the return to the fitting
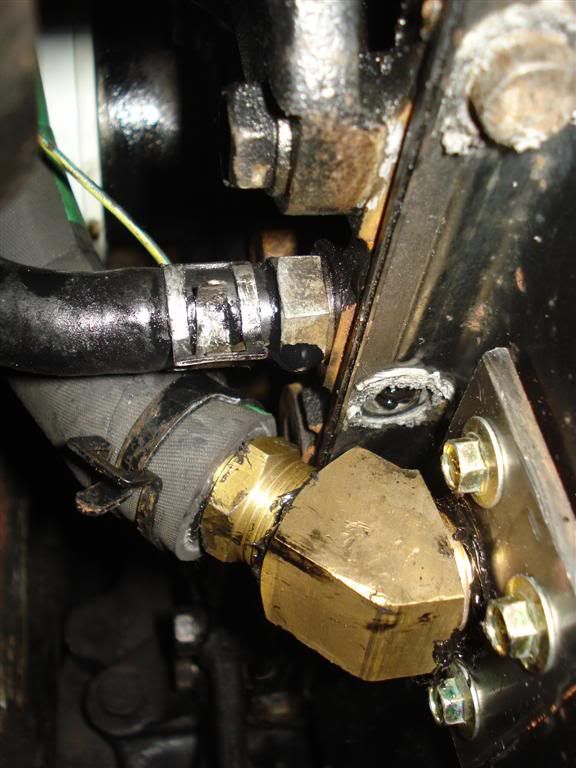
At this point I also fitted the exhaust and the oil feed/return flange to the bottom of the turbo.
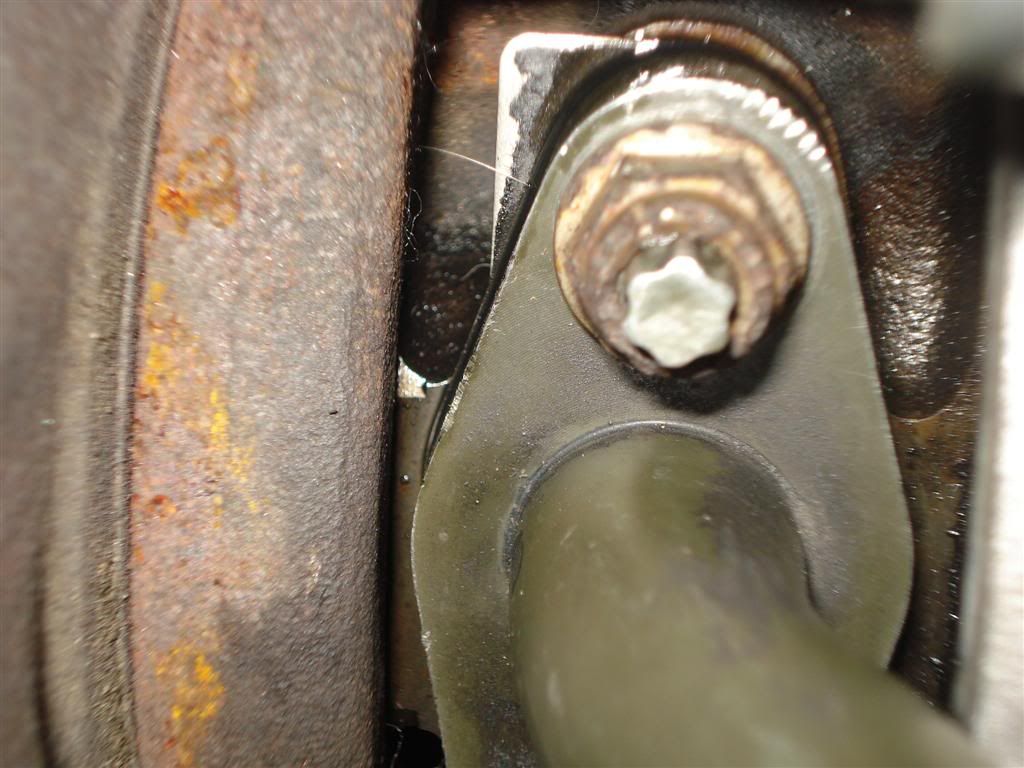
I'd recommend a new gasket here as it's a real pain to get on and off once the turbo is mounted and the most prone place for leakage I found.
I also had to use some copper high temp sealant on the threads of the studs that hold the flange to the turbo as I just couldn't stop mine leaking slightly from the threads otherwise
3. Inlet manifold
In my case I had the complete inlet from the donor engine which matches the crossover pipes. If you look at the link to the bjblaster thread you can see he has used the standard 3L inlet and made fittings to suit that.
http://bjblaster.homedns.org/projects/a ... index.html" onclick="window.open(this.href);return false;
This is the standard 3L inlet setup. In my case I already had a homemade oil catch can in line between the crank case breather and the inlet manifold.
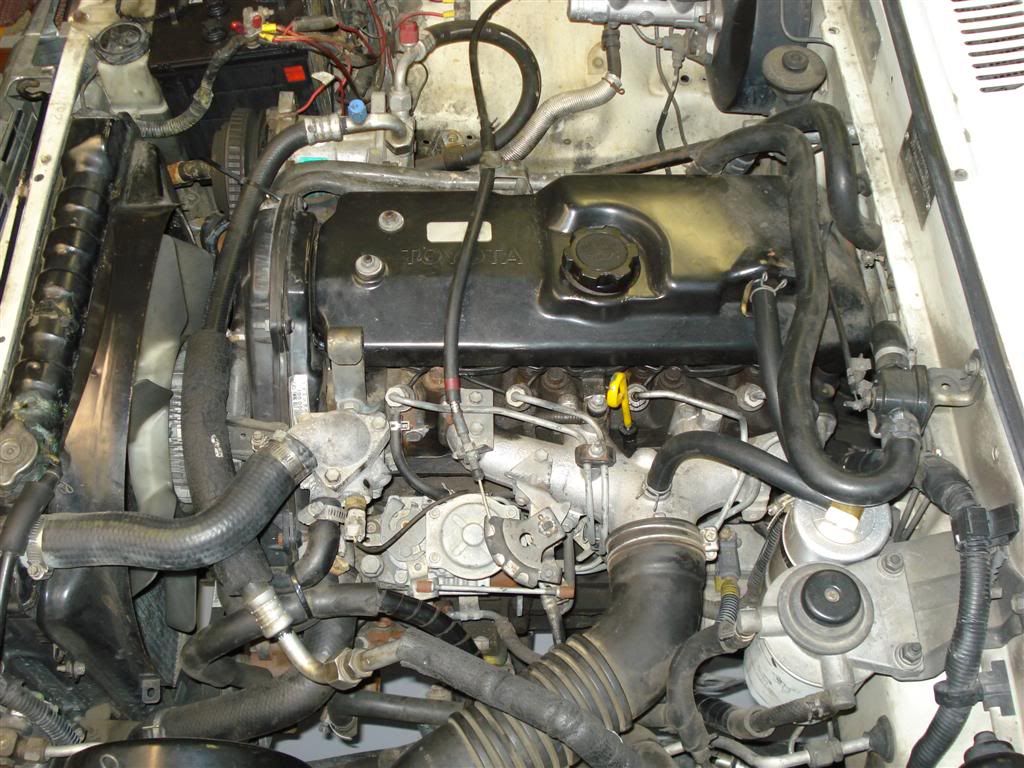
One issue to look out for with the inlet when adding a turbo is that you move the crankcase breather hose off the inlet manifold and reconnect it to the pipe feeding the turbo (or anywhere on the low pressure side of the inlet eg air box, catch can etc.)
If you don't then the boost from the turbo will use the breather hose to pressurize the crankcase causing crank seals to blow out. Once again these issues are not things I would have been aware of were it not for the searches I did on this forum.
Remove the stock inlet. It's very easy to get most of the bolts out to remove this however there are one or two behind the fuel pump that you probably need a stubby (12 or 14mm? can't remember) spanner to get off easily.
Undoing the fuel injection lines requires a large (larger than I had) spanner so I ended up using a shifter for this.
Also be careful to note the way the glow plug wiring comes apart (or have the manual) so when you put that back the plastic insulator goes in-between the block and the wiring.
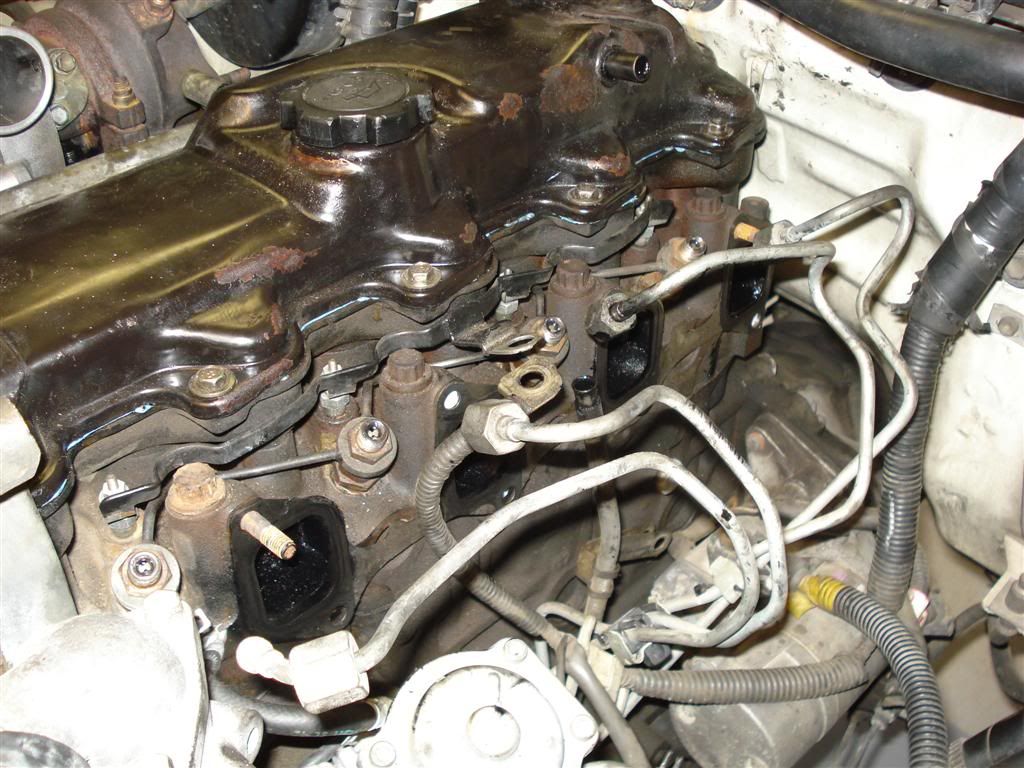
Installing the new inlet
The turbo inlet shown below has a hole in it for the EGR system we removed from the turbo manifold that also needs to be blocked off. Also note the handy connection (covered with a red end piece) that can be used for your boost gauge.
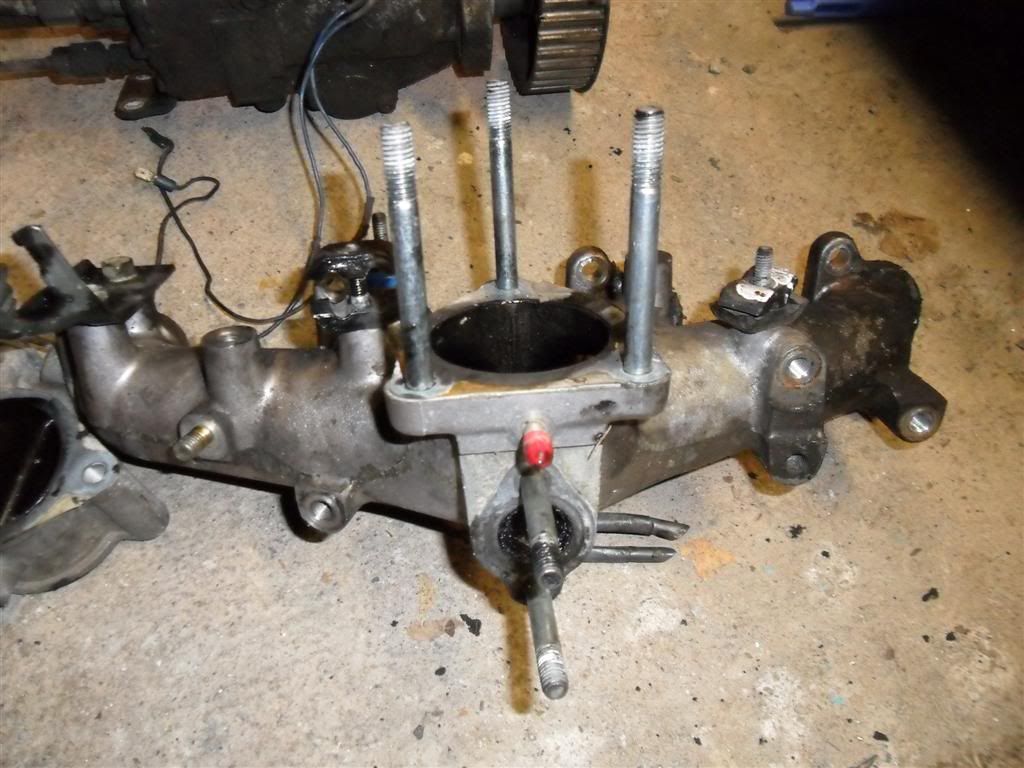
Another custom steel plate with some gasket paper to block the hole for the EGR (also you can see the boost gauge feed point too)
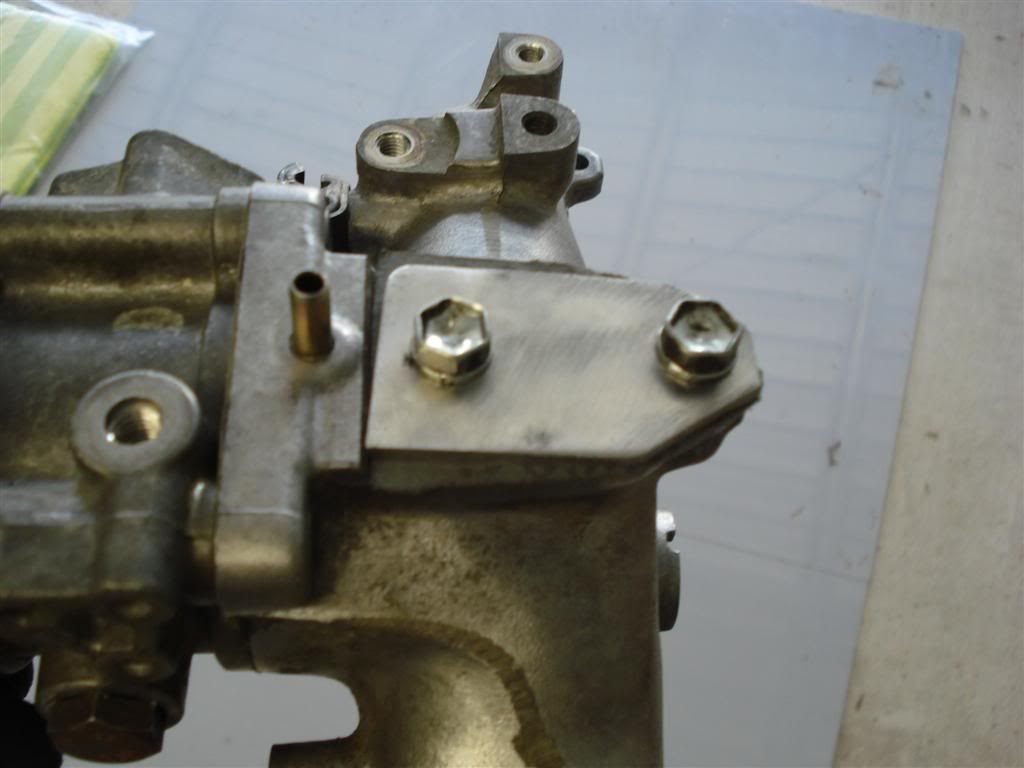
The turbo sourced inlet also has a butterfly in (it that plays some part in the EGR system I assume) that needs to be removed.
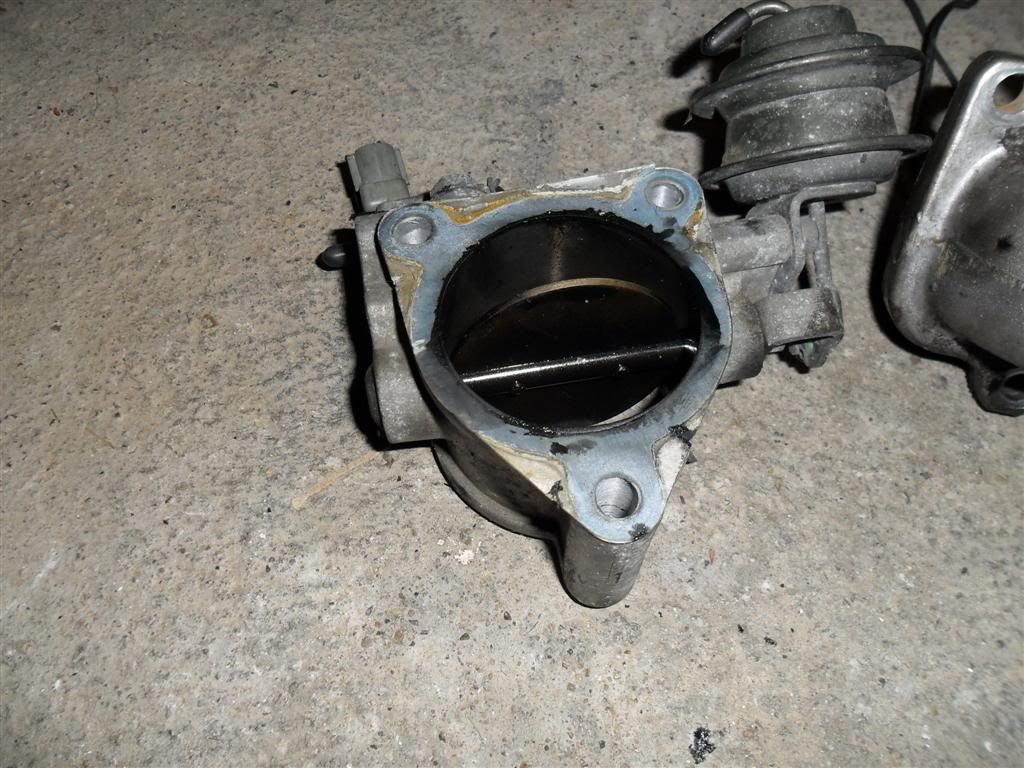
I ripped that out and used bolts with some selant to seal up the holes where the butterfly pivot comes out of the housing.
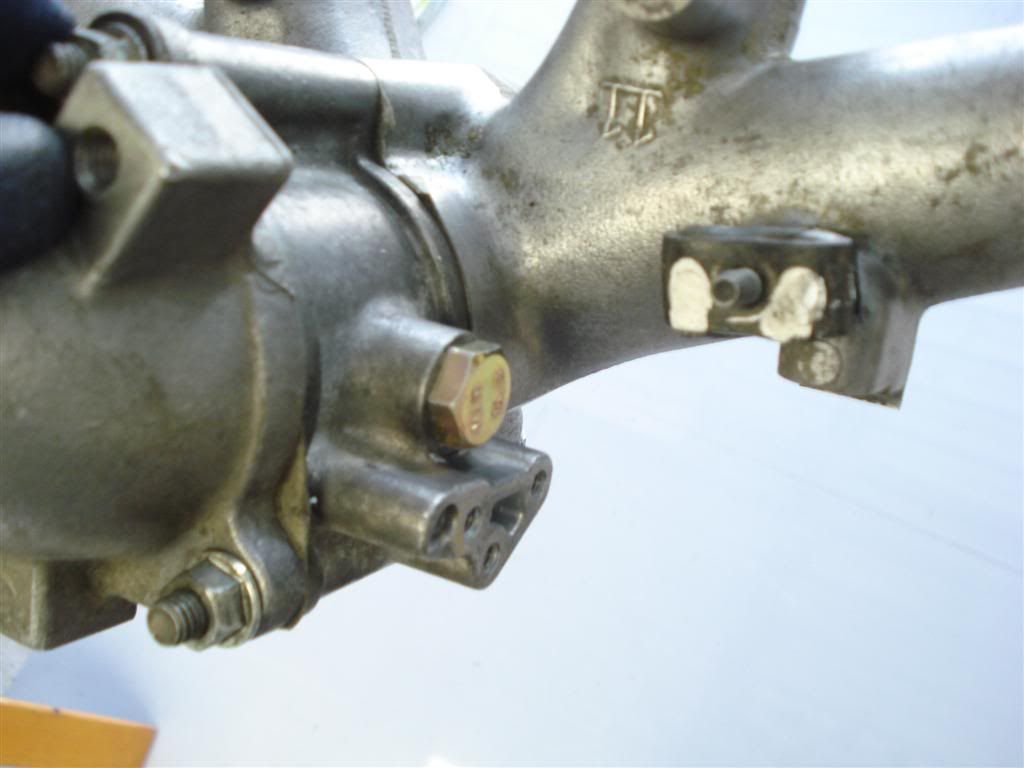
And here is the inlet side all back together with the new inlet mainfold
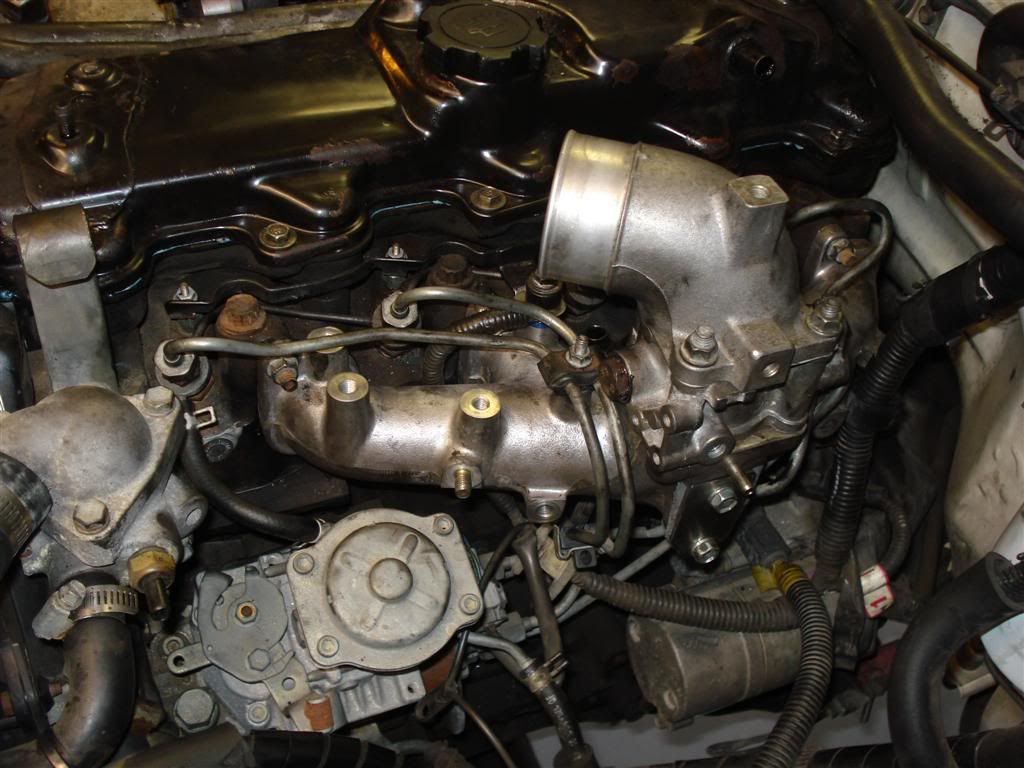
Now the high pressure cross over can go on. Note the smaller pipe that I assume was used for the breather on the 2L-T engine - it snakes under the cross over and remains a separate pipe the whole way. I've seen other posts that incorrectly say it enters the high pressure cross over. I didn't use it for anything.
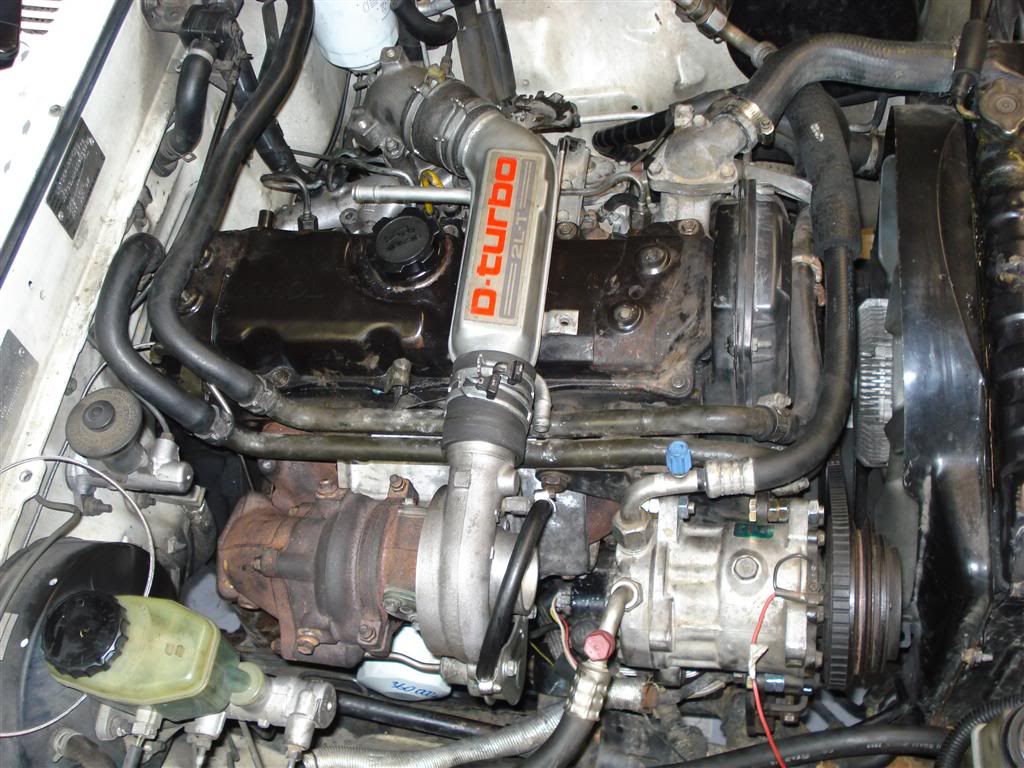
The final pipe to go on is the low pressure cross over from the airbox to the turbo.
I had to move my AC compressor forward (move the belt to the second pully and use spacers) to allow the pipe to clear it and even then I had to cut the steel elbow and replace it with silicone so it could rest against the hose fitting.
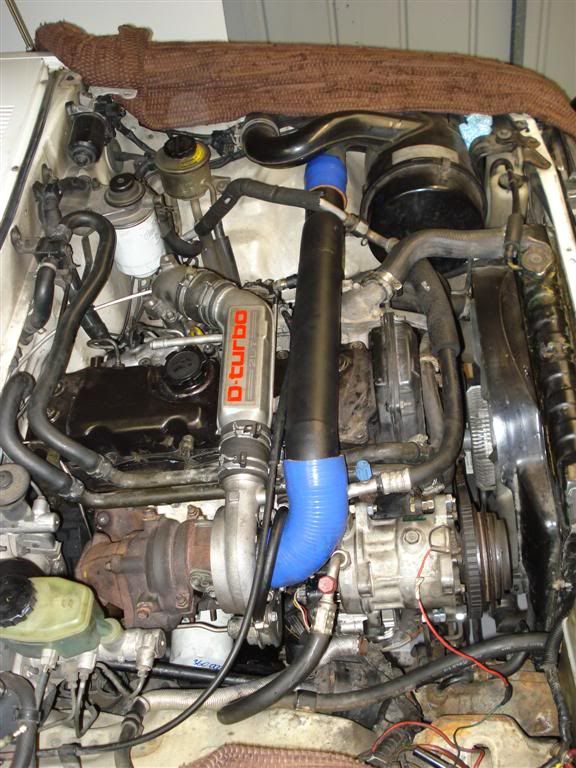
What you can't see very easily in this pic (beacuse it wasn't yet done) is the crankcase breather connecting to the low pressure cross over. There is an inlet about half way along the low pressure pipe facing the back of the engine and that's where mine is connected (with home made catch can in-line)
Next I added my boost gauge using the same method as bjblaster in his thread - I cut a hole in the instrument cluster above the fuel gauge and wired the back light to the dash lights so they would only come on when the dash lights did. One thing I mis-calculated here was the needle for the fuel gauge fouling on the boost gauage so if I had my time again I'd be more careful before I made my hole in the dash. It's all in and working now though.
I also installed an EGT or Pyrometer to measure exhaust temps as this seemd to be an essential for proper and safe tuning of the fuel when the turbo is in.
The egt I bought came from Auber instruments and is a digital led unit that all up cost me around $100 (when the AU dollar had parity with the $US)
At this point I fired her up and took it for a spin. I was seeing 10 -11psi building from 1.5 - 2k and peaking around 3k rpm. The EGT's were low as expected since I hadn't touched the fuel yet.
You need to increase the fuel when you add boost as it won't do much in the way of extra power without extra fuel to burn.
I eventually ended up with about an extra 3/4 of a turn over stock after slow increases and testing / monitoring EGT's
The max EGT I see AT THE MANIFOLD (not the dump pipe) is 600C
So.. Was it worth it?
Well in a word yes. The lux has way more power than stock. It's not a rocket on the road but it is probably twice as quick off the mark (anyone who has driven a stock 2.8 3L will know how slow they are)
It holds 100 on the free way easily now where previoulsy I would have to shift down to 4th to hold 100 on a slight rise in the free way. I can even overtake in 5th up to about 120 -130 but that's starting to get the revs up over 3k which the engine really doesn't seem to like much.
The only issue I have had since installing the Turbo has been the oil seal (compressor) in the turbo. I had a fair amount of oil comming into the cross over pipe but afterlooking back at the pics I took while removing the turbo from the donor vehicle what I assumed then to be blow by was actually the turbo leaking.
Not to worry as I got the whole kit (including pump with boost comp) plus a spare radiator for $500.
I have since rebuilt the turbo myself and it's all working perfectly now. I'll do a separate thread for my turbo rebuild and the traps there later.
Hope this is helpful to those out there thinking of doing this mod in the future. Any constructive feedback welcome.