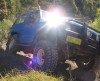
Bought this wheel carrier+jerry can holder off Mark Costello, apparently its the factory option. Since then I've had a bitch of a time getting the bloody thing installed. Drilled lots of holes in body, sworn a lot.
Anyone have instructions on its install? Specifically, I'm up to the bit where I need to install the backing plate for the top mount of the hinging side. I'll be buggered if I can get the bloody backing plate to fit up behind the body wall - the arch mounts for the tail light mounting frame get in the way.
Starting to think I should have paid some shop for something new and designed to fit... but now I have over a dozen new holes drilled in my body work, I think I better see it through.
Notice: We request that you don't just set up a new account at this time if you are a previous user.
If you used to be one of our moderators, please feel free to reach out to Chris via the facebook Outerlimits4x4 group and he will get you set back up with access should he need you.
If you used to be one of our moderators, please feel free to reach out to Chris via the facebook Outerlimits4x4 group and he will get you set back up with access should he need you.
Recovery:If you cannot access your old email address and don't remember your password, please click here to log a change of email address so you can do a password reset.
Factory MQ Wheel Carrier installation
Factory MQ Wheel Carrier installation
* Nothing is foolproof to a sufficiently talented fool *
aaaahhh yes.
i had one the same as this originally but it was only the carrier half and not the jerry can half.
there is away for getting the ones above the tail lights in.
i took the tail light up and got my girlfriend to hold a nut up there while i screw the bolt in.
she has small hands to get up there.
i got her to take it off later too.
its a bitch but can be done.
TUFF TRUCK TEAM OPPOSITE LOCK Proudly Sponsored By:
Opposite Lock Narellan, Lightforce Australia, Offroad Systems, Judd Panels, Townsend Signs, RDG Engineering, Central Safety Workwear
Opposite Lock Narellan, Lightforce Australia, Offroad Systems, Judd Panels, Townsend Signs, RDG Engineering, Central Safety Workwear
Mmm, speed holes. At least 33 of them so far (seriously - about 9 mistakes  ). Still a couple to go.
Still haven't figured out that top inside mount. The nuts are welded onto the backing plate - I don't actually have to hold the nuts anywhere. I just can't get the whole thing up there. Started with the file on the arches that are blocking the way, but it'll be next Christmas before I'm done there. The backing plate is pretty simple (warning! dodgy ASCII art approaching!) :
___
/ . |
| . |
|___|
dots are nuts. Then there's flaps that wrap around the side, so the profile view looks like this:
__ _
/ . \___/ . \
The closest I can get is about 15mm too low and about 10mm too far left (away from the wall that the flaps bolt to.
Grr...
). Still a couple to go.
Still haven't figured out that top inside mount. The nuts are welded onto the backing plate - I don't actually have to hold the nuts anywhere. I just can't get the whole thing up there. Started with the file on the arches that are blocking the way, but it'll be next Christmas before I'm done there. The backing plate is pretty simple (warning! dodgy ASCII art approaching!) :
___
/ . |
| . |
|___|
dots are nuts. Then there's flaps that wrap around the side, so the profile view looks like this:
__ _
/ . \___/ . \
The closest I can get is about 15mm too low and about 10mm too far left (away from the wall that the flaps bolt to.
Grr...
* Nothing is foolproof to a sufficiently talented fool *
I have the same carrier, i didnt use a backing plate, just nuts/bolts and some big ass washers. With the large washers and only a 31" tyre on it, i dont think theres too much stress on the body panels, hopefully it will never rip out anyway. Mine HAS hit on the tailgate tho. Like you if i could go back, i wouldnt have put holes in my body :(
Impossible job without removing the tail-lights, the bottom bolts were a prick of a job.
Impossible job without removing the tail-lights, the bottom bolts were a prick of a job.
RWC
Heath - as I said, we did this very same install the other week on my mates MQ shorty..... You have to cut the bracket - the MQ shorty didn't have it as an option but the LWB did - got figure. As I said also - if you take the paint off the factory has put some filler over the indents on the mounts dents - they put small marks so it was easy if you take the paint off.
The only way to get around this problem is to cut the top inside nut holder off I think.... then you only have 3 holding it but thats ok.... 3 is better than none and I wouldn't use washers - had one that had washers and it cracked nicely along the body and left good pull marks too.... the locking catches end up getting loose and putting much pressure on this mount....
Speed holes are good though...
Hope this helps mate
Mk
MQ/MK Parts for sale!!!! See for sale section!
For a 31 inch tyre, big bolts and large washers are fine.
one problem.
Heath runs 35's so u need the backing plate if u r going to run this carrier.....
Heath, cut the bracket in the middle as Mark said and put it up in 2 peices.
You will find this should fix the problem.
another word of advice, especially because u have extra holes in there.......... BUY A TUBE OF SIKAFLEX from ur local repco and seal around the outside bracket where is sits against the panel.
You will find it will get water in there and rust the bolts and nuts and weaken the holes in the panel steel slowly weakening it.
dont use silacon as it has an acid in it and eats panel steal out and rusts it. SIKAFLEX is ur freind mate.
screwy
TUFF TRUCK TEAM OPPOSITE LOCK Proudly Sponsored By:
Opposite Lock Narellan, Lightforce Australia, Offroad Systems, Judd Panels, Townsend Signs, RDG Engineering, Central Safety Workwear
Opposite Lock Narellan, Lightforce Australia, Offroad Systems, Judd Panels, Townsend Signs, RDG Engineering, Central Safety Workwear
Thanks heaps folks, very useful info.
Patroldude, I remember you talking about the paint and thought that would be an awesome help. Unfortunately, no matter how much I scrubbed, I couldn't find any marks under the paint. I think my methods of paint removal were either too light to get enough paint off (sanding block) or too heavy leaving obscuring groove marks (wire brush). And now that you mention it, I do remember you saying something about the LWB/SWB issue - makes sense now!
Well, my ASCII art did indeed suck, so here's a crappy picture. Main face on left and profile view on right.

The blue sections are the bits I'm thinking of cutting. At least for starters - I'm pretty sure I'll have to remove the top bolt hole entirely (because of the difficultly hooking the bolt hole up above the top internal arch), as suggested, but I thought I'd start with this.
Sikaflex? Awesome, I'll grab some. I've got a tub of putty and some mesh material, but was looking for something along the lines you describe. The full paint strip down/rust cutting/bogging/repaint procedure will be done right after the carrier is finished. I know that's going to be a lengthy biatch of a job.
Catches appear workable at the moment, as long as I position them right. Lots of other "tweaks" had to be made to get everything to line up though.
Patroldude, I remember you talking about the paint and thought that would be an awesome help. Unfortunately, no matter how much I scrubbed, I couldn't find any marks under the paint. I think my methods of paint removal were either too light to get enough paint off (sanding block) or too heavy leaving obscuring groove marks (wire brush). And now that you mention it, I do remember you saying something about the LWB/SWB issue - makes sense now!
Well, my ASCII art did indeed suck, so here's a crappy picture. Main face on left and profile view on right.
The blue sections are the bits I'm thinking of cutting. At least for starters - I'm pretty sure I'll have to remove the top bolt hole entirely (because of the difficultly hooking the bolt hole up above the top internal arch), as suggested, but I thought I'd start with this.
Sikaflex? Awesome, I'll grab some. I've got a tub of putty and some mesh material, but was looking for something along the lines you describe. The full paint strip down/rust cutting/bogging/repaint procedure will be done right after the carrier is finished. I know that's going to be a lengthy biatch of a job.
Catches appear workable at the moment, as long as I position them right. Lots of other "tweaks" had to be made to get everything to line up though.
* Nothing is foolproof to a sufficiently talented fool *

good luck heath.
any other probs just ask.... I cant see the pic for some reason so i cant help much there...
screwy
any other probs just ask.... I cant see the pic for some reason so i cant help much there...
screwy
TUFF TRUCK TEAM OPPOSITE LOCK Proudly Sponsored By:
Opposite Lock Narellan, Lightforce Australia, Offroad Systems, Judd Panels, Townsend Signs, RDG Engineering, Central Safety Workwear
Opposite Lock Narellan, Lightforce Australia, Offroad Systems, Judd Panels, Townsend Signs, RDG Engineering, Central Safety Workwear
yeh, theyll fit if u mod the brackets, those gq end bits are piddly too, but personally a stock MQ rear bar is rubbish......
tube bars are nice, ill get one for my MQ when i get the dosh together..
screwy
tube bars are nice, ill get one for my MQ when i get the dosh together..
screwy
TUFF TRUCK TEAM OPPOSITE LOCK Proudly Sponsored By:
Opposite Lock Narellan, Lightforce Australia, Offroad Systems, Judd Panels, Townsend Signs, RDG Engineering, Central Safety Workwear
Opposite Lock Narellan, Lightforce Australia, Offroad Systems, Judd Panels, Townsend Signs, RDG Engineering, Central Safety Workwear
Nah.... not off the car that can wait a couple of weeks at least (except for radiator, brakes, driveshafts and other assorted moving parts which I'll do when the car is cold at home).
No I meant for yourself after you've had to wade though knee deep slime to put on the strap, or slipped over on your bum cos of wet clay....
No I meant for yourself after you've had to wade though knee deep slime to put on the strap, or slipped over on your bum cos of wet clay....
Beastmavster wrote:Nah.... not off the car that can wait a couple of weeks at least (except for radiator, brakes, driveshafts and other assorted moving parts which I'll do when the car is cold at home).
No I meant for yourself after you've had to wade though knee deep slime to put on the strap, or slipped over on your bum cos of wet clay....
Wat ya hate is when ur more muddy than ya rig, u hop in without thinking and there goes ur nice seats and carpet
i hate pulling carpet out
TUFF TRUCK TEAM OPPOSITE LOCK Proudly Sponsored By:
Opposite Lock Narellan, Lightforce Australia, Offroad Systems, Judd Panels, Townsend Signs, RDG Engineering, Central Safety Workwear
Opposite Lock Narellan, Lightforce Australia, Offroad Systems, Judd Panels, Townsend Signs, RDG Engineering, Central Safety Workwear
MQ080 wrote:Screwy, did you like the bar set up on the back of the yellow MQ? That was the best set up i had seen and it happily took the weight of the vehicle on the rear tyre
YES!!!
Must admit. The Kaymar Wheel carrier / rear bar setup on the back of old yella was good. Hung down a little low i found, but was very strong.
its perfect for its purpose.
screwy
TUFF TRUCK TEAM OPPOSITE LOCK Proudly Sponsored By:
Opposite Lock Narellan, Lightforce Australia, Offroad Systems, Judd Panels, Townsend Signs, RDG Engineering, Central Safety Workwear
Opposite Lock Narellan, Lightforce Australia, Offroad Systems, Judd Panels, Townsend Signs, RDG Engineering, Central Safety Workwear
Who is online
Users browsing this forum: No registered users and 3 guests