Notice: We request that you don't just set up a new account at this time if you are a previous user.
If you used to be one of our moderators, please feel free to reach out to Chris via the facebook Outerlimits4x4 group and he will get you set back up with access should he need you.
Recovery:If you cannot access your old email address and don't remember your password, please click here to log a change of email address so you can do a password reset.
Dual Cab 6-Point Cage Construction - Pics
Moderators: toaddog, Elmo, DUDELUX
Dual Cab 6-Point Cage Construction - Pics
Just thought people might like to see the process of building an internal cage. This one in particular is being built in a 2nd gen dual cab and will be of through dash style, it is however not being built to CCDA or CAMS specificatons.
I didn't get any pre stipped photos.
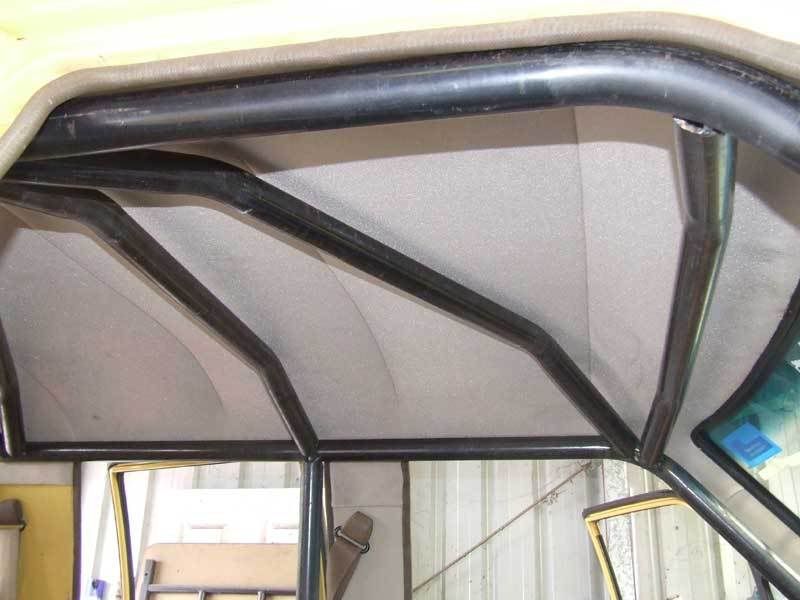
The most complicated piece of tube in the whole construction, a single piece of tube with 2 bends on 2 different planes. This is because the roof section is narrower than where it comes through the dash to meet the floor.
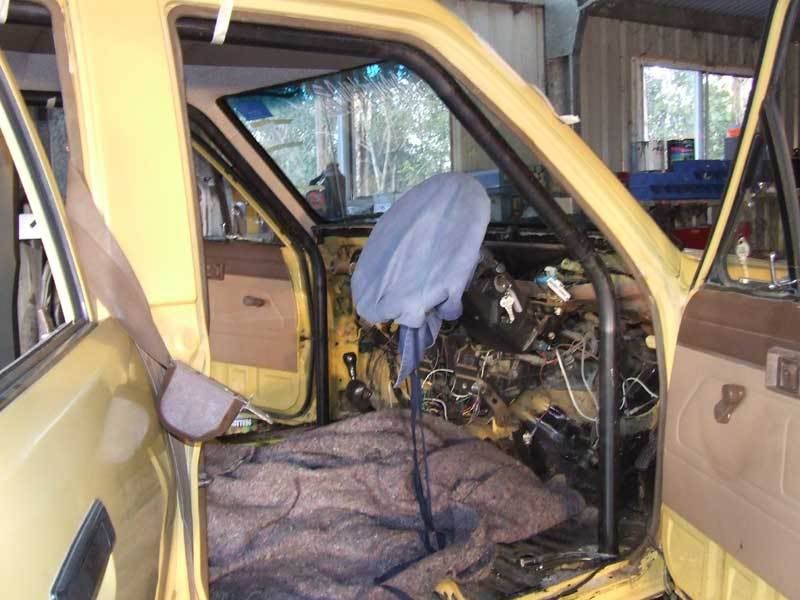
This shows the other main tube in place as well.
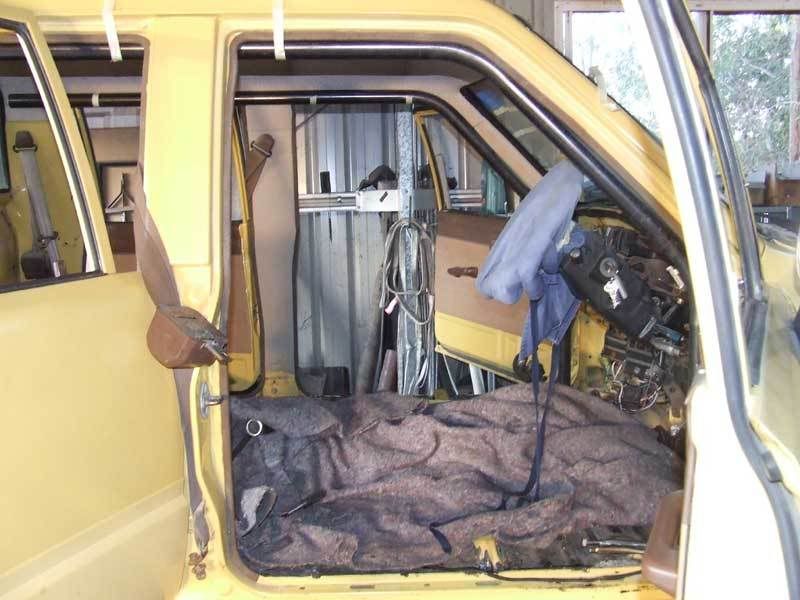
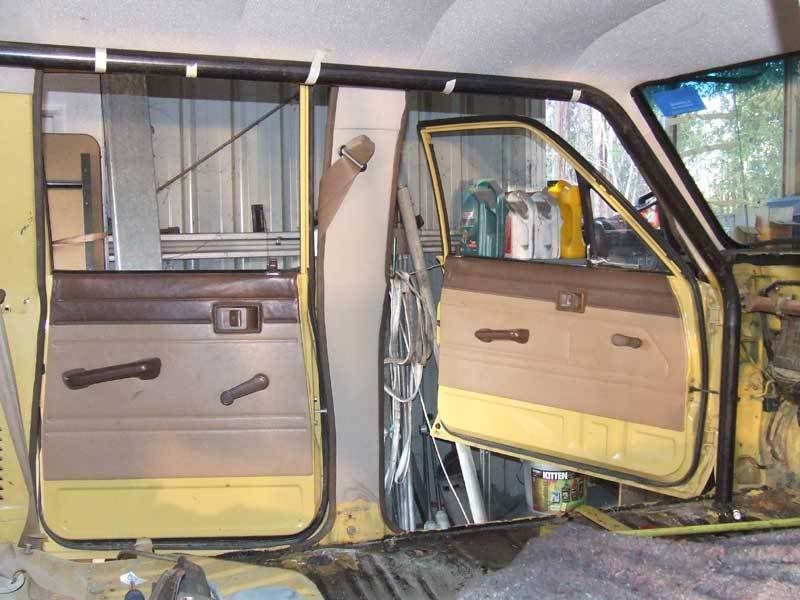
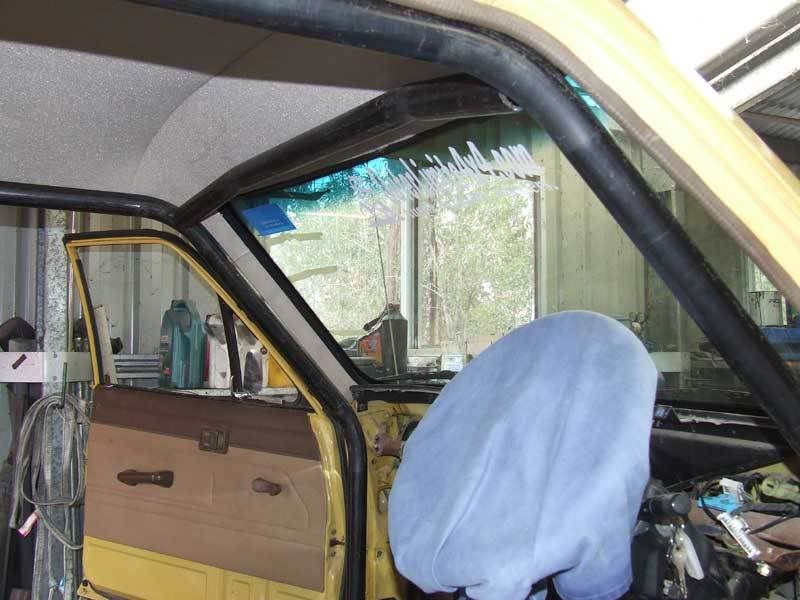
From the side showing the way it follows the A pillar and roof as close as possible.
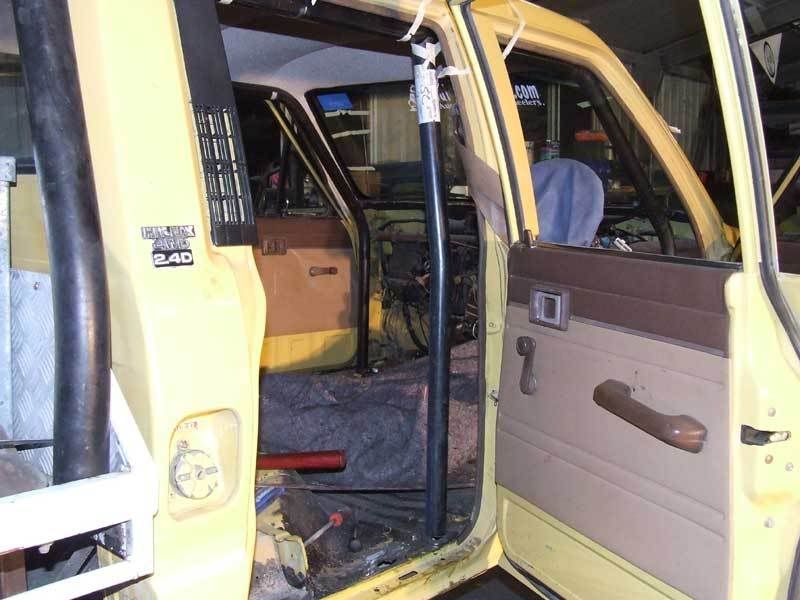
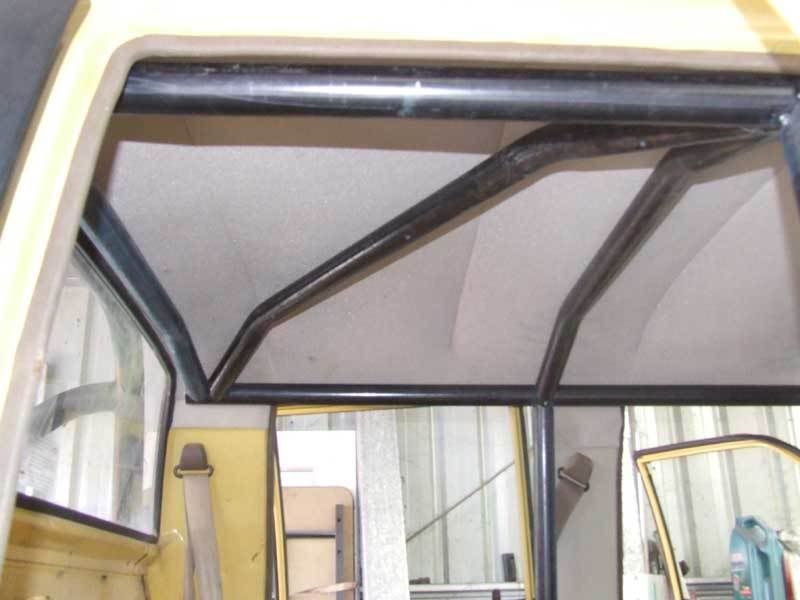
Here we have the first of the B Pillar supports in place. These have a single bend in them to keep the same profile as the front A pillar tube when looking straight on.
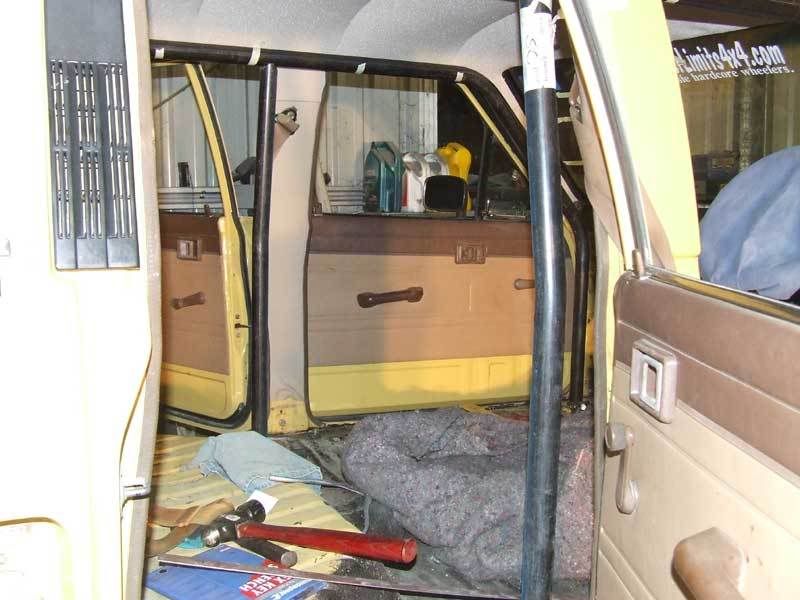
Showing the other side tube in place as well. In stead of tacking all the tubes in place as I go I have used the masking tape to hold them in place, makes having to remove pieces easy. You want to minimise the amount of welding and grinding you have to do inside the car.
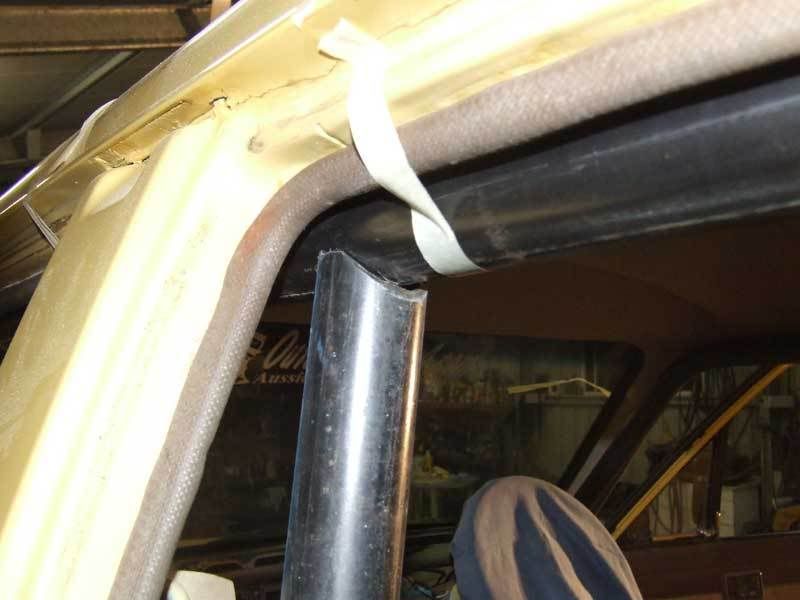
Just showing how you can still get a pretty decent notch without the use of a hole saw style notcher.
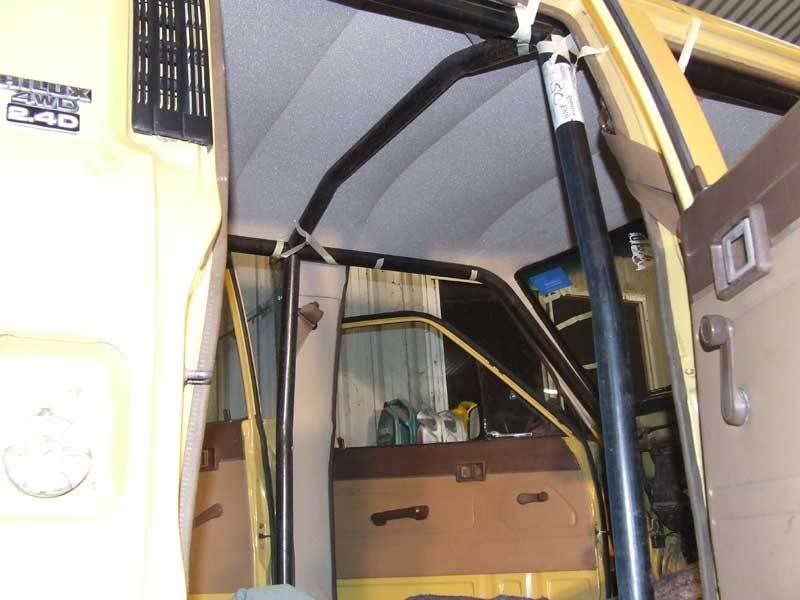
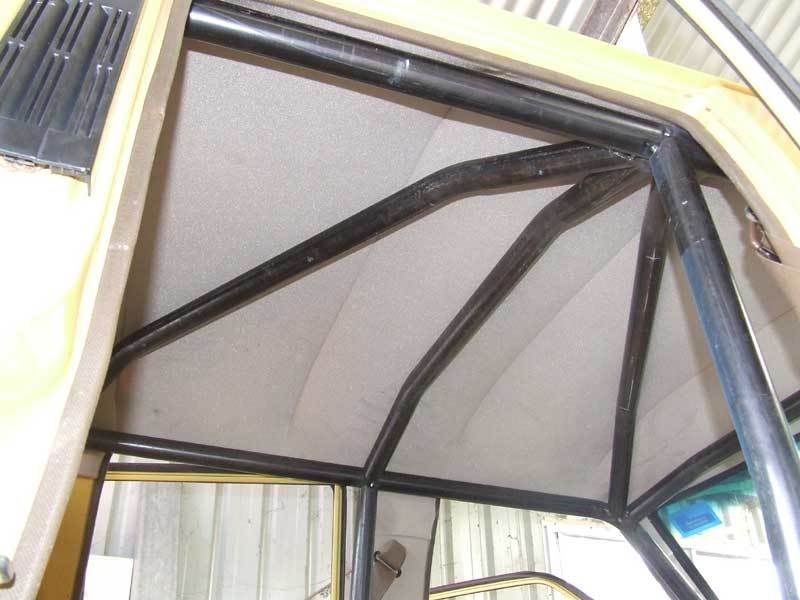
Here is the B pillar spreader in place, this one is a simple tube with only 2 bends to follow the roof.
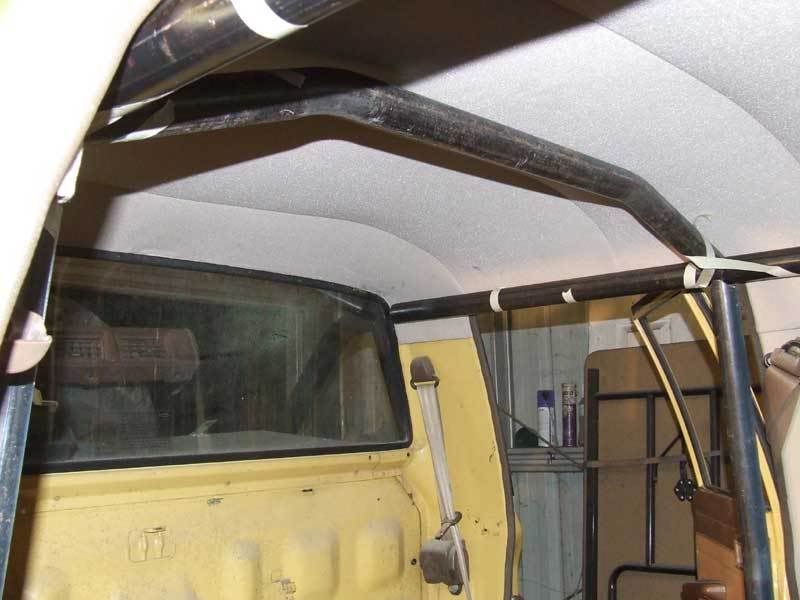
Here is the B pillar spreader from the front.
I'll update it tommorow when I get some more done.
Buddy
http://www.budscustoms.com.au
Like us and follow on facebook for up to date information of what we are working on and great random specials!
Custom Parts & Fabrication!
Ph: 0417 708 598
Like us and follow on facebook for up to date information of what we are working on and great random specials!
Custom Parts & Fabrication!
Ph: 0417 708 598
Everybody has commented on that, yet its good for these inside out photosRUFF wrote:Ha Ha the sticker on the windscreen is on on backwards
http://www.budscustoms.com.au
Like us and follow on facebook for up to date information of what we are working on and great random specials!
Custom Parts & Fabrication!
Ph: 0417 708 598
Like us and follow on facebook for up to date information of what we are working on and great random specials!
Custom Parts & Fabrication!
Ph: 0417 708 598
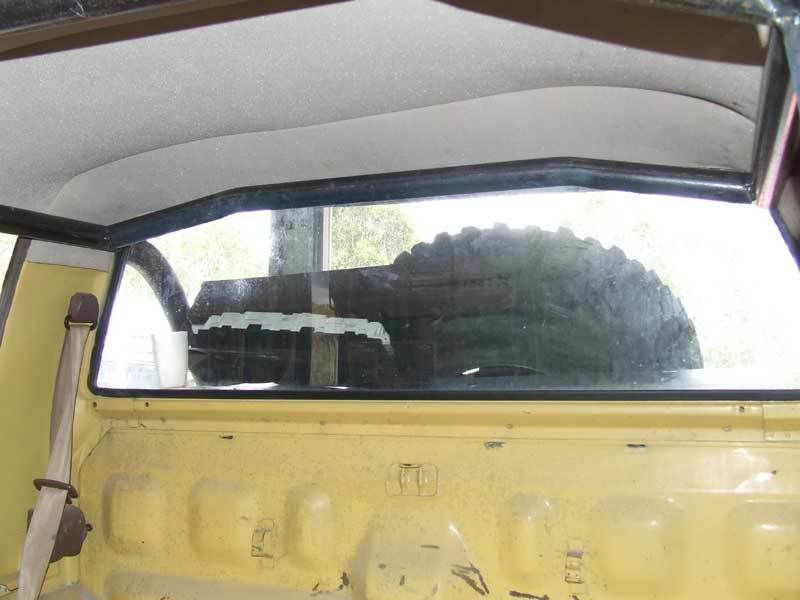
Now I have the A - C Pillar spreaders in, I have now tacked this main part of the structure.
C Pillar spreader.
A Pillar spreader.
C Pillar spreader.
A Pillar spreader.
http://www.budscustoms.com.au
Like us and follow on facebook for up to date information of what we are working on and great random specials!
Custom Parts & Fabrication!
Ph: 0417 708 598
Like us and follow on facebook for up to date information of what we are working on and great random specials!
Custom Parts & Fabrication!
Ph: 0417 708 598
cage
looking very nice ,so if you dont use a hole saw notcher what do u use?????
Lockers or Knockers ,both will make for fun.
HYBRID 4B PRDUCTS Visit Tigerz11 here http://www.tigerz11.com.au/ and LOCKTUP 4x4 here http://www.locktup4x4.com.au/ cheers
www.trailtrack4x4.com
HYBRID 4B PRDUCTS Visit Tigerz11 here http://www.tigerz11.com.au/ and LOCKTUP 4x4 here http://www.locktup4x4.com.au/ cheers
www.trailtrack4x4.com
Re: cage
5" Angle Grinder, or the 9" which ever one is closerWebbie wrote:looking very nice ,so if you dont use a hole saw notcher what do u use?????
http://www.budscustoms.com.au
Like us and follow on facebook for up to date information of what we are working on and great random specials!
Custom Parts & Fabrication!
Ph: 0417 708 598
Like us and follow on facebook for up to date information of what we are working on and great random specials!
Custom Parts & Fabrication!
Ph: 0417 708 598
i found this the other day, has made my life so much easier
http://www.metalgeek.com/static/cope.pcgi
looking the goods,
i too would like to know how you get to the top of the tube to weld it,
and when your using the grinder to notch the tube, (having only done it a couple times myself and not having done the greatest of jobs and that being on a 4 inch pipe)
is thier a specific way you go about it? like do you cut the small wedge out first then get it to the profile you want or??
and second last question i have, is how come you havent done the main bar over the b pillar like the cams specs state( i knwo your not building it to thier specs, but they must state it for a reason)
why i think you didnt do a b pillar hoop, is so that you dont need tube to criss cross behinde the drivers seat so that passengers can still sit in the back without tube in the way of thier knees???
if im wrong i would like to know, as i am looking at doing my trays roll bars soon, and then a while after it will be internal cage too. but at this point more for me.
last question, would that cage be engineerable the way its built so as to still have insurance cover???
cheers mate, love your work too
Go Hard Or GO Home
I drilled 2" diameter holes through the floor. tacked the cage in place inside the car, dropped it down through the floor then welded everything 360*
I then lifted it back in place and used 4mm plates on the floor on the top only as the floor plates were welded into the cab not bolted.
***********
These are the only photos i ever took of that cage.
I then lifted it back in place and used 4mm plates on the floor on the top only as the floor plates were welded into the cab not bolted.
***********
These are the only photos i ever took of that cage.
http://www.budscustoms.com.au
Like us and follow on facebook for up to date information of what we are working on and great random specials!
Custom Parts & Fabrication!
Ph: 0417 708 598
Like us and follow on facebook for up to date information of what we are working on and great random specials!
Custom Parts & Fabrication!
Ph: 0417 708 598
Who is online
Users browsing this forum: No registered users and 1 guest