Page 1 of 1
Dual Cab 6-Point Cage Construction - Pics
Posted: Sat Jan 20, 2007 12:04 am
by bubs
Just thought people might like to see the process of building an internal cage. This one in particular is being built in a 2nd gen dual cab and will be of through dash style, it is however not being built to CCDA or CAMS specificatons.
I didn't get any pre stipped photos.
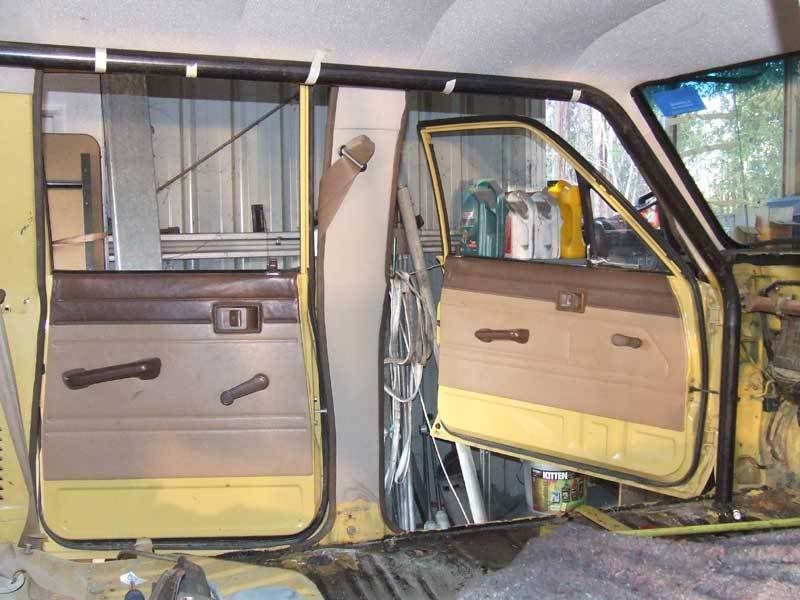
The most complicated piece of tube in the whole construction, a single piece of tube with 2 bends on 2 different planes. This is because the roof section is narrower than where it comes through the dash to meet the floor.
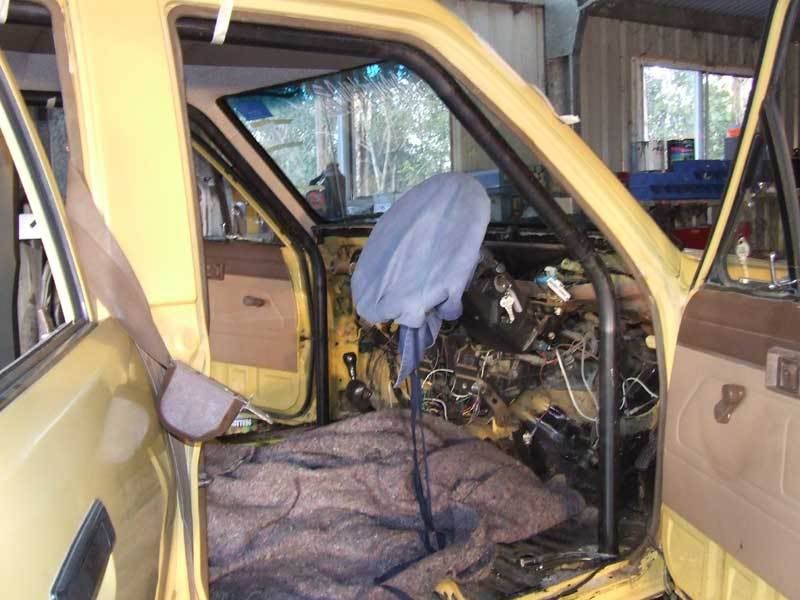
This shows the other main tube in place as well.
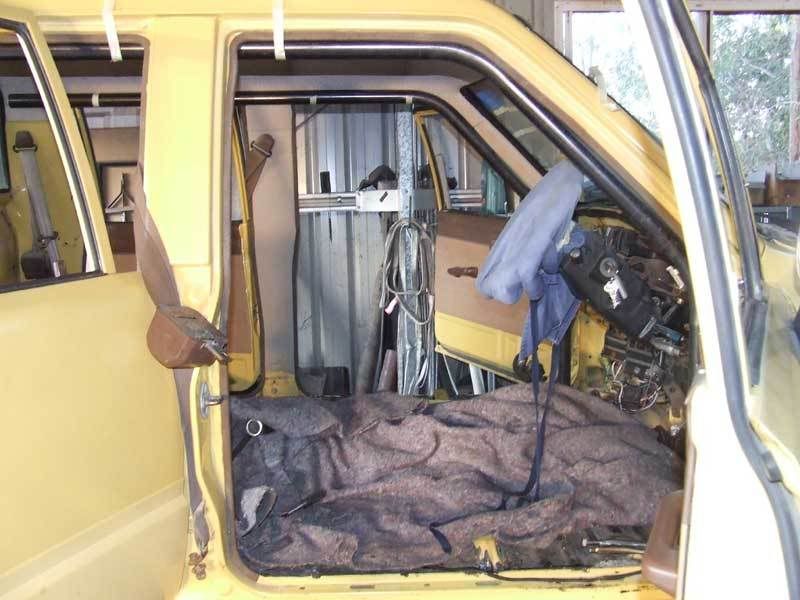
From the side showing the way it follows the A pillar and roof as close as possible.
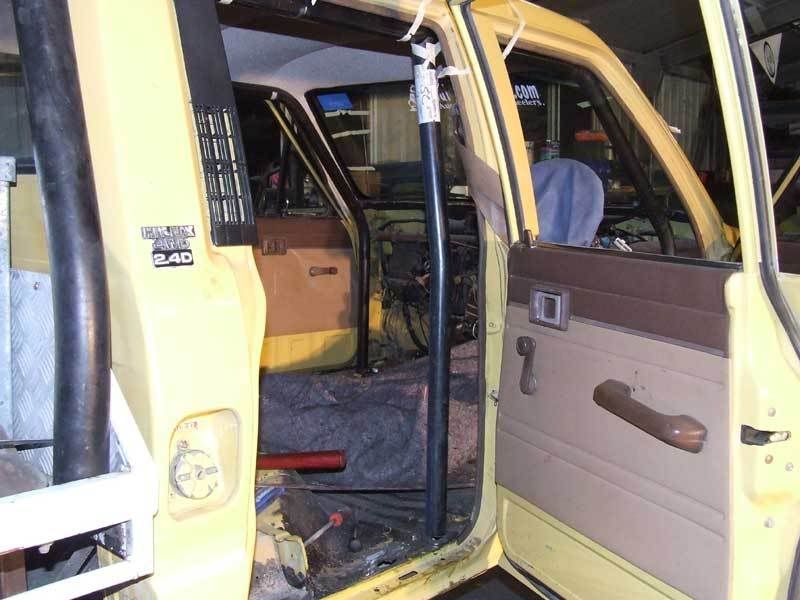
Here we have the first of the B Pillar supports in place. These have a single bend in them to keep the same profile as the front A pillar tube when looking straight on.
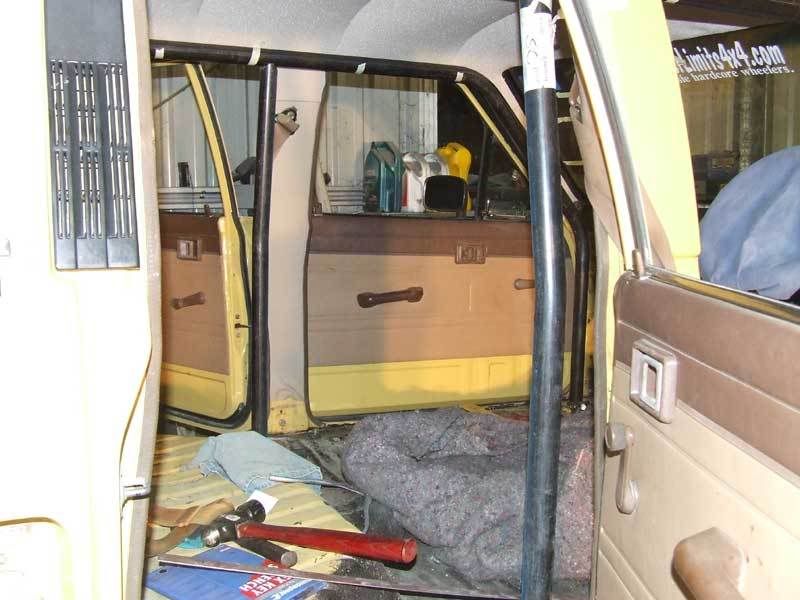
Showing the other side tube in place as well. In stead of tacking all the tubes in place as I go I have used the masking tape to hold them in place, makes having to remove pieces easy. You want to minimise the amount of welding and grinding you have to do inside the car.
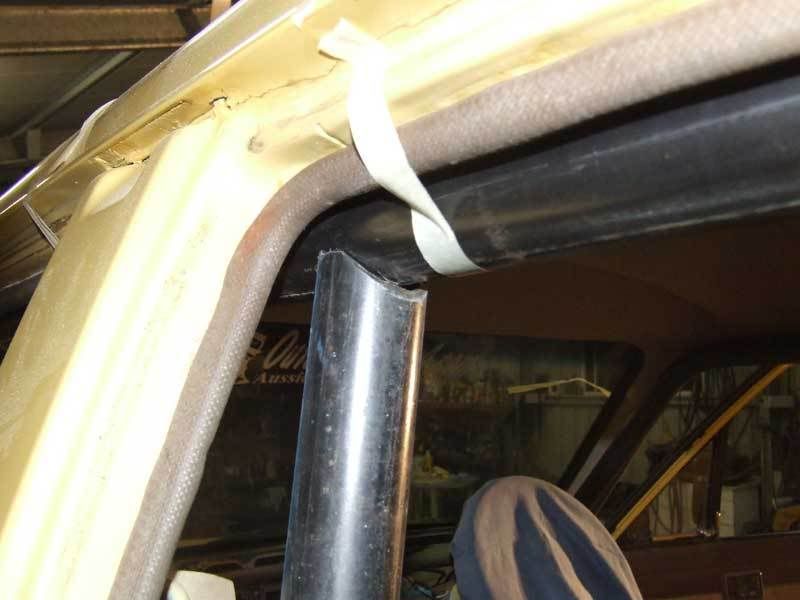
Just showing how you can still get a pretty decent notch without the use of a hole saw style notcher.
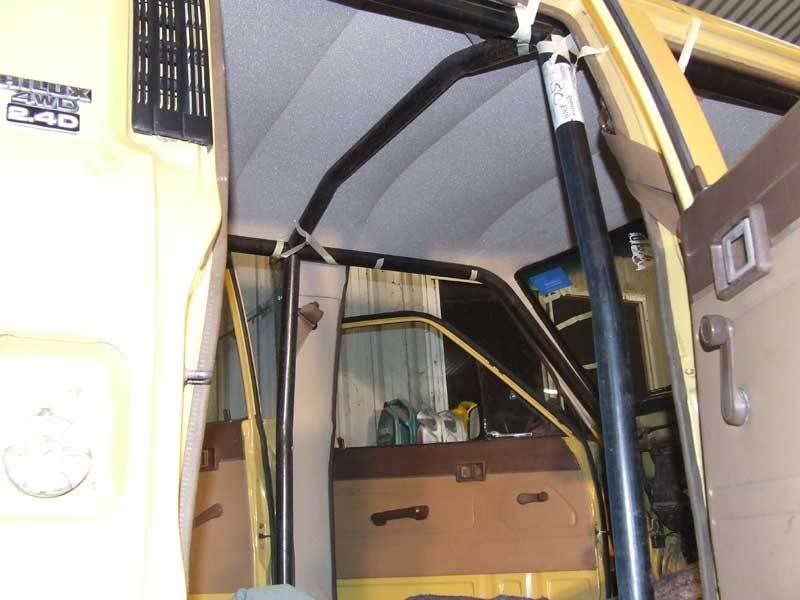
Here is the B pillar spreader in place, this one is a simple tube with only 2 bends to follow the roof.
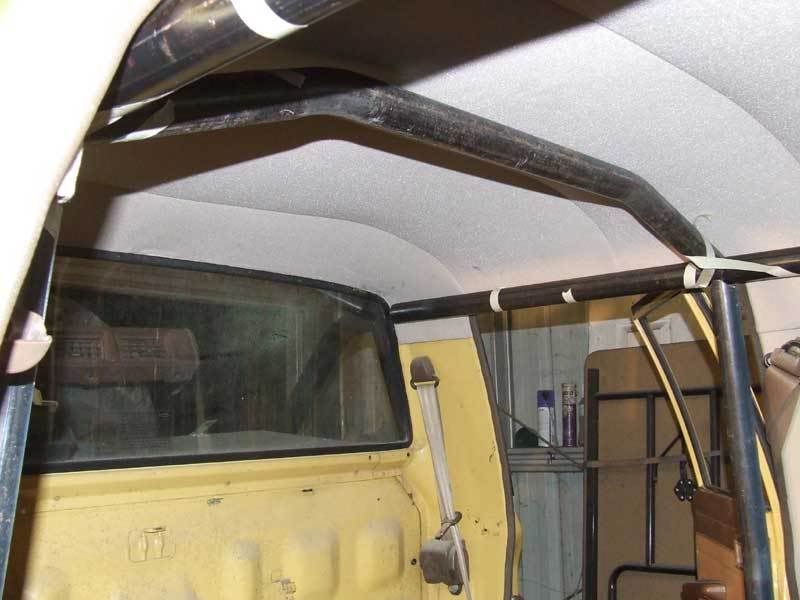
Here is the B pillar spreader from the front.
I'll update it tommorow when I get some more done.
Buddy
Posted: Sat Jan 20, 2007 8:15 am
by ausyota
Nice work.
What steel you using? Is it just 32NB pipe or some fancy stuff?
Posted: Sat Jan 20, 2007 9:17 am
by RUFF
Ha Ha the sticker on the windscreen is on on backwards

Posted: Sat Jan 20, 2007 9:58 am
by bubs
ausyota wrote:Nice work.
What steel you using? Is it just 32NB pipe or some fancy stuff?
Yes 32NB Heavy Wall
Posted: Sat Jan 20, 2007 9:59 am
by bubs
RUFF wrote:Ha Ha the sticker on the windscreen is on on backwards

Everybody has commented on that, yet its good for these inside out photos

Posted: Sat Jan 20, 2007 10:01 am
by bubs
Now I have the A - C Pillar spreaders in, I have now tacked this main part of the structure.
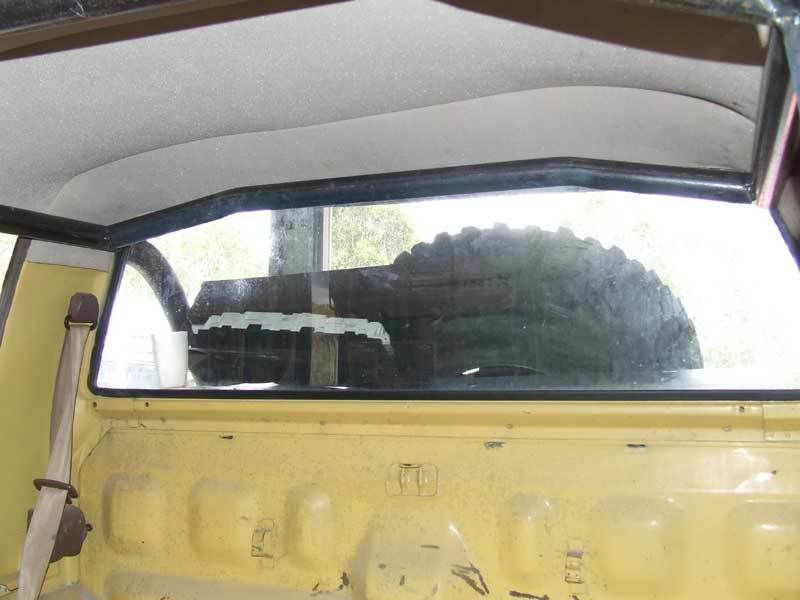
C Pillar spreader.
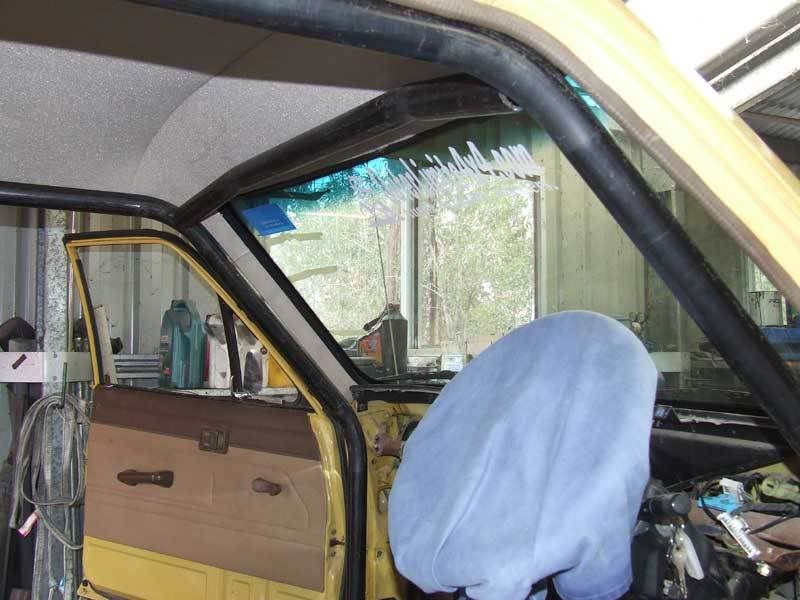
A Pillar spreader.
Posted: Sat Jan 20, 2007 11:31 am
by bubs
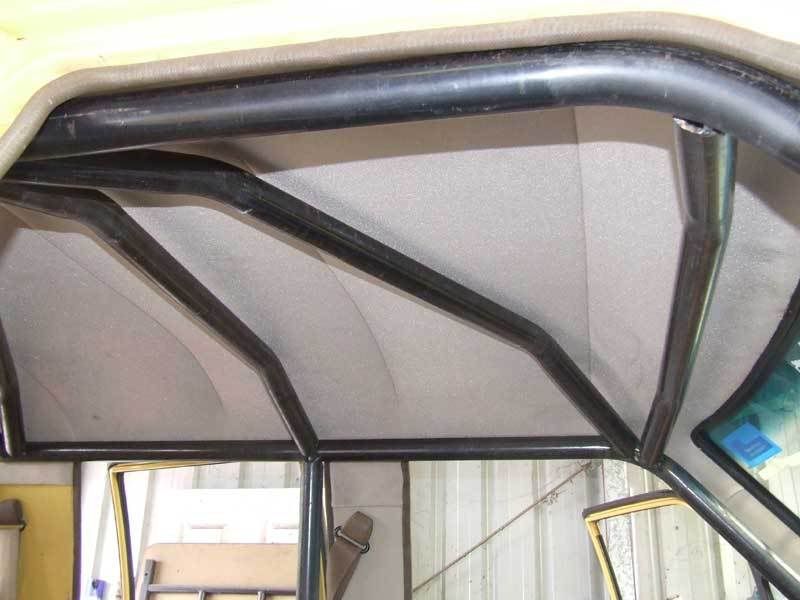
A Pillar to B Pillar diagonal spreader.
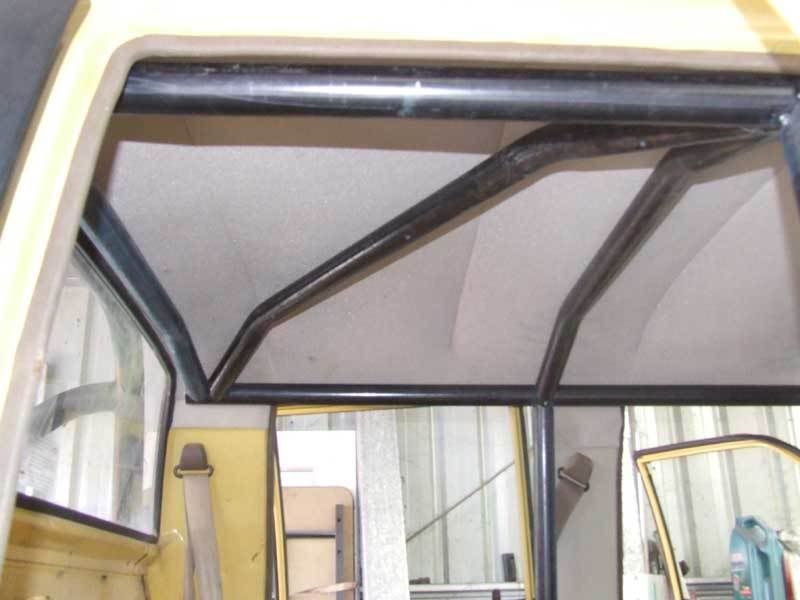
B Pillar to C Pillar diagonal spreader.
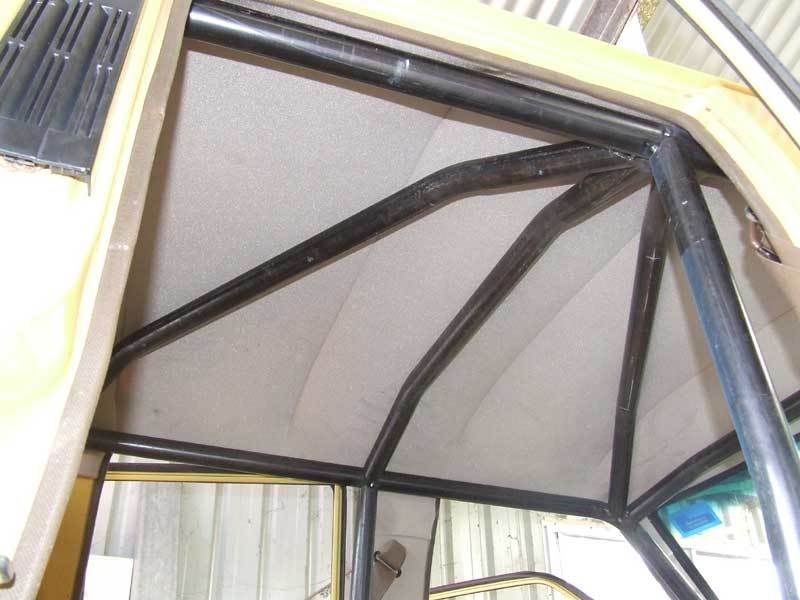
I call it "The Claw"
cage
Posted: Sun Jan 21, 2007 7:50 am
by Webbie
looking very nice

,so if you dont use a hole saw notcher what do u use?????
Re: cage
Posted: Sun Jan 21, 2007 9:26 am
by ausyota
Webbie wrote:looking very nice

,so if you dont use a hole saw notcher what do u use?????
Im guessing a cutoff saw.
Re: cage
Posted: Sun Jan 21, 2007 12:30 pm
by bubs
Webbie wrote:looking very nice

,so if you dont use a hole saw notcher what do u use?????
5" Angle Grinder, or the 9" which ever one is closer
Re: cage
Posted: Sun Jan 21, 2007 12:33 pm
by RUFF
bubs wrote:Webbie wrote:looking very nice

,so if you dont use a hole saw notcher what do u use?????
5" Angle Grinder, or the 9" which ever one is closer
Shut up and go and finish this

Does it get cheaper the longer it takes?

Posted: Sun Jan 21, 2007 12:36 pm
by Shadow
why didnt you wanna build it to cams specs?
does it make it alot harder or something?
Posted: Tue Apr 13, 2010 8:28 pm
by SIMMO84
Did you get an pics of where the cage mounted in the front floor wells?
Posted: Tue Apr 13, 2010 9:58 pm
by banks001
good question stock zook ive been wondering to
is this brads yellloowwwww subbbbbbbbbb
Posted: Tue Apr 13, 2010 10:28 pm
by pozman
i found this the other day, has made my life so much easier
http://www.metalgeek.com/static/cope.pcgi
Posted: Tue Apr 13, 2010 11:01 pm
by Wambat
looking the goods,
i too would like to know how you get to the top of the tube to weld it,
and when your using the grinder to notch the tube, (having only done it a couple times myself and not having done the greatest of jobs and that being on a 4 inch pipe)
is thier a specific way you go about it? like do you cut the small wedge out first then get it to the profile you want or??
and second last question i have, is how come you havent done the main bar over the b pillar like the cams specs state( i knwo your not building it to thier specs, but they must state it for a reason)
why i think you didnt do a b pillar hoop, is so that you dont need tube to criss cross behinde the drivers seat so that passengers can still sit in the back without tube in the way of thier knees???
if im wrong i would like to know, as i am looking at doing my trays roll bars soon, and then a while after it will be internal cage too. but at this point more for me.
last question, would that cage be engineerable the way its built so as to still have insurance cover???
cheers mate, love your work too
Posted: Wed Apr 14, 2010 6:33 pm
by chunderlicious
the holes in the floor dont need to be 3 inch holes... just big enough for the tube to get through....
or chop the roof off.... whichever you prefer.
welding half the tube is booty fab at its best and will get you laughed at and thrown out of any comp.
Posted: Wed Apr 14, 2010 7:07 pm
by bubs
I drilled 2" diameter holes through the floor. tacked the cage in place inside the car, dropped it down through the floor then welded everything 360*
I then lifted it back in place and used 4mm plates on the floor on the top only as the floor plates were welded into the cab not bolted.
***********
These are the only photos i ever took of that cage.


