Notice: We request that you don't just set up a new account at this time if you are a previous user.
If you used to be one of our moderators, please feel free to reach out to Chris via the facebook Outerlimits4x4 group and he will get you set back up with access should he need you.
Recovery:If you cannot access your old email address and don't remember your password, please click here to log a change of email address so you can do a password reset.

Nissan GU diffs or upgrading Rover gear?

Tech Talk for Rover owners.

Moderator: Micka

Post Reply
Posts: 687
Joined: Sun Apr 04, 2004 9:54 am
Location: Sydney

Nissan GU diffs or upgrading Rover gear?

Post by up2nogood »

Well, not yet but am weighing up the options.

I figured there's a few guys here who have done the conversion (Maggot, DAS) as well as hepas of you who have upgraded your Rover gear so I thought I'd open my dilemma up to the forum.

The car:
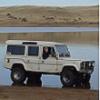
* 1995 Bushranger (Discovery)
* 300TDi, R380 manual, std '95 diffs with 3.54:1 ratios.
* 33" tyres, or the metric equivalent anyway. Not going bigger. I have to remain legal for insurance and to avoid personal liability claims from having a non-compliant car.
* Current weight before dual batteries, recovery gear and winch is 2,000kgs on the dot with one spare, one N70 battery and no jerry cans. Reckon I'll have to figure on another 750kgs with two people and gear.
* Will tow 800kg trailer on trips.
Trips in a Bushranger? Hey, I've nearly got the dual aircon working! :D


The plan:
* Fit front and rear jac mac air lockers, axles and drive flanges.
* Convert ratios to 4.11:1 (I have these gears already)
* Do something with front CV's. Maxidrive? AEU2522's? Blu-tac?
* Sort out crap front prop shaft binding. Custom shaft?
* Sort out appalling brakes from having fitted 33's to it.

The use:
* Be able to stop. No, there's nothing wrong with what's on it, as long as I run small tyres. Only just passed engineering and roadworthy checks with the 33's.
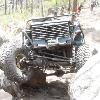
* Just driving the damn thing, but need to be able to get up rough as guts tracks without needing to 'baby' it. I don't drive like an idiot but I do push it. But I don't need it to be able to complete EWC or OBC.......


I need to put in lockers as the stock 2 pin carriers will lunch my expensive 4.11's at some stage and I run out of traction anyway.....
The brakes need to be sorted by getting Defender calipers and fitting those, along with vented rotors.
The drive$haft$ are just gonna cost money, so that needs to be done no matter which conversion I go with. Although if I stick with Rover I don't need to do the rear one.

Thanks guys, appreciate your experience on this.
Posts: 783
Joined: Sat Jan 01, 2005 1:34 pm
Location: Narellan NSW

Post by andrew e »

buy my f250 danas, HEAPS stronger than piddley gu and only 3k the pair. Better brakes too. you know you want to.


Andy
Posts: 687
Joined: Sun Apr 04, 2004 9:54 am
Location: Sydney

Post by up2nogood »

Thanks Andy, but they're a little heavier too!

That and I don't reckon I'm gonna break GU's. And I hate drum brakes!
Posts: 783
Joined: Sat Jan 01, 2005 1:34 pm
Location: Narellan NSW

Post by andrew e »

heavy shemevy........ the fronts disc, and the rear drums are amost 4 inches wide!
Posts: 687
Joined: Sun Apr 04, 2004 9:54 am
Location: Sydney

Post by up2nogood »

But I didn't want to have to put in a 7.3ltr turbo diesel! Although that idea does have merits......
Posts: 2588
Joined: Mon Apr 19, 2004 10:45 pm
Location: Hobart Tas

Post by Reddo »

From my experience, you are on the right track here. What you propose is like the D1 plus a bit more, and it works well, ie, Jac Mac axles and air lockers and upgraded (thicker) drive flanges, 33's - some guard trimming (soon to be 35's with a lot mor guard timming), pegged CW and Nissan CV's in the front (requires some machining which JM can do at the same time the axles are configured), 4.11's and 24 spline rear axles and pinions. Defender rotors and calipers are the way to go - huge improvement in braking and much less wear on pads.

AU 2522s are too expensive and I have been told they vary heaps in quality and strength whereas the Nissan CVs are consistantly strong and relatively cheaper and easy to get at 250 each. Using the Rangie set-up post Jac Mac axles would be my next choice - easy to get and easy to fix as they will break the removable short axle, if they break.

Peg the CWs while you have the diffs out for fitting the 4.11's - do it yourself (see Ashcroft web page for ideas), or get Jac Mac to do it.

Replace all seal in the drive train while your at it with upgraded Cortico seals (see Rover Parts for best price), eg., double lipped for inner stub axles seal which helps keep the water and mud out.

Front drive shaft issues??? Not sure what the problem is here - ours is fine. Perhaps look to replace with another Rover one. Wreckers are your firend here.
Nice gq swb ute chop with a huffer for the good times
Posts: 687
Joined: Sun Apr 04, 2004 9:54 am
Location: Sydney

Post by up2nogood »

Thanks Reddo!

Pegging looks to be a bloody good idea and should remove any potential for breakage. For my use anyway. Have you done it and what did you use?

What needs machining in the the hubs to accept the Nissan CV's? And you mean GU CV's? Does Jac Mac make a different axle to suit this?

Thanks, I reckon I can make this damn thing strong enough without having to go back to the engineer, just need to make sure.
Posts: 3064
Joined: Sun Jun 12, 2005 11:00 pm
Location: Yinnar South, Vic

Post by cloughy »

I hope he means GU, 'cause GQ's are as weak as standard rover
Wanted: Car trailer or beaver tail truck, let me know what you got
Posts: 2588
Joined: Mon Apr 19, 2004 10:45 pm
Location: Hobart Tas

Post by Reddo »

Here is some info posted some time ago on the pegging exercise.

Nissan GU - well so the supplier siad, but have since been told this is not possible cause they won't fit the housing. Have yet to pull one out and measure. If they are GQ size, I'm confident they are stonger than Rover anyway. Whilst the Rover CV is quite big at 93 mm diameter (same size as 80 series I think), the axle star/input diameter is puney compared to Nissan, hence the need to change CVs when fitting the Jac Macs - JM don't like to do axles to suit the Rover CVs cause the axles will break too easily where it narrows into the CV star whereas the Nissan sized ones don't narrow at this point.

The back of the stub axle needs machining to take out the Rover needle roller bearing and to accept a Nissan tapered bronze bushing. The Nissan CV has the Bell and stub in one.


--------------------------------------------------------------------------------
Pegging went well.

Firstly I should acknowledge that the Ashcroft Engineering web site provides some very useful pictures on this topic. Dave is great on info and this is one reason why we bought his 4.11s

The biggest issue is working out where to drill the holes through the casing and making sure they are at right angles to the axis of the pinion.

For this we used a tee square adjusted to match the radius of the crown wheel, that is the distance from the centre of the crown wheel to the centre of the flat that the bearing pad will eventually run on - effectively this is the space from the gear mounting hub/flange (just above the bolt holes) to the outside of the gear wheel. There is slight chamfer on the outermost part of the gear, and this forms the limit of the bearing surface available, ie between the gear mounting flange/hub and the chamfer - and is approx 10mm wide.

Remove the CW and sit the tee square on the top of the cast/machined CW bearing block closest to the CW- that is so it is effectively at the centre of the CW and mark the approx depth/location of the holes on the inside of the diff housing. We then referenced this location, adjusted for radius (using the radius of the CW, and located two points (ie, the holes for tapping and fitting the locating pegs) that are approx 40mm centre to centre apart on the outside of the housing.

There is a need to weld on some flat steel shaped to fit between the cast ribs on the outside of the housing in this place so it covers the marked holes allowing two threads to fit nicely approx 40 mm apart with a nut on top. As said, this plate is fitted and welded between the ribs that are cast on the the outside of the housing and when finished should leave a surface paralell to the pinion axis and at right angles to the CW bearing axis - we used a bit of modified 5mm angle and u can use the machined mounting surface for working out the right angles.

This is fiddly work and a die grinder helps a lot here. Before welding (using low hydrogen rods) pre-heating the housing to dull red in the weld area is essential otherwise the welds will fail due to shrinkage.

Once welded, locate the peg holes on the now 'flat' fillet of steel, drill pilot holes using a drill press taking care to ensure the holes are at 90degree to the plate and the pinion axis. Tap later to suit whatever thread you're using - we used Grade 5 15mm pre-threaded rod starting with 100mm. You cut this down to length later so that once inserted and adjusted, there's just enough height/thread left to allow a nyloc nut to be fitted.

It is necessary to machine down the ends of the thread to fit snugly into stopped holes in the bearing pad (as the thread is too large by itself to fit the bearing pad) or drill and insert suitable dowell/round bar which in turn will fit matching holes in the bearing pad to locate it and allow the thread to be turned to adjust the bearing pad against the CW. Dowells should protrude about 5-8mmmm from the shoulder of the thread, and the pad holes should be stopped at a depth that is suitable for good location and which allows easy rotation - around 5-8mm depending on the thickness of the pad.

The bearing pad was made from 25mm bronze rod, cut in half and shaped to the approx radius of the CW, trial and error is required to get the thickness and shape right to ensure it fits in between the CW and the housing - and u may need to grind a little of the housing away inside, at the narrow end to get the best fit - the pad ends up looking a bit like a banana - perhaps 60mm long and 12-15 mm wide and 8-10 mm or so thick. We found one diff allowed a thicker pad cause the inner casting was slightly different with more clearance to the CW. However, backlash adjustment may also impinge on the space ultimately abvailable and as said, u can grind away a bit of the housing inside if needed - it's 20mm thick here anyway.

We marked the locating holes by installing the CW and adjusting to its approx backlash, placing the shaped bronze pad on the CW with some sticky grease and carefully rotating it to the correct location and then inserted painted rods ends down the pilot holes. Once located, drill the pad to suit the machined or dowelled end of the thread. Cut the thread to length and cut slots in the outside end of the thread for a large screwdriver to fit to turn, and finally tap the holes right thru the welded plate and the diff housing proper to match the threaded bar.

Assemble and once adjusted, thread on some ny-loc nuts to suit the bar and tighten down hard. Rotate and make sure it does not foul. Don't adjust too tight though.

The only issue has been effectively sealing the threads and using silicone on the threads when assembling front diff worked well, but the rear has leaked a bit since. Not sure how to stop this yet but it is not too bad - one or two drip per journey!

I don't want to take out the offending thread as the pad may fall away from the CW, never to be located again. Oh well, it can wait until it's out again and after all, it is a Rover so Toyota and Nissan owners can point the finger at it and snigger wisely .

Cost, threaded bar 30 dollars for a metre length, nyloc nuts to suit 5 dollars, 25mm dia bronze rod 30 dollars for 30cm length. Rest of materials were scrap and had the tap to suit already.

Time 2-4 hours installed the 4.11s at the same time.
Nice gq swb ute chop with a huffer for the good times
Posts: 2158
Joined: Sat Jan 20, 2007 8:16 am
Location: New Zealand

Post by KiwiBacon »

Brakes are easy.

Some defender front calipers have pistons 25% bigger (area) than disco/rangie parts. They bolt in place but are single line so rangie owners have some plumbing to do.

Results are fantastic. 25% doesn't sound like much, but it's basically changing a 1% power reserve to a 26% power reserve.

I went to vented front rotors at the same time.
Posts: 683
Joined: Thu Mar 06, 2003 3:42 am
Location: Sydney

Post by GURU »

cloughy wrote:I hope he means GU, 'cause GQ's are as weak as standard rover
Pfft...GQ is more than twice the strength of rover in every way but the CV's, CV's are stronger but not the strongest on the market (nothing standard is though). GU on the other hand are strong like 80 series CV's cause they are that much bigger.

But to answer your delema, I had a RR on 33" x 9.5" with 4.11's and a ARB rear locker (not locked in) driving through dirt wombat holes on a weekend trip and broke a STD disco 24 spline axle, thats when I decided to go the GQ's.

Reasons to me was price, you price to get a pair of 4.1 GQ diffs ($1000) and then match that with the 4.11 diffs, Jac Mac axles, flanges, HD carrier (not locked) and CV upgrade then you still have to fit them all.

My RR with GQ diffs and a 4.4L P76 Stopped on a dime...never felt another car let alone a 4wd stop as good as it did, and it was running 35's by then. And the turning circle was AWSUME. These 3 things alone is what is making me put GQ's in my new Rangie which is the tow rig and light weekend wheeling, I don't want to have to baby weak Sh1at when I can fit strong stuff standard.

As for your front shaft issue, GU's and GQ's have high pinion front diffs, so that should fix your binding, you will probably have to fit a double carden for the rear shaft.

Just something for you to think about
[i]DAS[/i]
MY05 4.4L V8 Range Rover Vogue
Series 2a Buggy....In the Building
Posts: 2588
Joined: Mon Apr 19, 2004 10:45 pm
Location: Hobart Tas

Post by Reddo »

Good advice Guru - and the cheaper you can get the Nissan stuff the better.

Unfortunately, when I looked at this last year the price of GQ diffs was twice that you paid in Tasmania, and they probably still are....and the pumpkin clearance suffers. Oh, and the Transport guys did not want to know about it - not standard so factor in engineering (could be problematic with the Code), and fitment etc etc. There's no doubt the Nissan stuff is stronger stadard, but it's not all meat and potatoes!
Nice gq swb ute chop with a huffer for the good times
Post Reply

Who is online

Users browsing this forum: No registered users and 5 guests