Notice: We request that you don't just set up a new account at this time if you are a previous user.
If you used to be one of our moderators, please feel free to reach out to Chris via the facebook Outerlimits4x4 group and he will get you set back up with access should he need you.
Recovery:If you cannot access your old email address and don't remember your password, please click here to log a change of email address so you can do a password reset.

80'S IN A LUX...ONE WAY OF DOING IT.

Tech Talk for Cruiser owners.

Moderators: toaddog, Elmo, DUDELUX

Posts: 2169
Joined: Fri Jun 16, 2006 4:41 pm
Location: melbourne

80'S IN A LUX...ONE WAY OF DOING IT.

Post by joeblow »

hey all....i don't frequent the tojo section all that much......cause you blokes scare me...... ;)

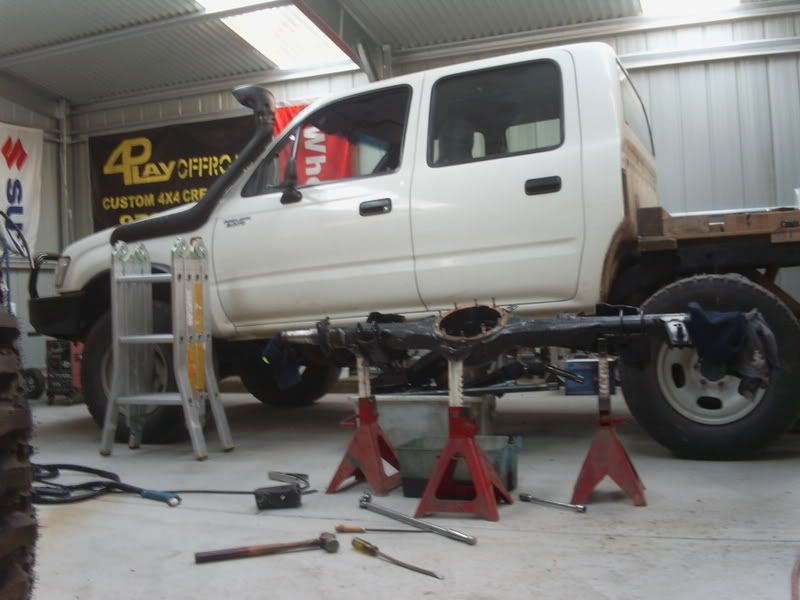
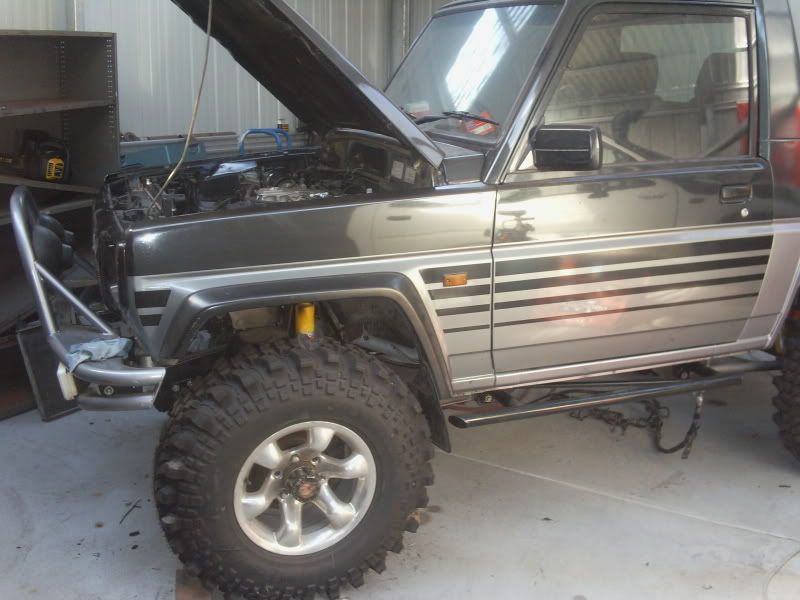
i'm currently working on a 2002 turbo deisel twin cab for a couple of friends who had some 80 diffs sitting around. now for starters this is not being built for stupid amounts of flex etc. its being built to be a little more capable and to run max 35 inch tyres. we pretty much want this vehicle to be a good performer off road and drive very well on the road.

the front will be done soon, but for now the rear was my concern as we wanted to maintain the larger fuel tank in its current spot. the rear is being flipped and coil mounts etc modded to suit. the rear will be five link, while the front will be three using original arms.
Image
the vehicle..............

Image
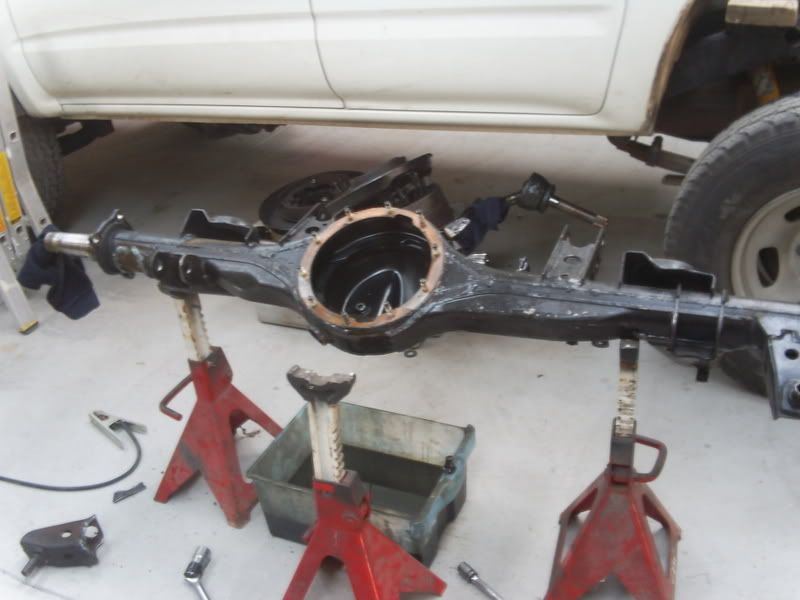
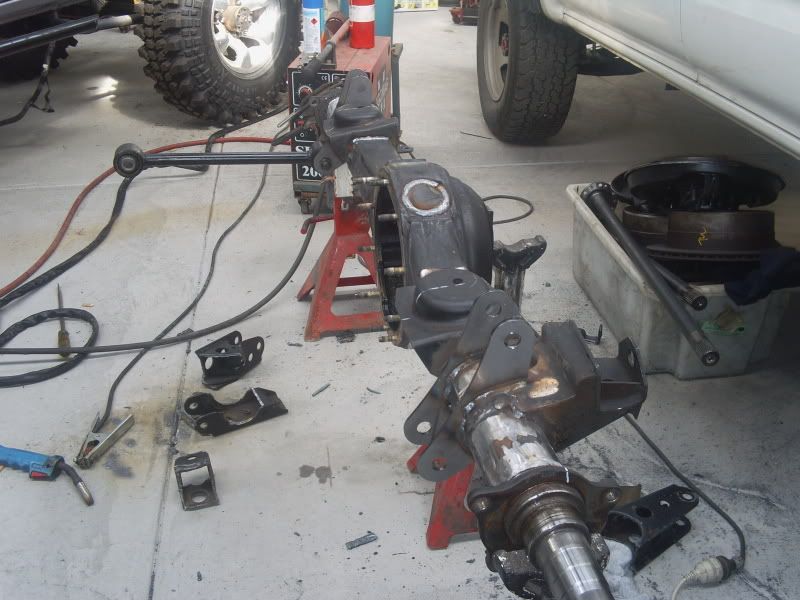
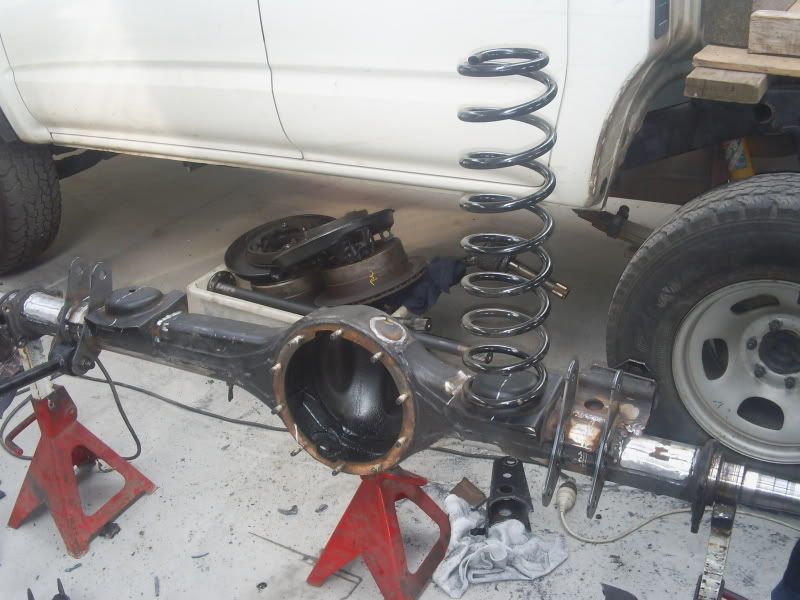
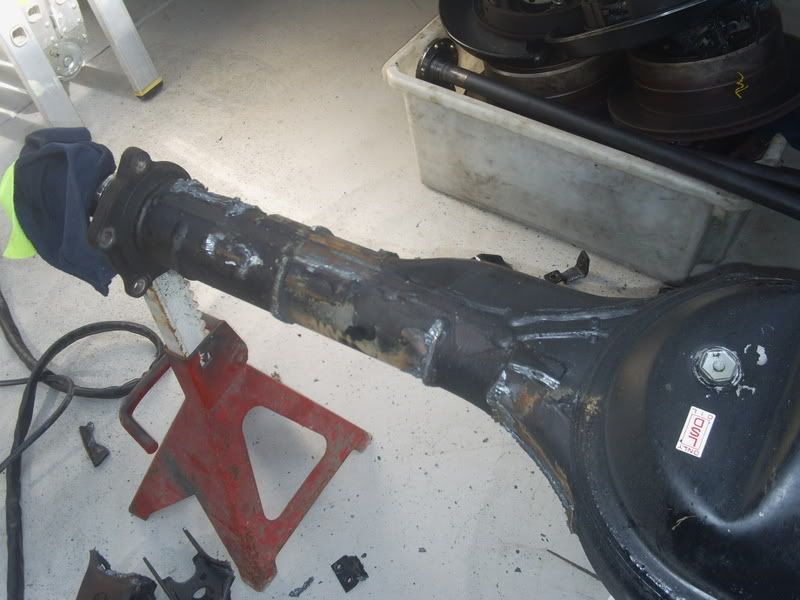
the 80 rear. it will be flipped including being modded to rotate the centre 180°, this also involves cutting and rotating the pumkin 'hat' to suit as well as some new notches for the ring gear.
Image
some fun with a plasma.....

Image
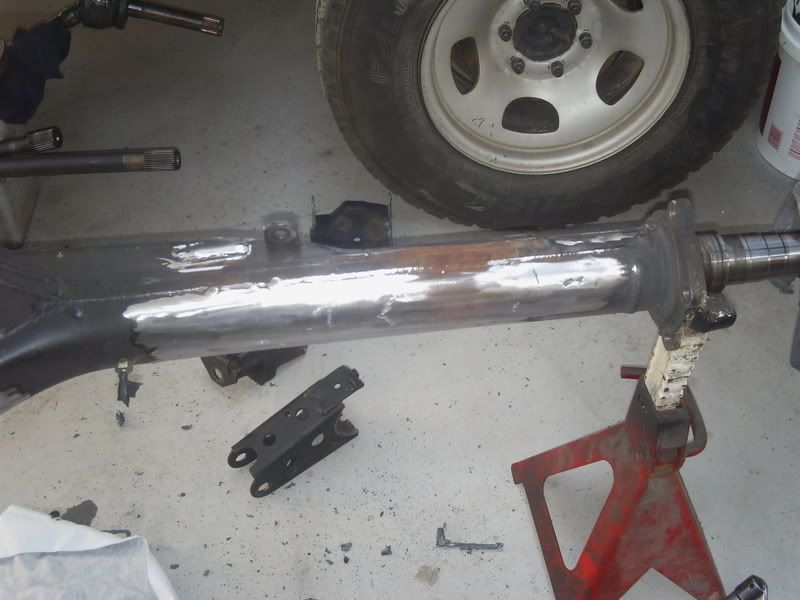
some cleaning up afterwards.....

Image
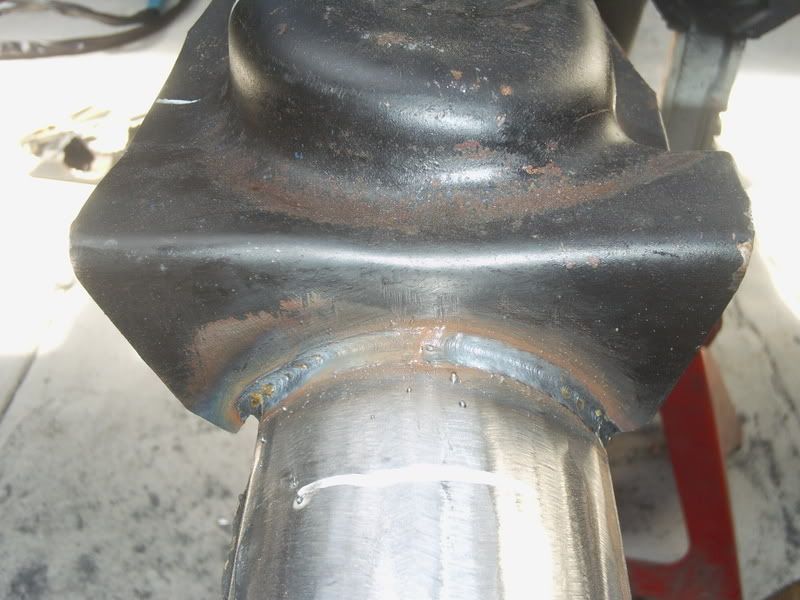
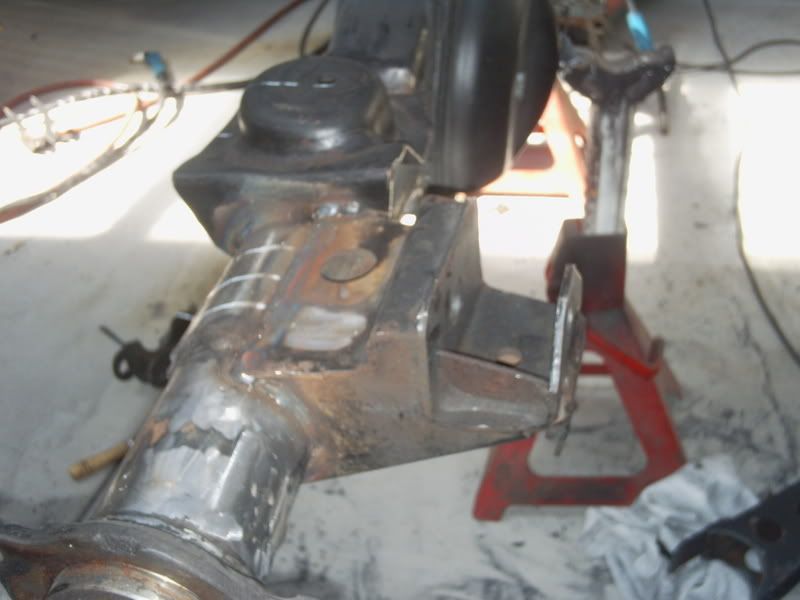
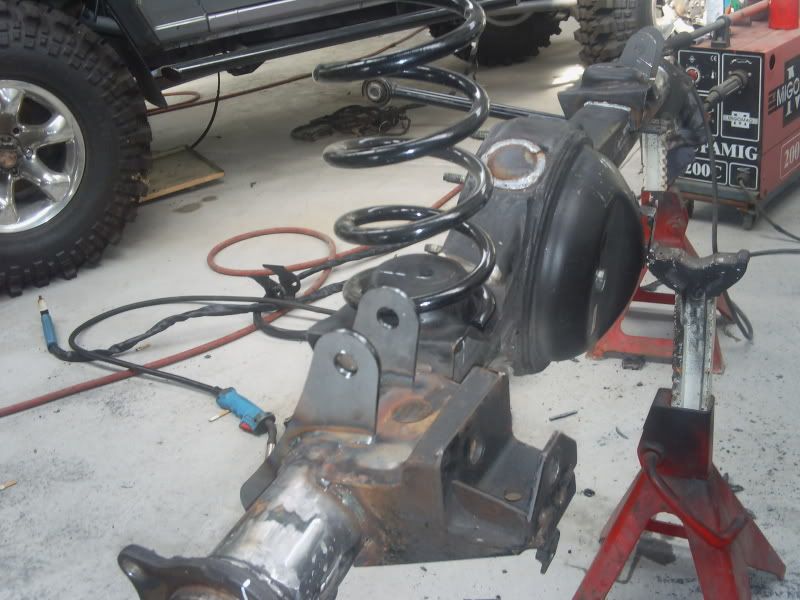
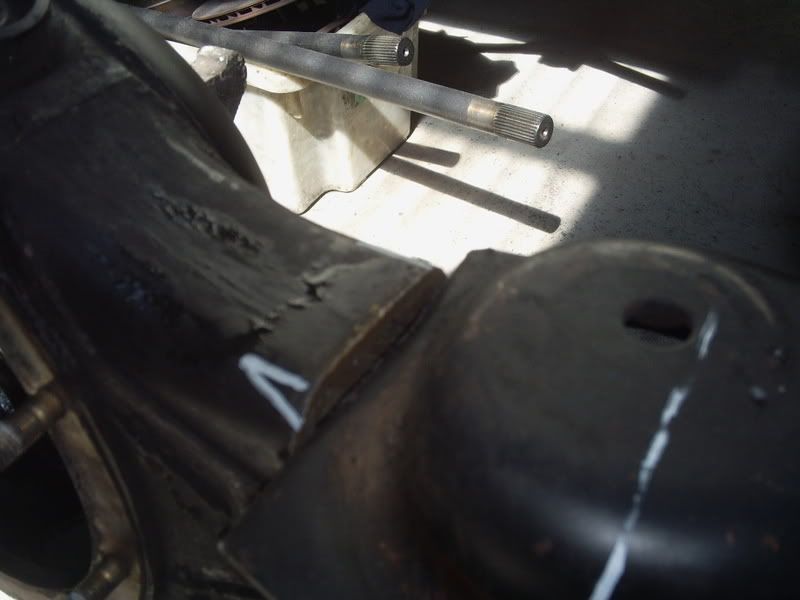
the lower coil mounts are being placed just inboard of the chassis using jk wrangler front coils. had to be modded to suit the bracing that was originaly on the bottom of the diff and is now on top.
Image
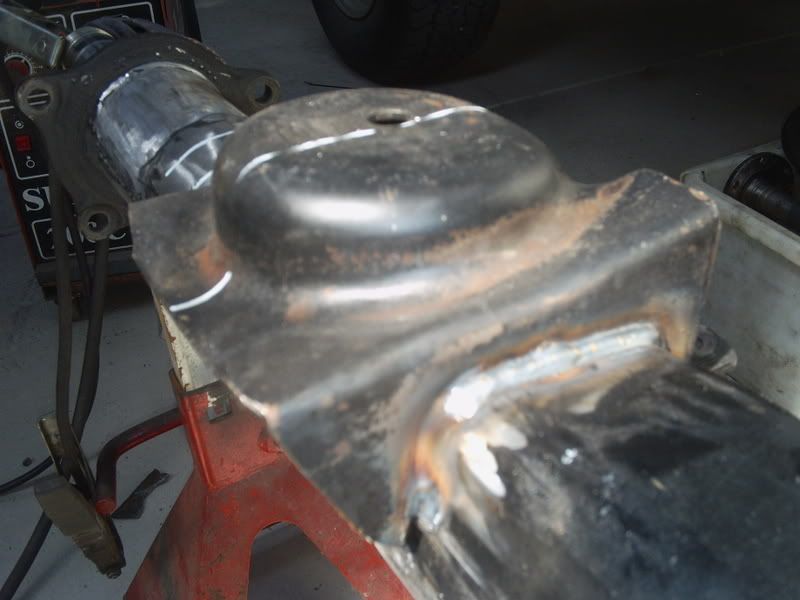
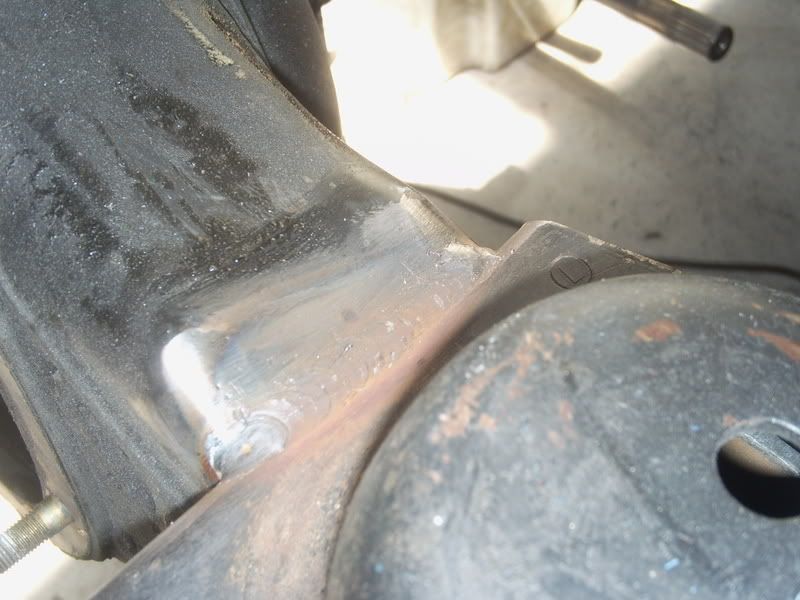
the new pass side mount was slightly cut into the bracing so it won't sit too high.
Image
cut, bent and welded in place......

Image

Image
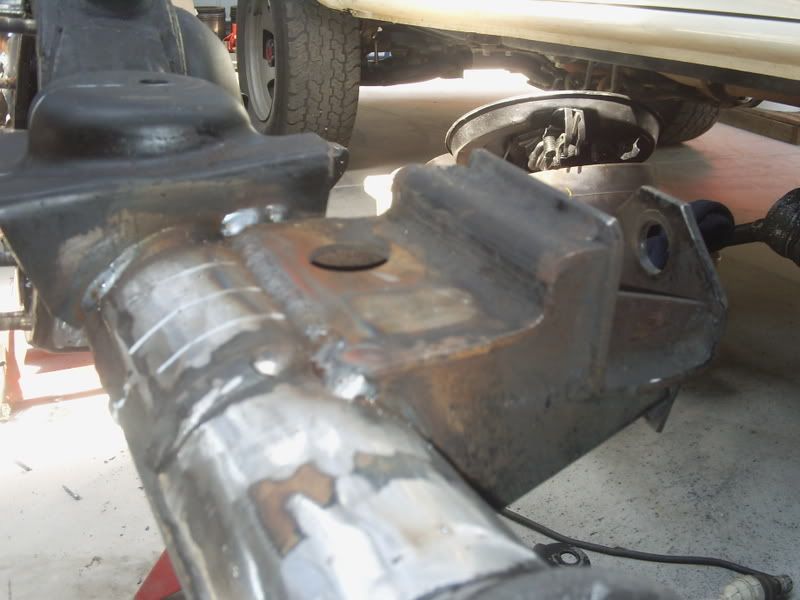
panhard rod mount welded in its new position.
Image

Image
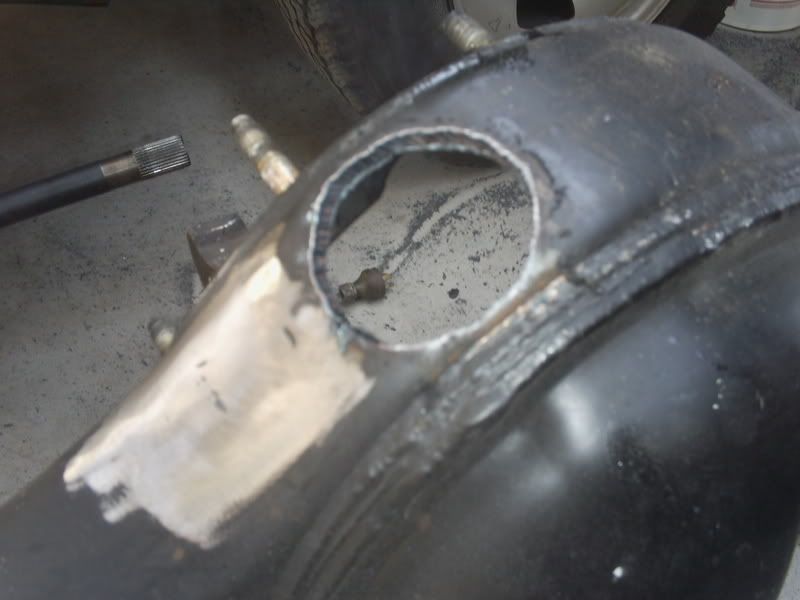
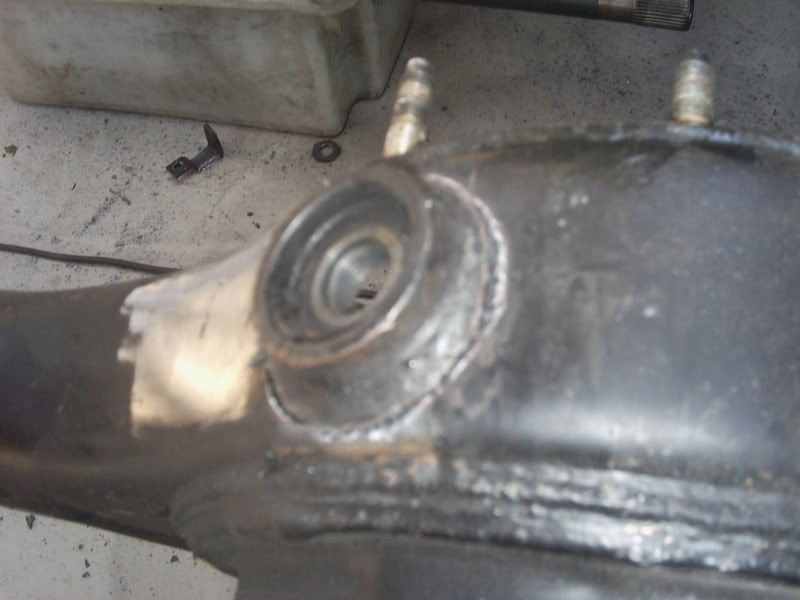
drain plug cut to be re positioned on the new bottom.
Image

Image
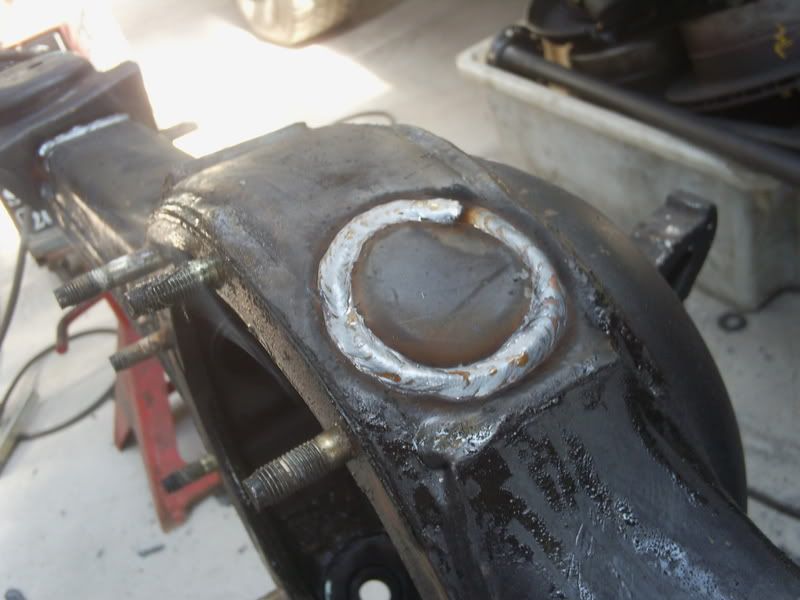
the old hole plugged.......

more pics to come as the build progresses.......
lwb 1.6efi,4sp auto,f&r airlockers,dual t/cases.custom coils.builder of ROAD LEGAL custom suzukis...and other stuff.
CAD modelling-TECH drawings-DXF preparation.
http://www.auszookers.com/index.php
Posts: 804
Joined: Thu Aug 07, 2008 9:44 am
Location: Perth

Post by pinkfloyddsotm »

nice work man, shold put this in the members section, its a farkin shitload of work gettin those brackets off huh ? :D
Posts: 94
Joined: Mon May 07, 2007 5:29 pm
Location: A.C.T

Post by luxembuger »

Awesome!! Just wondering what you're doing about the tailshaft offset? I'm in the process of modding a 100 Series rear to suit my Lux.
Cheers, Chris.
97 DC lux
Posts: 2169
Joined: Fri Jun 16, 2006 4:41 pm
Location: melbourne

Post by joeblow »

luxembuger wrote:Awesome!! Just wondering what you're doing about the tailshaft offset? I'm in the process of modding a 100 Series rear to suit my Lux.
Cheers, Chris.
the pinion offset will be around 90mm to the passenger side, something we are not too concerned about considering the length of the tailshaft.

and yes......i don't want to cut brackets off one of these again in a hurry!

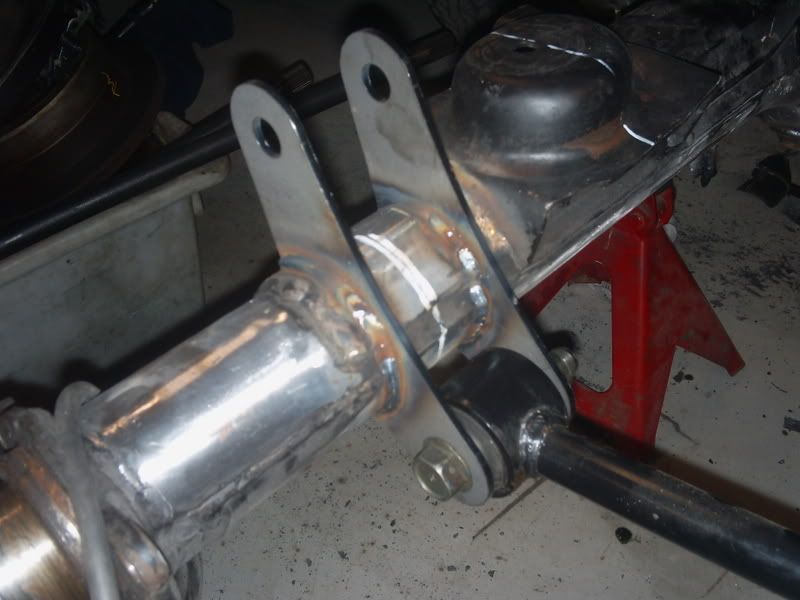
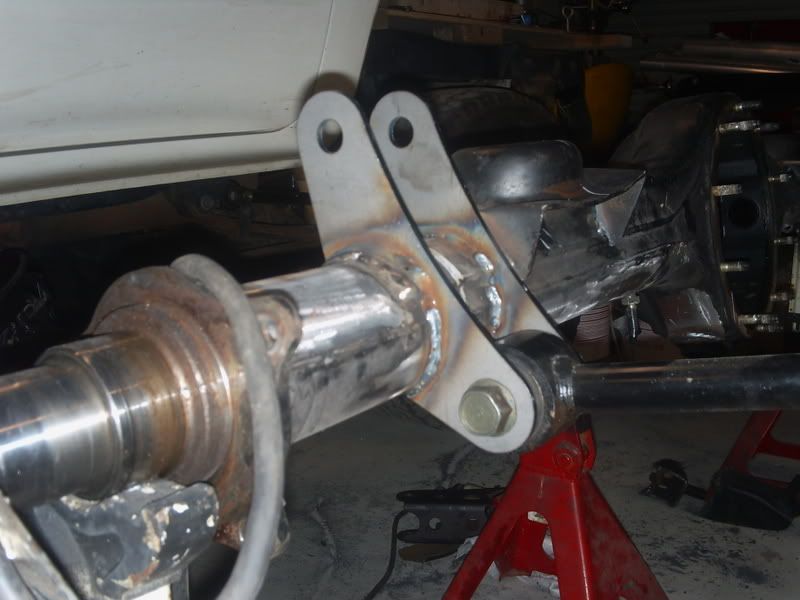
started the control arm mounts today.................
Image

Image

oh, and if a moderator feels that this should be in members please feel free to move it and i do appologise..........
lwb 1.6efi,4sp auto,f&r airlockers,dual t/cases.custom coils.builder of ROAD LEGAL custom suzukis...and other stuff.
CAD modelling-TECH drawings-DXF preparation.
http://www.auszookers.com/index.php
Posts: 1350
Joined: Tue Nov 25, 2008 4:48 pm
Location: Sunshine Coast - Brisbane

Post by money_killer »

nice work should be a weapon when complete
Posts: 44
Joined: Thu Aug 16, 2007 6:05 pm
Location: ferntree gully

Post by itufgq »

top work joe looking really good should be a good build to watch keep up the good work
Posts: 16934
Joined: Sun Oct 20, 2002 6:57 pm

Post by RUFF »

Why not just go 3 link with a Panhard in the rear? It will flex much better and wont bind as the suspension cycles.
Posts: 804
Joined: Thu Aug 07, 2008 9:44 am
Location: Perth

Post by pinkfloyddsotm »

hey you didnt weld the coil moutns on back to front did ya ? or is that how the wrangler coils wind in ? and i dont know if you did do it ,hard to tell in pics but the coils moutns also need to suit the pinion angle, i made the mistake of weldin them on level with the diff but when you correct the pinion it tilts the moutns right back and bends the hell out of the coils..just a thought. you might be right i dunno..
Posts: 2169
Joined: Fri Jun 16, 2006 4:41 pm
Location: melbourne

Post by joeblow »

normaly in the rear of a vehicle i will do a triangulated setup if possible like this.....
Image

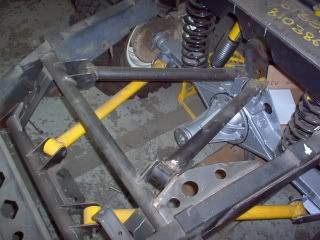
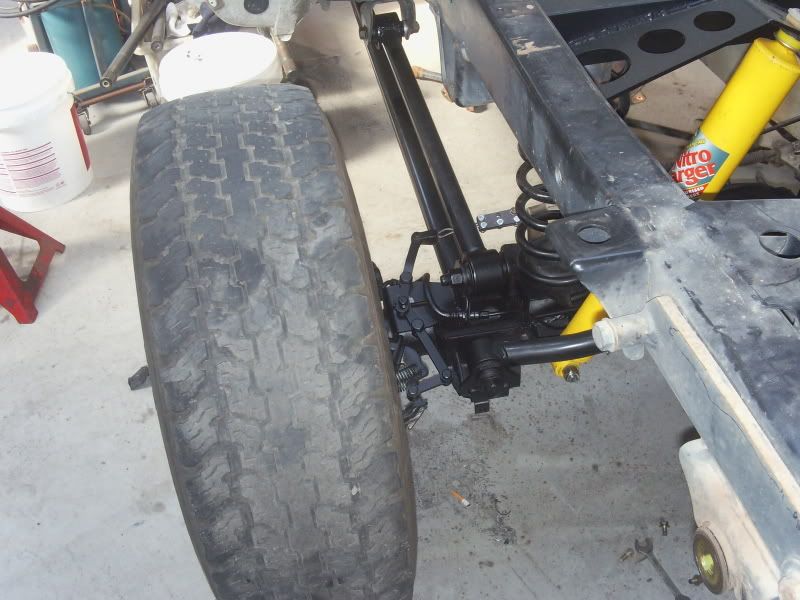
but with the tank etc this was not possible, plus this thing is more of a tourer than super-flexy crawler. the main reason for the five link rear is to control pinion angles during suspension cycling, something not really possible with three link ( i want to keep the input and outputs allmost parallel during cycling). the coil mounts are 96° from the pinion line.

Image
Image
all arm mounts done. all that is left is shock mounts on the weekend.

Image
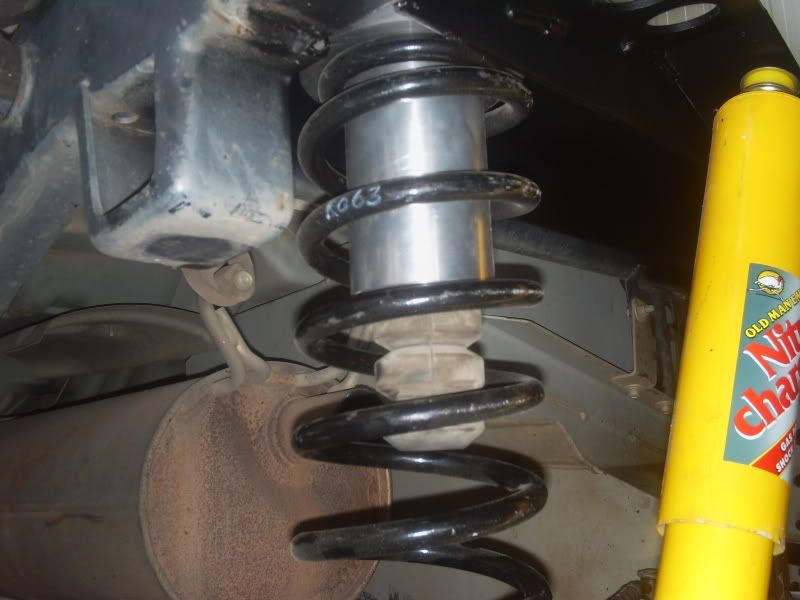
jk coil in position.

Image
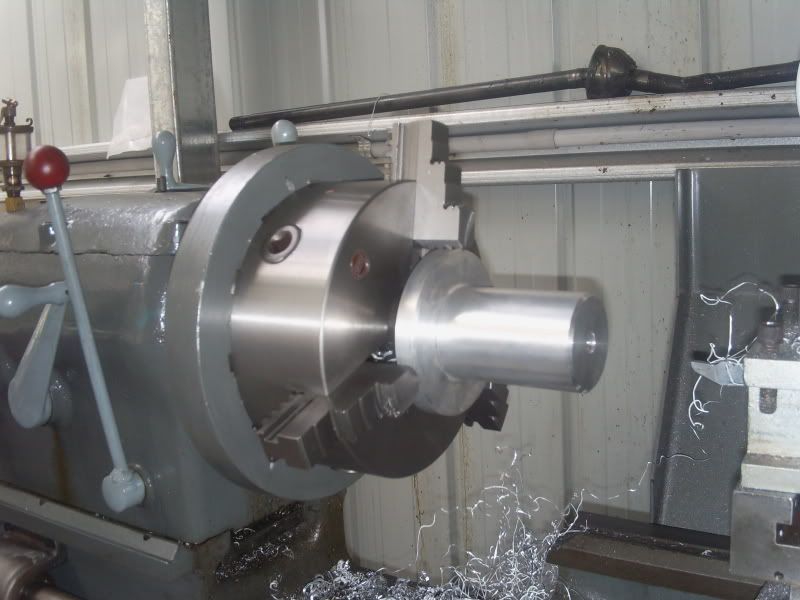
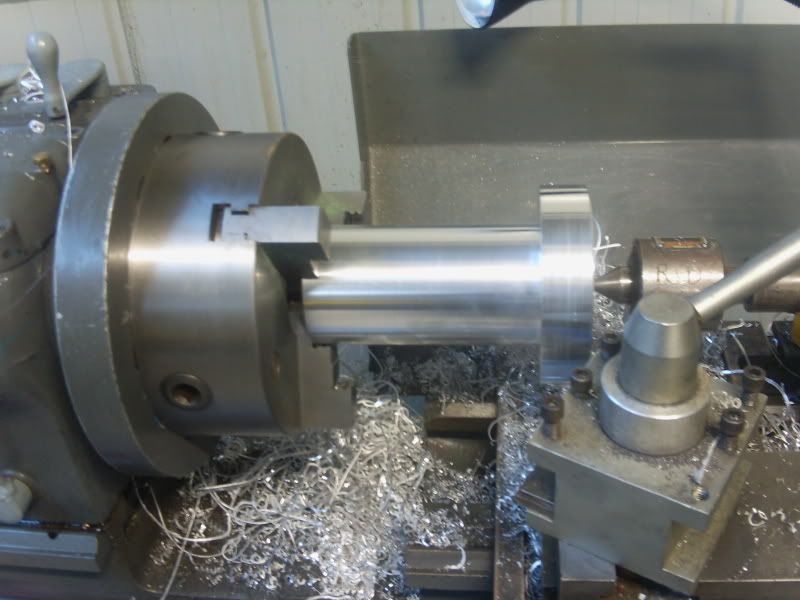
these are what the upper coil mounts are going to look like. machined from alloy, suzuki version shown.
lwb 1.6efi,4sp auto,f&r airlockers,dual t/cases.custom coils.builder of ROAD LEGAL custom suzukis...and other stuff.
CAD modelling-TECH drawings-DXF preparation.
http://www.auszookers.com/index.php
Posts: 2169
Joined: Fri Jun 16, 2006 4:41 pm
Location: melbourne

Post by joeblow »

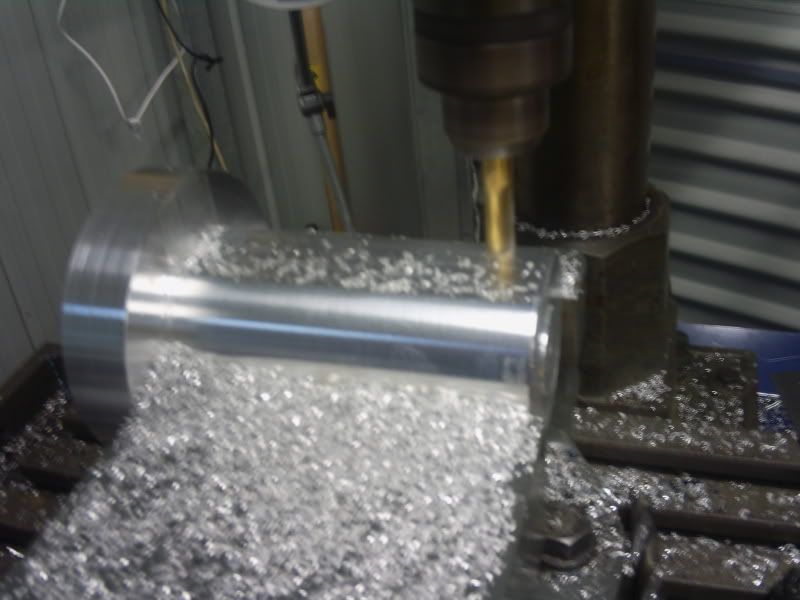
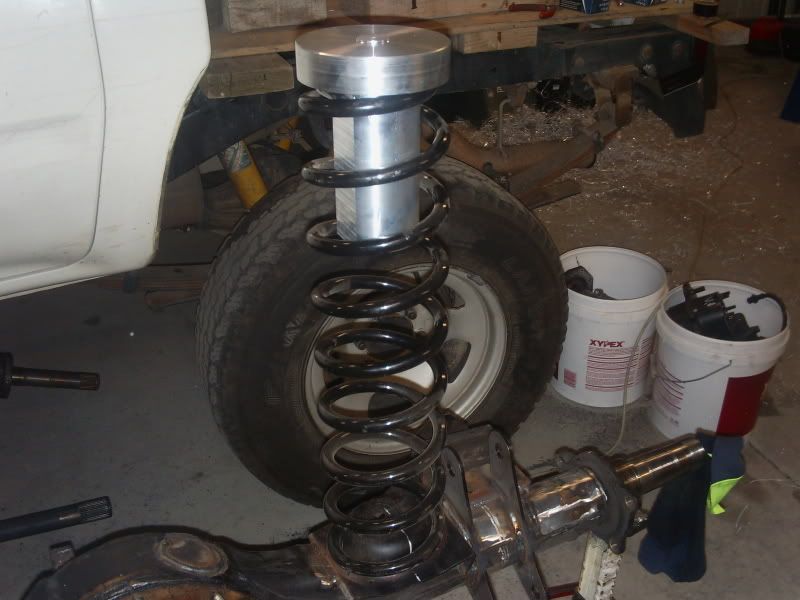
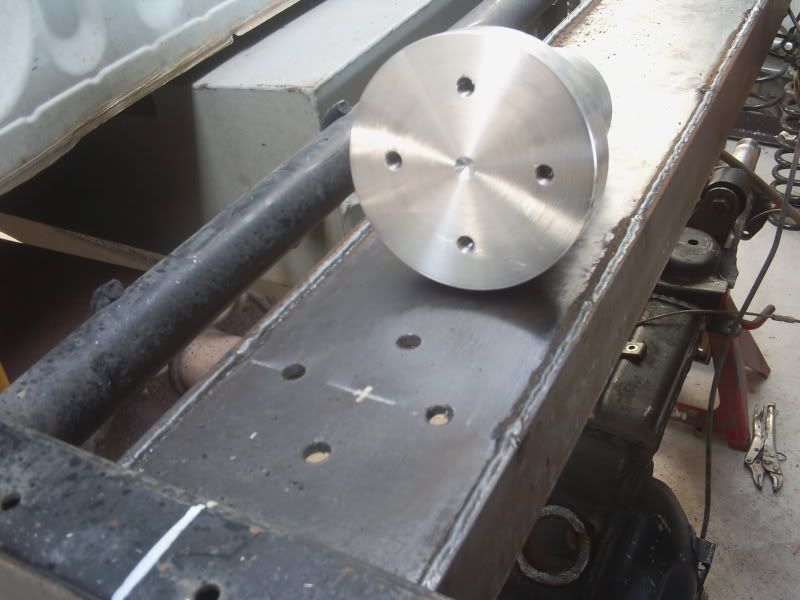
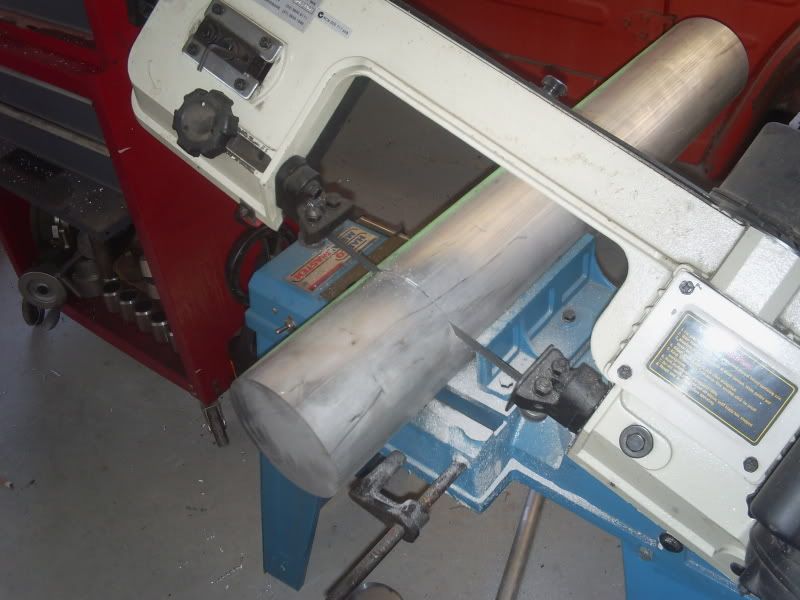
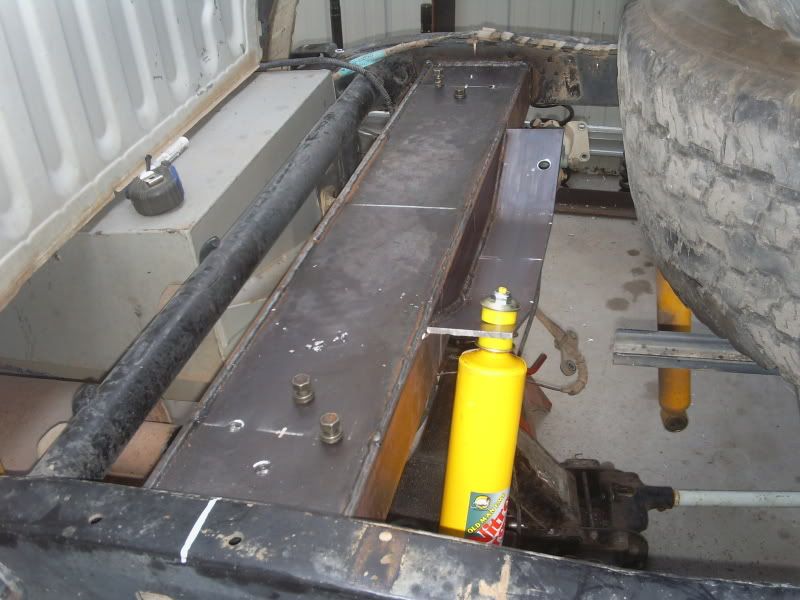
time for rear upper mounts machined from aluminium. they will bolt into a new upper crossmember.

Image

Image
Image
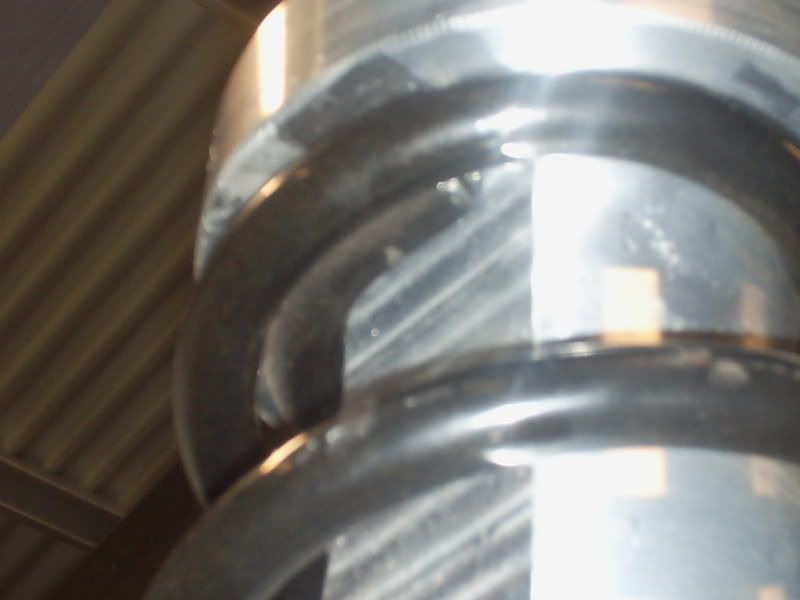
the top of the jk pigtail has a flat spot, so i've machined the coil mount to suit. this shuold stop it unwinding during flex.

Image
lwb 1.6efi,4sp auto,f&r airlockers,dual t/cases.custom coils.builder of ROAD LEGAL custom suzukis...and other stuff.
CAD modelling-TECH drawings-DXF preparation.
http://www.auszookers.com/index.php
Posts: 804
Joined: Thu Aug 07, 2008 9:44 am
Location: Perth

Post by pinkfloyddsotm »

awesome stuff dude
Posts: 68
Joined: Sat May 10, 2008 7:30 pm
Location: melbourne

Post by Evan-08 »

Any more pix joe looks great :armsup:
Posts: 166
Joined: Tue Mar 04, 2008 4:04 pm
Location: SW Victoria

Post by djroberts »

very neat work - nice one
loose as a goose
Posts: 2169
Joined: Fri Jun 16, 2006 4:41 pm
Location: melbourne

Post by joeblow »

thanks for the comments guys :armsup: ...........
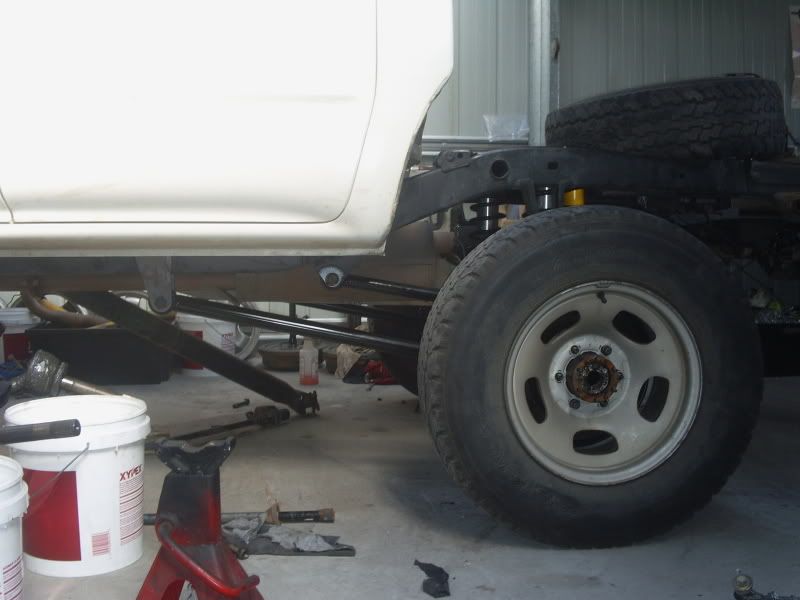
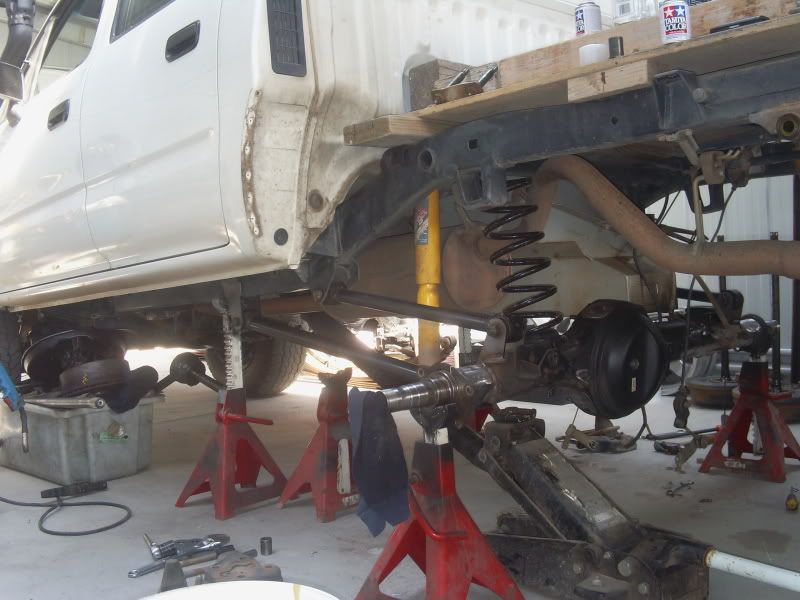
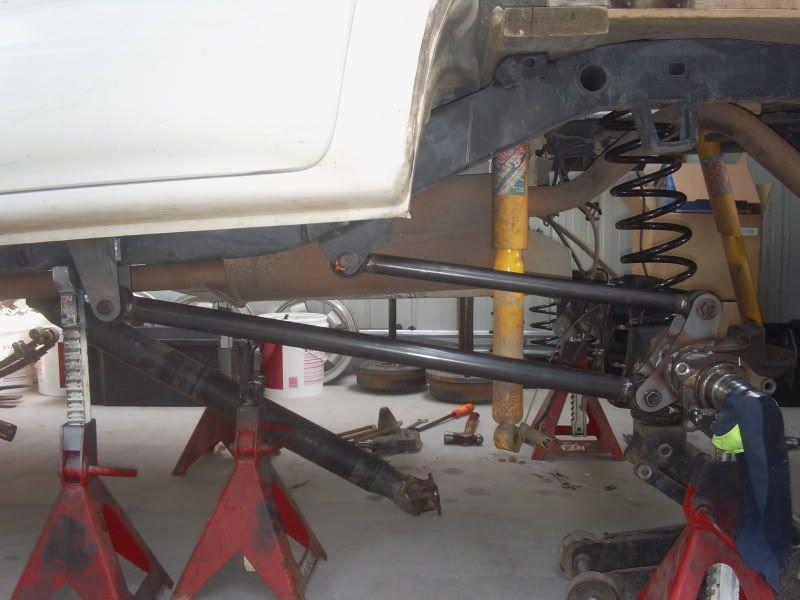
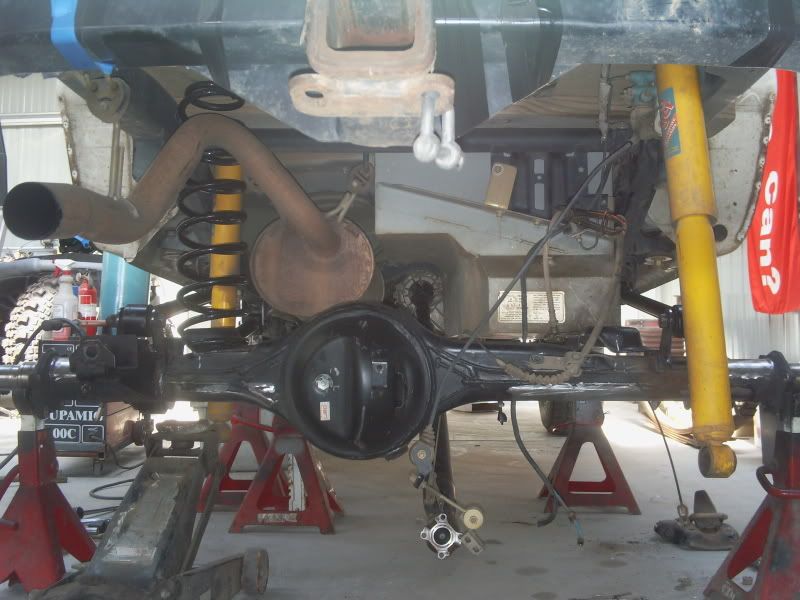
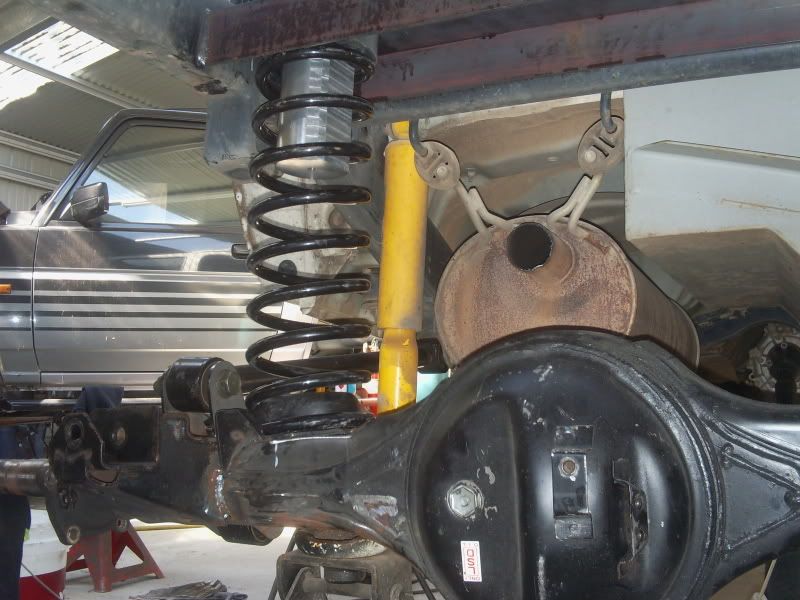
ok.........pulled the old tojo rear out this weekend so i could start on the links. please note in these pics the vehicle is being set up for no tray, as that is how it came, so i will be setting it up for no tray which means it will look higher than it will be until the tray is fitted. oh, and the coil is not sitting in its correct position...........could not be bothered cutting the exhaust yet with the 9 inch.... :oops:
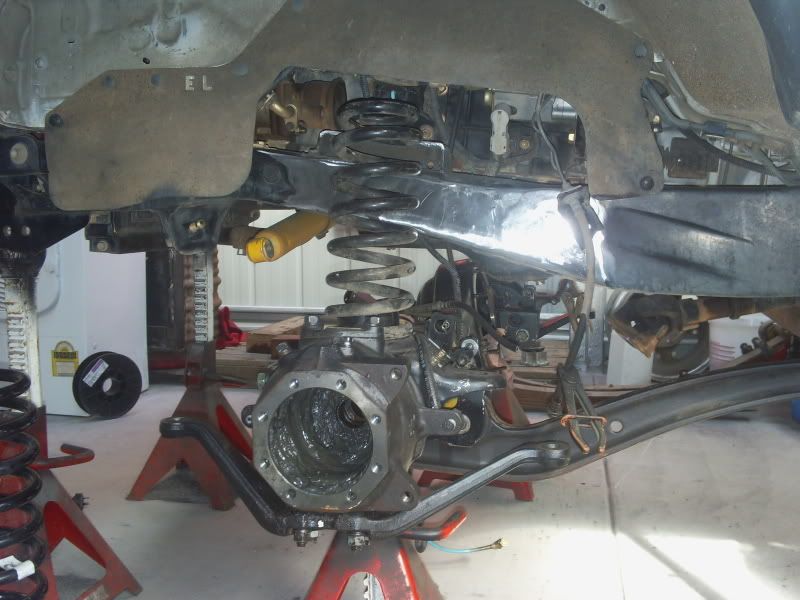
Image
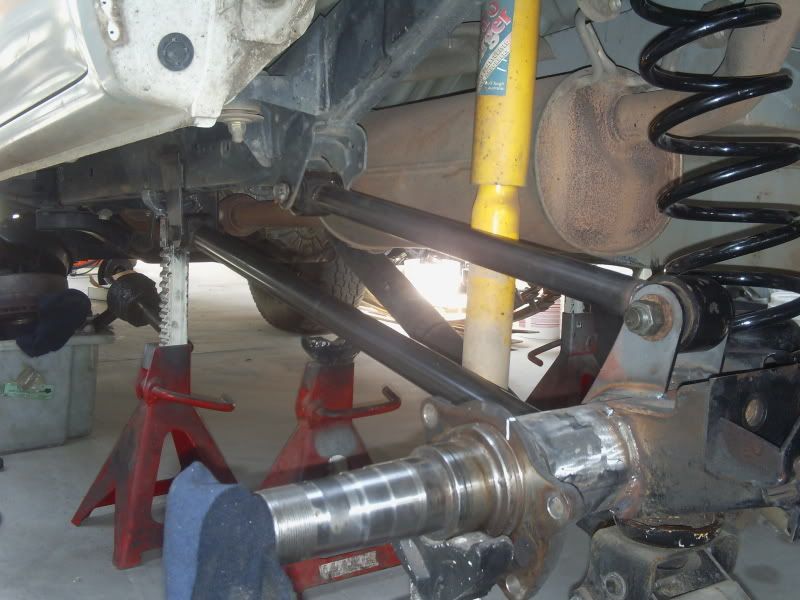
links in position. they are set up this way to allow the pinion angles to remain allmost parallel when cycling.
Image
Image

Image
you can notice the 90mm offset in this pic.

once all links and mounts are in position the diff will be removed and finished off properly.
lwb 1.6efi,4sp auto,f&r airlockers,dual t/cases.custom coils.builder of ROAD LEGAL custom suzukis...and other stuff.
CAD modelling-TECH drawings-DXF preparation.
http://www.auszookers.com/index.php
Posts: 804
Joined: Thu Aug 07, 2008 9:44 am
Location: Perth

Post by pinkfloyddsotm »

nice work man.
Posts: 2169
Joined: Fri Jun 16, 2006 4:41 pm
Location: melbourne

Post by joeblow »

ok.been a bit slack this weekend.....got some bug and spent more time sleeping than working............
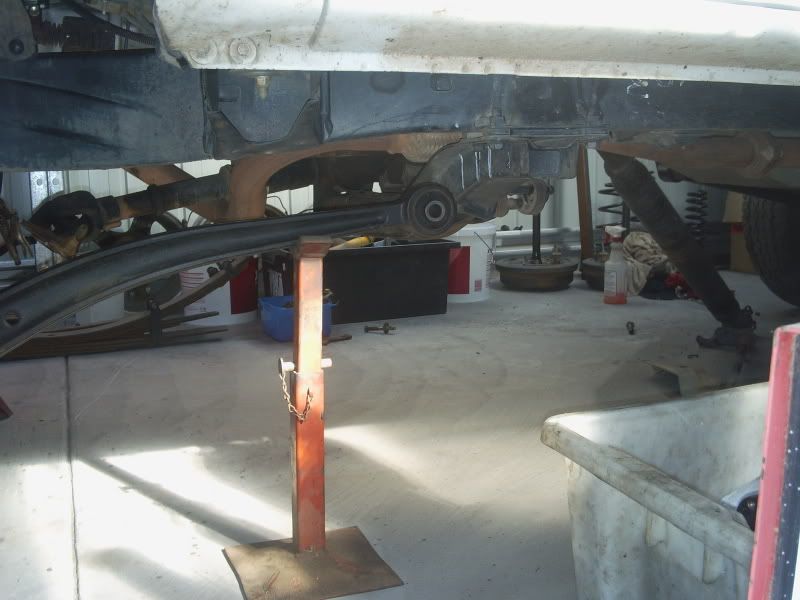
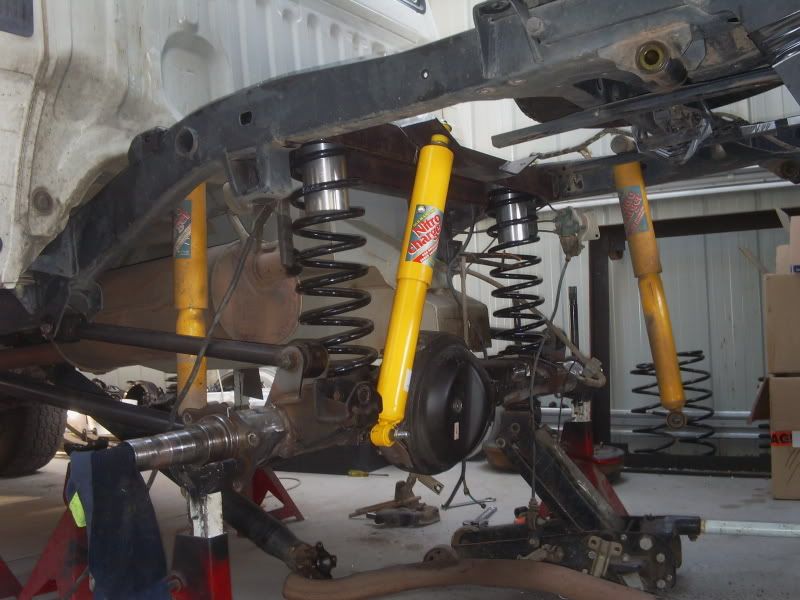
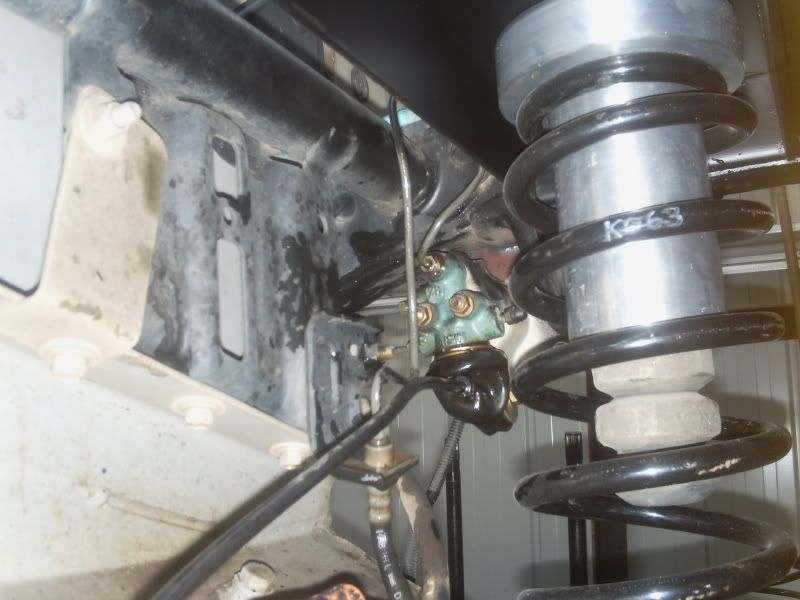
upper coil mounts are in, and shock mounts half done, but so far so good. i'll have to finish the shocks before i can do the panhard as its going to be a tight fit between the rod and left shocker. the lsp valve will have to be moved and its lines shortened too.

Image
Image
coil mount one goes in to confirm measurements.

Image
second mount being made now that measurements are exact.

Image
sitting on her own weight to within 8mm of what i had planned........sometimes is just pure arsiness.........( i realy should take out those old shockies!..)

Image
shock mounts half done.
lwb 1.6efi,4sp auto,f&r airlockers,dual t/cases.custom coils.builder of ROAD LEGAL custom suzukis...and other stuff.
CAD modelling-TECH drawings-DXF preparation.
http://www.auszookers.com/index.php
Posts: 745
Joined: Sat Aug 02, 2008 9:45 am
Location: Vanuatu/ QLD

Post by thrashlux »

very well done

I had similar ideas this is my old truck i wanted a tourer that could flex and look stock i wanted lots of fuel to

i used a surf housing for the rear and a 79 for the front with 80 series hubs this gave me ifs hilux offset front and rear with center diff pumpkin

have you seen the diff in the 200 series center pumpkin conversions here we come

i used 80 series arms on the rear as surfs are way to short to flex also to alow for max up travel i used 80 series spring mounts reversed as the surf ones go under the rails causing the spring to bind.

i added the surf panard rod cross member and diferent support for the center diff locating arm

Image

Image

pic showing both fuel tanks installed
Image

cheers
80 series 1980 hilux cab supra twin turbo engine
1hdfte 80 series
LHD fz 80 series GX
Posts: 804
Joined: Thu Aug 07, 2008 9:44 am
Location: Perth

Post by pinkfloyddsotm »

awesome work joe blow
Posts: 310
Joined: Fri Jan 12, 2007 1:22 pm
Location: brisbane

Post by azwa »

very neat work keep the pics comin ;)
"instant combustion"
"ITS A JEEP THING"
Posts: 2169
Joined: Fri Jun 16, 2006 4:41 pm
Location: melbourne

Post by joeblow »

ok..........been crook with the runs........ :cry: ........but all good now. plus me and the boys have been building the bar.....long overdue!
Image

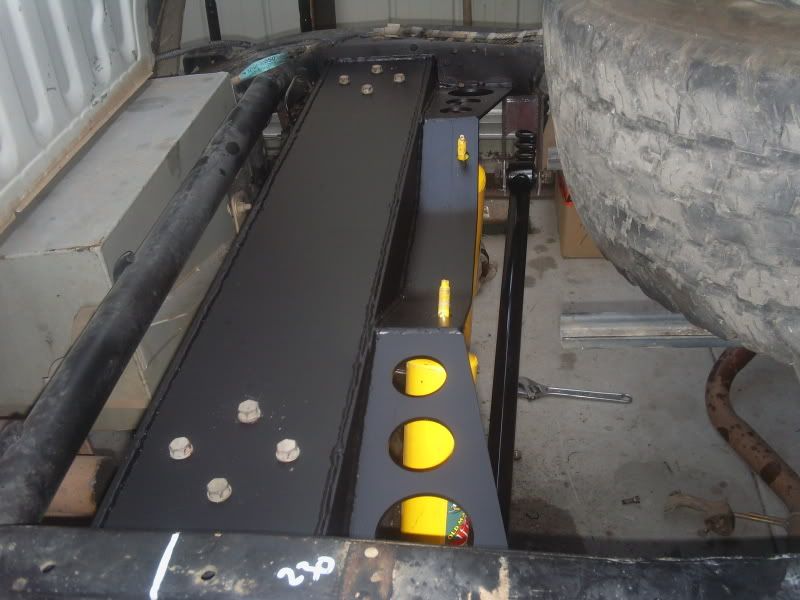
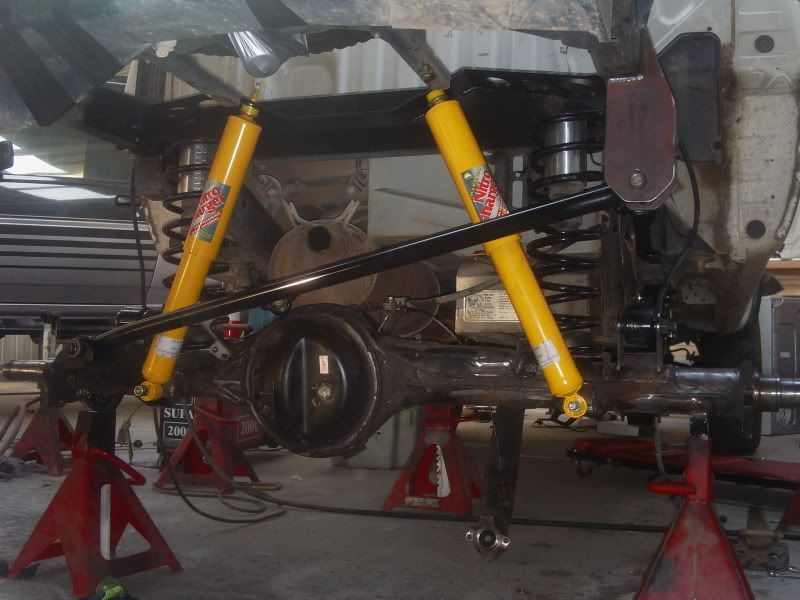
anyway, the diff is finished, just have to do the LSPV mounts etc. all the chassis work is just about done. the only thing left is to do the tubular cross-brace for the panhard rod. other little bits are to be done but for the most part the rear is complete.

Image
bumpstops in place.

Image
chassis work complete and painted.

Image
re-loacation of the LSP valve.

Image
sitting under her own weight. the rear will drop another 2 inches when the tray is fitted.
lwb 1.6efi,4sp auto,f&r airlockers,dual t/cases.custom coils.builder of ROAD LEGAL custom suzukis...and other stuff.
CAD modelling-TECH drawings-DXF preparation.
http://www.auszookers.com/index.php
Posts: 3740
Joined: Sat May 26, 2007 5:04 pm
Location: Licking a window near you

Post by 80's_delirious »

nice neat work Joeblow :cool: :cool:

is there enough vertical separation between the upper and lower mounts at the front of rear links? looks like the lower link could hit the upper mount at full compression?
Posts: 5256
Joined: Fri Jun 16, 2006 6:49 pm
Location: Melbourne

Post by Struth »

Very nice work x 2, it's a top quality job by the looks of it.

Very interested to see how you mount the front diff too, keep the pics and info coming.

Cheers
Posts: 804
Joined: Thu Aug 07, 2008 9:44 am
Location: Perth

Post by pinkfloyddsotm »

i like how yo mounted the uppers into the existing leaf spring hangar ,nice work.
Posts: 2169
Joined: Fri Jun 16, 2006 4:41 pm
Location: melbourne

Post by joeblow »

80's_delirious wrote:nice neat work Joeblow :cool: :cool:

is there enough vertical separation between the upper and lower mounts at the front of rear links? looks like the lower link could hit the upper mount at full compression?
yes, when the bumpstops go solid there is still enough clearance.

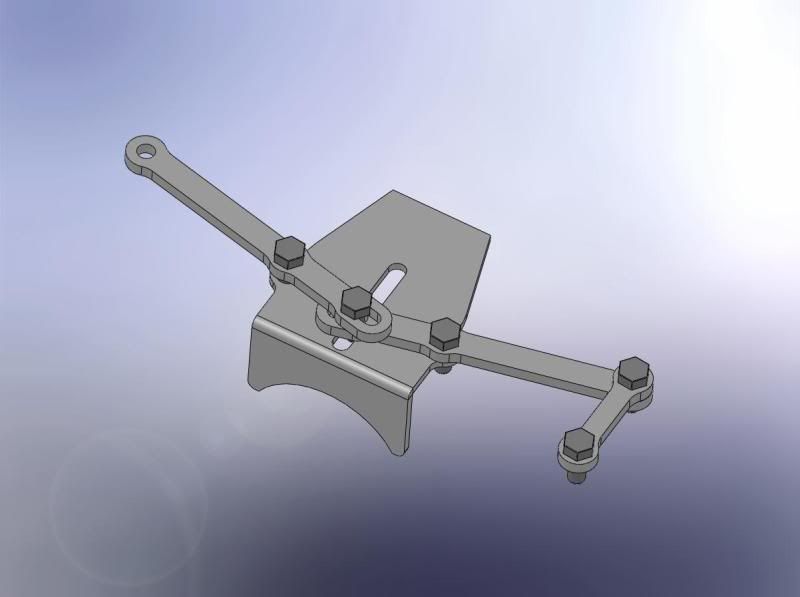
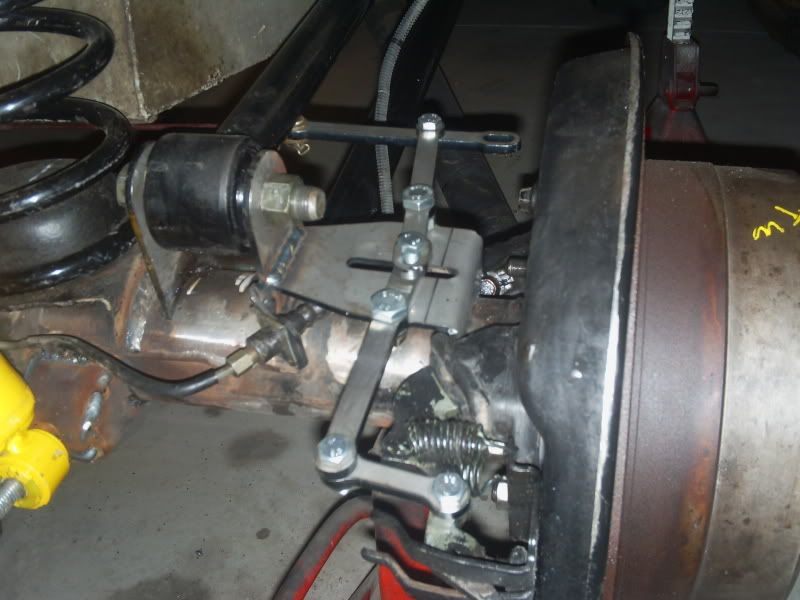
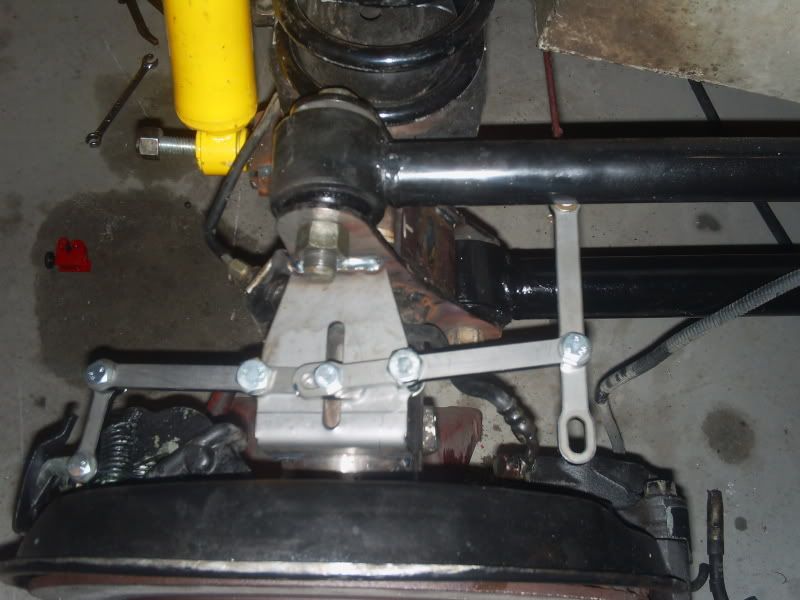
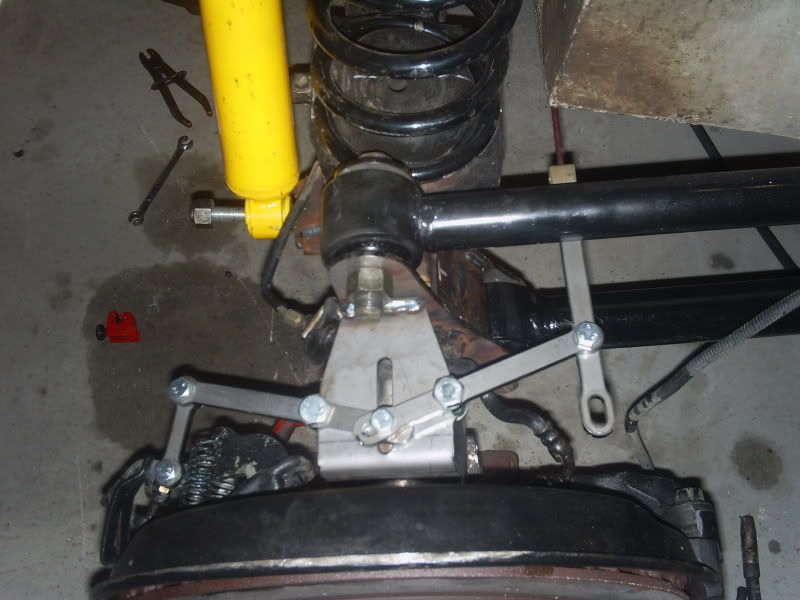
one thing had me stumped...........the hand brake cable is now at the front of the diff yet the levers are still behind. after some lovely cans of JB and some brainstorming i thought i would draw this crank sytem up and give it a shot.
Image

i had the parts cut and welded them on tonight. the bracket for the cable end is only a mock-up and will not be the final version, but as a proof of concept it seems to work rather well.............one less problem :)

Image

Image
hand brake in the off position.

Image
in the on position.


time to pull the front apart.
lwb 1.6efi,4sp auto,f&r airlockers,dual t/cases.custom coils.builder of ROAD LEGAL custom suzukis...and other stuff.
CAD modelling-TECH drawings-DXF preparation.
http://www.auszookers.com/index.php
Posts: 804
Joined: Thu Aug 07, 2008 9:44 am
Location: Perth

Post by pinkfloyddsotm »

shit yer, nice stuff man.
Posts: 195
Joined: Sat May 31, 2008 3:05 pm
Location: wodonga vic

Post by hixi126 »

totally love it you crazy work-a-holic :finger:
www.trailtrack4x4.com
a big lux etc etc
User avatar
udm
Posts: 659
Joined: Tue Apr 26, 2005 8:35 pm

Post by udm »

nice fabrication mate...

do you reckon you should swap over left and right calipers to allow the bleeders to be back on top? maybe with the bleeders now on the bottom, air wont be bled out of the calipers easily, its just a thought, so i could be wrong.
Ulises

www.OzSigns.com - 0400008422
Posts: 2169
Joined: Fri Jun 16, 2006 4:41 pm
Location: melbourne

Post by joeblow »

udm wrote:nice fabrication mate...

do you reckon you should swap over left and right calipers to allow the bleeders to be back on top? maybe with the bleeders now on the bottom, air wont be bled out of the calipers easily, its just a thought, so i could be wrong.
don't worry, they are switched around, just hard to see in those pics.
lwb 1.6efi,4sp auto,f&r airlockers,dual t/cases.custom coils.builder of ROAD LEGAL custom suzukis...and other stuff.
CAD modelling-TECH drawings-DXF preparation.
http://www.auszookers.com/index.php
Posts: 630
Joined: Mon Aug 20, 2007 8:09 pm
Location: Ormeau QLD

Post by dirtfix »

Looks like alot of work. Bloody nice work at that. I was thinking of putting some 80 series running gear under my gen 2 hilux but this has got me thinking. 1 i dont have the equiptment for this kinds thing and 2 its looking quite complicated for a novice like me.
Lifes tough, be tougher!
1984 Hilux Dual cab LN65
Old School Flavour!
Posts: 2169
Joined: Fri Jun 16, 2006 4:41 pm
Location: melbourne

Post by joeblow »

dirtfix wrote:Looks like alot of work. Bloody nice work at that. I was thinking of putting some 80 series running gear under my gen 2 hilux but this has got me thinking. 1 i dont have the equiptment for this kinds thing and 2 its looking quite complicated for a novice like me.
its a big job, but with time its very worth while. a bad job is a rushed job. if you can make the time and do it neatly the feeling afterwards is great, plus it makes for engineering it easy. if they see a lot of time being taken to get it right they(engineers) will lean more towards your ideas.

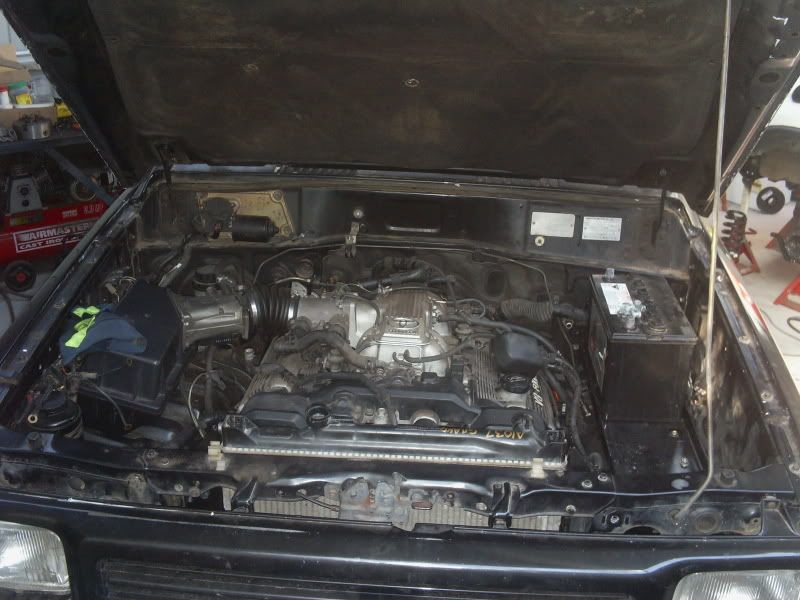
front is clean and ready for new brackets. been a little distracted by working on my mates 1UZ-FE powered rocky thart we have been doing for the past 3 years and is almost done.........some pics............gotta love the tojo v8.........

Image

Image


anyway......the lux is on it rear wheels with handbrake and normal brakes working well. the front diff with locker is for sale and this will cover the new rear airlocker we need.

Image

Image


the front should go together rather quickly now that it is all clean, but some bracing between the chassis will be needed as the ifs crossmember has been removed.
Image

Image
the new front arm mounts will be located on the g/box crossmember. would rather they be on the chassis for removal of the c/member sake, but this is the perfect spot for the system we are running.
lwb 1.6efi,4sp auto,f&r airlockers,dual t/cases.custom coils.builder of ROAD LEGAL custom suzukis...and other stuff.
CAD modelling-TECH drawings-DXF preparation.
http://www.auszookers.com/index.php
Post Reply

Who is online

Users browsing this forum: No registered users and 71 guests